You use stairs to enter your house, so why not your camper? Here are four step solutions to make getting into your camper easier.
Submitted by: Ron Richardson, 2014 Ram 3500, 2012 Wolf Creek 850
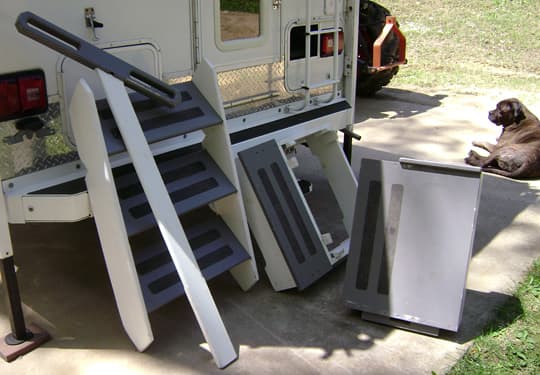
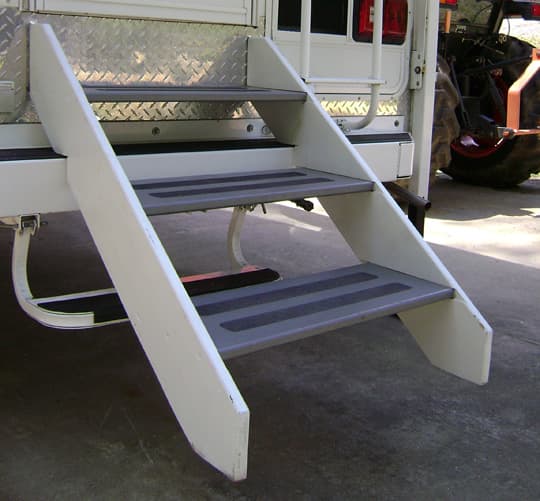
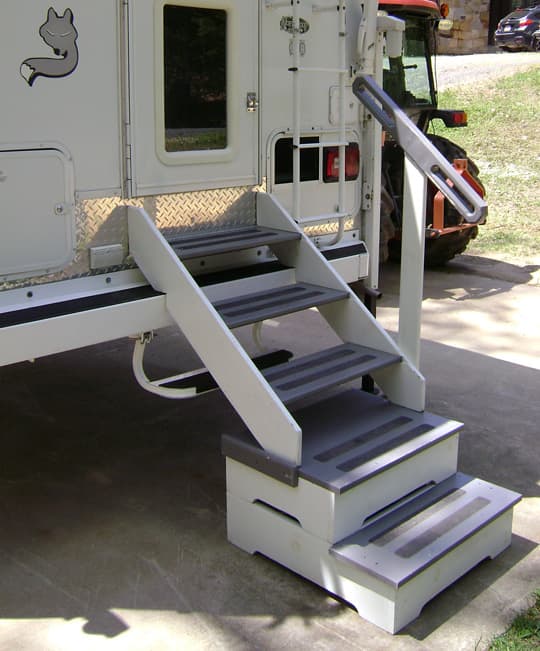
My camper was purchased used and did not come with stairs. At one time it had Torklift steps, so I still had the anchor brackets. I wanted stairs for when the camper was on the truck and when it was off the truck. The stairs also had to fold away. That was a tall order and I went through two iterations to get it right.
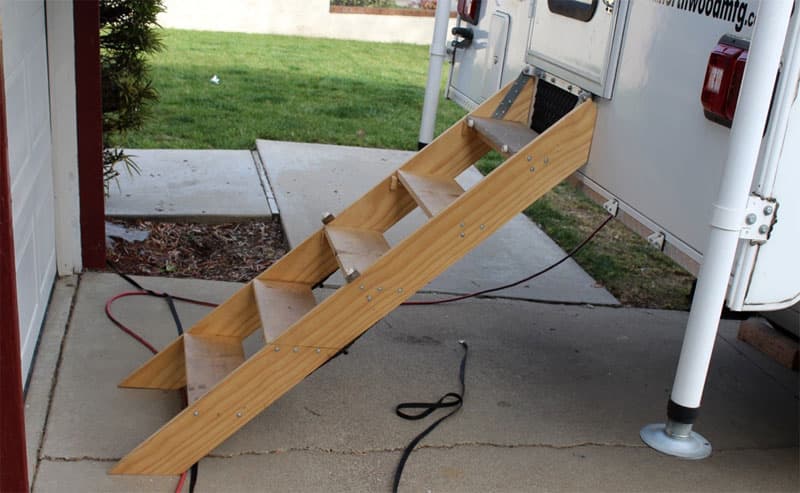
The stairs are made out of 1-inch by 6-inch Douglas fir for the stingers (sides) and 1-inch by 8-inch pine for the treads. There are a lot of calculations in order to figure out the proper rise and run. I eliminated the run calculation by making the strings come down at a 45-degree angle.
The rise calculation is the distance from the ground to the floor of the camper. In my case, the rise is 47-inches. Divide that by the number of stair treads you want. The stair rise should be around 8-inches.
Six treads give me a rise of 7 7/8-inches for each step. The sixth step is the camper’s floor, so therefore the stairs will have five treads.
Now for the hard part. I want to use the same stairs for when it’s on or off the truck.
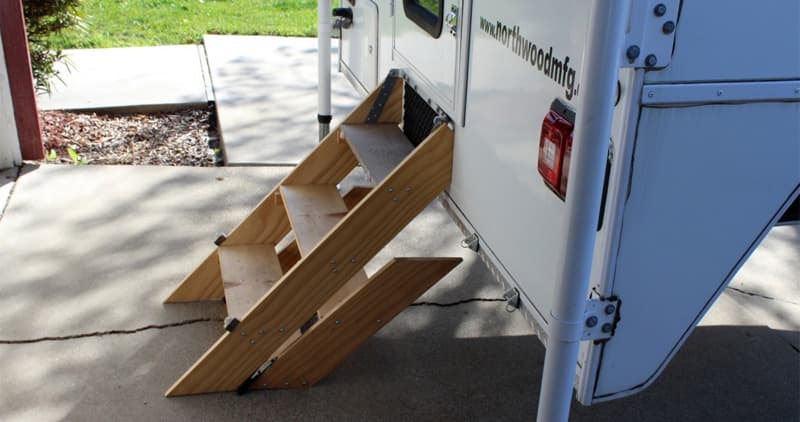
A hinge will be used to fold the stairs under. The stair height for when it is on the camper is set at 47-inches. The ideal height for the stairs when it is off is 22-inches, but with that height, the stairs would not fold under without hitting the camper. So the height was set at 31.5-inches. The height should be at the stair’s tread.
My first iteration was to not use hinges. I used stairs that slid together for the different heights. Then I got a new truck that had a different height. I used that opportunity to make a new design. The first set of hinges were 1-inch wide and too weak. Those hinges did not last one trip. The second set of hinges are much bigger and have lasted.
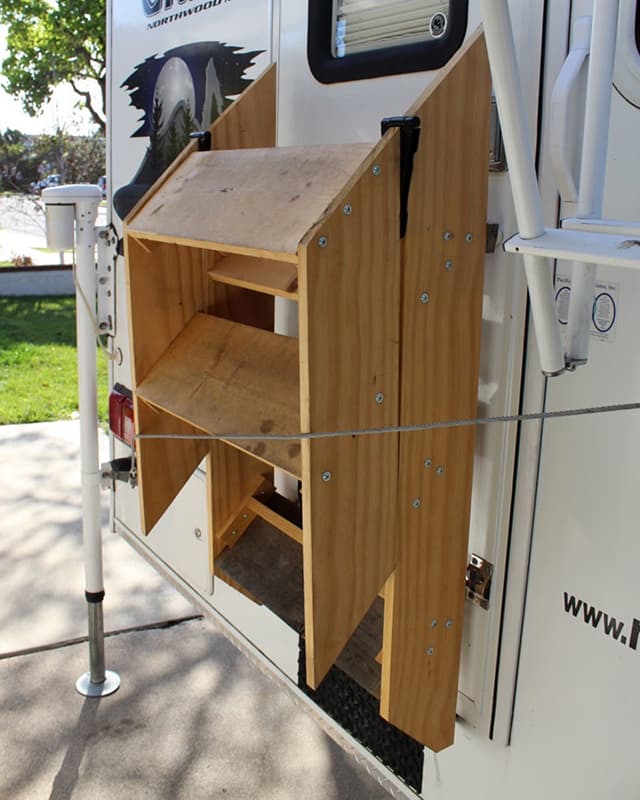
So far the stairs have worked great. They are stable and easy to set up. My first iteration with the one-inch hinges failed when my brother-in-law tried them. Since I went with the new hinges, they work flawlessly.
It took four hours to complete and cost $40. In my opinion, the skill level of this modification is medium.
Submitted by: Charles Coushaine, 2001 Ford F-350, 2012 Chalet DS116RB
My truck camper is in one of two elevations when in use; high when mounted on the truck, and low when it is off the truck and lowered down.
This presents a challenge for the factory entry step system. In one instance, the lowest step is too high off the ground. In the other, just perfect. To address the gap when the camper is mounted on the truck, I decided to build an additional set of pivoting and folding steps.
My goal with this folding step design had four criteria for success. These were:
1. Safety. The folding steps must be securely fastened to the camper when in use so that the steps cannot come off for any reason.
2. Strength. The folding steps must be attached strong enough to support at least 300-pounds.
3. Ease of Use. The folding steps must be able to be attached and removed from the camper with no tools, be rust-proof, and fold for ease of storage.
4. Adjustability. The folding steps must be adjustable to account for uneven terrain.
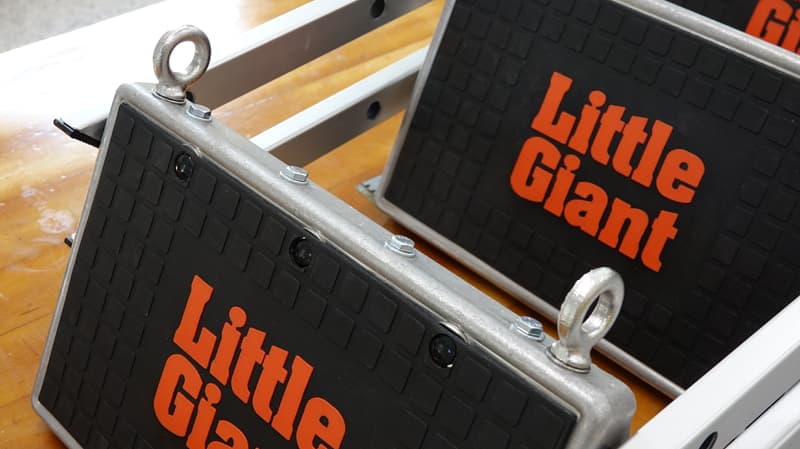
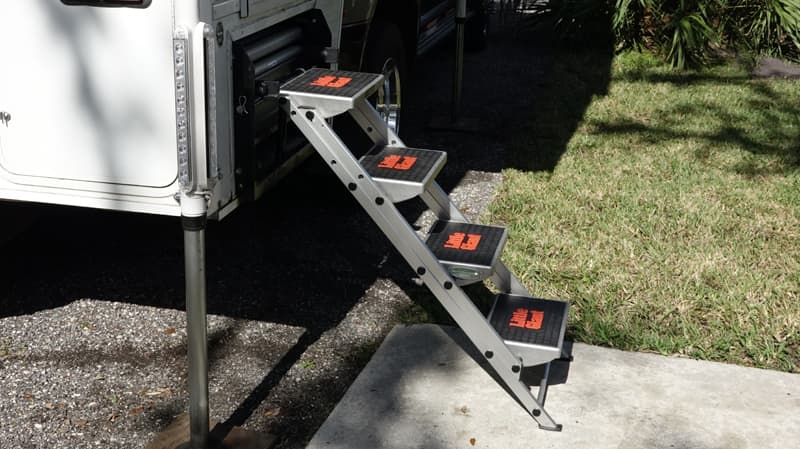
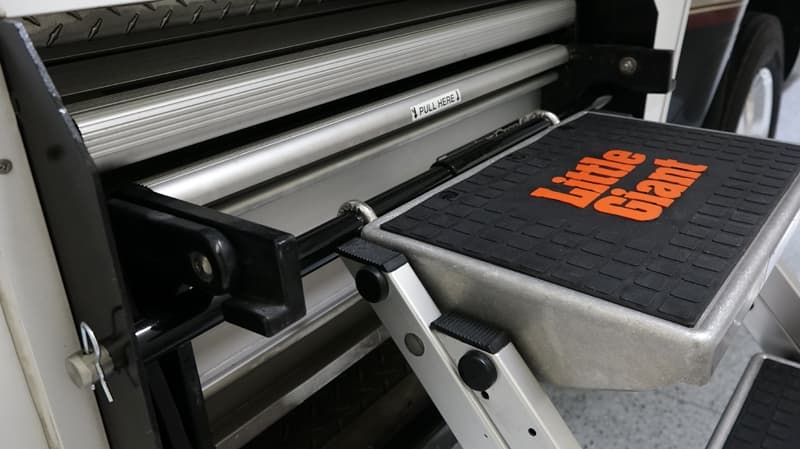
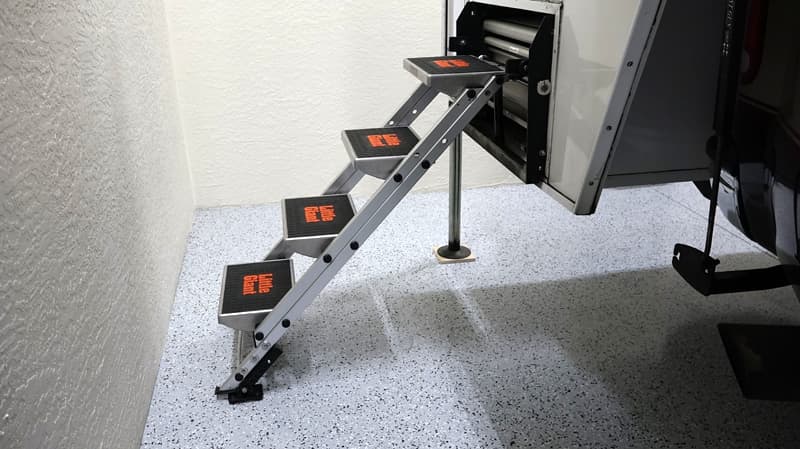
For this modification, I purchased a four-step Little Giant Step Ladder, took it apart, and added an eye-hook attachment to the top step of the ladder to hook it to the camper.
Being all-aluminum, the steps required additional support to the inside of the top step to make the steps robust.
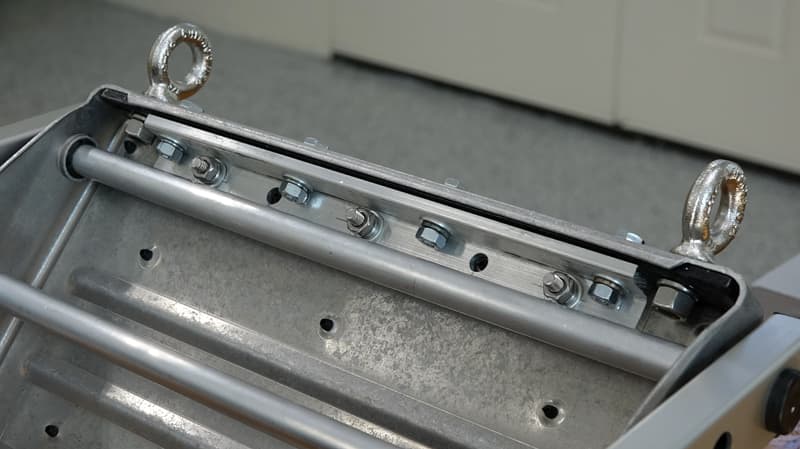
I then added a 3/4-inch diameter stainless steel rod across the steel supports for my original steps.
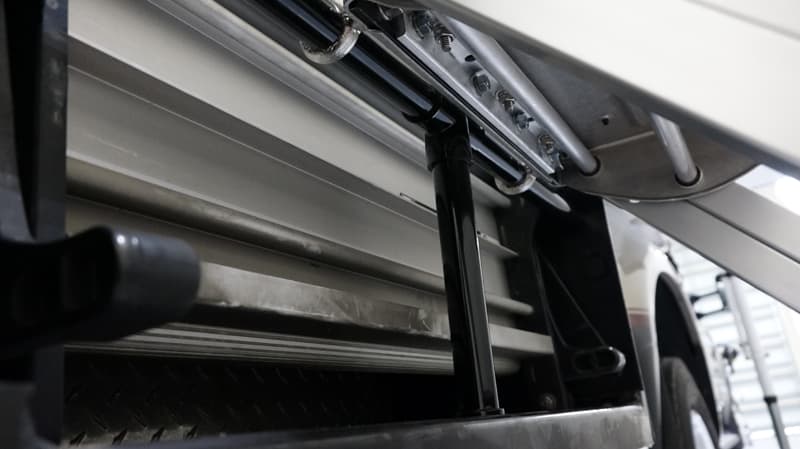
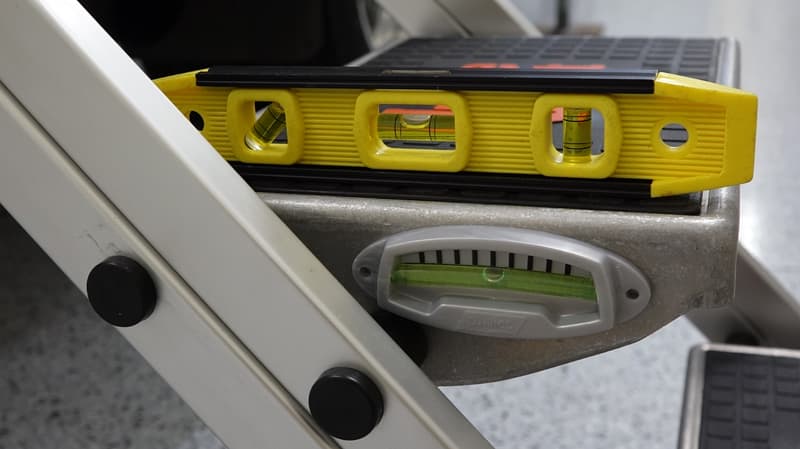
This rod then feeds through the eye hooks while three pieces of PVC pipe keep everything centered on the door. To account for ground variations, I attached a set of Torklift All Terrain Landing Gear that adjusts for varying ground slopes.
Watch this video to see the build in action:
The steps perform perfectly! The steps were easy to attach to the camper and provided us with a very stable entry and a consistent step height all the way up into our side-entry camper.
It took me eight hours to complete this modification and cost me $350. In my opinion, the skill level of this modification is hard.
Submitted by: Denis Senecal, 2011 GMC 3500 HD, 2006 Arctic Fox 811
A couple of years ago I decided I wanted to go vacationing. Truck campers are versatile and small enough to go anywhere but big enough to do it without excess stuff to bring or tools to use. But, truck campers are relatively hard to get into and out of with the steps.
Since woodworking is my hobby, I made steps out of wood. I designed the steps to be dissembled and stored on top of my truck camper while traveling.
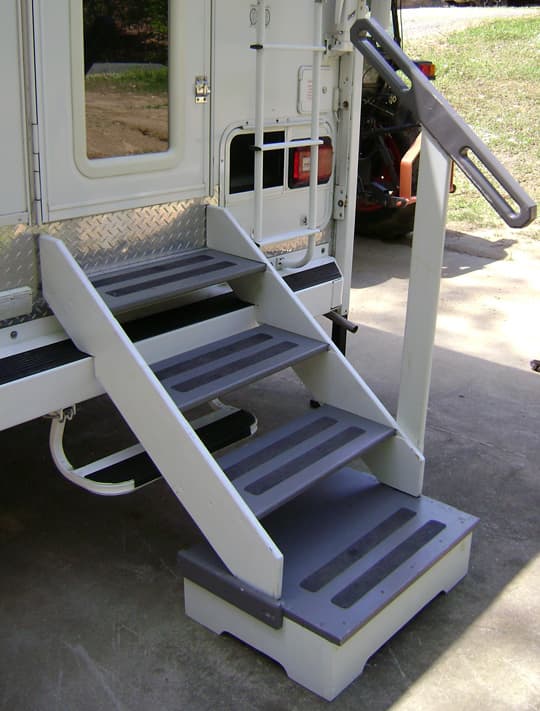
There in four different parts to the steps; the base that sits on the ground, the middle parts that sit on top of the base, and the top part which has three steps. There is also a railing to grab when entering and exiting the camper.
All parts of these steps are made out of one-inch thick white pine boards from my property. For strength, the top three steps were grooved to accept the stairs. The stairs were then primed and painted with exterior paint. Self-adhesive non-slip was added to the stairs. The whole unit was assembled with decking screws.
Submitted by: Bruce Jones, Toyota Hilux, Week-n-der Camper
I have visited many of the major places of interest in our beautiful country, but usually at 35,000 feet or 120 kilometers per hour (74 mph). I would now, at 76, like to take time to smell the roses and explore all the places in between.
I am no longer interested in pitching tents or sleeping in sleeping bags and stretchers. I know better than to try and persuade Liz to do so. We love camping but, at our age, we need a comfortable bed to sleep in.
I have a Toyota four-wheel drive truck with low mileage. I recently bought an old Week-N-Der camper in order to travel South Africa and surrounding countries in Africa. While it is in relatively good condition for its age, it overlaps the bin by about five centimeters (about 2-inches) and does not allow the tailgate to close. This is not a problem because it acts as a veranda at the entrance.

I needed entrance steps and, after much research, could not find what I was looking for. I also need somewhere to store camping equipment such as groundsheets, tent pegs, tarpaulins, and other light but bulky items. These items would otherwise have to be stored inside the camper while traveling and could be wet and muddy on occasion.
After much trial and error, I came up with the idea of putting the steps in a box that could be raised or lowered or removed entirely. It also is extra security as it locks over the entrance.
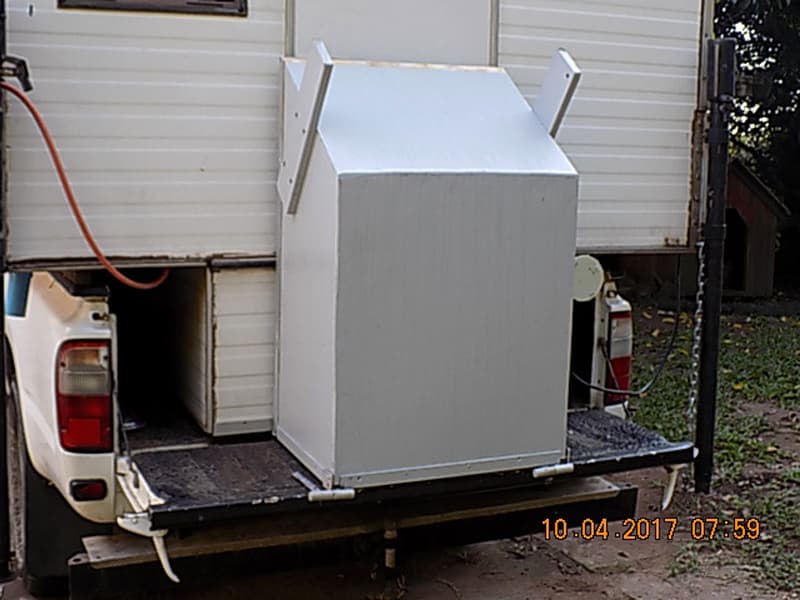
I did not want anything heavy, so the outer box is constructed of plywood. The sides which need strength are 10mm and the rest is 6mm. The steps are made from tongue and groove pine floorboards. The slide sections are aluminum angle.
Bullet hinges facing the same way allow the box to tilt up onto the tailgate and the whole contraption can be removed. There is a lot of space in the box and the steps act as shelves. Once the bulky items have been packed away, the front and top covers are slid into place and the box can be tilted up onto the tailgate.
I did the project over a few days; cutting out the parts, gluing and screwing the framework, constructing the slides, sandpapering, painting, and allowing it to dry. I estimate the total time to be about six-hours.
The cost to me was minimal as I had most of the wood, screws, and aluminum on the farm and purchased only the 6mm ply. In my opinion, the skill level of this modification is hard.
Disclaimer: The modifications above are submitted by Truck Camper Magazine readers. It is your responsibility to make sure that any do-it-yourself modification project you undertake is safe, effective, and legal for your situation.


