Nothing says summer more than hot barbecue and truck camping in the great outdoors. Here are eight different ways to mount a BBQ to your camper. Jack, hitch or bumper-mount, don’t leave home without your grill.
Submitted by: Brian Sibbles, 2015 Ram 1500, 2012 Travel Lite 800
We love to BBQ when we’re on the road camping, but it was a pain when we didn’t have a picnic table handy to place it on.
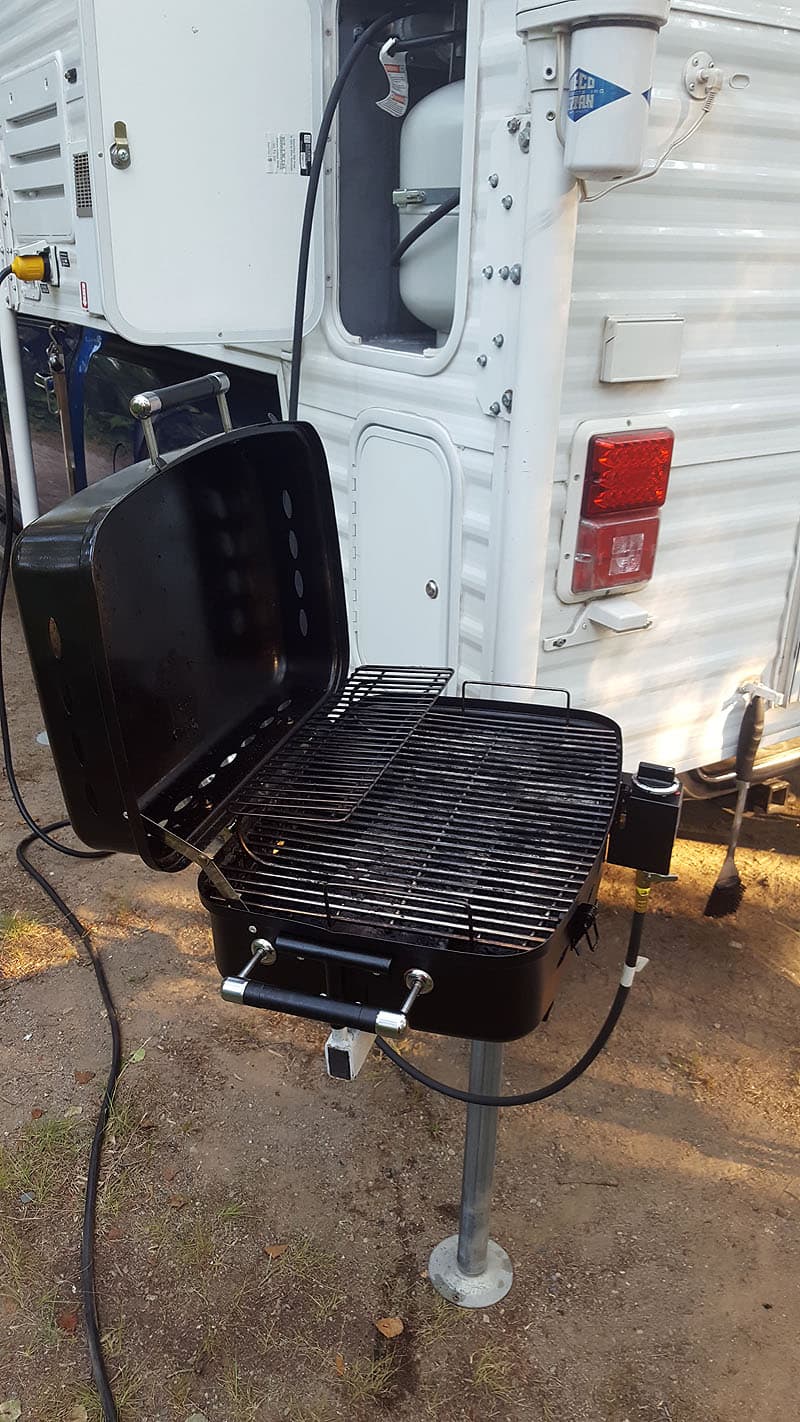
At an RV show, we saw a lot of trailers with outside rails that would hold a BBQ. The problem with truck campers is the height of where that rail is may change from time to time (loaded or unloaded) so you’re either BBQing too low or too high.
 |
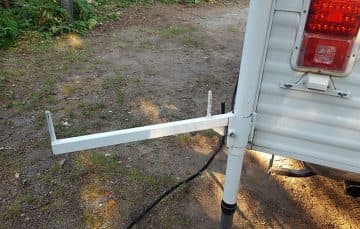 |
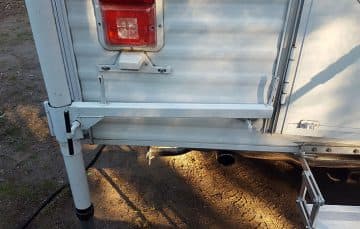
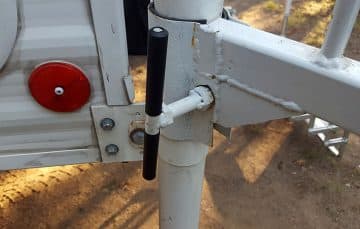
We came up with a solution that allows for adjustability. Using a piece of steel, we welded on the rods that slide into the BBQ. Then we took a piece of pipe slightly larger than our jack legs, cut it in half, and welded a hinge on one side to allow the pipe to become a clamp.
 |
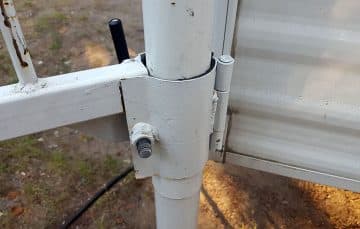 |
Next, we coated the inside with a rubber floor mat, made a wing nut from a bolt, and created a completely adjustable swinging arm. Now we can place the BBQ at the perfect height on any jack.
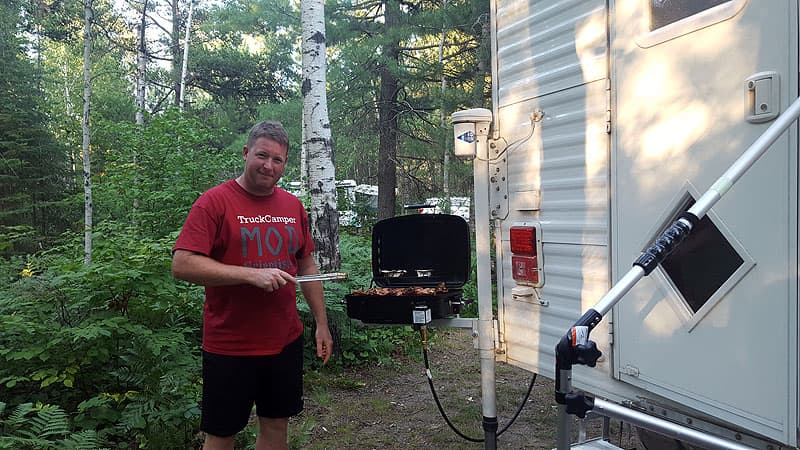
In over 7,500 kilometers, the BBQ has been used almost every day. The adjustable arm works perfectly.
Submitted by: Mike Brandl, 2014 Ford F-250, 2019 Lance 855S
My theory is that things are more enjoyable to use if they require less work. I wanted a permanent mount for the grill that required no setup. I could not find anything to purchase for a truck camper that matched what I had in mind.
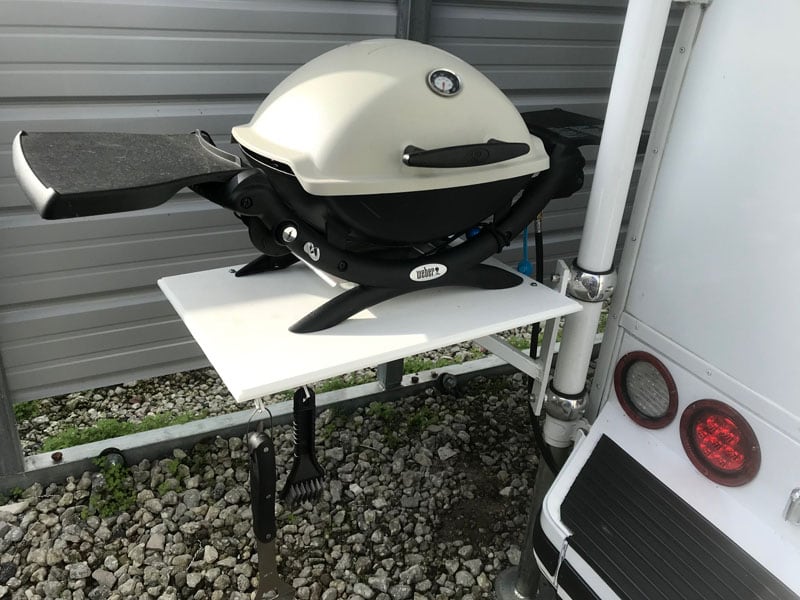
I came up with the idea to build the grill mount off the camper’s back left jack leg because it was a space that wasn’t being utilized for anything else. I did some searching and found wakeboard tower speaker clamps that matched the diameter of my camper’s jack’s legs. Off the clamps, I built a steel box tube frame.
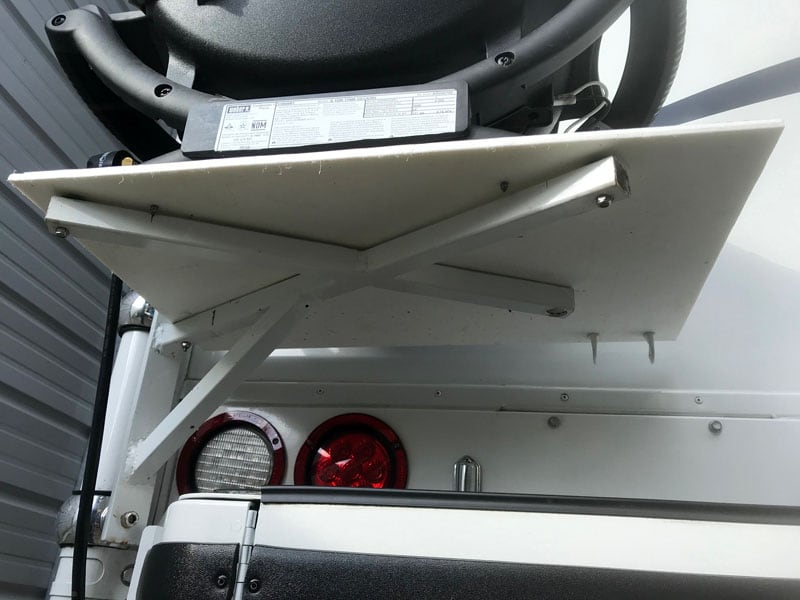
I used a piece of starboard for the top and routed the edges to give a cleaner appearance. The grill is bolted down to the top to prevent theft and to keep it in place during travel.
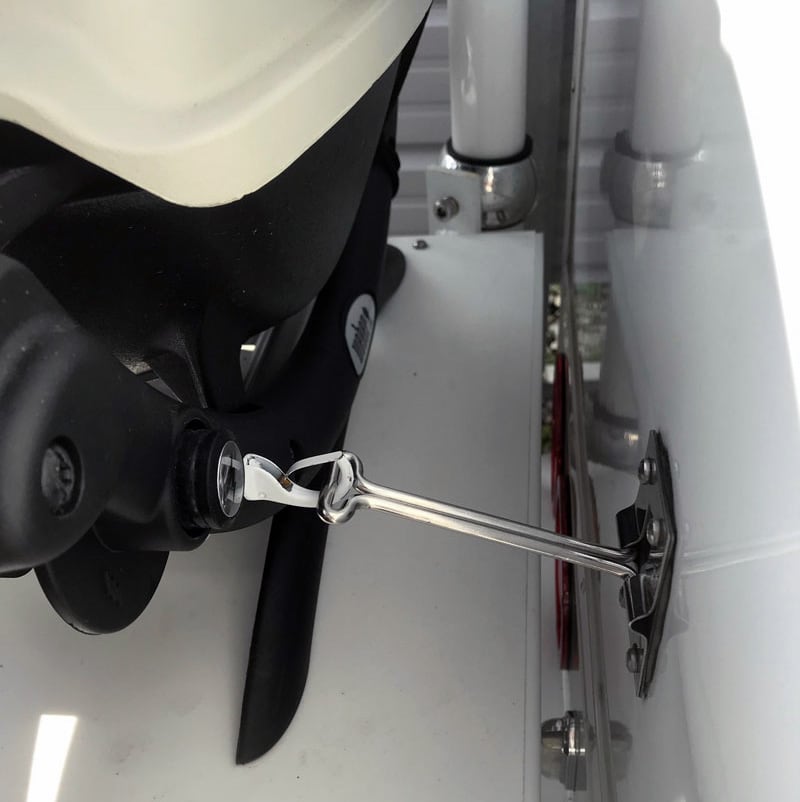
When it’s stowed away, the camper’s door latch holds the grill from swinging out. When I’m ready to use it, I unhook the latch and swing the grill out.
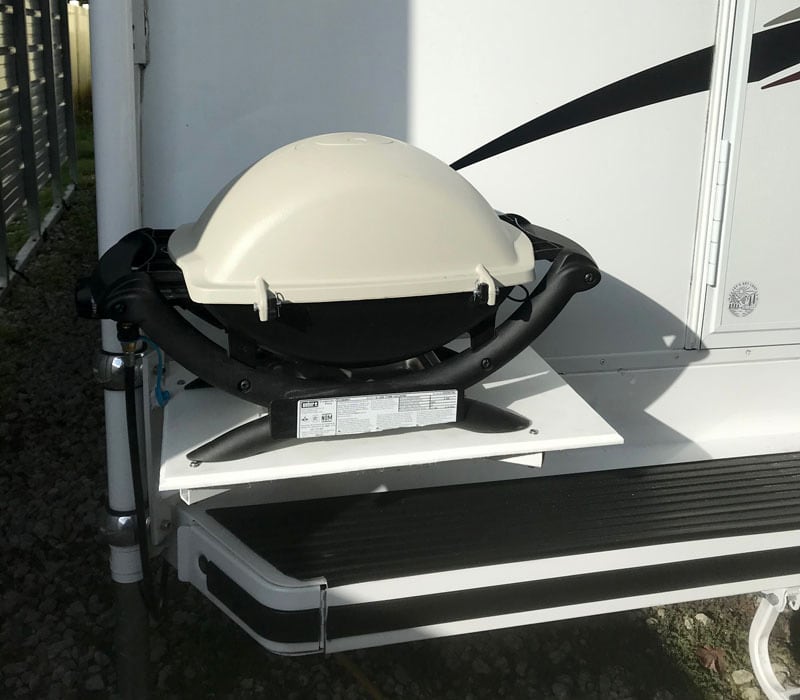
As a bonus, I deleted the regulator on my Weber Q1200 and piped the onboard propane into the grill. That way I don’t have to worry about having the one-pound bottles available.
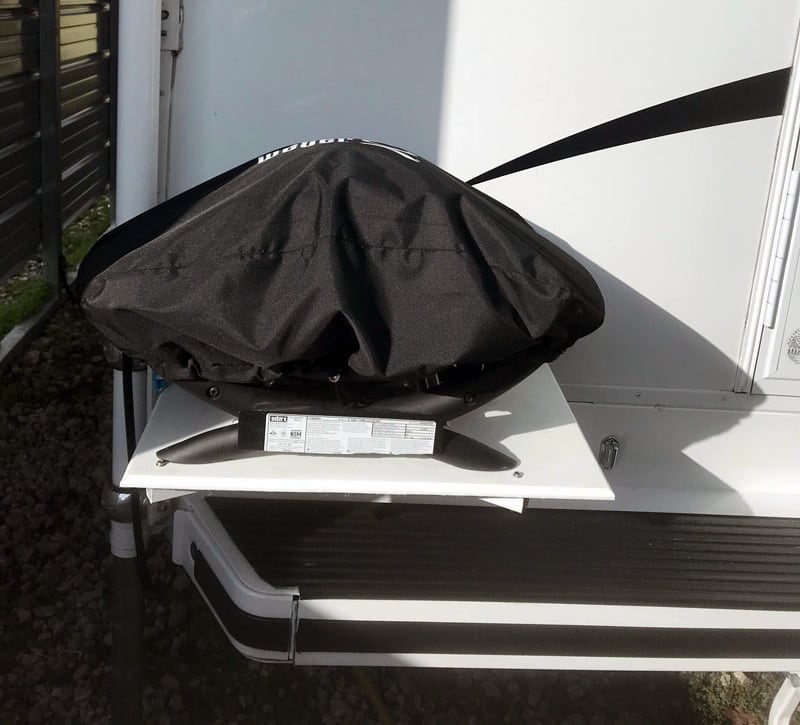
This is by far my favorite mod so far and it is exactly what I was looking for. With the gas line connected and no setup needed, I simply remove the cover and turn the grill on.
It took me four hours to complete with paint and some trial and error. This modification cost me $60. In my opinion, the skill level of this modification is hard only because you have to know how to weld.
Submitted by: John Bell, 2007 Dodge Ram, 2000 Lance 1130
I wanted a compact gas grill that was convenient to store and use. I couldn’t find what I wanted so I made this one.
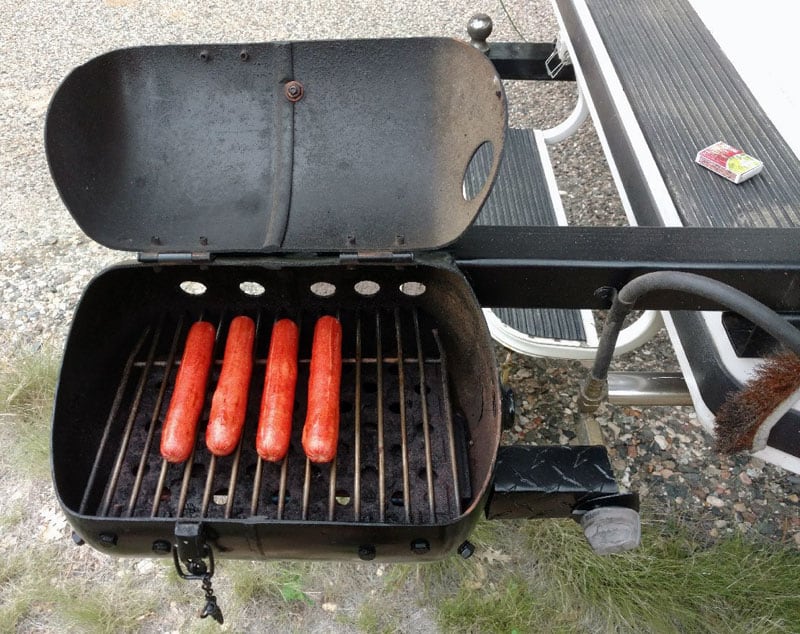
The mount design was the harder thing to figure out. There is very limited space between the ladder and the rear jack which is why I chose a 10-pound tank. I wanted the grill to fit nicely in this space.
I used a couple of small pieces of wood temporarily on the ladder and the jack post to determine the proper position. I used a ratchet strap to hold the tank in the proper position and adjust it to the proper height. Then I could measure where the arm should be welded to the tank.
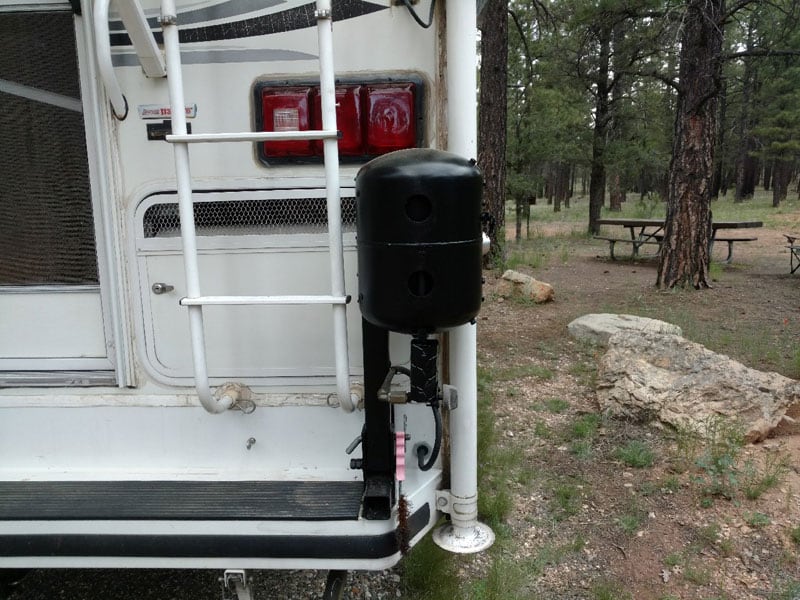
The arm is actually positioned on the backside, toward the top. I had to put it there so that the swing mount could bolt to the bumper as the tank extends a little further out than the bumper. After I got this design figured out the rest was fairly easy.
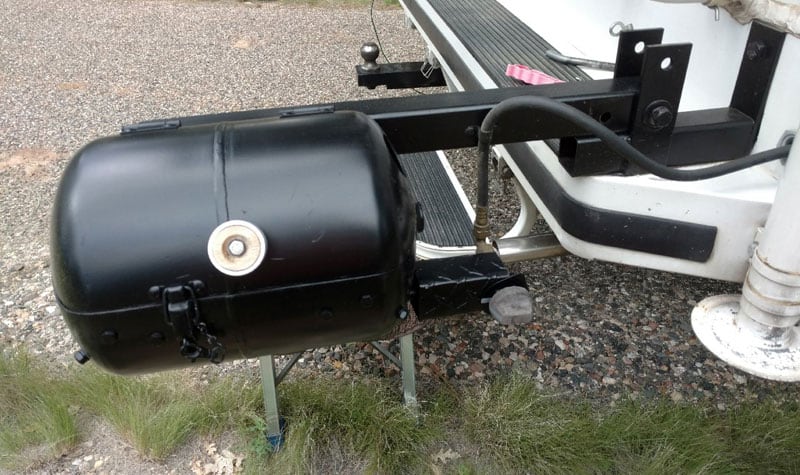
I used an angle grinder with a cutoff wheel to cut the 10-pound propane tank open. It’s cut on a curve at the ends to allow space for the arm mount.
I got the tank from a propane dealer friend of mine. It was in good condition and had not been used in years. It did not have an OPD valve.
I removed the old valve and inspected the inside. It looked clean and had very little odor. I washed it out well before I cut it open.
I used the stainless burner from a larger grill and cut down the stainless rack from the same larger grill to fit. I put a tee fitting in the generator compartment and flex line to supply propane to the grill.
I am 72 years old and first learned to weld in high school. Welding was not my profession, but I have always repaired and built things in my home shop.
I have made many things in my life using wood or metal. It’s been a great hobby. It seems like I am always happiest when building something. I find it difficult to sit and do nothing.
The barbecue grill has been a great addition, and it’s so simple to use. Just pull the pin to lower and light it. After cooking, I just raise it up put the pin in and I’m done. It fits neatly in this corner. No fuss. No muss.
It took me 20-hours to complete this modification and cost me $40. In my opinion, the skill level of this modification is hard.
Submitted by: Jim and Anne Beach, 2009 GMC Sierra 3500, 2012 Arctic Fox 865
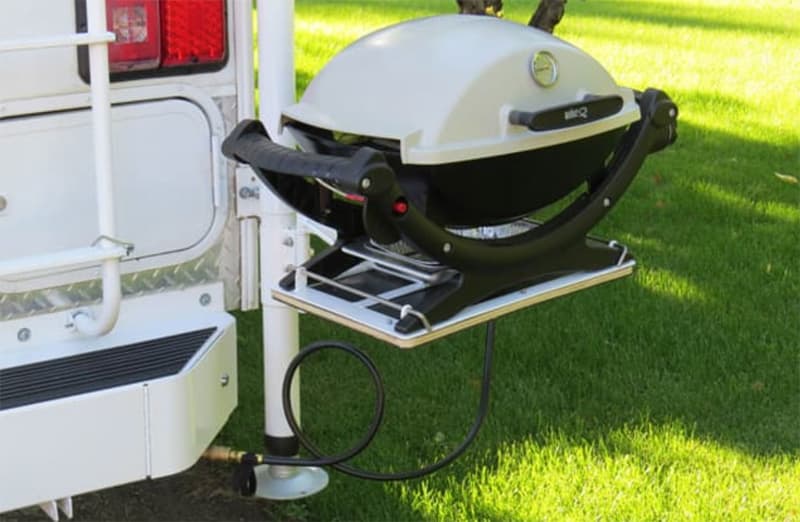
The Arctic Fox 865 has a propane outlet installed at the rear right side of the bumper. The first thing was to attach it more securely to the bumper and add a cover for the quick attach. A hydraulic quick coupler cover works well. There is usually a good selection of covers available from any farm supply store.
First, we built a steel support frame for the Weber 100 BBQ that can be removed from the BBQ by pulling two long SS pins. The base has two tubes mounted above the base so the base is flat on the bottom. It is made from one-half inch ply with a one-eighth inch rubber base glued to the bottom. That is not really necessary but makes it less likely to slide where ever you store it.
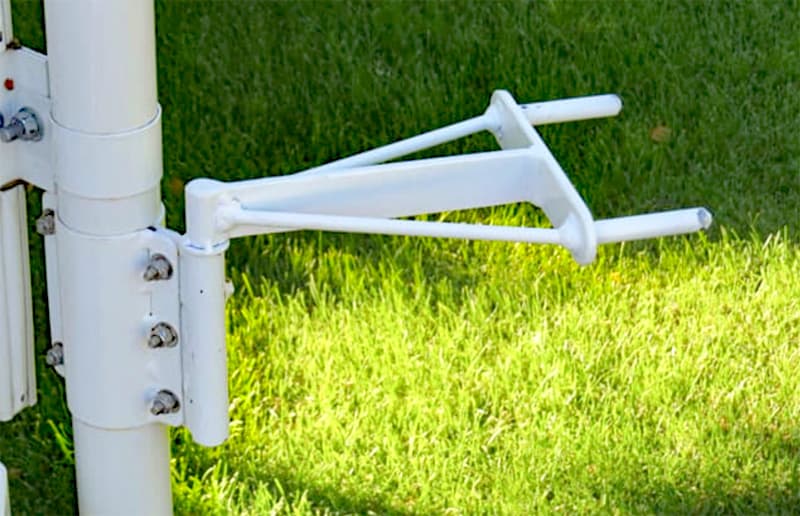
There is a V-shaped yoke that has two pins that are installed into the tubes on the BBQ’s base. One pin is set at ninety degrees to the V bracket which fits into the bracket on the camper’s jack leg. I happened to have a piece of exhaust tube about six inches long which had the inside diameter closely matching the outside diameter of the jack’s leg. I split it in two lengthwise and welded a three-quarter inch by one-eighth inch flat bar to the edges to make a clamp.
The vertical tube that fits the single pin on the V bracket has a piece of a three-quarter inch by three-sixteenth inch flat bar welded to the tube. It is sandwich bolted to the half-moon bracket. The inside diameter of the tube has a slip fit on the single pin on the V bracket. The half-moon bracket stays attached to the camper jack and can be adjusted up or down to suit your ideal BBQ height. I used SS bolts so it won’t rust.
We have ours slightly higher than our at home BBQ and find it just fine. When installed, the BBQ will turn at about a 120-degree range from the back of the camper to the side. I painted the brackets white to match the camper’s jack legs. The V bracket is removed for storage when the BBQ is not attached to the truck camper.
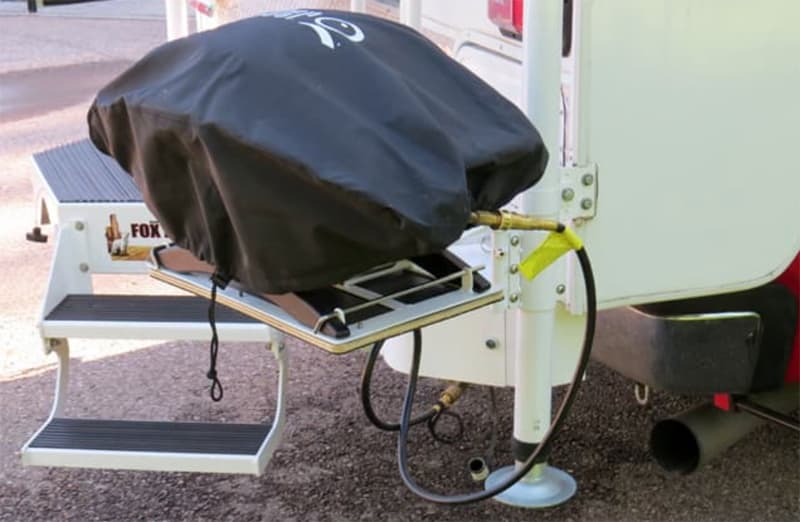
The propane connection is via a five-foot hose with a quick connector from the truck camper to the BBQ. The BBQ was modified by taking off the regulator and installing a male quick connect on the propane inlet. The BBQ regulator needs to be removed because the propane supply is regulated down to operating pressure by the truck camper propane system regulator.
It was a bit of work to make the brackets. If you are handy with steel and a welder, it is a good winter project.
Submitted by: Doug Baughman, 2008 Ford F350, 2013 Northstar Arrow 8.5
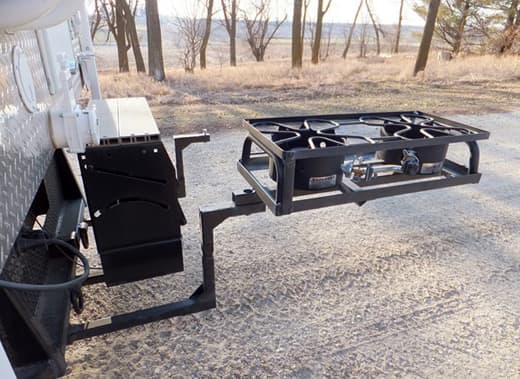
I added a grill/one burner that swings up behind the steps. DOT regulations require a length limit of no more than forty-eight inches behind the camper. With the grill swinging up behind the step, it falls under forty-eight inches.
I save a lot of storage space by having the grill/burning outside the truck. The grill/burner swings out of the way so we can use the steps for our truck camper. There are two stability points for the grill/burner to rest on.
It took me two hours to complete this modification and cost me $30. In my opinion, the skill level of this modification is medium.
Submitted by: Brent Portschy, 2005 Dodge Ram 3500, 2006 Host Tahoe 10.5
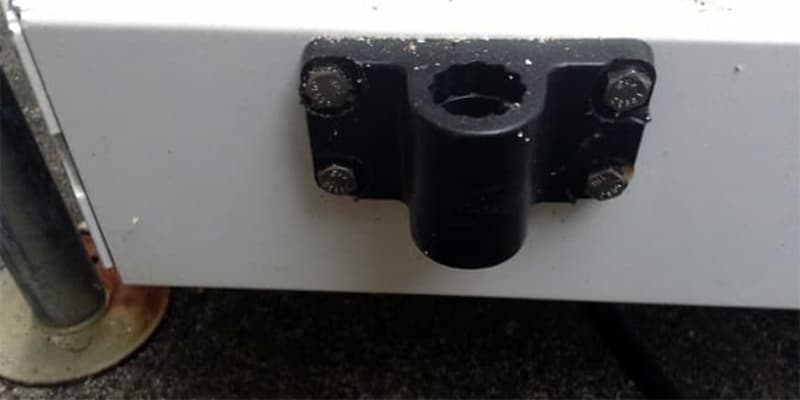
I’m not sure I have seen this exact mod done before. I mounted a Scotty fishing pole holder mount (pictured above) to the rear bumper of my camper. I use the same Magma barbecue that I use on my boat. This way I only needed one barbecue for either location.
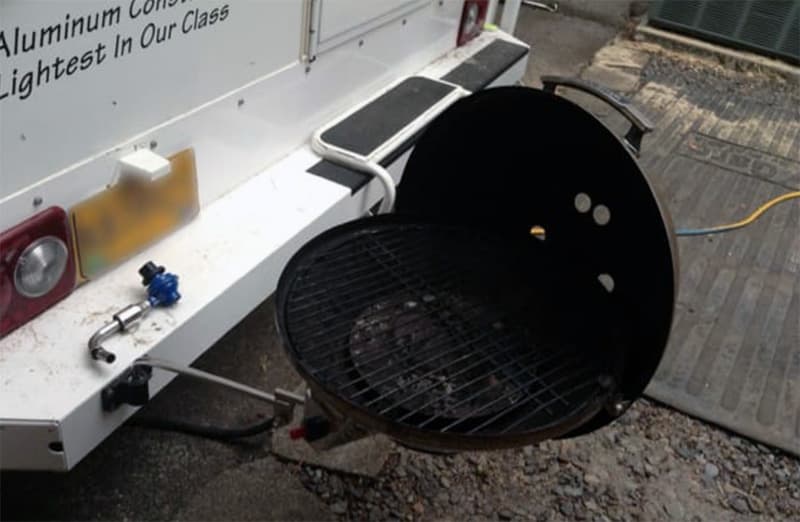
For this project, I needed the mount and four stainless bolts, nuts, and lock washers. It only took a few minutes to install. The Magma grills are available at any boating, large fishing store, or online.
Submitted by: Paul Karlson, 2012 Dodge Ram 3500, 2018 Palomino SS-1500
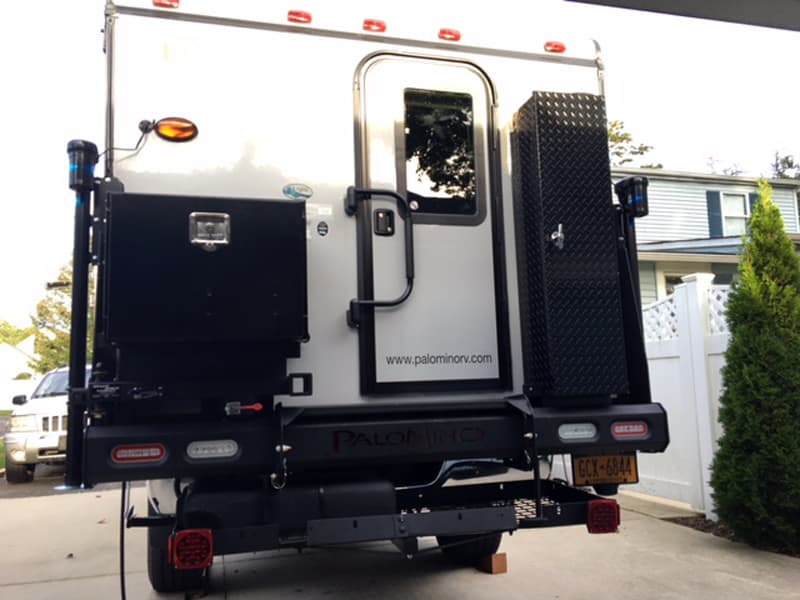
I did this modification because I wanted extra storage in my camper. I needed room for a portable generator for the air conditioner to operate and a place to put wet waders, rain gear boots, and a portable barbecue.
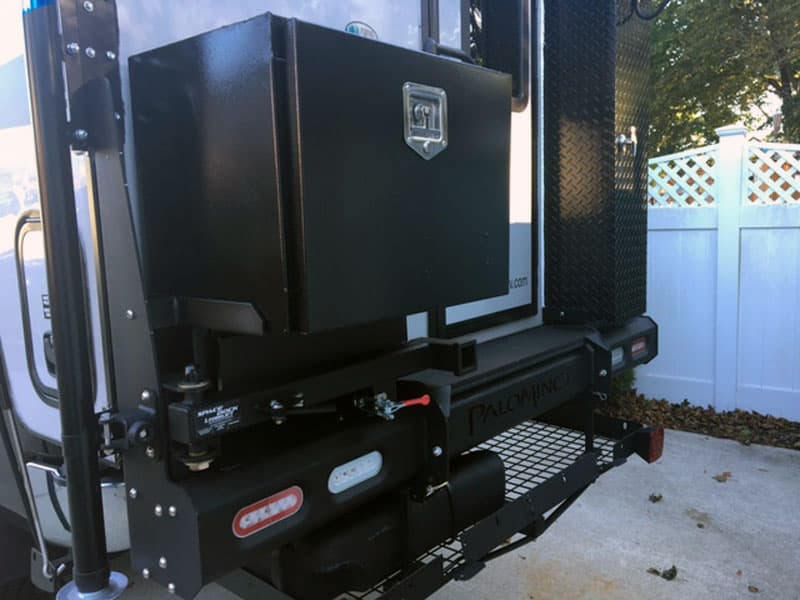
I wanted a steel lockable box for my 2,000-watt generator. Measurements taken, I found a store-bought box. I had steel laying around from years of working on cars and trucks. So all of the metal was on hand, but the steel probably would have cost about $100 had I bought it new.
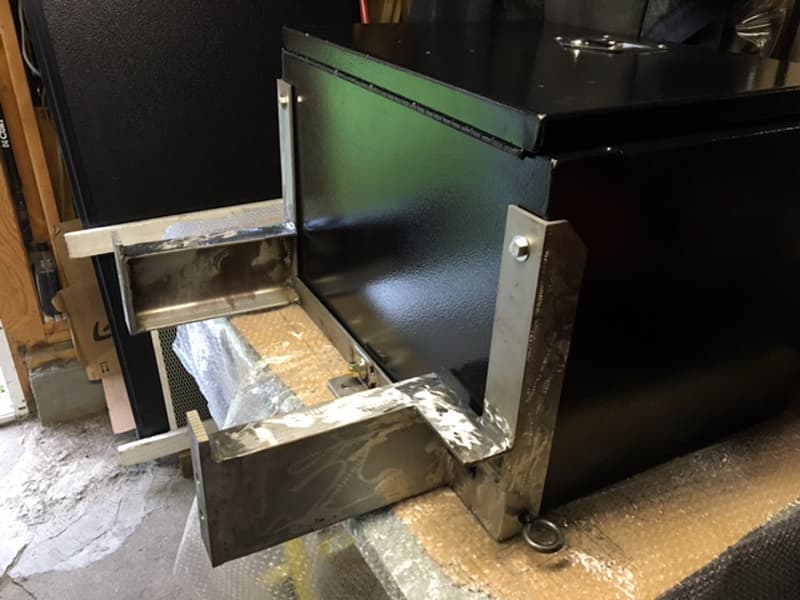
I welded support brackets to be mounted onto the rear bumper of the camper. I did not want to mount or drill into the back wall of my camper, but I had to drill one 3/8-inch hole for the aluminum wet gear box on the right side. All other holes were drilled into the rear aluminum bumper itself using stainless hardware.
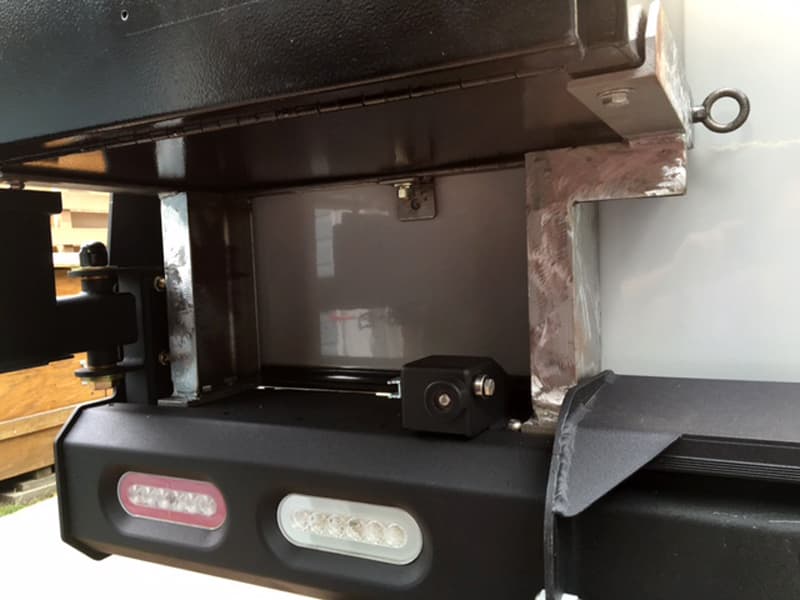
The total weight is 255-pounds including the rear Torklift bumper. The brackets I made are all steel, 1/4-inch thick, and welded. They are bolted to the storage boxes and to the bumper. I had all the brackets I made professionally powder coated black to match the bumper. I installed large hooks on the outside of the wet gear box as well as one fishing rod holder on the barbecue box.
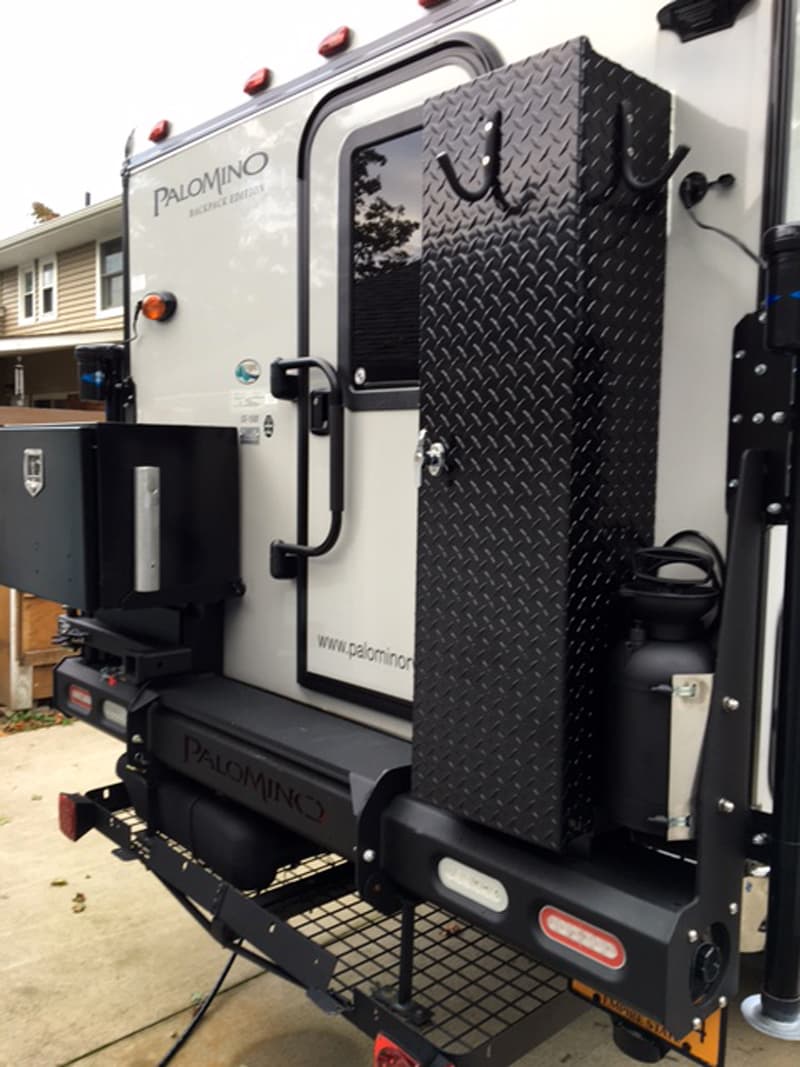
It actually worked out better then I thought.
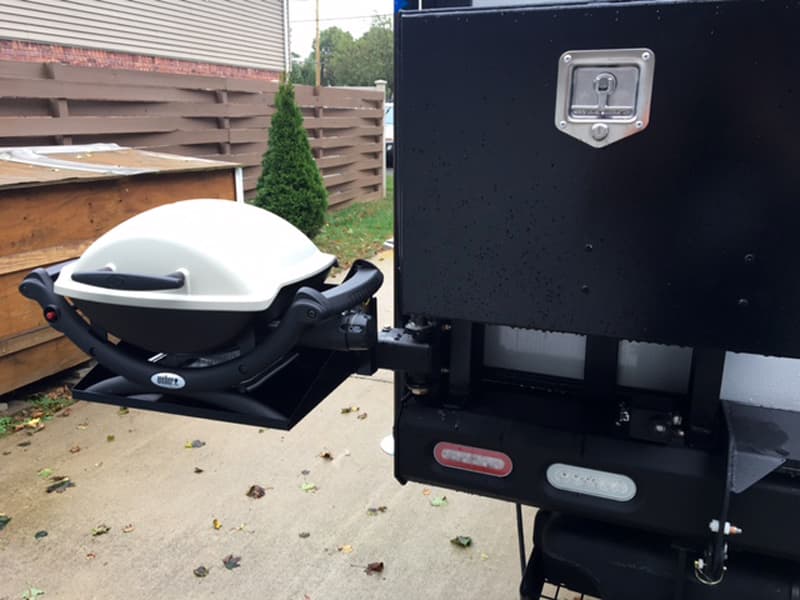
I now keep the barbecue in the steel box when I’m not using the generator.
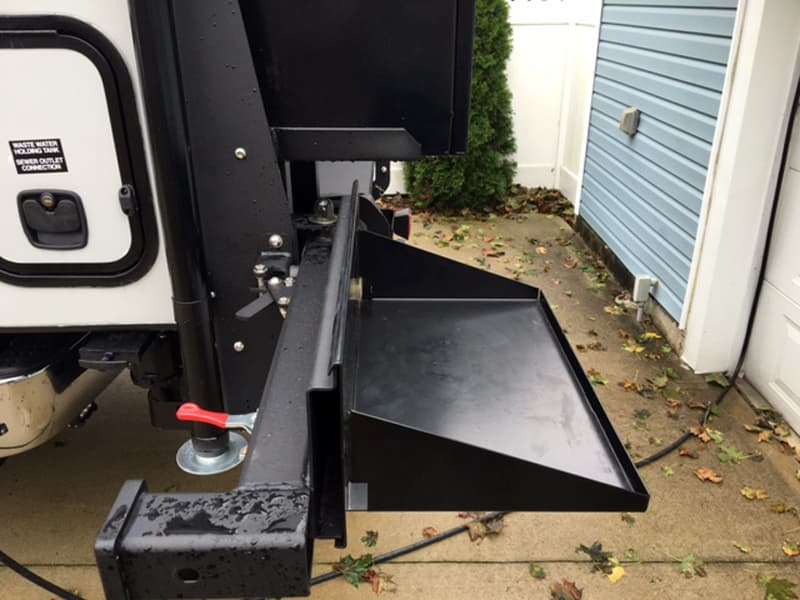
I do not run the generator inside this box. I still need to make a shelf for the generator to go into the Torklift Space Dock.
It took me probably 20 hours to fabricate everything; cutting metal, drilling metal, welding, and grinding. It cost me $375 all for the powder coating. In my opinion, the skill level of this modification is medium to hard because of welding and using a band saw and drill press.
Submitted by: Joe Dasilva, Jr., 2013 Ford F350, 2015 Lance 1050S
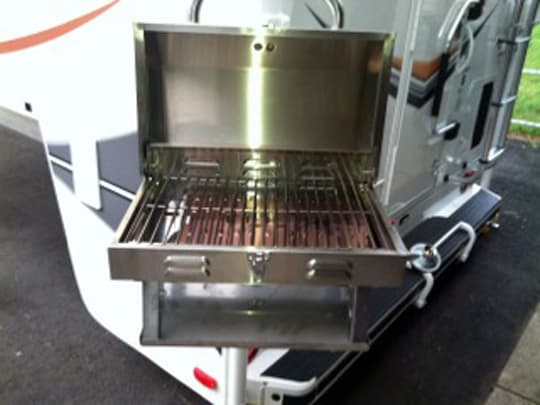
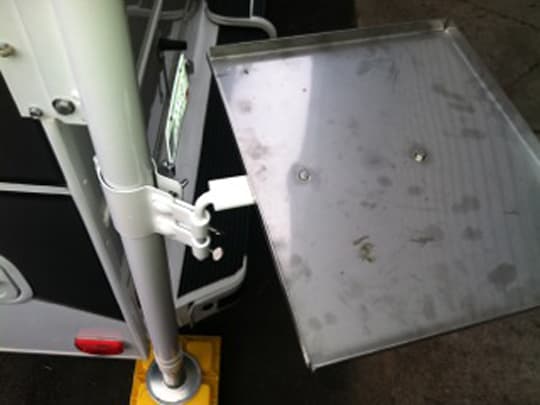
I needed a grill holder on my truck camper. So, I had an idea that I put on paper. I made it and it works great. It can be moved up and down and side to side.
Disclaimer: It is your responsibility to make sure that any do-it-yourself modification project you undertake is safe, effective, and legal for your situation.
