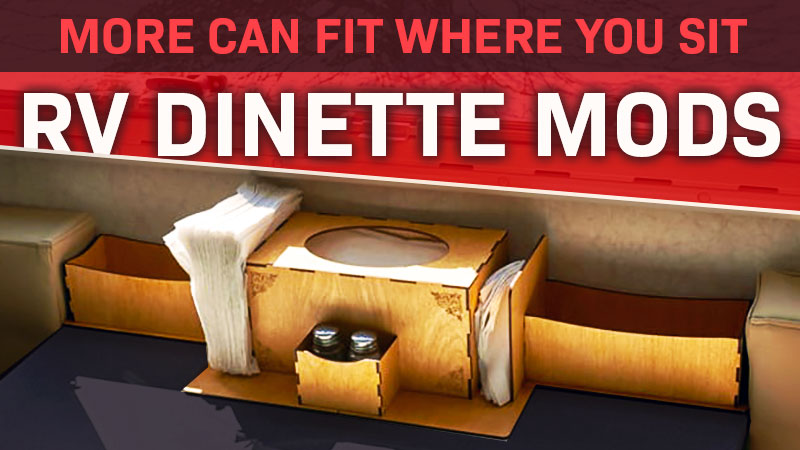
Nearly every truck camper on the planet wants more storage. Here are six incredible and ingenious ways to create more storage opportunities in your dinette. Here’s how more stuff can neatly fit – where you sit.
Submitted By: Tony and Barbara Tavares, 2013 Chevy 3500HD, 2013 Northern Lite 9-6

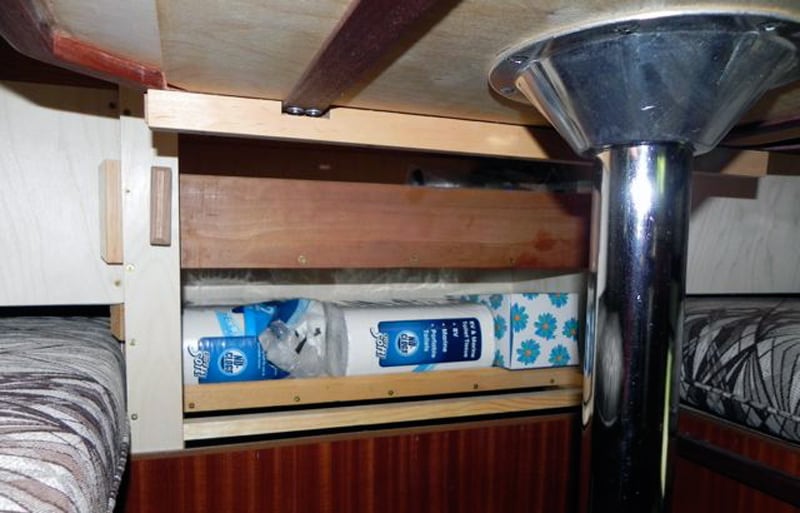
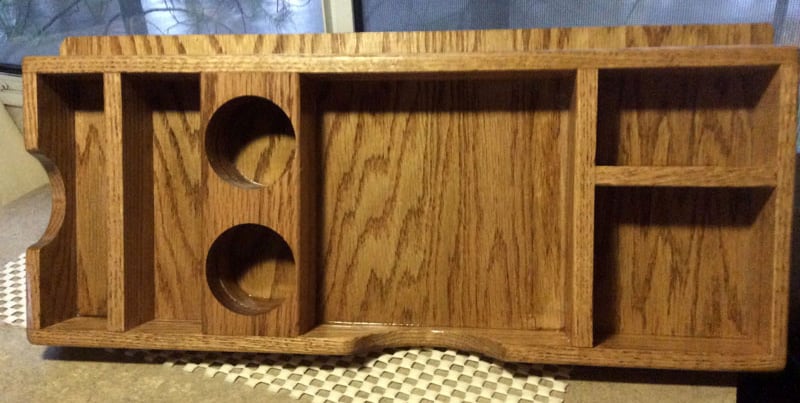
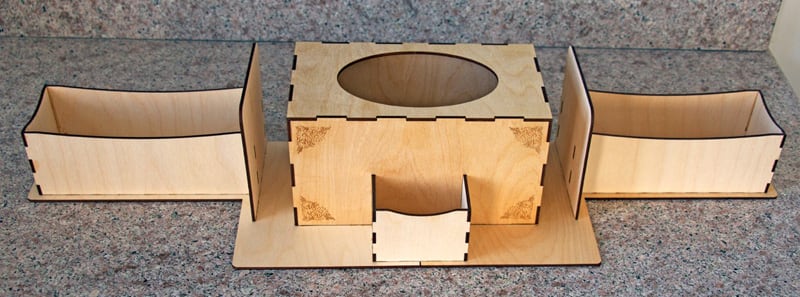
This is the modification I made to our Northern Lite 9-6. I replaced the wrap-around seating with three boxes in place of the wall-area seat cushions. The original storage box under the window seat contains our liquor closet and supports the new center console box.
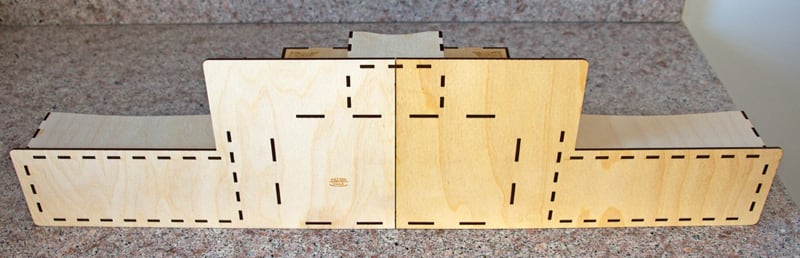
Above: The table moves out, and the wood bar is lifted up for an additional storage area
Above: The table moves out, and the wood bar is lifted up for an additional storage area
The tabletop had to be slightly modified by reducing the width of the underlying plywood support and adding a locking clamp to keep the table from sliding while traveling. The width reduction allows the table to slide out in order to access the liquor closet and center storage area.
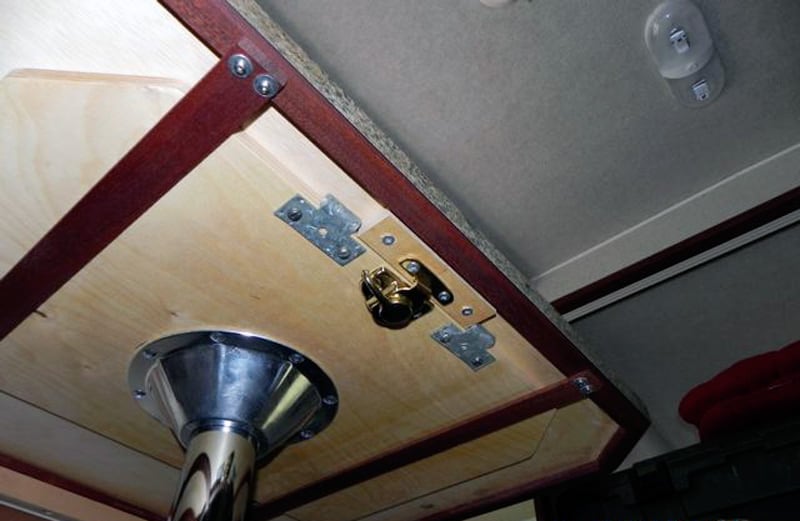
Above: The table was slightly modified for this modification
Above: Storage under the table
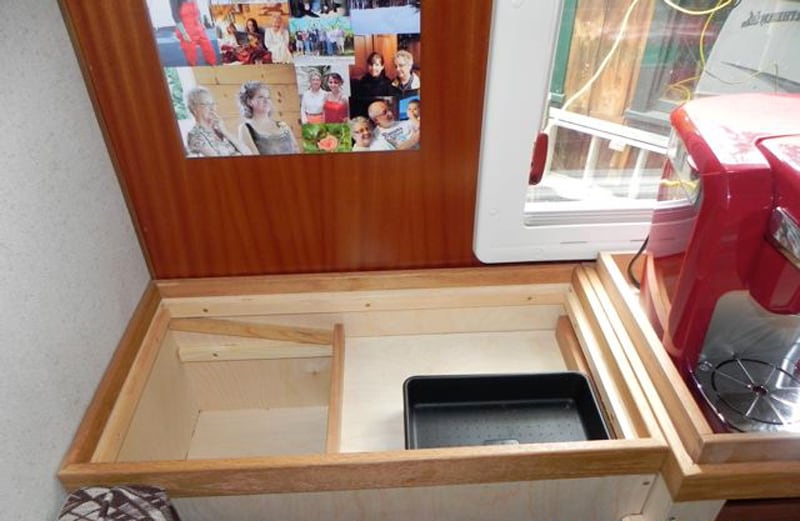
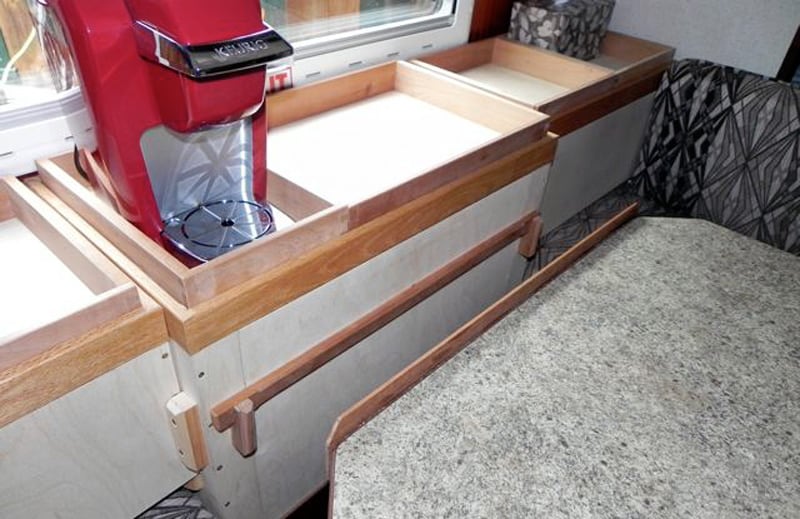
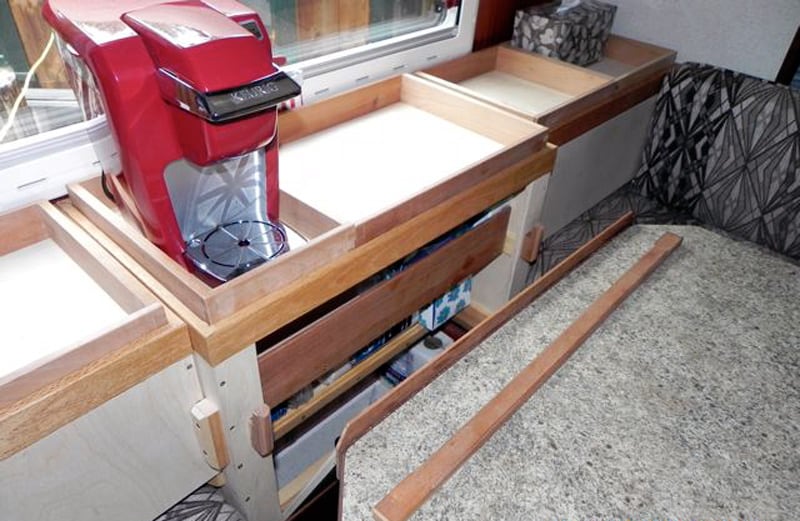
Above and Below: The end boxes with sliding trays for under the counter storage
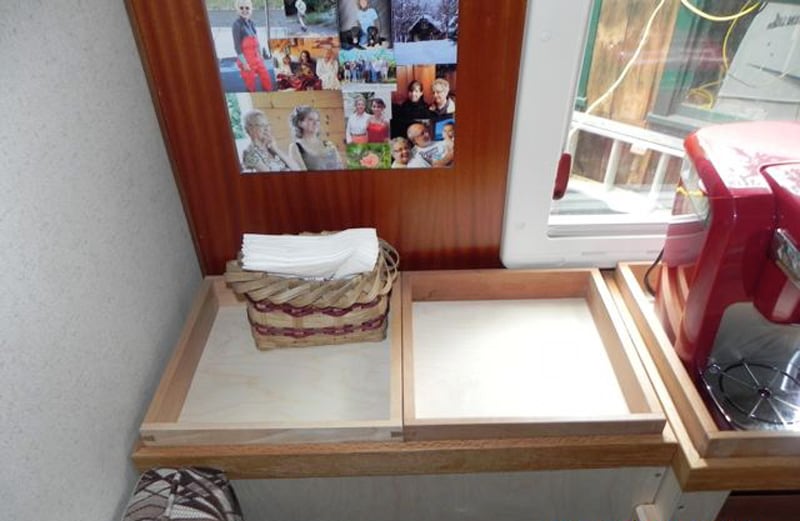
The two end boxes have a sliding tray under the cover trays. The end boxes are used for our small personal items. The top trays on all the boxes can lift off to access the interior of the boxes.
We used the modification during a twelve-week coastal trip. We found it very useful for the storage of paper towels, toilet paper, soap, and several bottles of wine and scotch. It also provided a convenient location for our Keurig pot.
Submitted By: Tim Zeh, 2005 Chevrolet 3500, 2007 Arctic Fox 1150
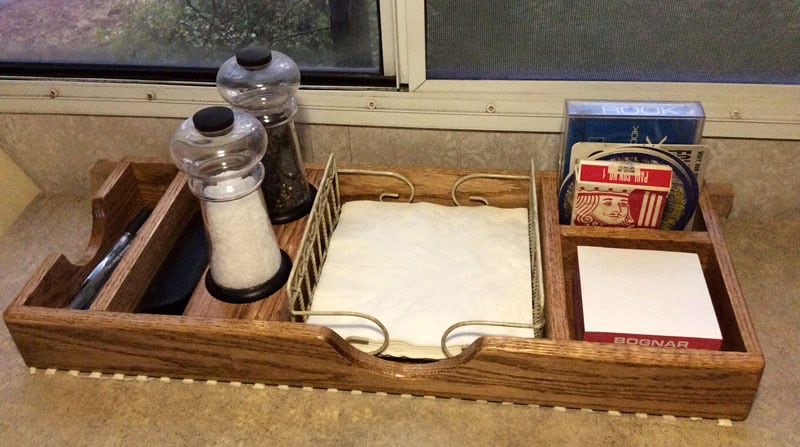
We like to keep items on the table and not have to put them away. These items include napkins, salt and pepper, playing cards, paper, pens and even reading glasses.
We tried the non-skid pads. They work pretty well when new, but the dust from all the gravel roads we travel eventually makes them ineffective.
I had some leftover oak from a woodworking project and built a caddy that hooks between the table and wall. Our 2005 Arctic Fox has the dinette which attaches to the wall. I made the cleat so the caddy between the two table brackets.
I planed down the wood to 1/2-inch and glued it together. With a little stain and poly, it looks like it was part of the original camper. I also added a piece of non-skid shelf liner to keep it from marking the table.
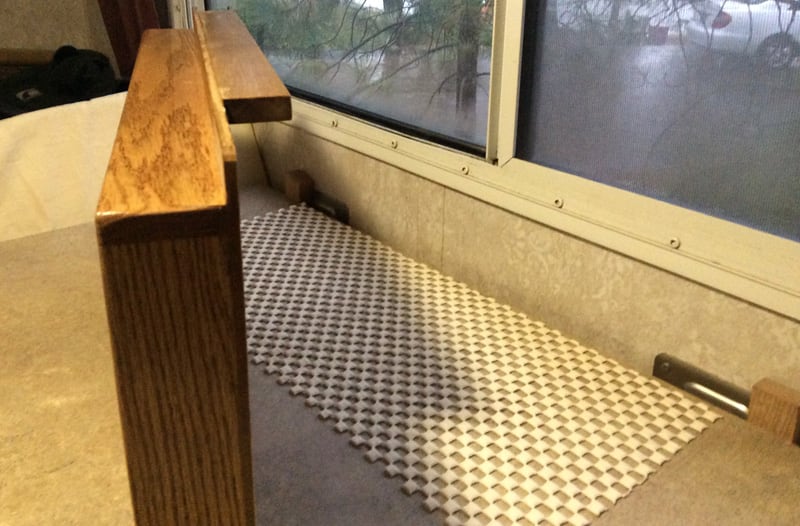
The dinette caddy works great! We’ve been out six weeks now. Even when everything else is on the floor, our caddy keeps everything in place. We could have made it bigger!
Also, we had lots of problems with salt clumping from all the humidity. The solution was to buy a salt grinder. It works!
It took me three hours to complete this modification and cost me $0. In my opinion, the skill level of this modification is hard.
Submitted By: Chuck and Jodie Ramsey, 2012 Chevy Silverado 3500, 2014 Adventurer 116DS
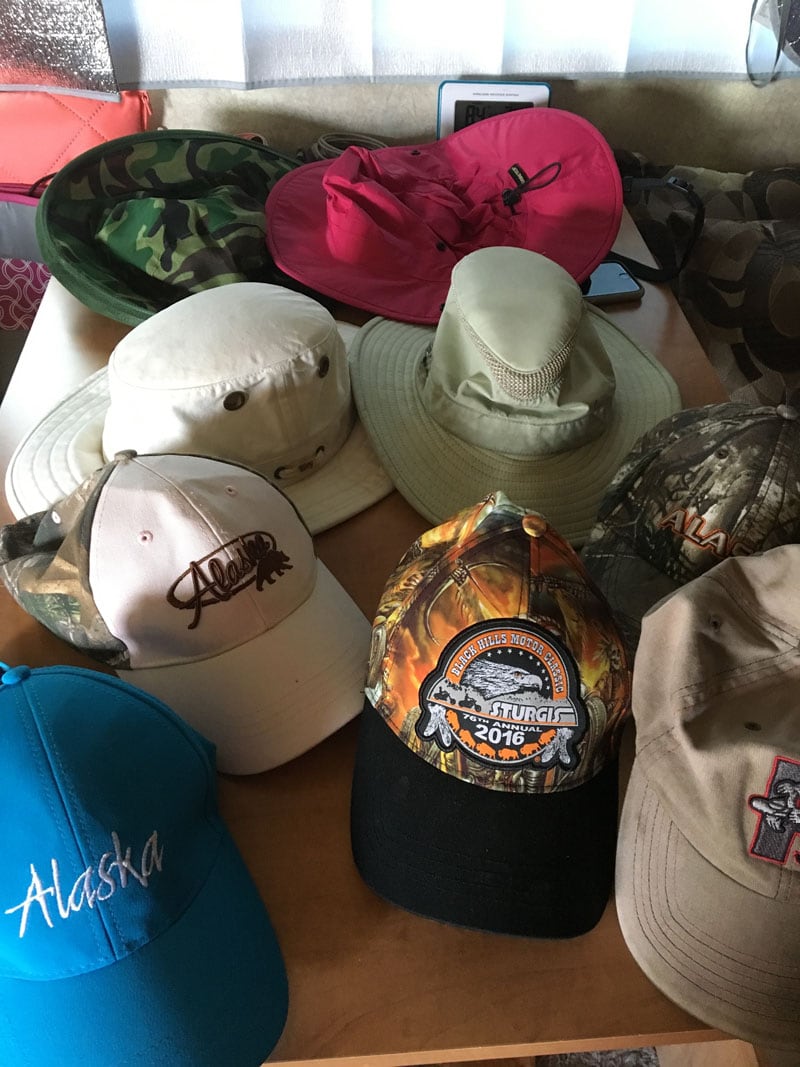
We travel with lots of hats; baseball caps, cowboy hats, rain hats, and even anti-bug hats. With the number of hats we own we needed an easy way to store them. So, we made hat racks.
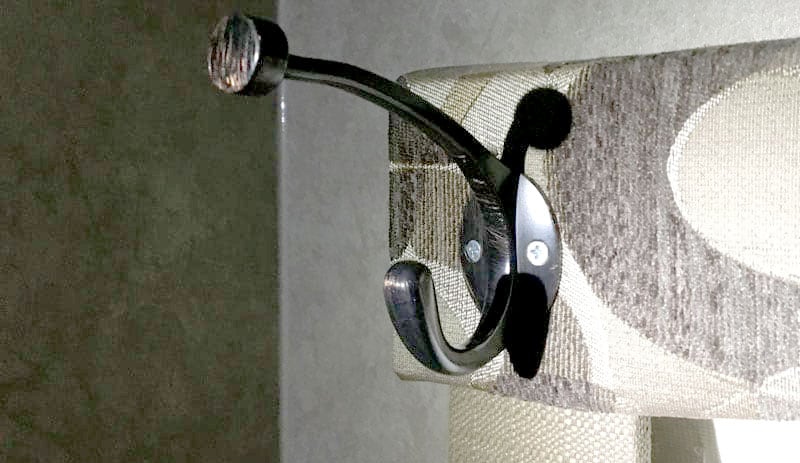
I went to Home Depot and bought two coat/hat hooks; one for each of us. Before I installed them, I changed the direction of the curve of the top prong on the hooks. I bent them down slightly. This modification to the hook was done so the crown of the hat would rest on more surface area. It will also not leave a dimple in our hats from the top of the hook.
We first considered attaching the hooks to the sidewalls using removable sticky tape to the coat/hat hooks. The wallpaper started to pull from the weight of the hooks, so we scrapped that plan.
Knowing we would need a more secure attachment point, I screwed the hooks into the valance over our dinette window. I installed one hook on each side.
We hang our baseball caps from the lower prong of the hook and then layer our full brim hats on the top hook.
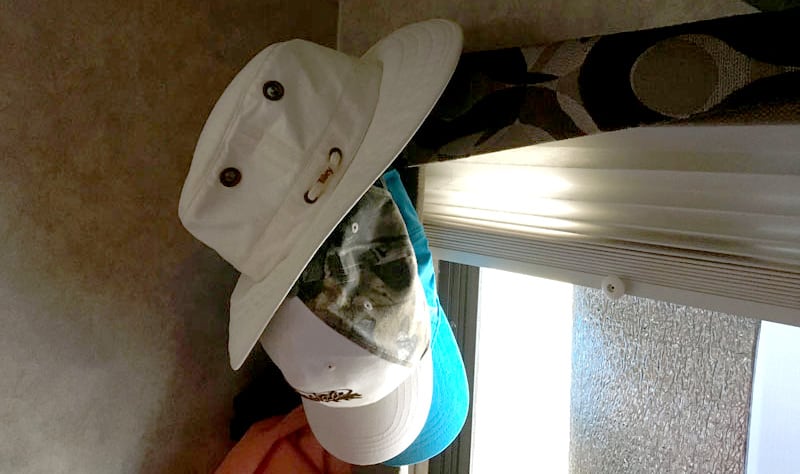
The hat rack has worked out very well. The hats are far enough out of the way for when we’re sitting at the table, but are in easy reach when we want to wear one.
It took me less than an hour to complete this mod and cost under $10 for two hooks and the screws. In my opinion, the skill level of this modification is easy.
Submitted By: Tracy and Steve Schuster, 2015 GMC 3500, 2012 Lance 992
I got tired of moving my iPad and my husband’s iPad around. I wanted to keep them out of the way when not in use, but easily accessible when we wanted them. I also hated putting them in a drawer or somewhere where something could be set on them and potentially damage them.
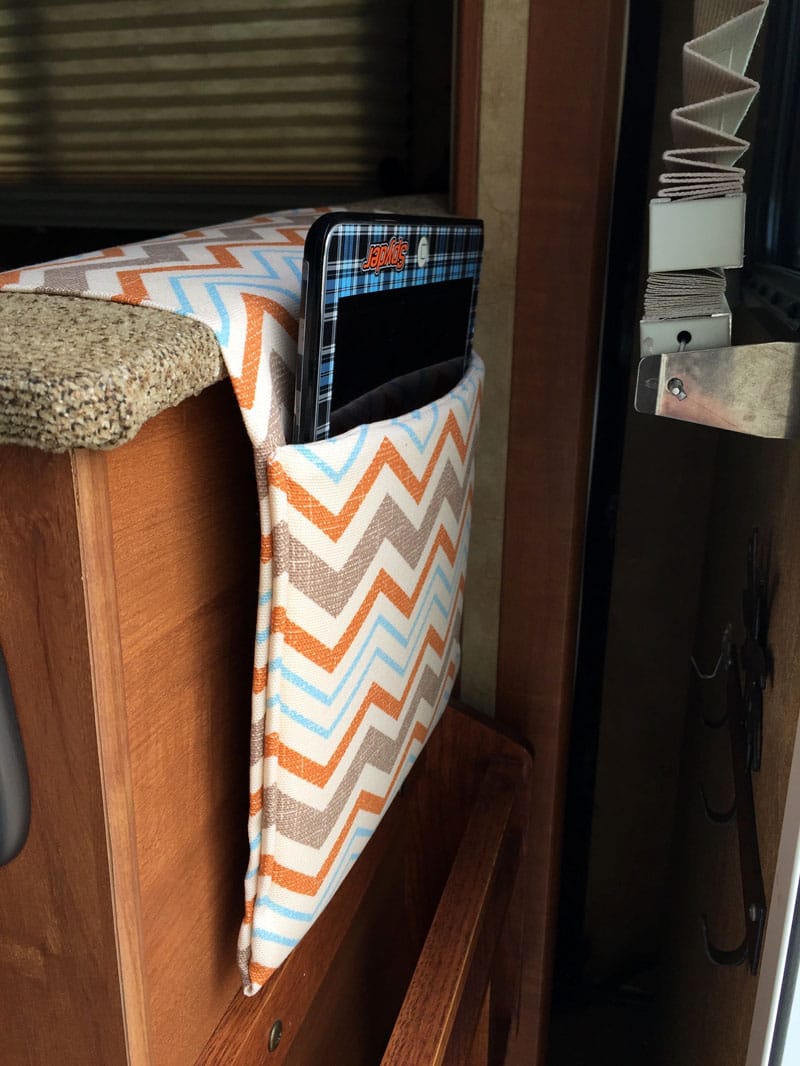
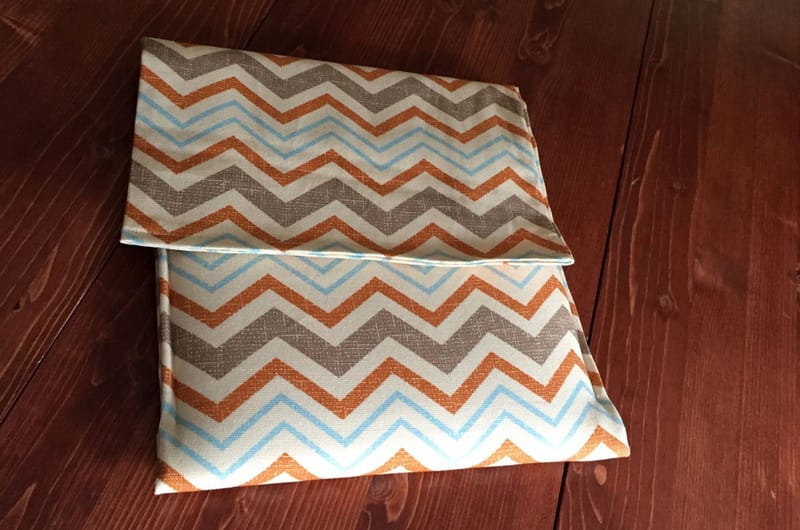
I bought some fabric and some Flex-Foam from Walmart’s fabric section. After some measuring, I found that a piece of fabric that was 25-inches long and 19 1/2-inches wide was needed. I also needed a piece of Flex-Foam that was 9-inches by 15 1/2 inches.
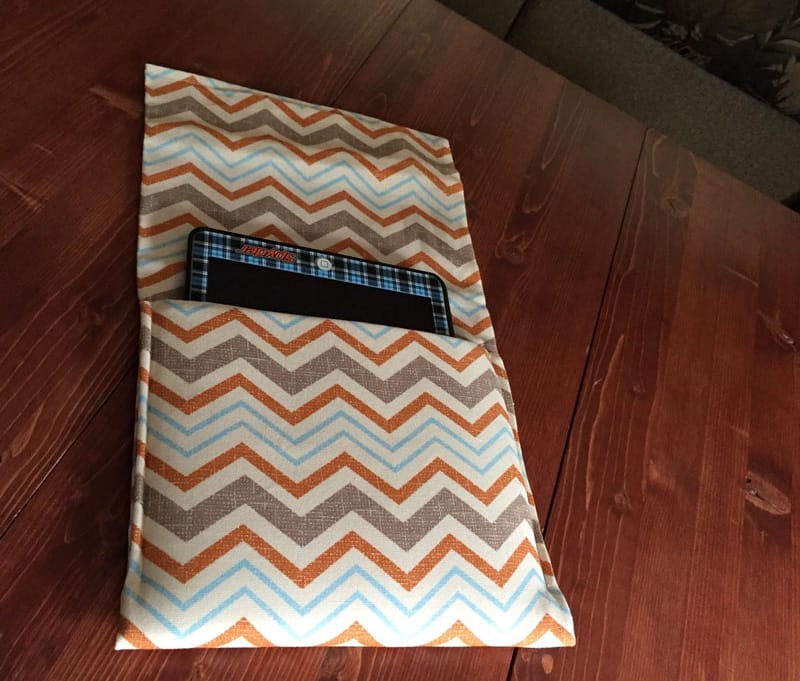
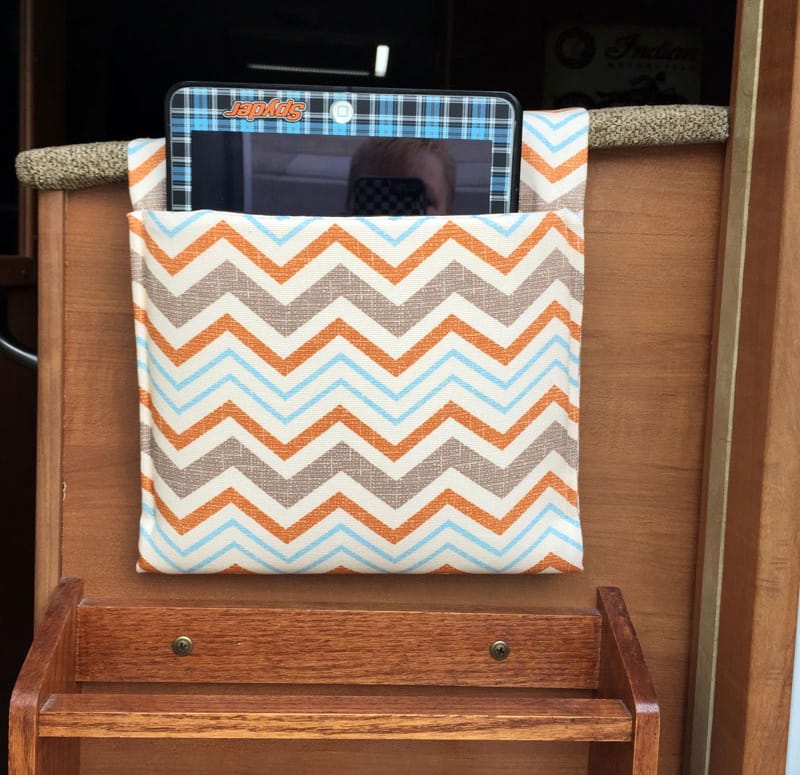
I sewed the fabric around the Flex-Foam and created a pocket slightly shorter than the iPad with a long (not foam lined) tongue at the top.
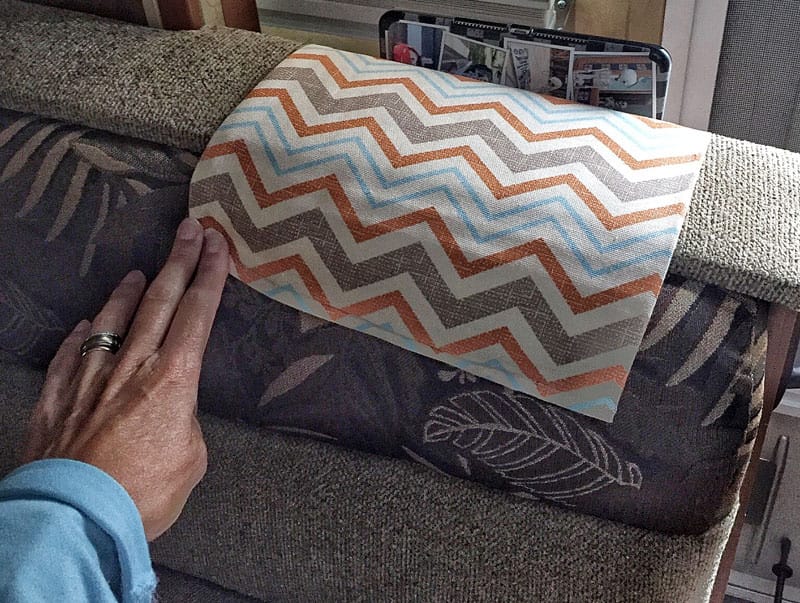
The tongue serves a dual purpose. First, it’s folded over and behind the seat back and cushion to hold the iPad pocket in place in the camper.
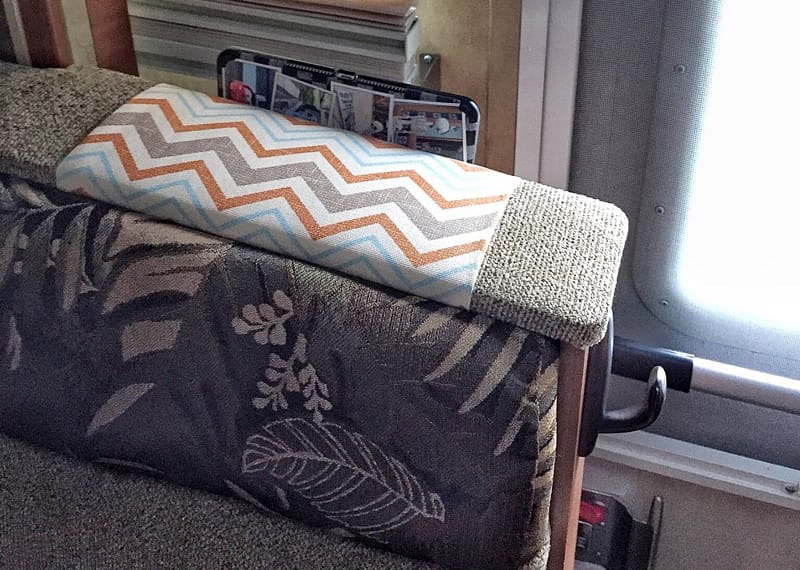
Second, it folds over the top of the pocket for protection while carrying the iPad outside of the camper.
Now the iPads are out of the way, but right where we need them. The portable protection was an unforeseen bonus. I actually did not set out to make this mod (I was altering a new purse to have an iPad place) but I should have done it long ago.
It took me about thirty minutes of sewing after an hour of planning and measuring. The mod was less than $4 for each holder. In my opinion, the skill level of this modification is easy, if you know how to sew.
Submitted By: Duncan Crawford, 2008 Ford F450, 2015 Northstar 12STC
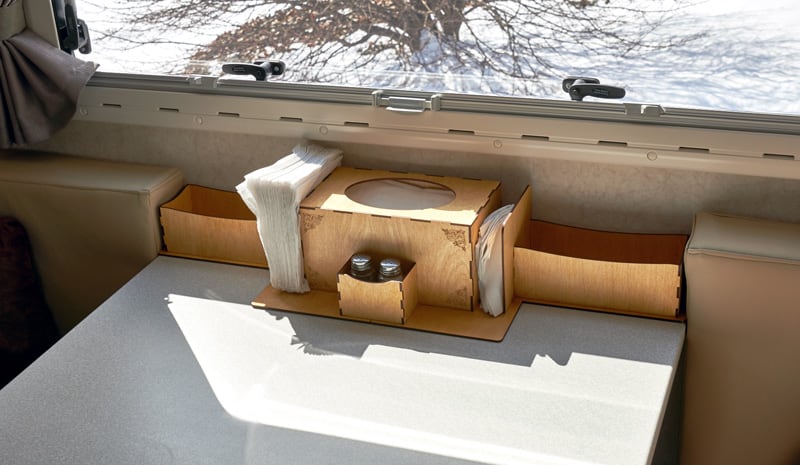
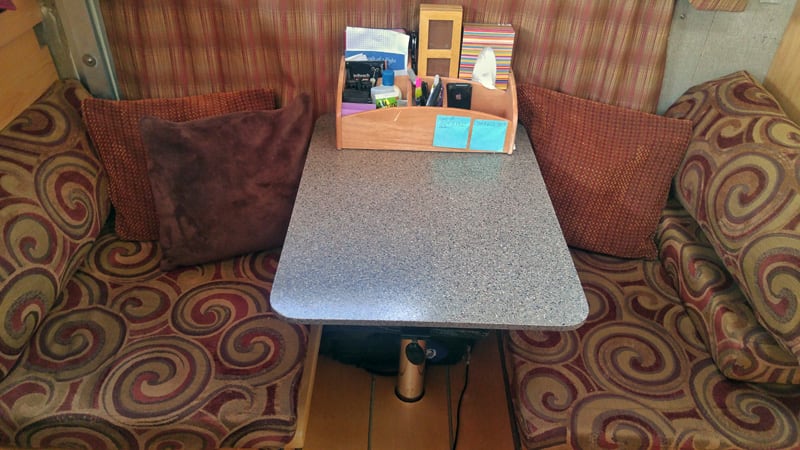
I made a dinette table organizer for all that stuff that needs a regular home including napkins, salt and pepper, tissues, cell phones, keys, ibuprofen bottle, and a bottle opener.
I designed it in CorelDraw, and cut it from 1/8-inch Baltic birch on my laser engraver.
Above: Bottom of the new table organizer
The finish is blonde shellac, which is adequate to minimize grandkid fingerprints. The unit is glued to the table with a couple of drops of silicone caulk, plus it’s captured between the corner seat cushions.
It hasn’t moved in several thousand miles, holds everything we want, and has defeated the grandkids (even better).
It took me three hours to complete and cost $6 for materials. Don’t ask about the cost of the tools and software. In my opinion, the skill level of this mod is hard, if you don’t already have the tools. It’s easy if you do.
Submitted By: Laurie Heimbigner, 2013 Ford F-550, 2013 Phoenix Pop-up
We are traveling long term and always need to be prepared for colder temperatures. That means additional jackets, blankets, and sleeping bags. The challenge was where to store these bulky items. Then I looked closely at our throw pillows.
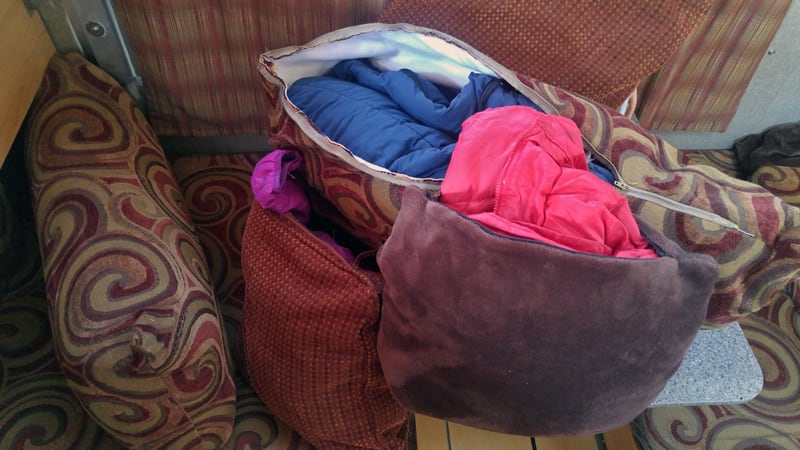
In less than 30-minutes, I ripped open each pillow’s seam and installed a zipper in its place. The throw pillows became our jacket and blanket storage. Then I took leftover upholstery fabric and made two zippered bolsters, each large enough to hold a sleeping bag.
Problem solved! All of our cold-weather gear is conveniently stowed away, yet quickly accessible, and we’re actually more comfortable with the additional pillows and bolsters.
It took me 4-hours for 4 pillows and 2 fully-lined bolsters. I already had the fabric, so all I was out was about $20 for the zippers. In my opinion, the skill level of this modification is easy. As long as you can sew a straight seam on each side of the zipper, you’ve got it.
Disclaimer: The modifications above are submitted by Truck Camper Magazine readers. It is your responsibility to make sure that any do-it-yourself modification project you undertake is safe, effective, and legal for your situation.


