Old school camper bumpers are often a sorry excuse for a step. Too shallow. Too short. You want a rear deck; something safer, sturdier and offers enough real estate for a grille, fishing gear or maybe even bikes. Here are five awesome examples to step up to.
Ten years ago the hot mod was a rear truck camper deck. Walk a campsite row at the Mid-Atlantic Truck Camper Rally in 2012 and you would see a half-dozen different takes on this popular concept. Those of us who didn’t have a rear deck couldn’t help but be jealous of the safer entry and exit they provided, not to mention the added functionality. Back then, nearly everyone wanted a rear camper deck.
Soon the truck camper manufacturers took notice and started offering factory decks of their own. These OEM platforms were not as large as what some individuals were fashioning, but they offered a much safer place to step-up and step-down. Skinny bumper steps were out. Fat porch deck systems were in. Some even had compartments for a sewer hose and other outdoor gear. Safer with more storage? That’s a truck camper home run.
Even with the clever industry solutions, there are still many home brew camper decks that offer more. More surface area. More versatility. More custom solutions. Here are five of the coolest rear camper decks we’ve seen over the past few years.
Submitted by: Dan and Susan Knapp, 2001 Chevy 2500HD, 1999 Coachman Ranger 115RB
We didn’t like the 4-foot drop right out the door and we wanted an easy to clean place to help keep sand and dirt out of the camper. We didn’t like how other fold-up deck designs block the door when up.
 |
 |
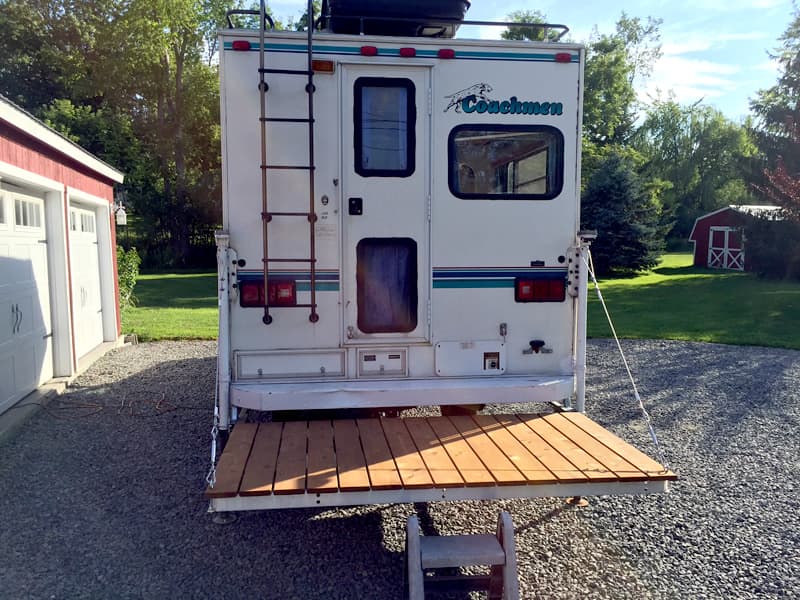
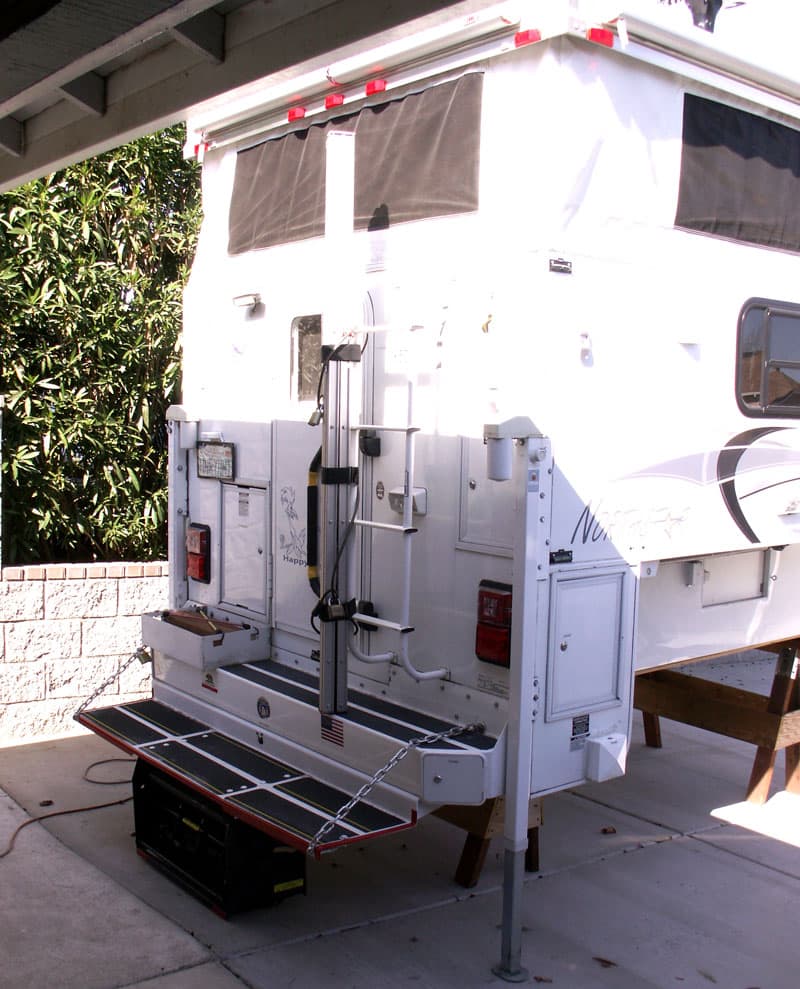
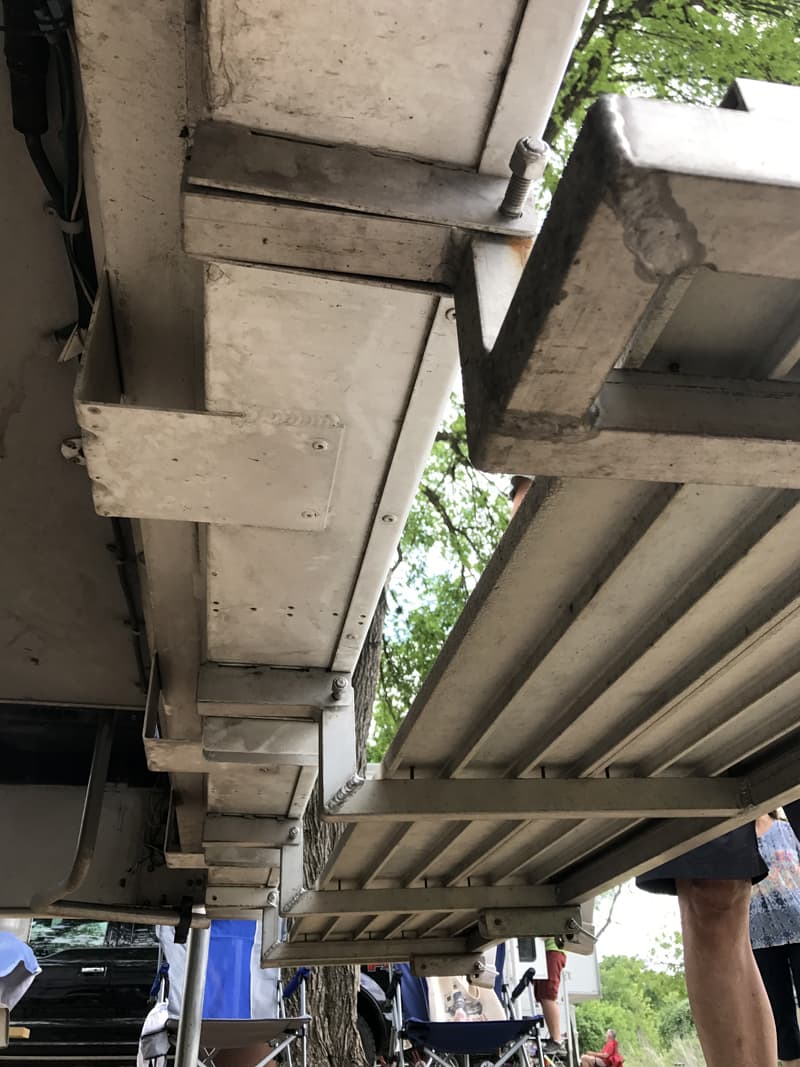
Above: The deck can slide under the back overhang of the camper
We added a rear deck to the camper that slides underneath. It is completely suspended from the camper and automatically locks in place when pulled out. We used aluminum and cedar to keep it light. It weighs about 100 pounds. The cables are rated at 800 pounds each. I have had five people sitting on it while tailgating without a problem.
It turned out better than expected. We don’t know how we lived without it. It feels very secure with almost no flex. It adds a little length, but we use it as a step when retracted. The jacks are still the lowest point and hit first when on uneven ground.
It took me 10 hours to complete and cost $150. The aluminum was dumpster sourced. In my opinion, the skill level of this mod is hard.
Submitted by: Eddie Henry, 2014 Ram 2500, 2014 Northstar 850SC
When our camper was mounted onto our 2014 Ram 2500 four-wheel drive truck, it was difficult getting in and out of our camper. We had a 5-inch wide by 5-inch high bumper-step, and the single 5-inch wide by 8-inch drop down step that came with it.
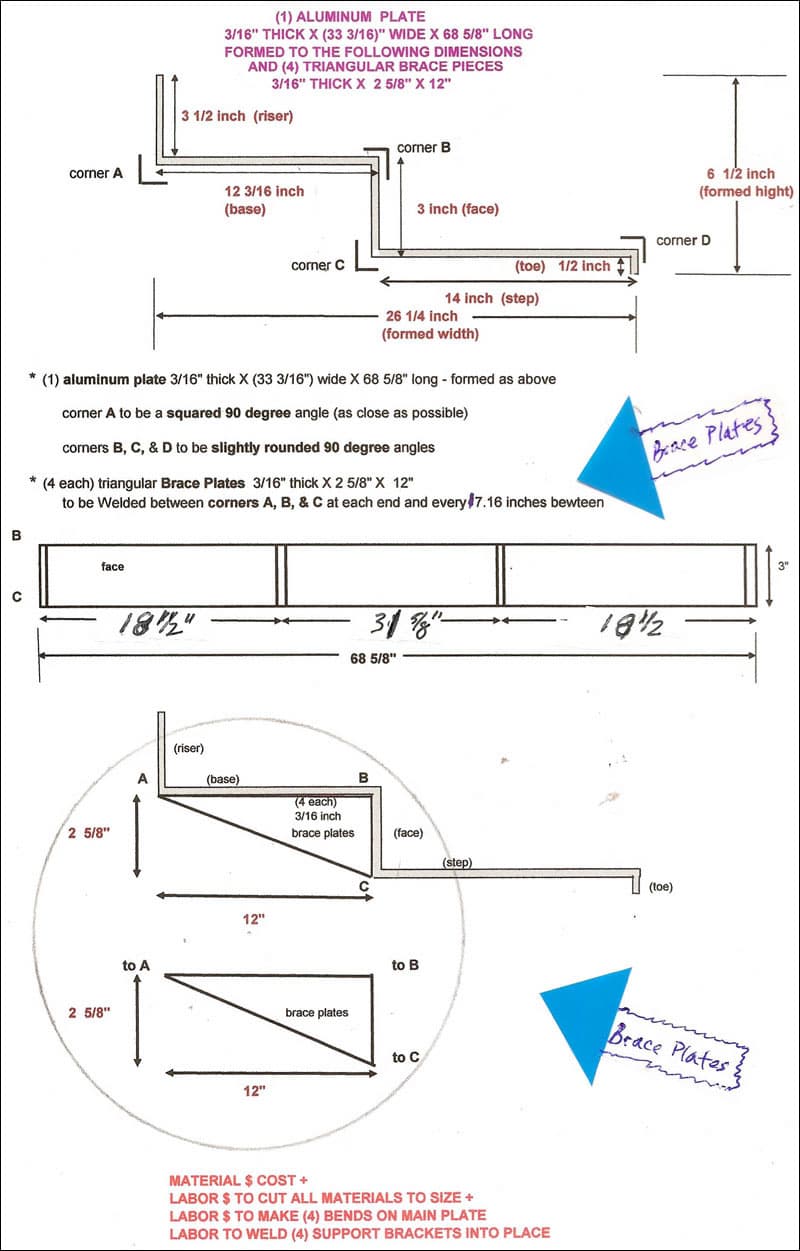
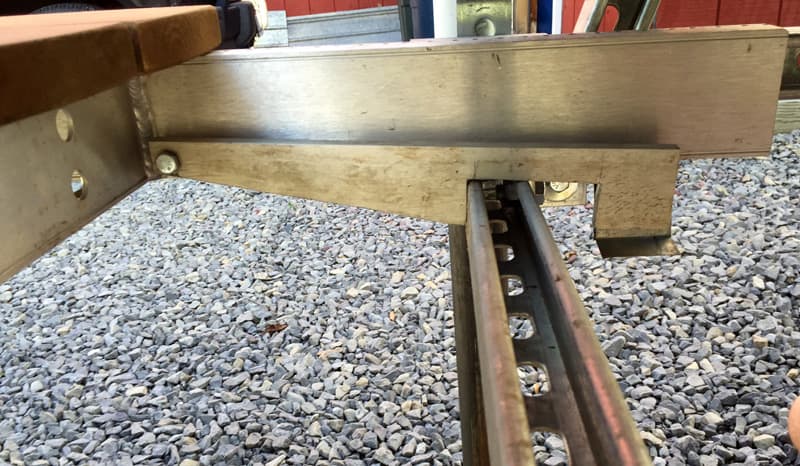
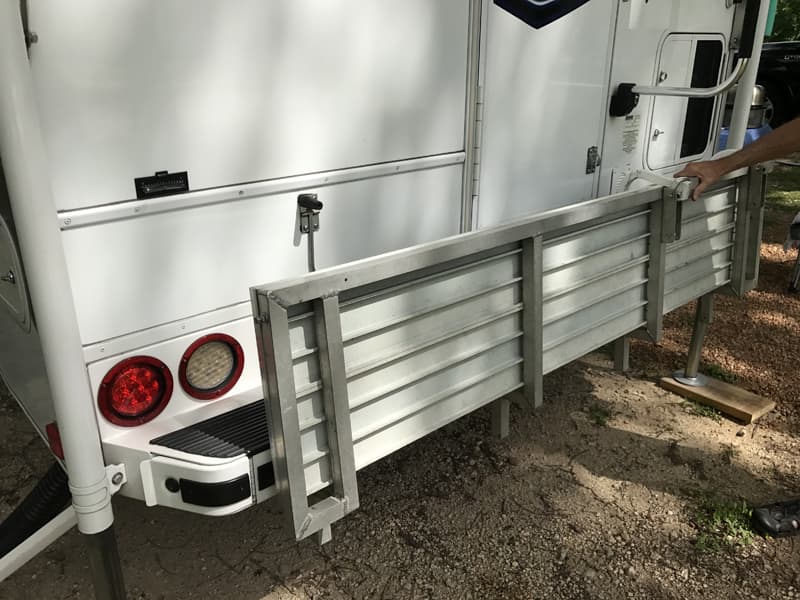
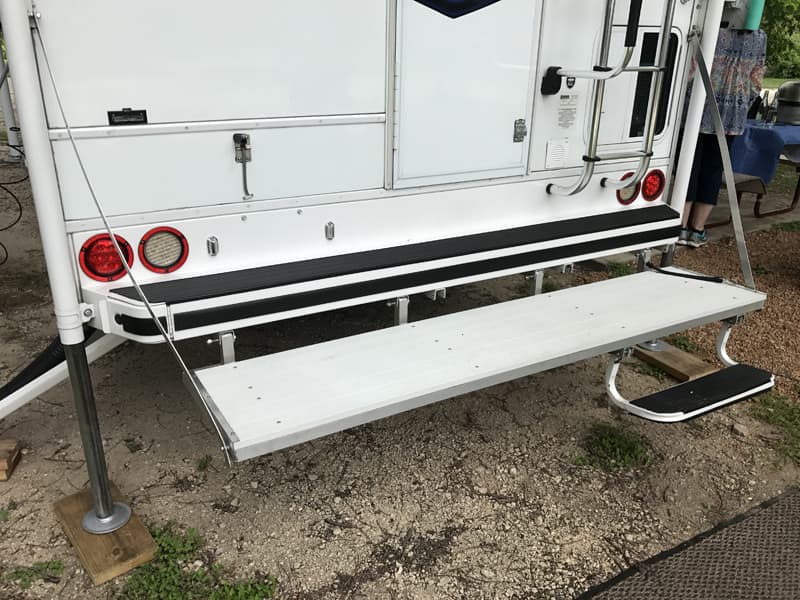
I designed and installed a 3/16-inch plate-aluminum landing-step and added a RV retractable 3-step system to that.
My landing step wraps under and behind the camper bumper. I secured it to the camper’s frame with bolts, nuts, and lag bolts. The steps drop down an additional 3-inches from the 5-inch bumper step, making for an 8-inch step. It extends out 16-inches to make for a nice landing that seconds as a bench seat, and extends the width of the bumper-step.
I also added one ¾-inch chain on each end to the landing, the bumper-step, and the camper’s wall. It’s an additional secure attachment so it doesn’t tend to bend down when stepped on. It provides the needed landing to stand on while opening the camper’s door (especially when it’s up in the air on a four-wheel drive truck) and getting in and out of the camper. Then I added a collapsible, fold-down RV three-step and added adjustable legs to level it on any ground.
We have only made one two week trip with our camper since installing the new landing step. It worked great! It is so much easier getting in and out now.
It took me five hours to complete. It took a couple of hours to design to spec, an hour welding, and a couple of installation hours to complete. It cost $300. In my opinion, the skill level of this mod is hard because the materials need to be cut and shaped to spec with braces heliarc welded on each end.
Submitted by: Jonathan Harris and Susan Boettger, 2006 Chevy Silverado 3500, 2007 Lance 1191
We take our truck camper rig beach camping and surf fishing quite regularly. For our beach camping, we wanted to have emergency truck supplies, fishing gear, firewood, and sand-covered items accessible and out of the truck and camper as much as possible.
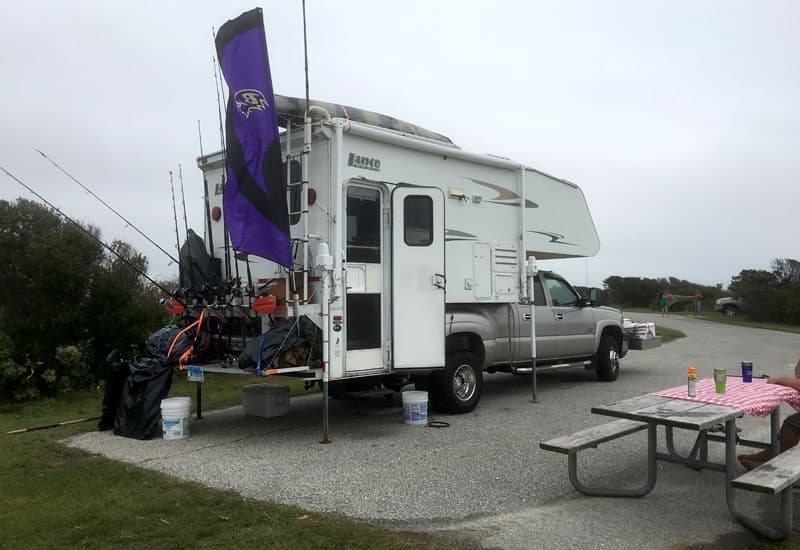
For this project, we wanted a place for cutting bait, rigging fishing lines, and storing fishing poles. We wanted a designated space for all of our equipment in the event we needed to pack up and move down the beach quickly due to weather or tide issues.
We also wanted to minimize having to put any wet gear into the truck or camper. Finally, we wanted to make sure we were sensitive to the building materials used; we needed strength, but to minimize additional weight, especially since we drive over the sand.
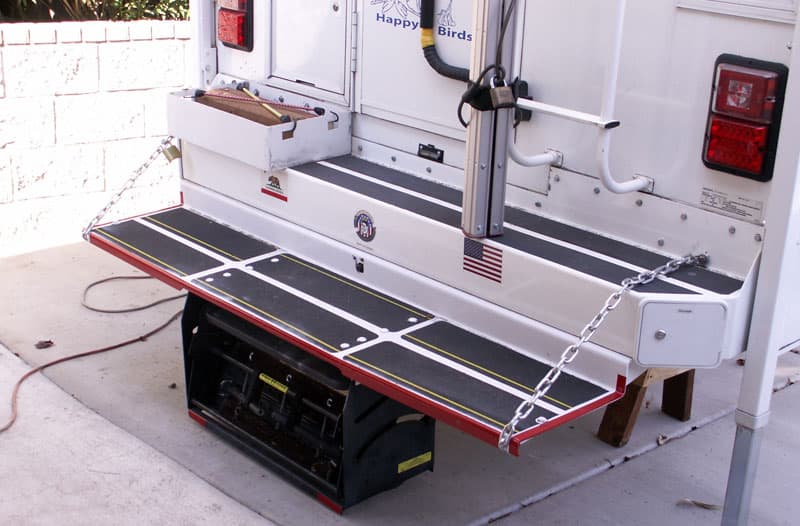
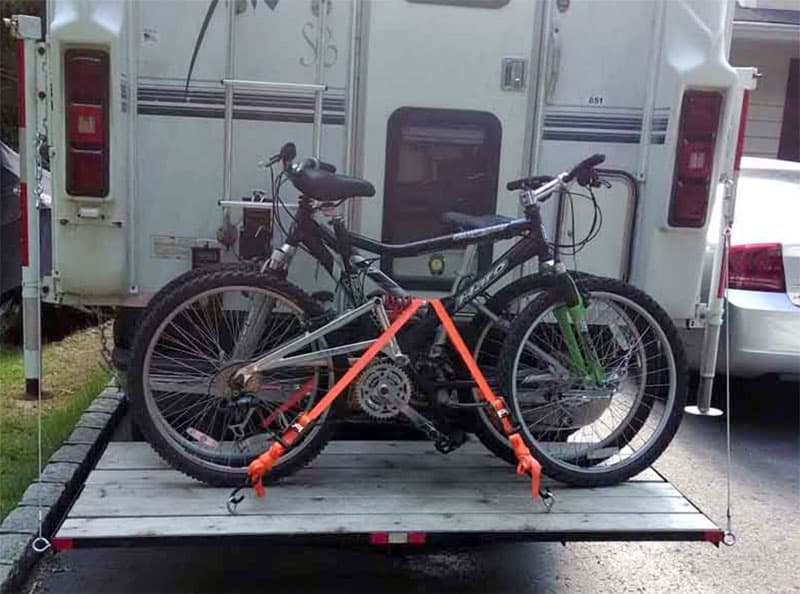
To accomplish our requirements, we added an aluminum locking toolbox and mounted it to the back bumper. Then we designed and built (from scrap) a lightweight aluminum back porch-rack. The porch-rack is mesh-like so sand and water can pass through it.
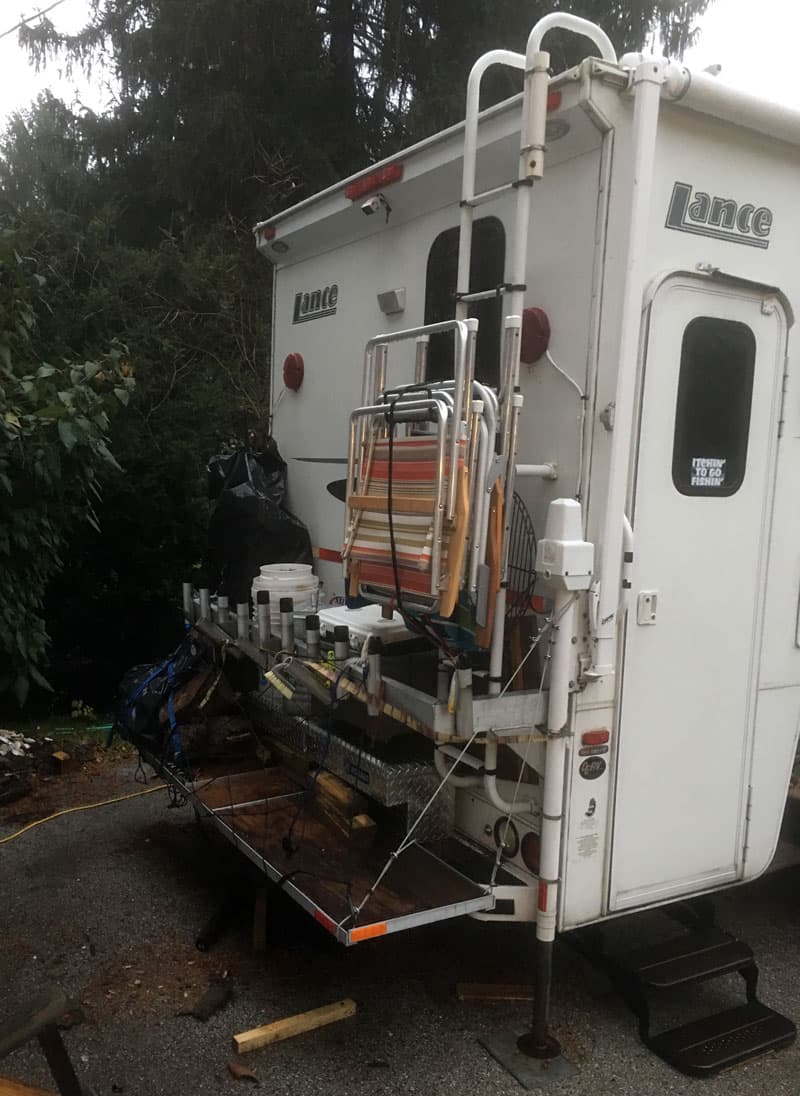
The porch-rack hangs from cabling from the rear Happijac jacks. It is intentionally notched so that we can fit the wooden boards that we are required to carry in the event we get stuck in the sand.
We designed, built, cut, welded, and mounted an aluminum rack that holds fishing poles at different angles. The rack was designed and spaced intentionally to have storage behind it and to still be able to access the generator and roof ladder, etc.
Behind the rack, we have a tall plastic trash bin that is used to store long items, such as beach umbrellas, wind blocks, bag chairs, and sand shovels. We built a wooden folding table for outside use, that stores out of the way, directly behind the toolbox.
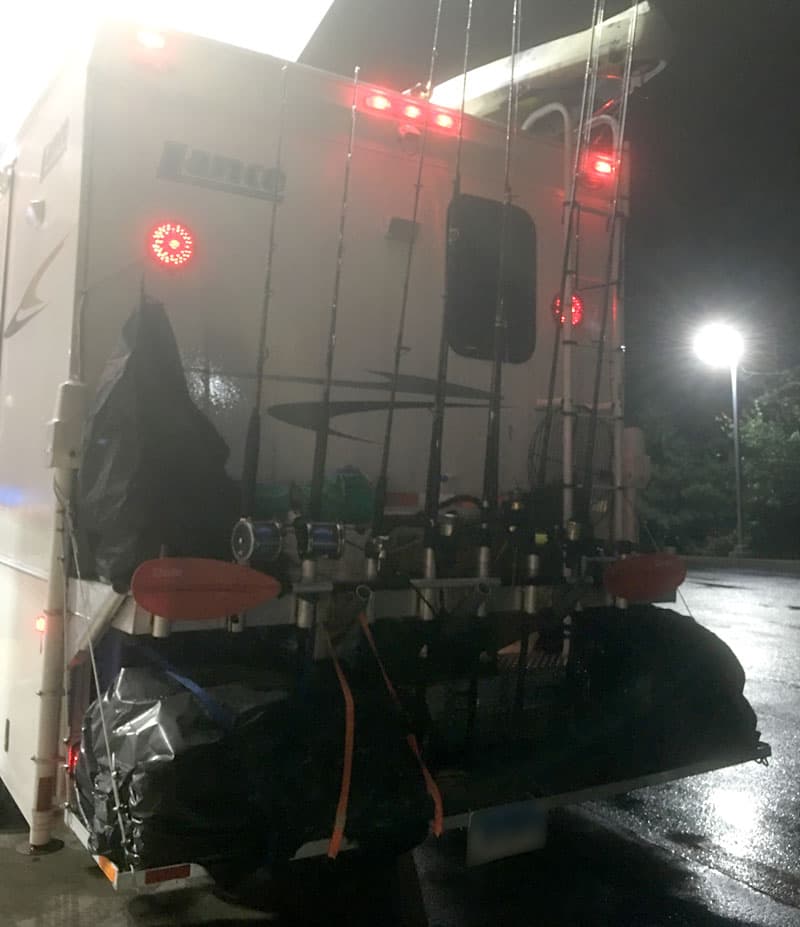
We use a spider-web bungee to help secure various items after strapping things down. We even added a spot on the back porch-rack for relocating the truck license plate, and we included stick-on reflectors for added safety.
The porch-rack has worked out great! We never give up on trying to find ways to continuously improve our beach camping and fishing trip process. We are always brainstorming what else can we do next. That is part of the fun for us!
It took me fifteen hours to complete this modification and cost me $450-$500. In my opinion, the skill level of this modification is hard.
Submitted by: Les Sage, 2015 GMC 3500, 2015 Lance 855S
The main issue for us was safely entering and exiting our camper with the stock eight-inch rear bumper. We generally had to exit the camper backward to be safe.
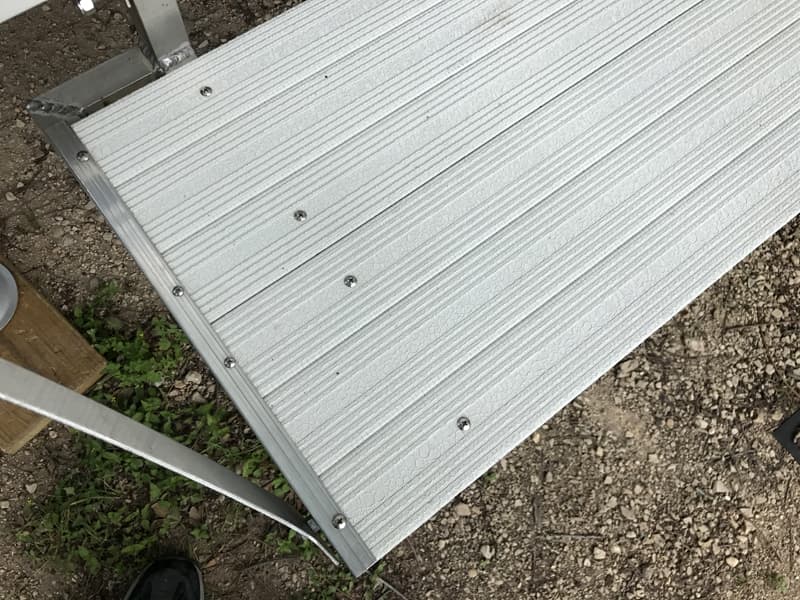
I wanted the deck to look professional and clean. My first thought was to use the aluminum panels often utilized for picnic tables. As I researched where to purchase aluminum panels, I discovered a company that made boat docks.
The boat dock company offered all kinds of decking material. When I contacted them, they and told me about their deck material with a white powder coat. I had them cut it to the exact length I needed and ship it with pieces of trim for the end caps.
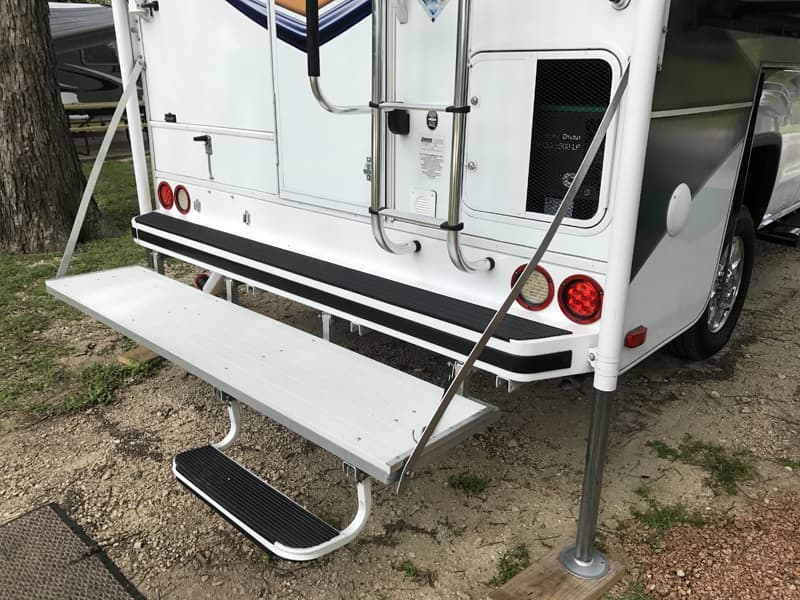
Before designing our rear deck, I studied how others installed various decks on the back of their truck campers. I pull a boat, so I designed our deck to tip up. The boat I pull only works with the deck secured in the up position. The deck is also a place to sit when we are boondocking.
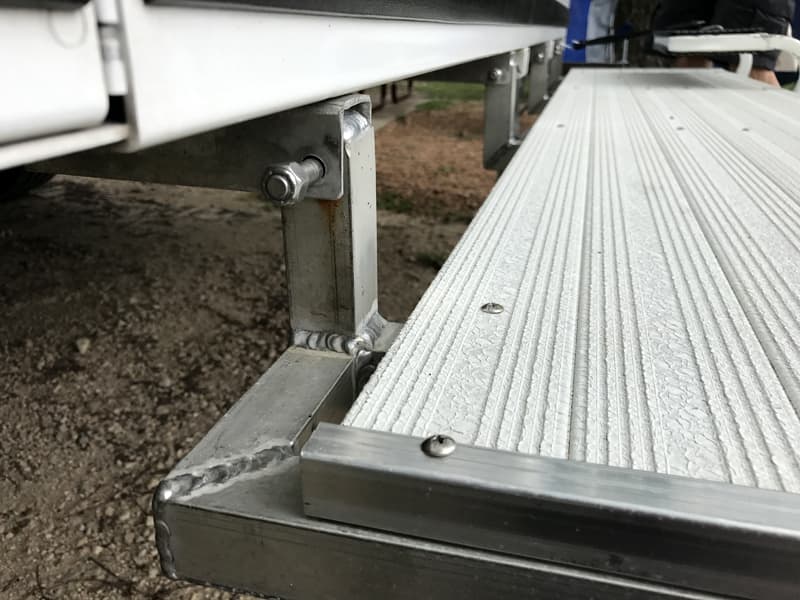
The deck framing is made out of 1½-inch square aluminum tubing. 1½-inch square aluminum tubing is the perfect diameter to fit inside the receivers on the bottom of the Lance Camper.
I used aluminum tubing to reduce weight.
When lowered, the deck stops when it is perpendicular to the vertical portion of the rear bumper and parallel to the ground. This design does not need chains or supports. It can support itself. I added the aluminum straps for more rigidity. I started with chains and they were too flexible.
The deck is very easy to remove. I drilled holes into the tubing so it can slide in and bolt into the channeled receivers the same way the camper step attaches. The deck can fold up when I drive, but I usually keep it in the down position.

At first, I was going to use a plastic step stool with the deck. Then I realized that the existing Lance swing step would attach to the outer edge. That eliminated the need for a plastic step stool. The Lance swing step folds up onto the deck, in the same manner, it did on the original Lance bumper.
I originally wanted the deck mounted at the same level as my bumper. I opted not to do that because we would need more steps to get into the camper. Using the Lance swing step eliminated that problem. The deck and step are pretty low to the ground.
I also added a big assist handle to the camper. I’m thinking of adding a box underneath the overhang for hoses and other exterior items.
I’ve done over a hundred modifications, and over everything, we have the most enjoyment from the rear deck mod. We put our shoes on it, we sit on it, and we have a carpet to wipe shoes on.
The rear deck took me an entire day, plus months of design considerations. I took the design to a professional metal fabrication shop for the welding part of the bottom of the deck.
The deck materials cost $150, plus the welding labor of $150. In my opinion, the skill level of this modification is hard due to the required aluminum welding.
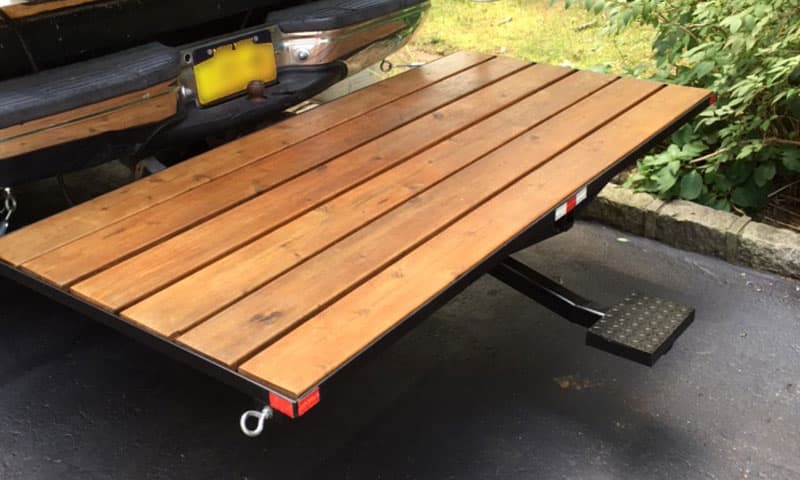
Submitted by: Bryan Malone, 1999 Ford F250, 1997 Shadow Cruiser 851
I began the build of my rear porch due to the sheer height of the camper and the unattainable way of entering and exiting without almost hurting myself.
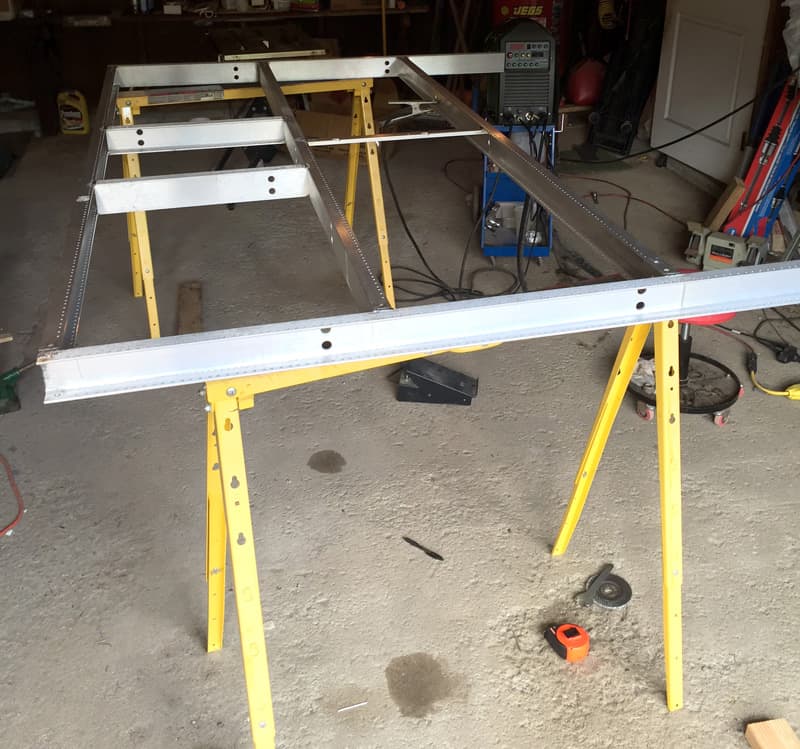
 Above: Before the step and stain was applied
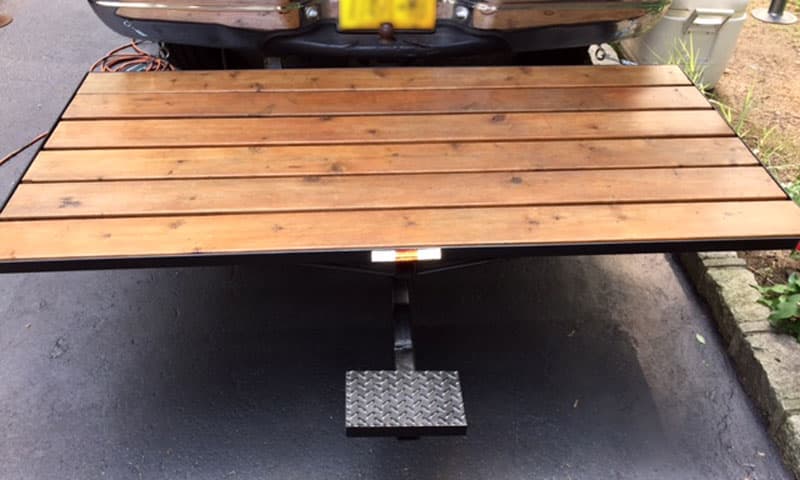
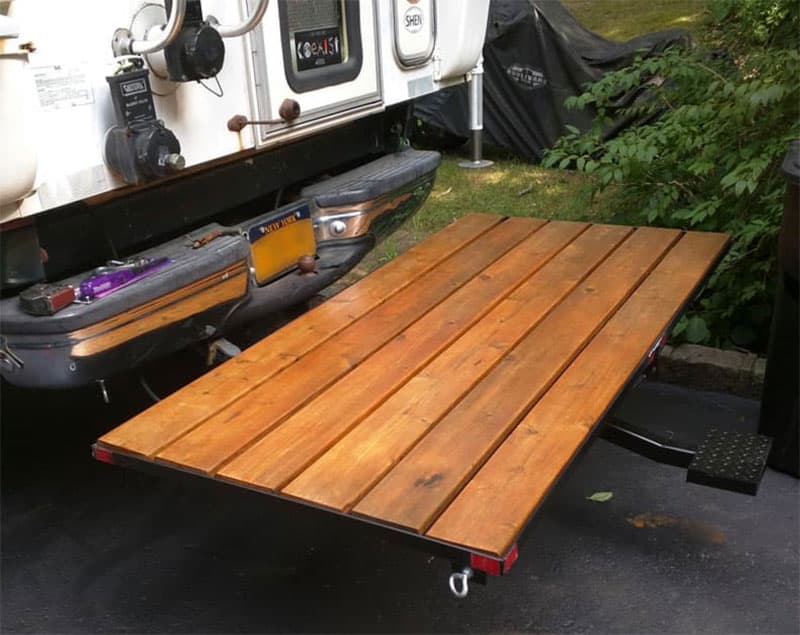
I constructed a 6-foot by 3-foot steel rear porch with cedar decking and a retractable step. It has 3/8-inch bolts welded to the underside to connect eye hooks for hauling various things.
 |
 |
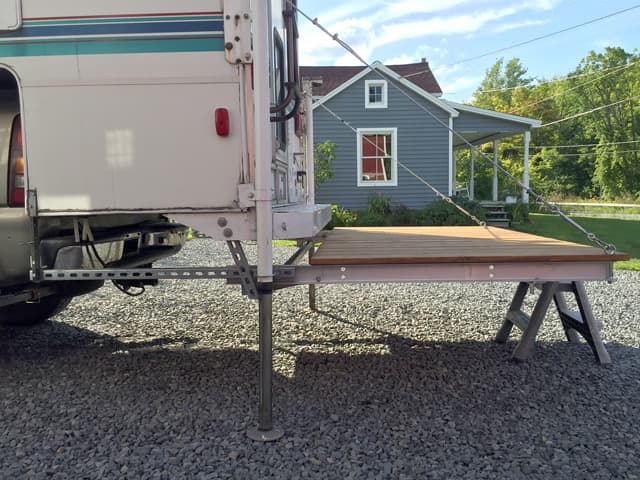
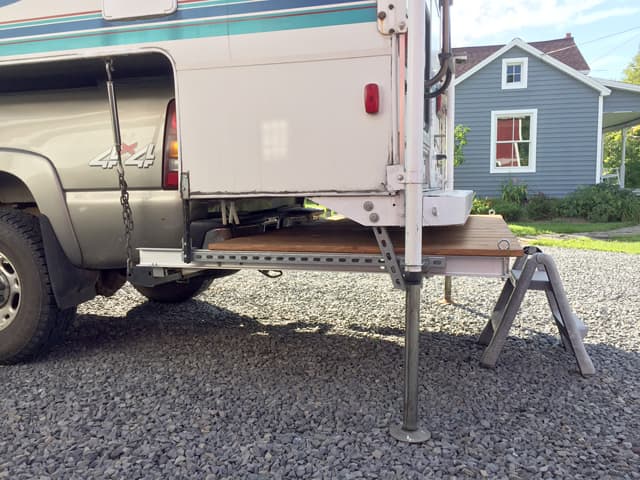
Above: The finished porch
The porch has worked out great with the ability to strap down most anything that I would like to carry including a generator, firewood, bikes, etc.
It took me eight hours to complete and cost $250. In my opinion, the skill level of this mod is medium.
Disclaimer: The modifications above are submitted by Truck Camper Magazine readers. It is your responsibility to make sure that any do-it-yourself modification project you undertake is safe, effective, and legal for your situation.


