Have you ever dreamed of totally redesigning your camper interior from floor to ceiling? Paint the walls! Refinish the cabinetry! Update the fabrics! Add a backsplash! Change the flooring! As you’re about to see in these four examples, the possibilities are truly transformative.

During our quarantine experience, Angela has been busy working on our camper. With the help of our co-quarantine friends, Charlie and Jeannie Coushaine, Angela has updated the kitchen and bathroom sinks to stainless, updated the fabrics of our valances, and done a short list of other enhancements here there and everywhere.
The difference these changes have made are nothing less than dramatic. Yes, our camper is still a 15-year old Alpenlite 1100, but it looks modern and fabulous. We hope to share some of these updates when we get a few more items ticked off the to-do list.
For this article we want to celebrate the idea of completely remodeling an older camper into something new and fresh. Not everyone can go out and buy the latest camper, but there are some very affordable things everyone can do to bring a dated camper back to life. The results are exciting, and dangerously inspiring. Trust me, I know.
Submitted by: David and Kathy Reed, 2006 Ford F350, 2005 Lance 815
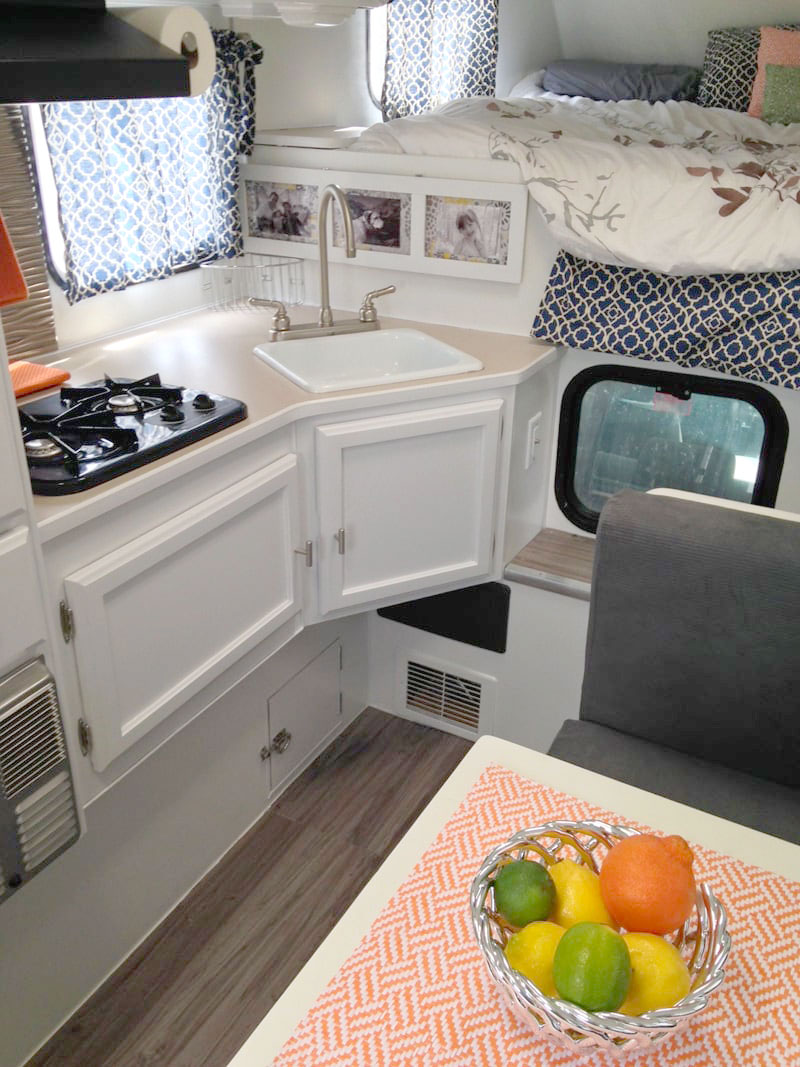
Above: David and Kathy remodeled their Lance 815 by painting the cabinets
My wife and I recently remodeled our 2005 Lance Lite 815. We were hoping for a new fresh look and were aiming to create the illusion of more space. The remodel took a few months of dedication to complete.
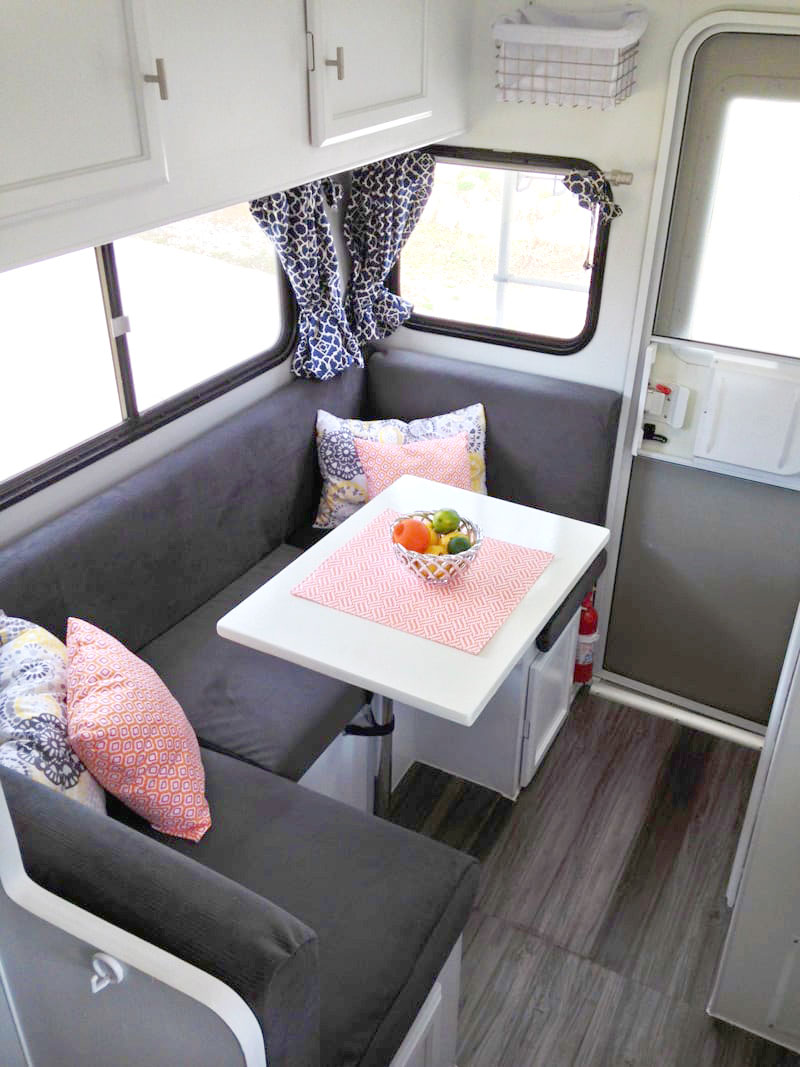
Above: David and Kathy remodeled their Lance 815 with a new kitchen table, new slip covers, new flooring, etc.
I primed and painted the cabinets and walls two different whites and added two light gray accent walls. I made a new kitchen table. We ordered dark grey suede zippered slip covers for the couch cushions. I installed grey maple vinyl plank flooring, chrome molding, caulk, curtain rods, paper towel holder, cabinet pulls, kitchen backsplash, stainless steel refrigerator cover, and wire baskets.
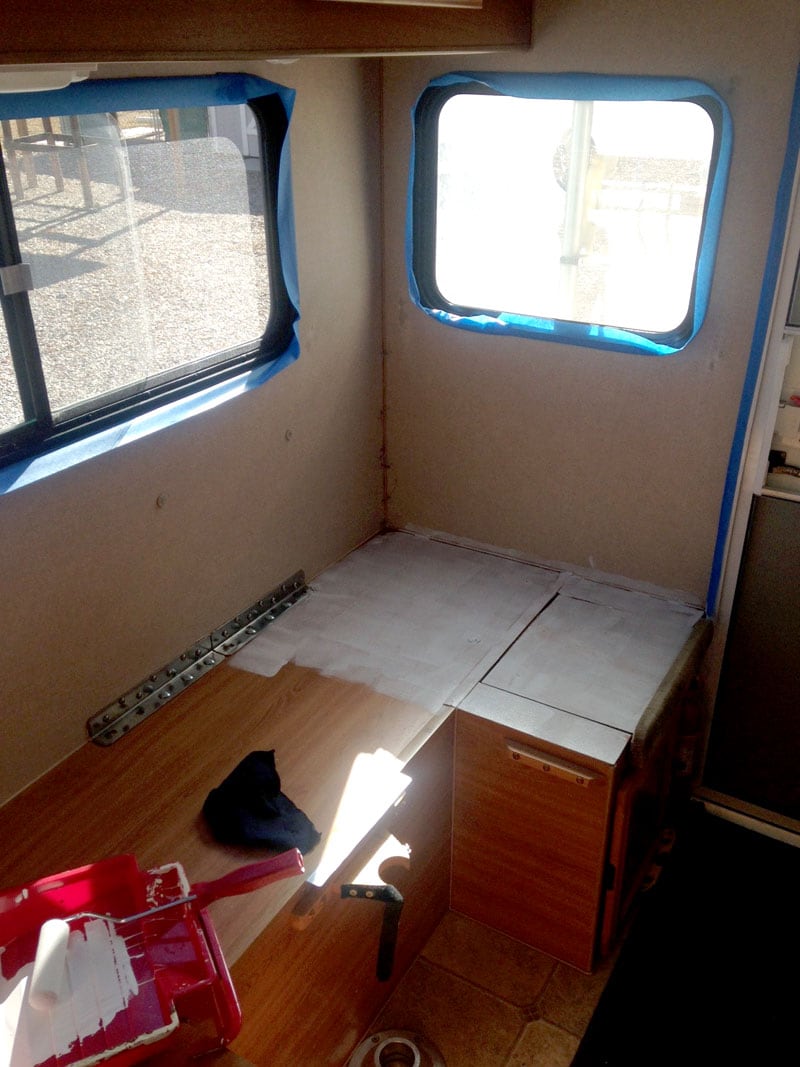
Above: The walls were painted a light grey accent color
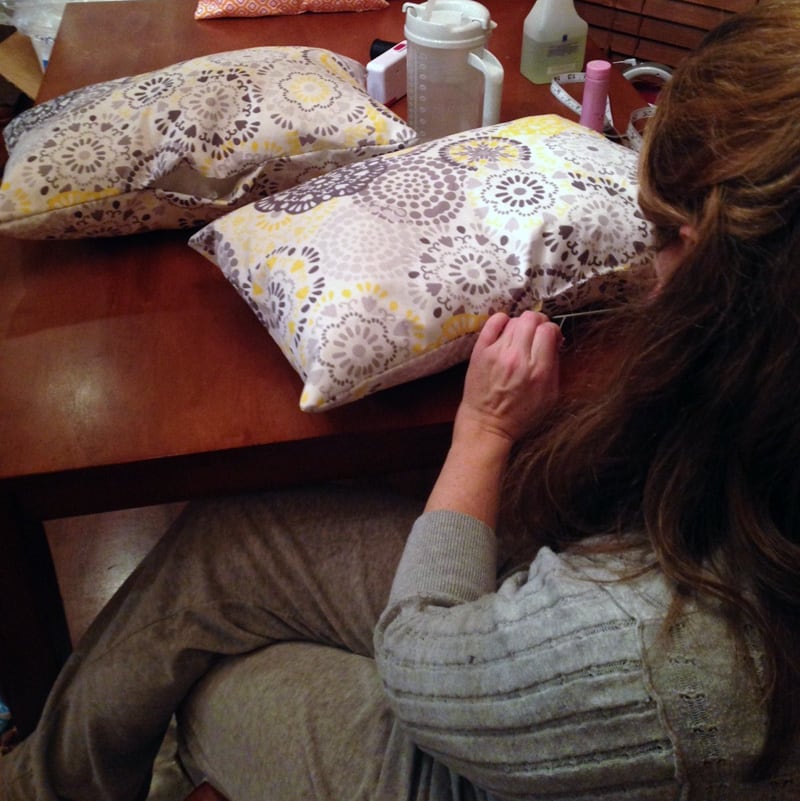
Above: Kathy making the accent pillows
My wife sewed the curtains and made the accent pillows. I made the picture frame and my wife decorated it with left over fabric and black and white family photos. I painted the heater vent and refrigerator with liquid stainless steel. I also added energy efficient LED replacement bulbs and a chrome faucet.
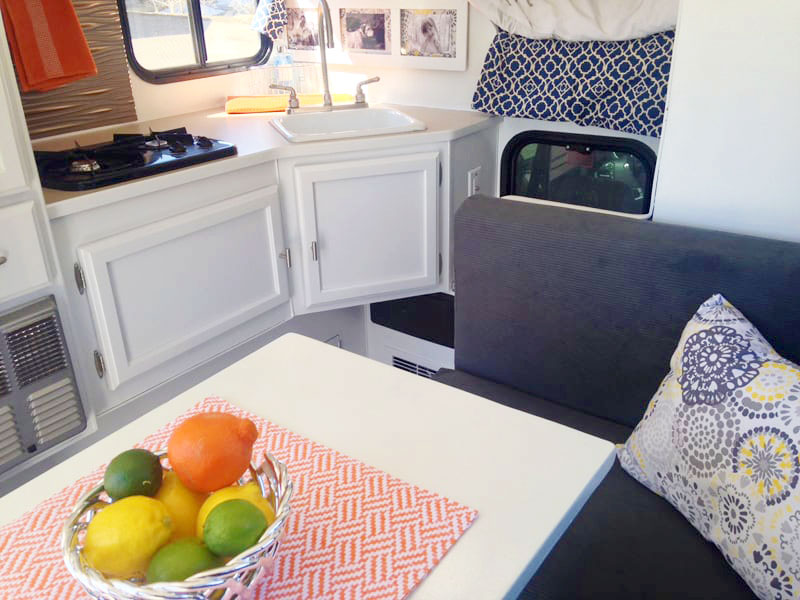
Above: A new backsplash behind the stove and high faucet were added
We did most of our shopping online. From Home Depot we got the vinyl plank flooring, backsplash, and faucet. From Lowes we got the curtain rods and curtains. We went to Ace Hardware to get the cabinet pulls, paint, and towel holder.
The fabric came from Walmart and the wire baskets from Crate & Barrel. The dish towels, pot holders, and table mat came from TJ Maxx. Online I bought the cushion covers from slipcovershop.com, the refrigerator cover from applianceart.com, the stainless steel paint from liquidstainless.com, and the LED bulbs from Camping World.
We love it! The camper feels bigger and cleaner.
It took me a little more than twenty hours to complete and cost $1,100. In my opinion, the skill level of this mod is medium.
Submitted by: Heidi Nicholl, 2013 Chevy Silverado 2500, 2005 Lance 815
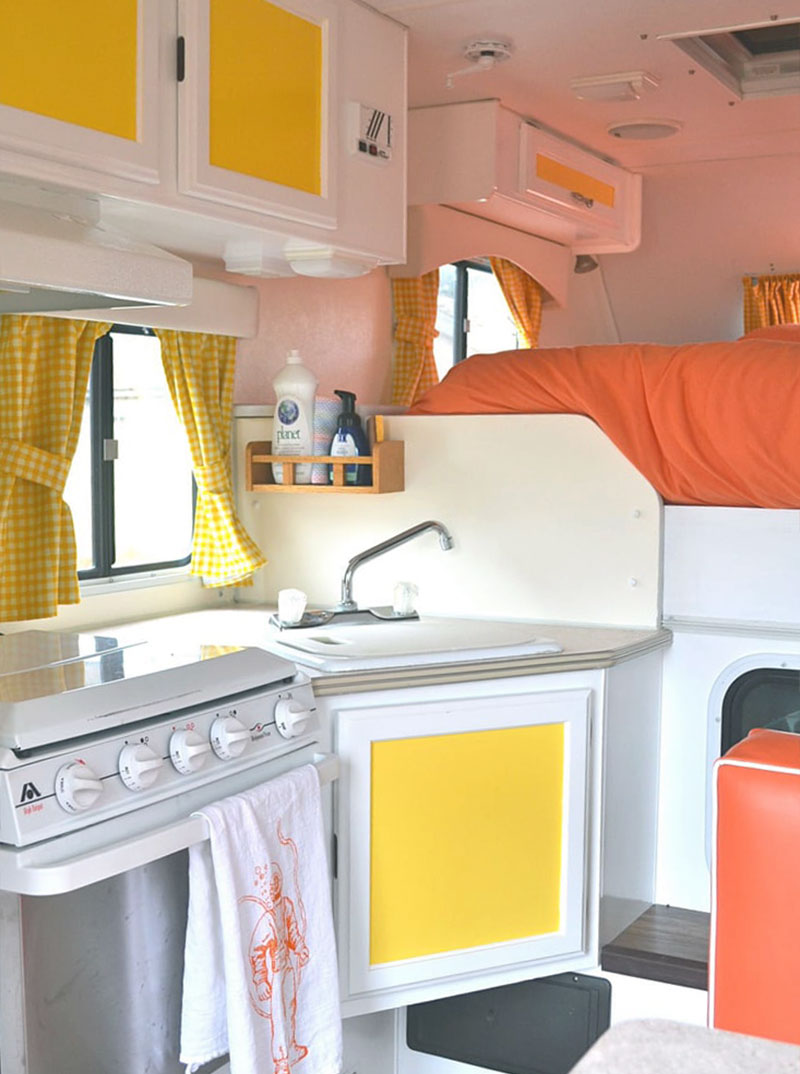
Above: The kitchen of the Lance 815
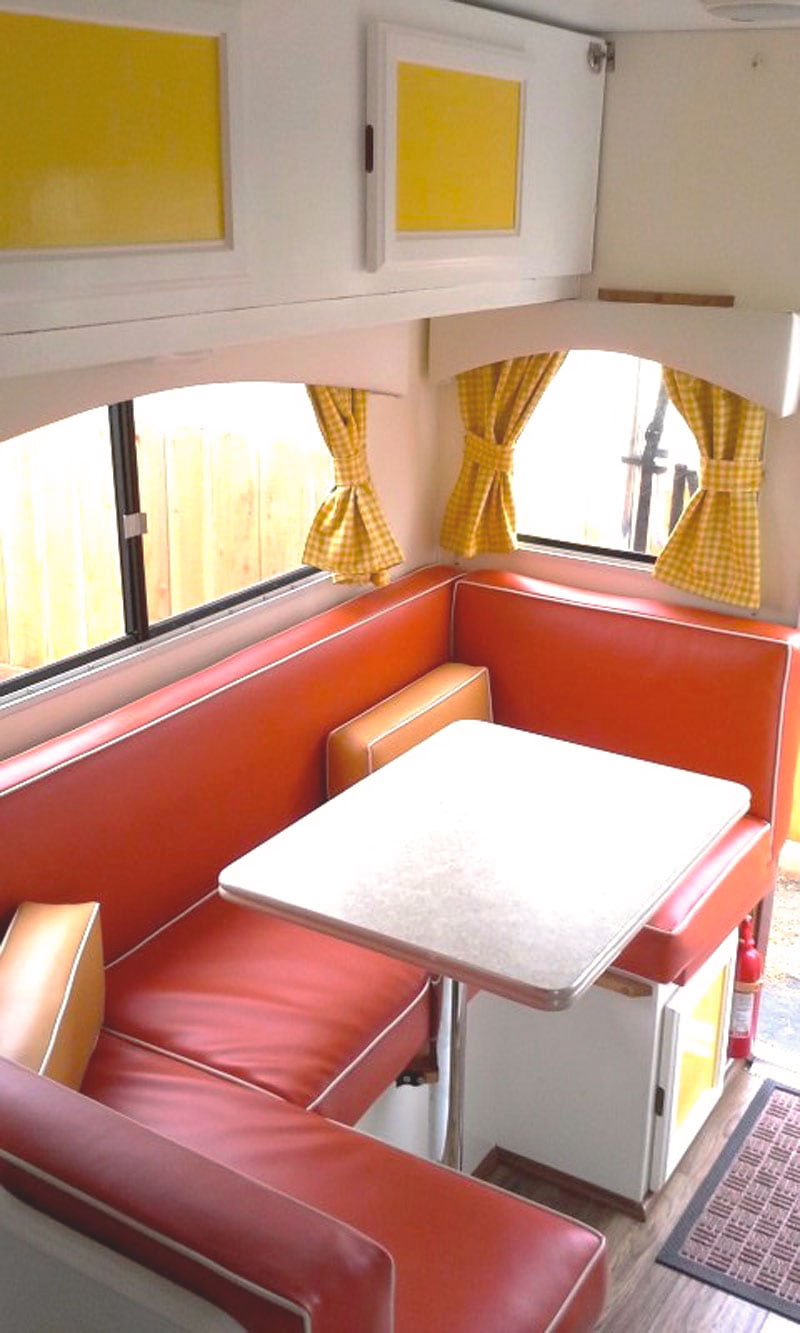
Above: The dinette of the Lance 815
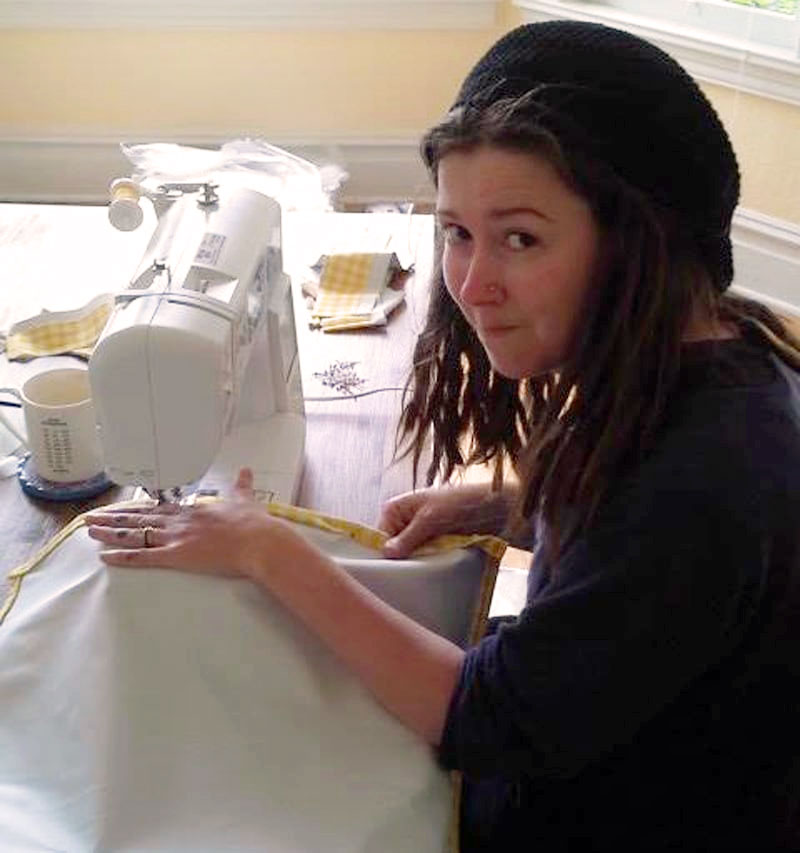
I re-did the interior of my Lance 815. I made the curtains myself and we got a local upholsterer to make new covers for the cushions. We have dogs and we wanted something bright and attractive, but very easy to maintain, hence the vinyl. I can sew, but the vinyl was more of a professional job.
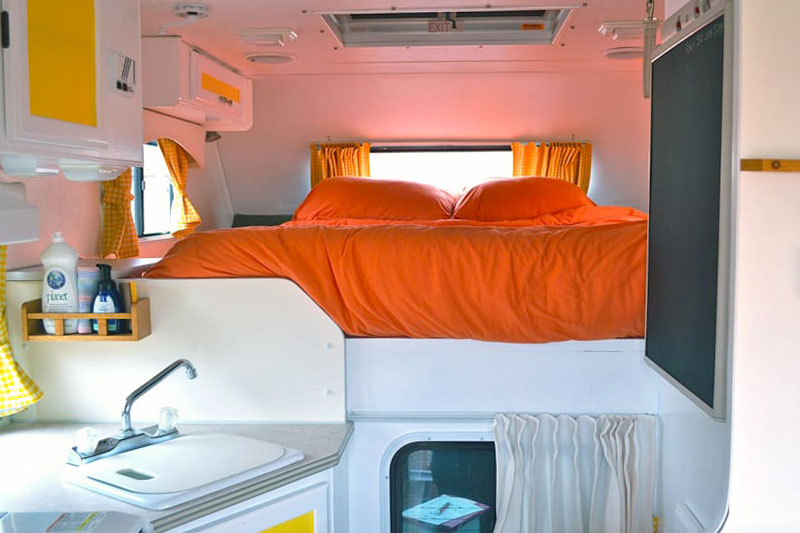
I painted the walls in a cream color and most of the wood work in bright white. We removed all the doors and painted them white.
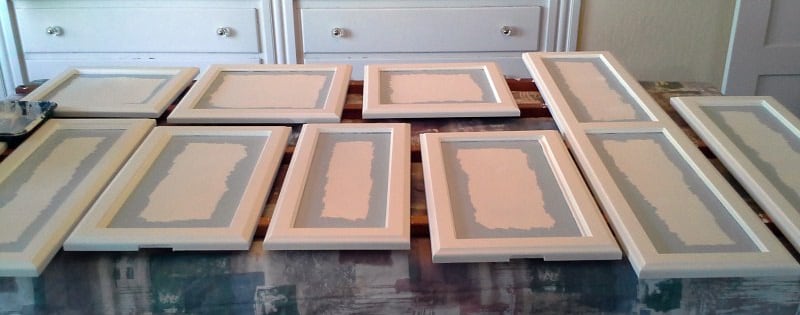
Then I picked out the accent color to match the curtains.

We’ve also put blackboard paint on the refrigerator. We think it works brilliantly having the blackboard paint.
I have redesigned more campers than our Lance 815. Check out some of the others:
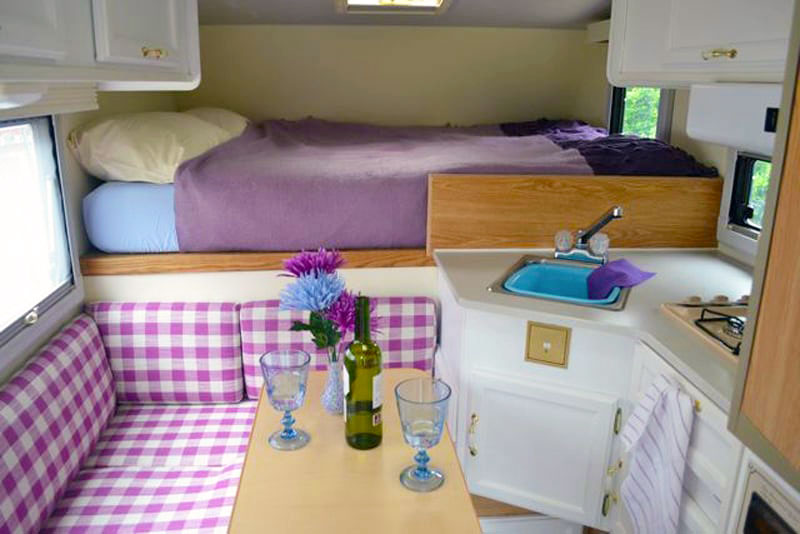
Above: Purple interior in a Northstar Camper
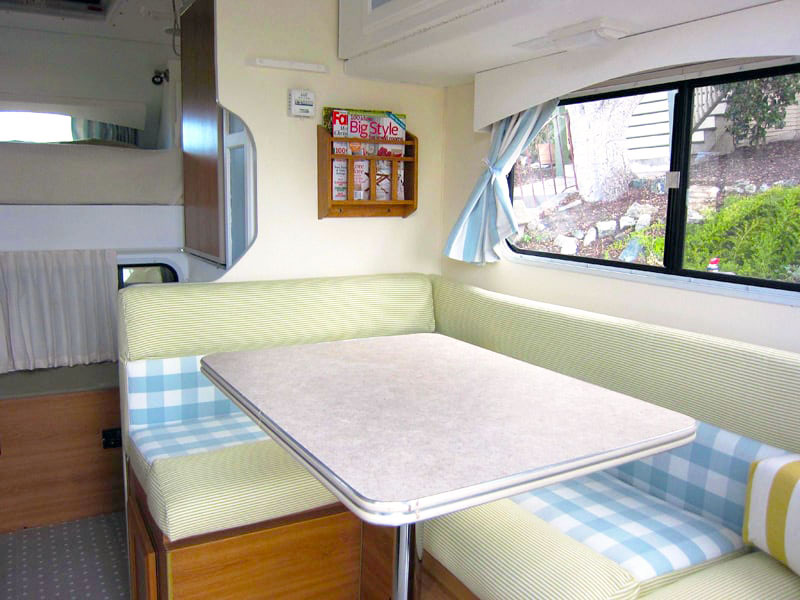
Above: Renovated Lounge Area in a Lance Camper
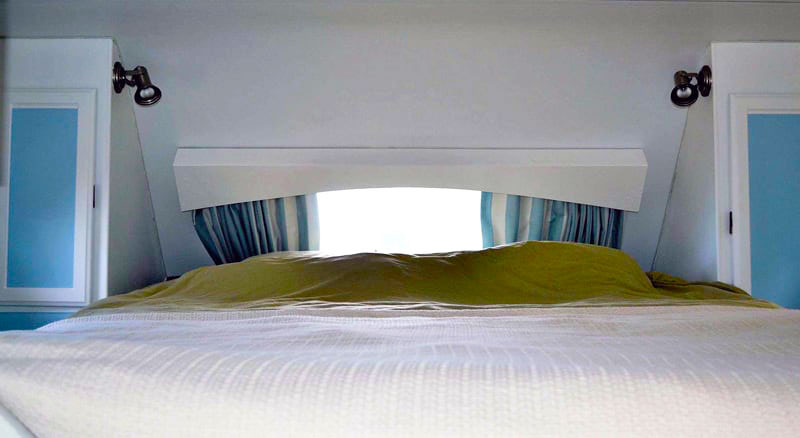
Above: Front Cabinetry and Curtains in a Lance Camper
Submitted by: John Doyle, 2017 Chevrolet Silverado 1500, 1996 Okanagan 80W
The idea of buying a truck camper occurred when I researched ways to travel affordably.
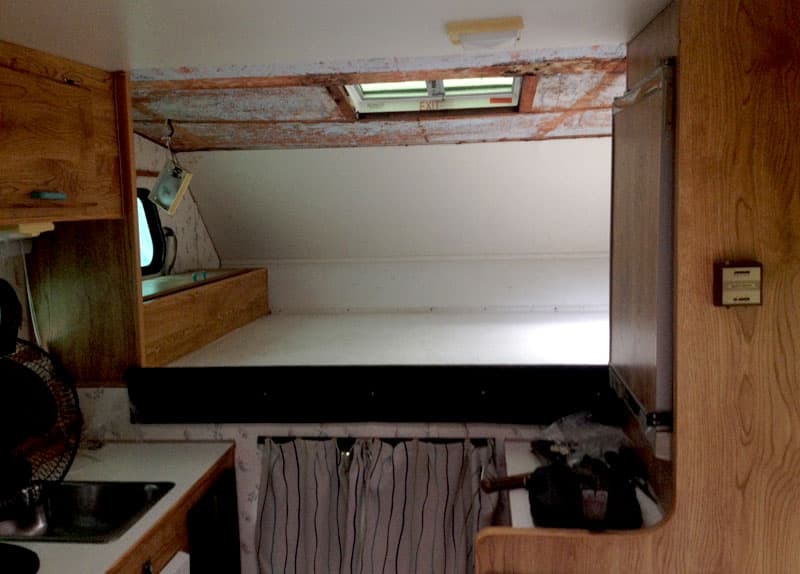
Since I already had the truck, my uncle and I figured a truck camper would be the perfect solution.
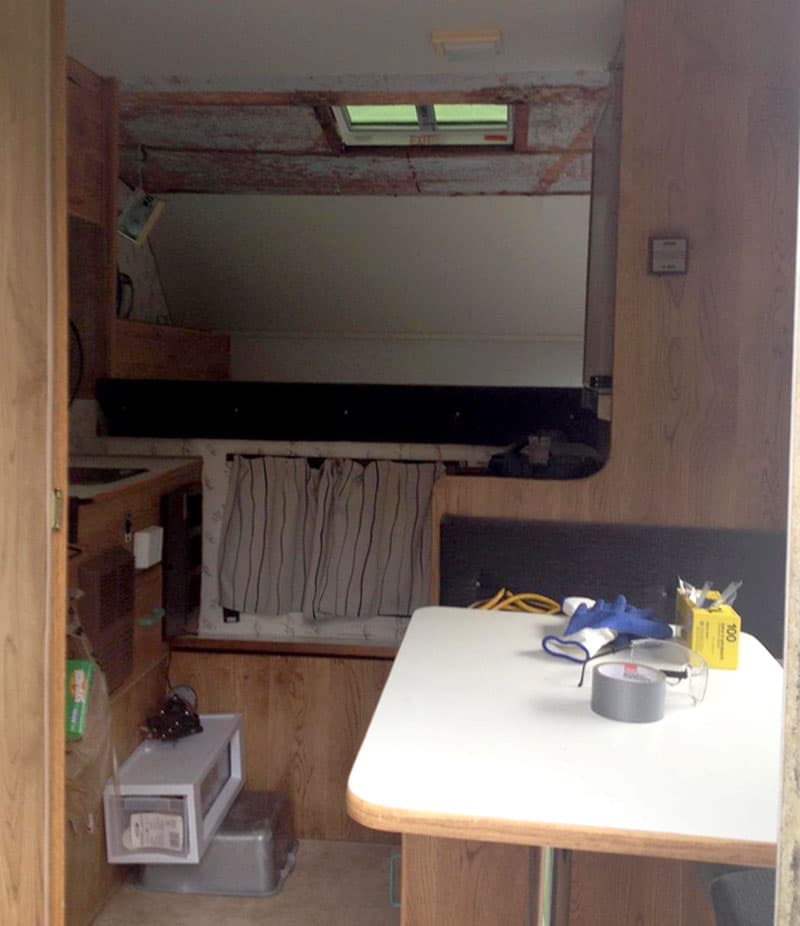
I purchased a 1996 Okanagan 8-foot truck camper with a 1,521-pound dry weight. My modification was designed to make this camper a home away from home while I explored Canada for the duration of 2018.
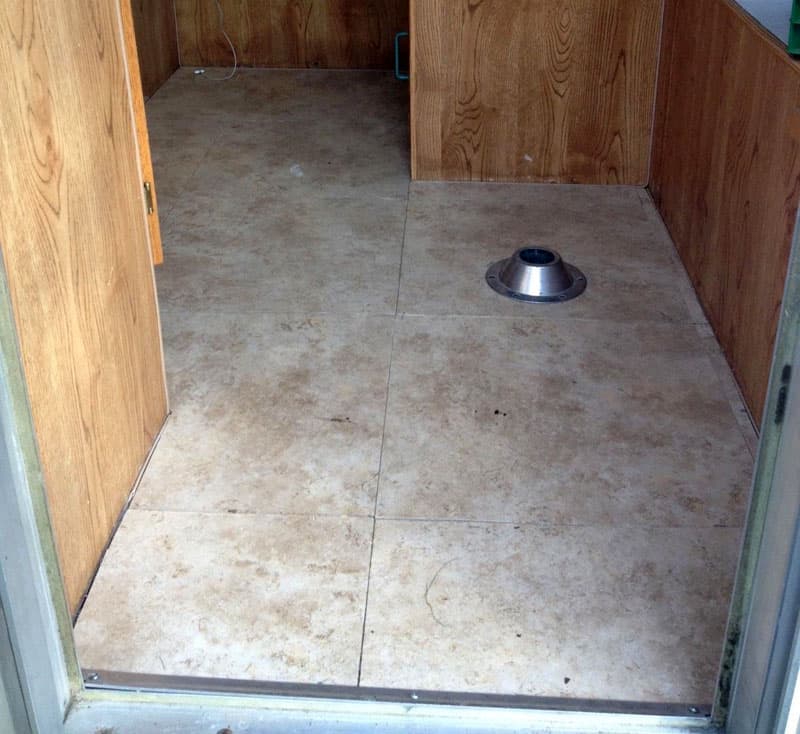
Apart from the needed repairs, I wanted an updated modern look with a unique cabin feel on the inside. I also wanted to keep some of the original features that the truck camper had to offer. So, an interior remodel was in order.
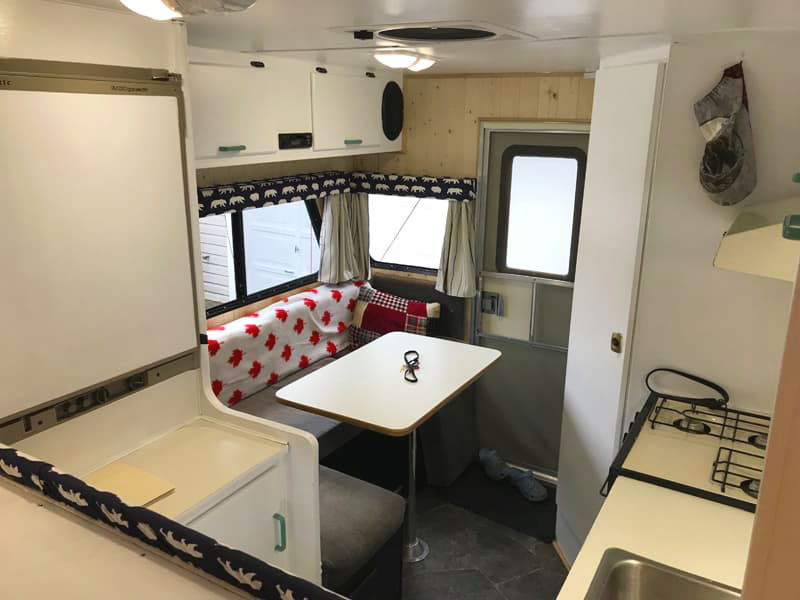
We gutted the interior down to the insulation and installed knotty pine wood paneling through the bedroom and living room area.
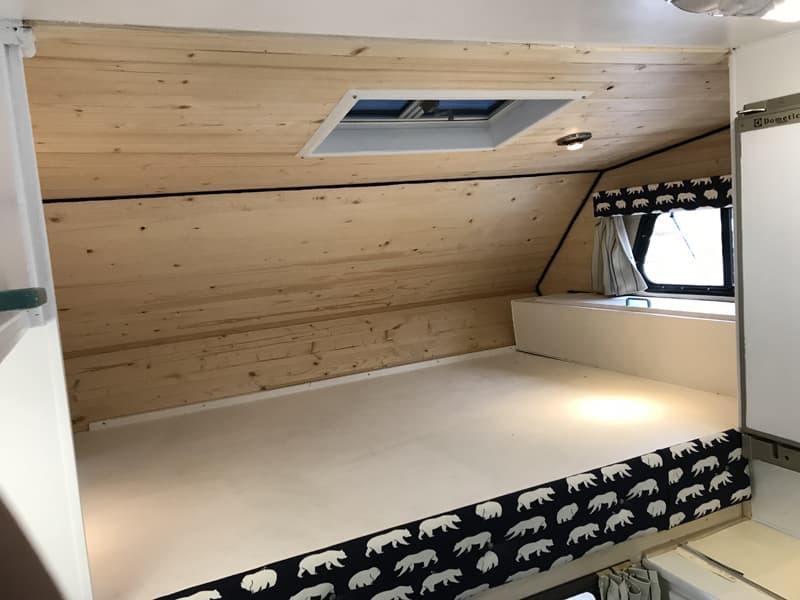
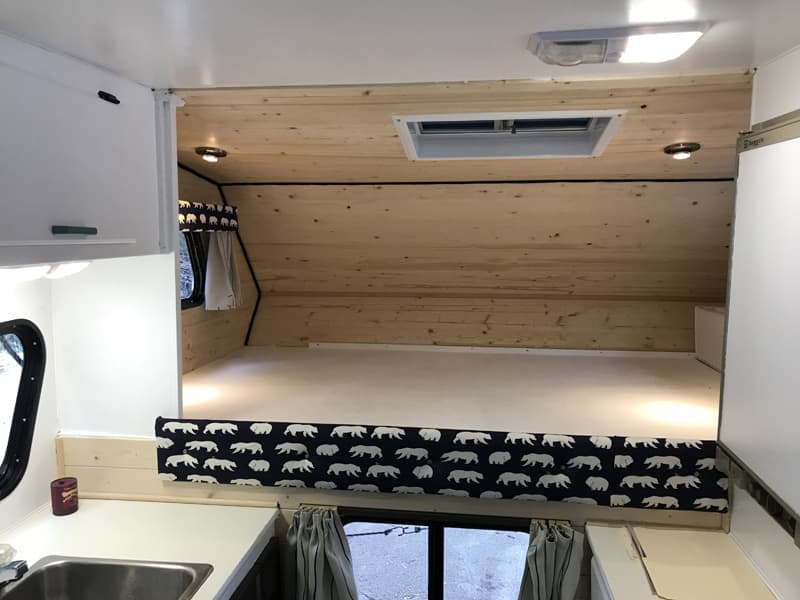
Instead of traditional wood trim in the bedroom area we used nautical rope to give it the cottage feel I was looking for. We also added LED lighting.
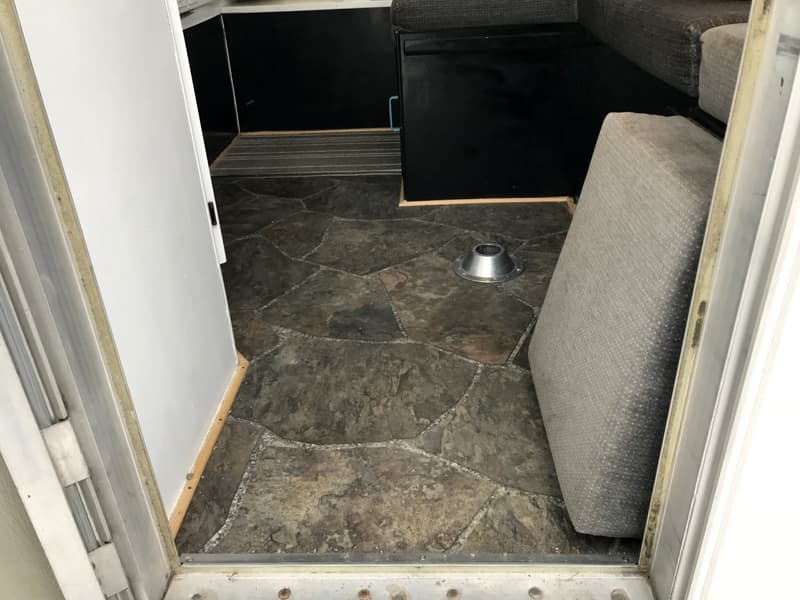
We ripped the old linoleum flooring out and replaced it with a new rubber membrane floor. It has a natural stone pattern that I complimented with a grey-white carpet.
The wallpaper in the kitchen was removed and replaced with a white eggshell paint.
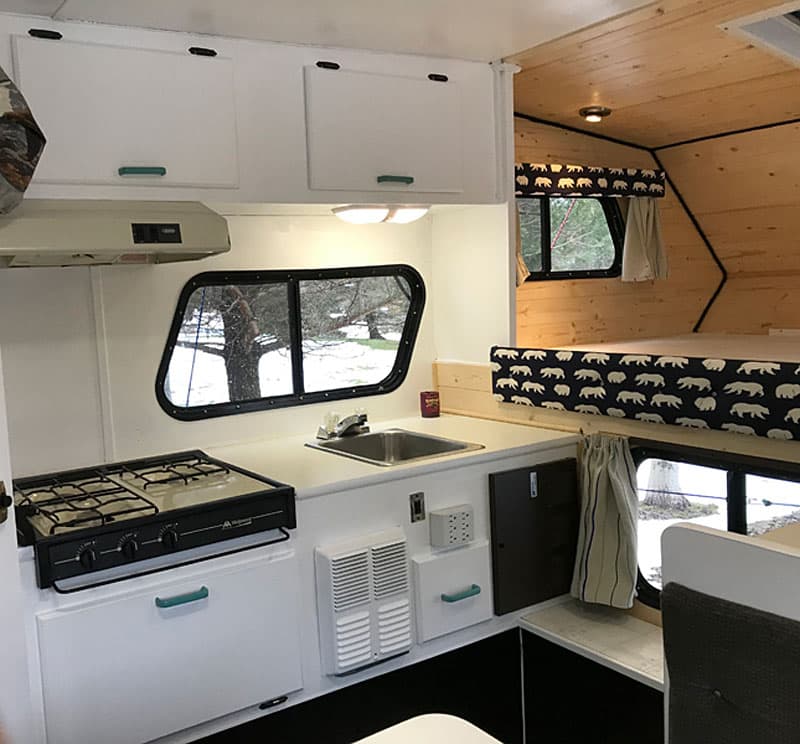
Last but not least, the valances were redone with new fabric.
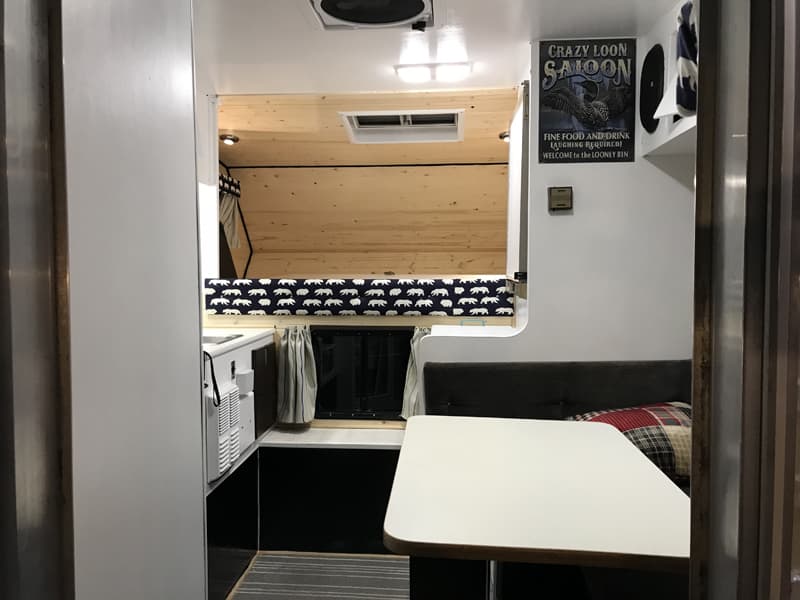
I also had to do a few repairs. Two of the three roof vents were leaking which caused significant water damage in the front cab over area of the camper. To fix this, we took the original vents out, resealed them with butyl tape, and installed new vents. One of the vents was a new Maxxair 5100K 10-speed intake/exhaust fan.
After that, a rubber roof was installed along with re-caulking the windows and lights. This made the exterior of the camper water tight.
Moving onto the inside of the camper we were able to salvage some of the appliances including the Wedgewood oven and cook top, Dometic three-way refrigerator, and the original Hydroflame furnace. They all required maintenance and a proper cleaning.
After careful consideration, we decided to seal off the black water holding tank and install a new Dometic 975 series toilet in the bathroom to add convenience.
The remodel worked out better than I had ever imagined! I enjoyed the truck camper as I went out camping this past weekend, but will unfortunately have to wait for winter to pass to try everything out.
It took me approximately 200 hours to complete this modification and cost me $2,580.56. In my opinion, the skill level of this modification is medium.
Submitted by: Melissa and Shawn Hartman, 2004 Chevy 3500, 1983 Travel Mate
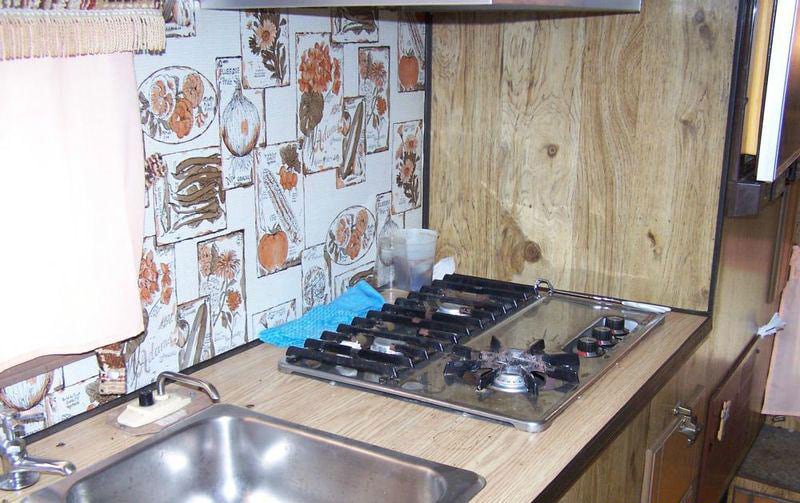
Above and Below: The Travel Mate before updating
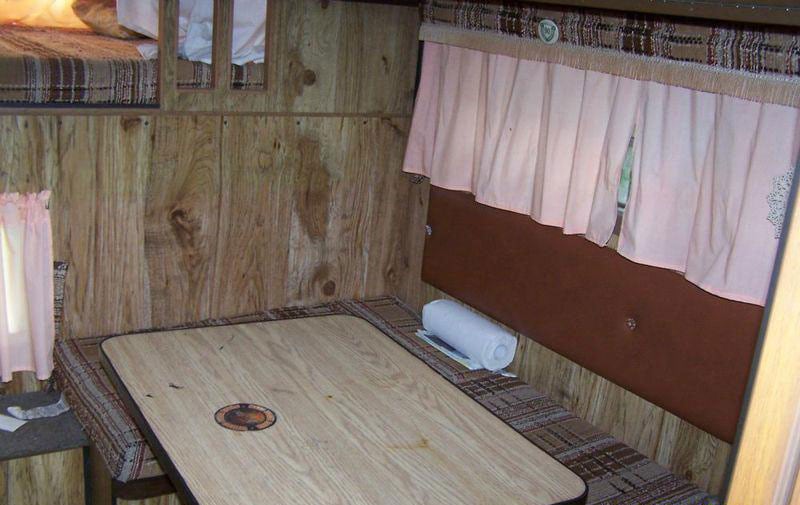
A few years ago my wife and I bought an older 1980s truck camper to try it out. We were going on a trip out East to New Brunswick, Prince Edward Island, and Nova Scotia and didn’t want to pull a trailer. I had already pulled one just about everyday for work being a carpenter/contractor.
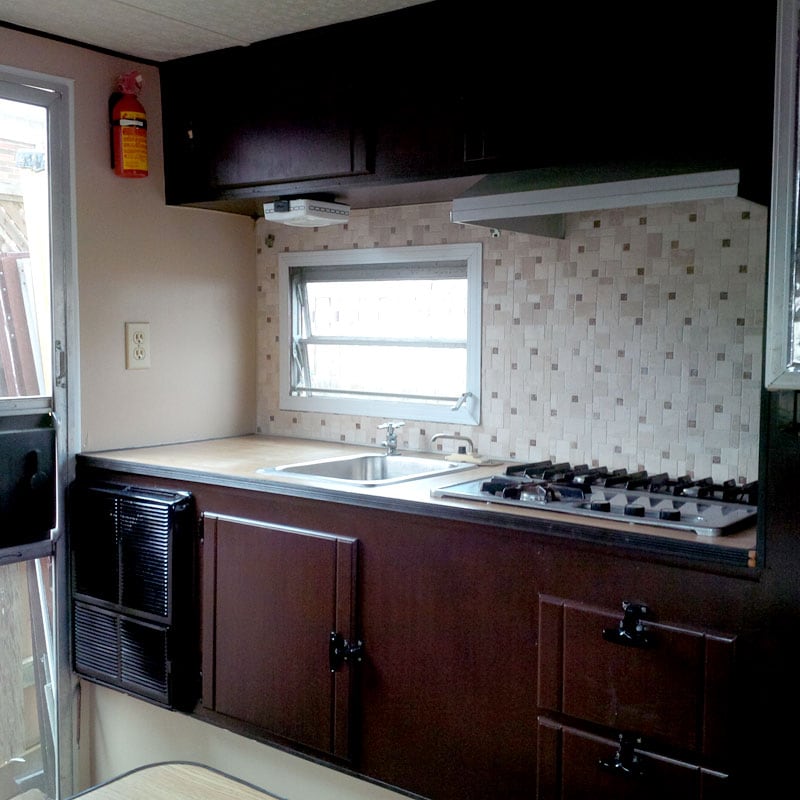
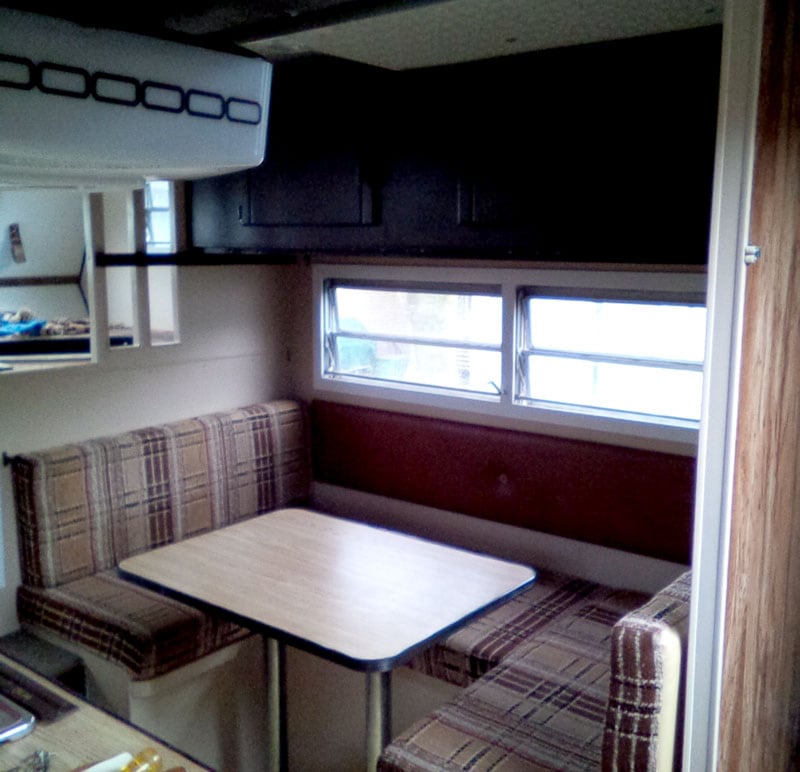
Above and Below: The kitchen and dinette after updating
Above: The Travel Mate after updating
Once we had our 1983 camper, we decided to update it a bit. We painted up the interior and made some new curtains. Those were just simple changes.
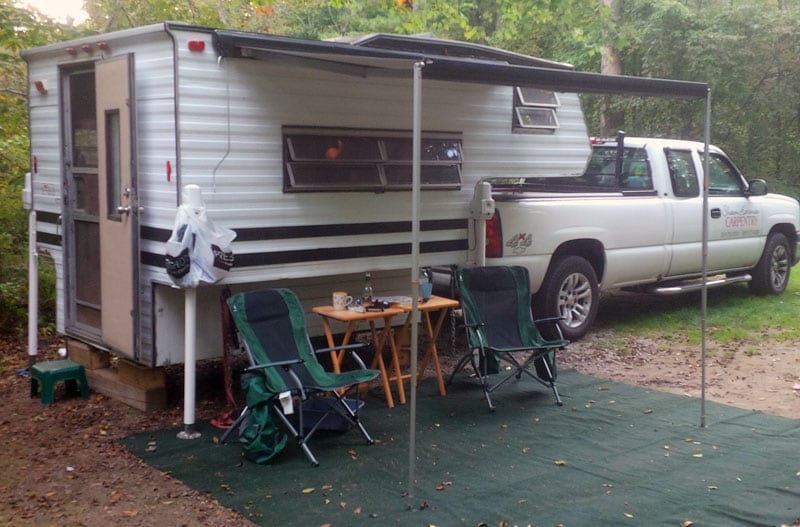
Above: The jacks were also changed to electric and an awning was added
Using it in the years following, we still loved it, but loading and unloading was a small challenge with only three manual jack stands. After some research and patience, I found some used power jacks with a remote. I installed the power jacks on the old camper to make it more stable and easier to load and unload.
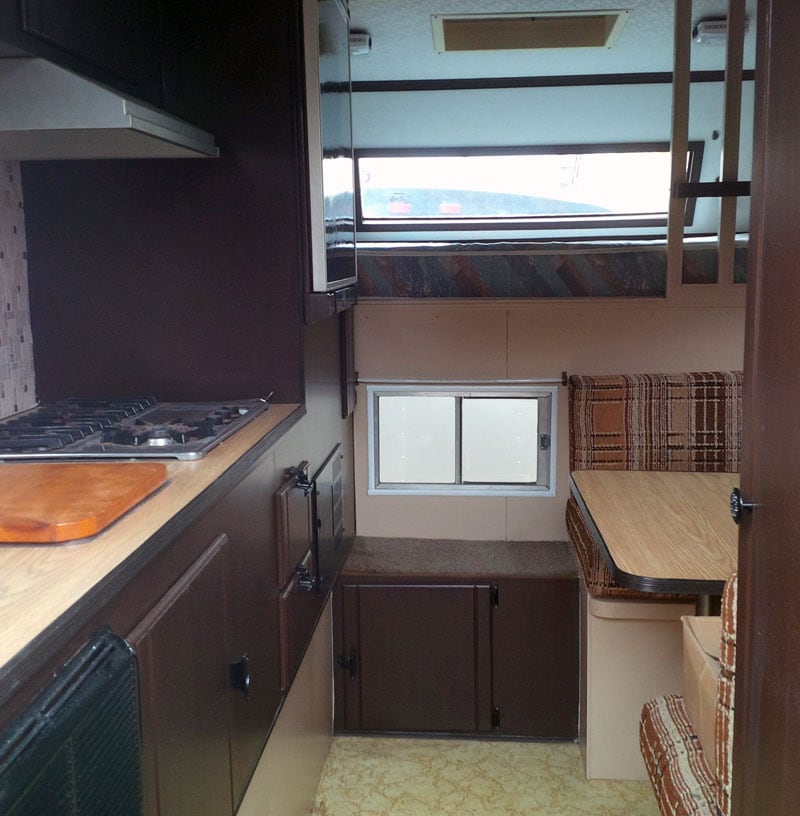
All in all, we love our older model truck camper and enjoy the ease of throwing it on the truck for a quick weekend away! Our older model camper has new life, which I’m sure the other older campers a jealous of. And a new awning to boot!
It took me one day to complete and cost $1,500 Canadian. In my opinion, the skill level of this mod is medium.
Submitted by: Tracy and Steve Schuster, 2015 GMC 3500, 2012 Lance 992
The decorative curtain is not a total redesign, but a decorative improvement.
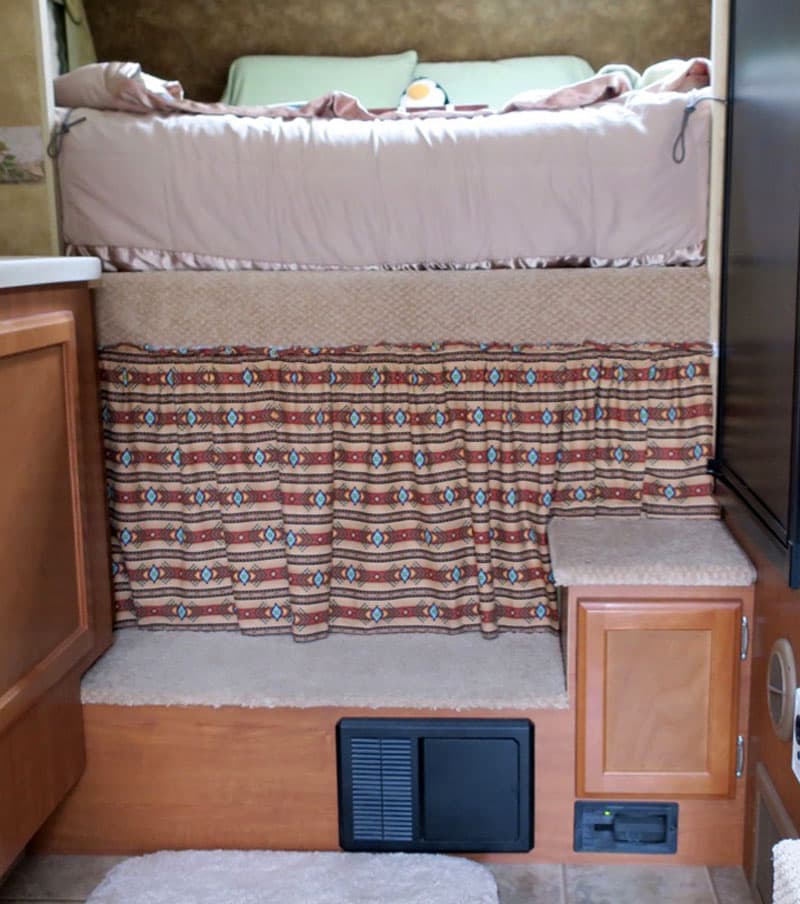
We added a curtain all the way across the wall to hide the window and replace the curtain that was offset in the wall. The fabric matches the headboard that we also recovered to be more to our liking.
