After 12 monthly mod contests and over 100 submitted mods, it’s time to vote for the 2016 Truck Camper Mod of the Year. Here are the best mods of 2016. Vote for your favorite now.

The following are the 12 winners of the 2016 monthly mod contests. From these 12 monthly winners, vote for your favorite to become the 2016 Truck Camper Mod of the Year.
Voting for the 2016 Truck Camper Mod of the Year starts today and ends next Thursday, August 25th. The winner will be announced next Friday. Who will be the 2016 Mod Scientist of the Year? It’s time to find out.
The vote is now over. Thank you, Jim Kauffman (#12 below), for having the best mod of 2016!
August 2015 Winner – Auxiliary Grey Tank Attached To Camper
1. Gerry and Lynn Minor, Dunnville, Ontario
2009 Ford F150
2006 Palomino 1251
While traveling to Colorado last May, we quickly realized that not having a self-contained unit had some downsides, like what to do with dish water after you stop for lunch in the parking lot in the middle of Indianapolis Motor Speedway.
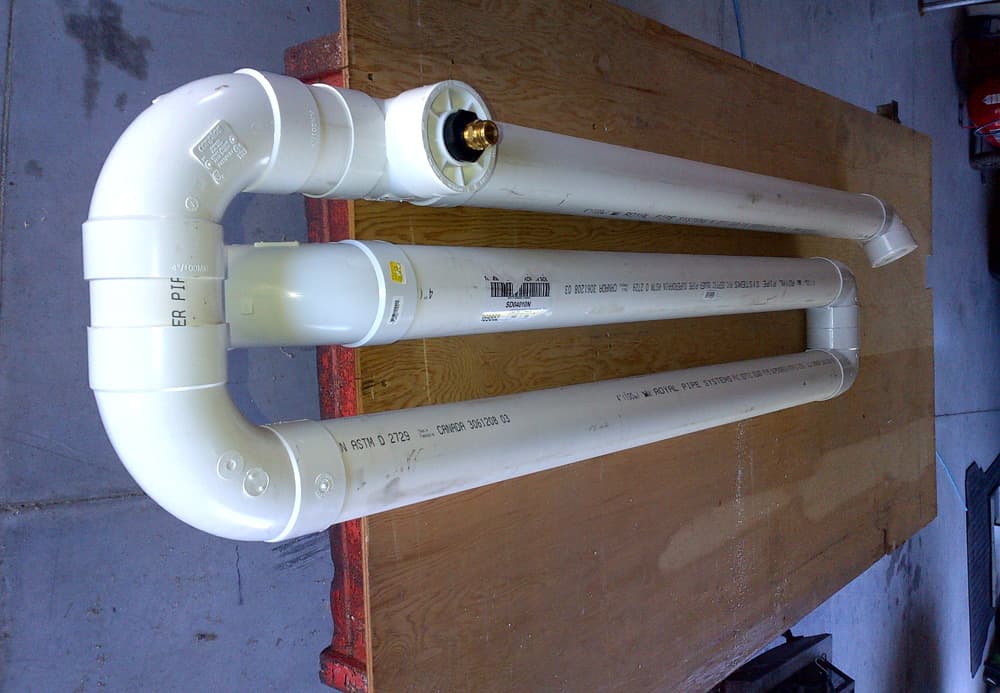
Above: Gerry’s grey water auxiliary tank
When we got home, we first upgraded to a larger pop-up camper since space was always an issue. But, I still had to solve the grey water issue as the camper didn’t have a grey water holding tank. After a failed attempt to use a portable waste tank, I came up with this idea.
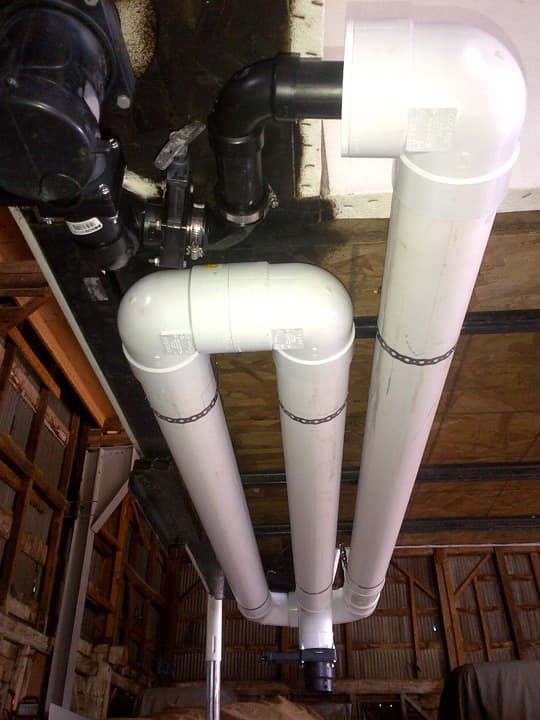
Using just ordinary drain pipe from our local hardware store, and a few plumbing fittings, I created a loop of pipe that holds just about as much water as our onboard fresh water tank.

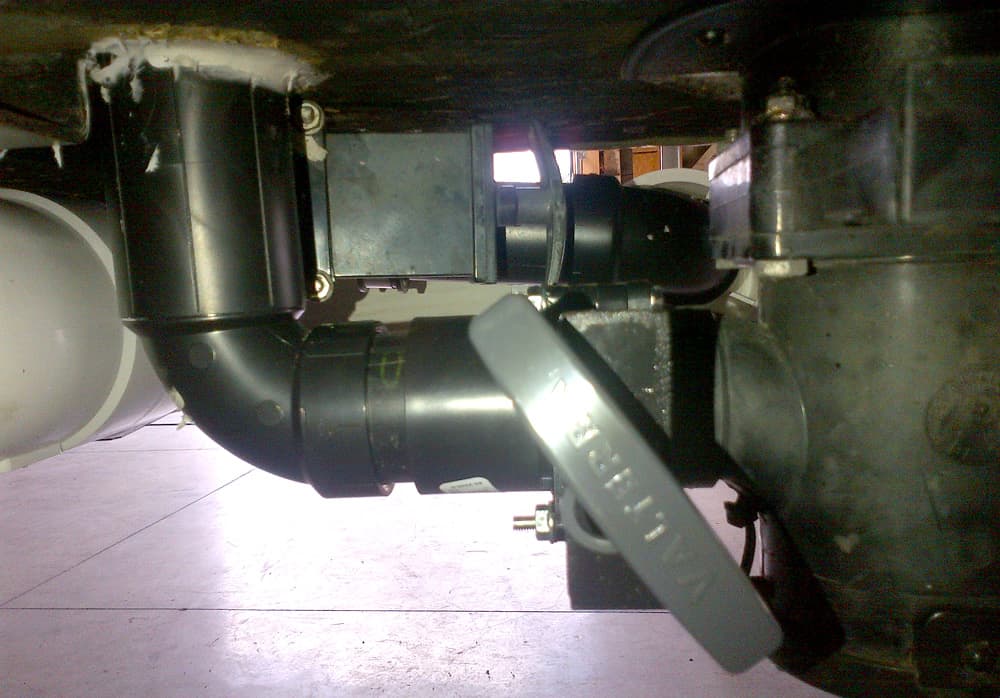
Then, I installed a T where the camper drain came out the bottom and added a blade valve to allow the water to enter the new holding tank.
Hint: It is hard to see in the pictures, but I used a rubber elbow to connect to the camper. This allows for some vibration.
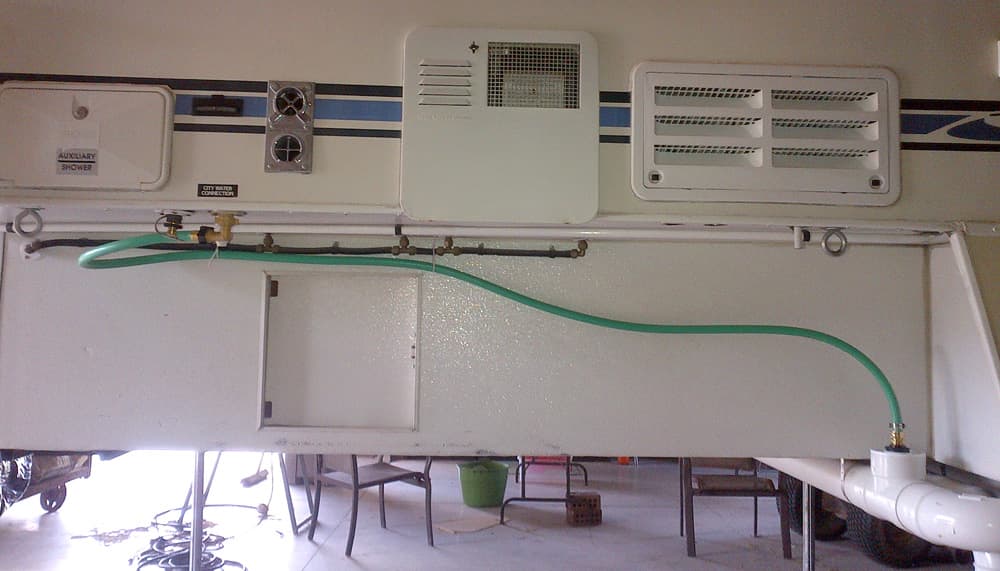
Now we can use the sink, rinse our feet after a day on the beach, or even take a quick shower after hiking. Only basic tools are required for the project, and it works great!
It took me five hours to complete and cost $100. In my opinion, the skill level of this mod is medium.
September 2015 Winner – Battery Relocation
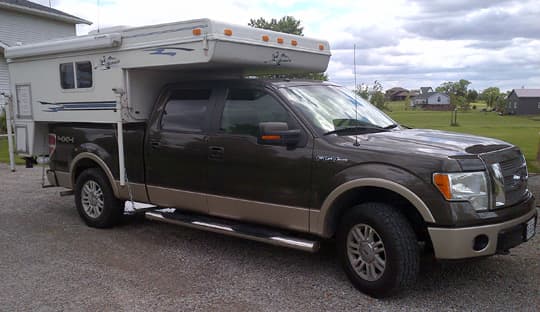
2. Mark Siminoff, Mountain View, California
2005 Dodge Ram 3500
2004 Alpenlite Saratoga 935
I chose to upgrade my camper’s electrical storage system for three reasons.
1. I wanted to have more total capacity so that I could boondock for extended periods of time without the need to start the generator or truck engine. Also, I wanted to be off-the-grid during times of overcast skies or in a dense forest. Those are conditions in which the solar panels would be shaded.
2. I wanted a battery bank that could supply sufficient current and capacity to operate high current devices (via a 2000W sine-wave inverter), such as my convection oven/microwave, induction cooktop, or even the roof air conditioner.
3. I wanted the batteries to be in a better location than where they were originally installed. In my case, better means that the temperature is controlled so that the battery capacity and service life will be extended. I also wanted the batteries as low and as close to the front of the truck camper as possible to contribute to shifting the camper’s center of gravity down and forward.
The fact that I wanted the batteries to be in a climate controlled space meant that I needed to use absorbed glass matt (AGM) batteries. AGM batteries, when properly charged and discharged, do not vent hydrogen gas and, as a result, they are safe for installation in spaces with limited ventilation. Conveniently, this battery type can provide extremely high discharge rates (perfect for running the microwave) and also accepts very high charge current. I can charge at over 100A from either my alternator or my inverter/charger.
I selected to use three Odyssey PC2150 (Group 31) batteries for my installation. These were a size that would fit in my intended location in the basement, offered 100Ah of capacity each (at 20/hour rate), and have an unlimited charge current rate.
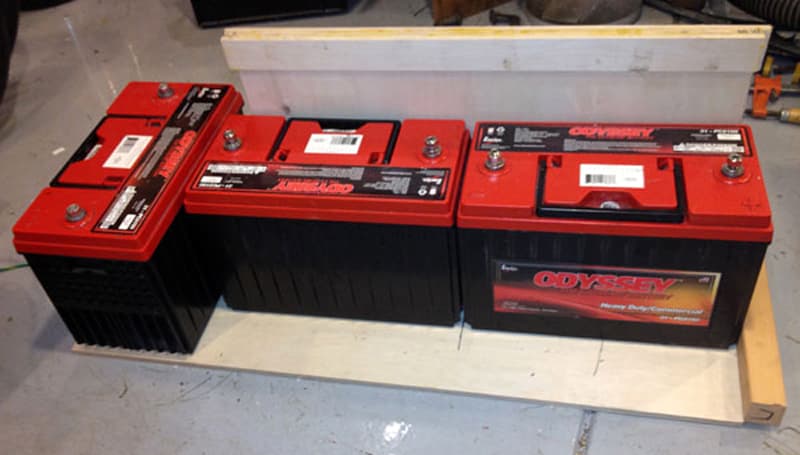
Above: The T-shaped configuration of the three Odyssey PC2150 (Group 31) batteries. Click to enlarge.
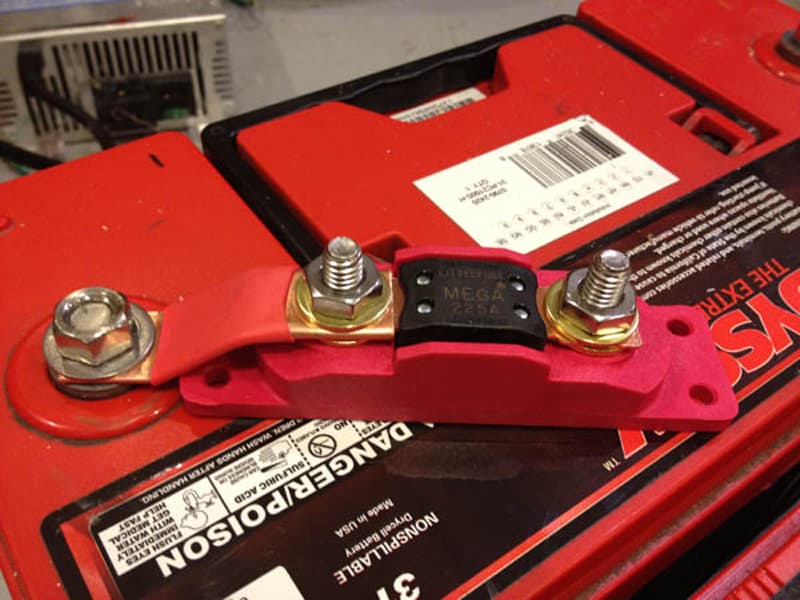
Above: The fuse and fuse holder. There is one of these on top of each of the three batteries. Click to enlarge.
In addition, Odyssey has a nationwide dealer network and their batteries carry a three year warranty.
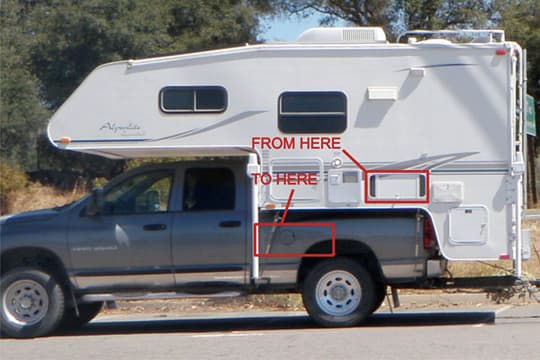
Above: The factory battery location and the where they have been relocated to in the basement
I moved the batteries from their original location in a battery box on the side wall of the camper into the basement up against the front wall of the camper. This move meant that I needed to do a significant reinforcement of the structure of the front of the camper and basement floor so that the 230 pounds of batteries could be safely supported.
 |
 |
 |
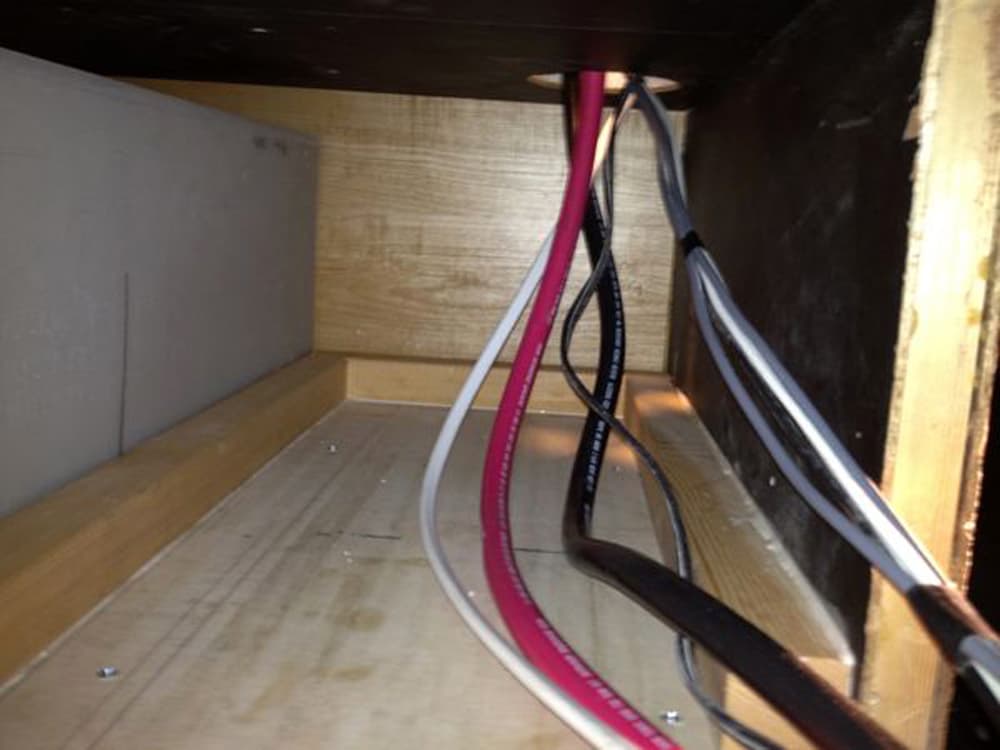
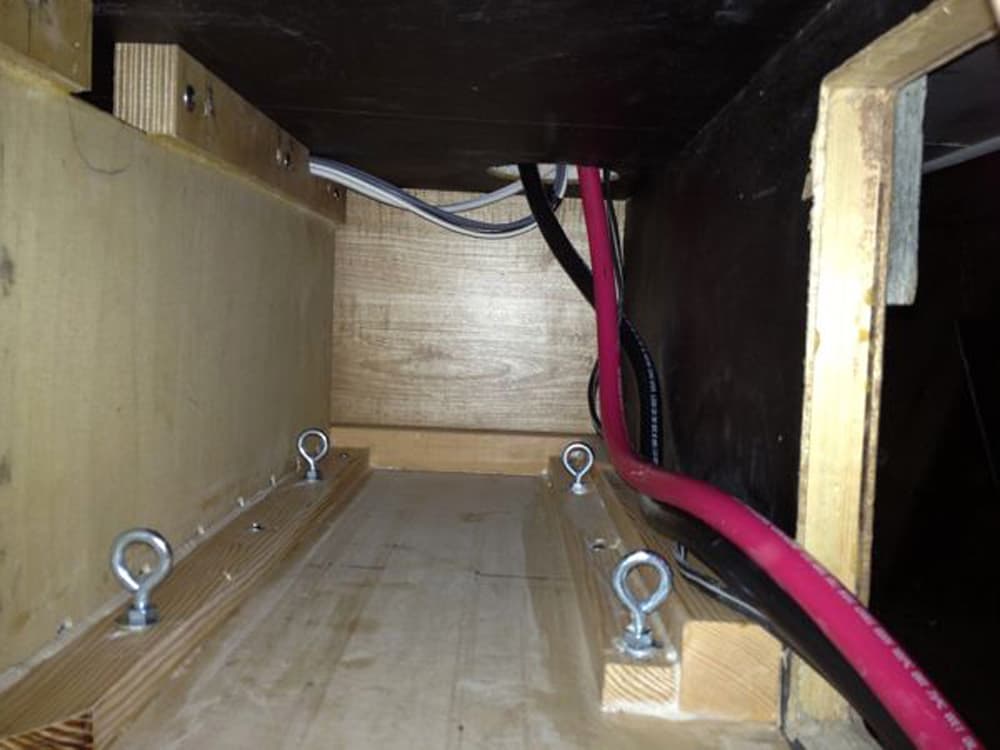
Above: These three photos show the assembly of the battery mounting components in the basement. The white box in the photo on the left is the camper’s fresh water tank. The eye-bolts are used to securely tie-down the batteries and they are screwed into T-nuts which have been installed into the plywood base plate. In the photo on the right you can see the temperature probes for the inverter/charger and solar charge controllers. Click to enlarge the above photos.
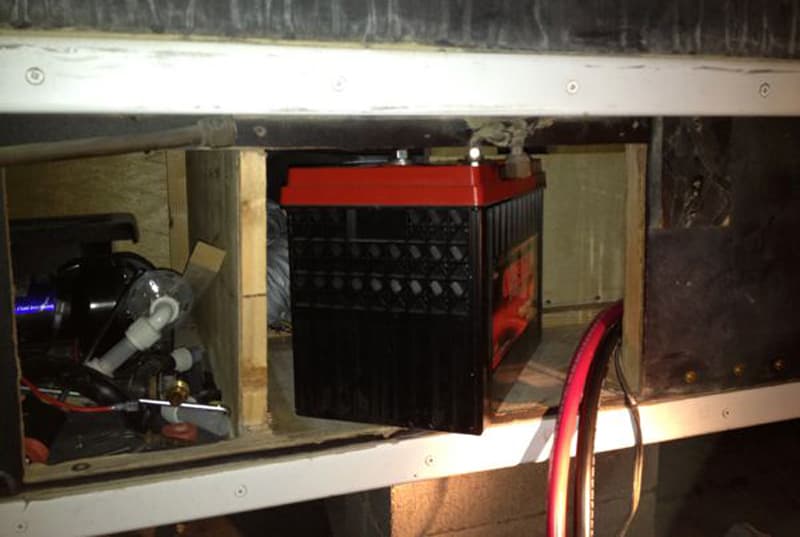
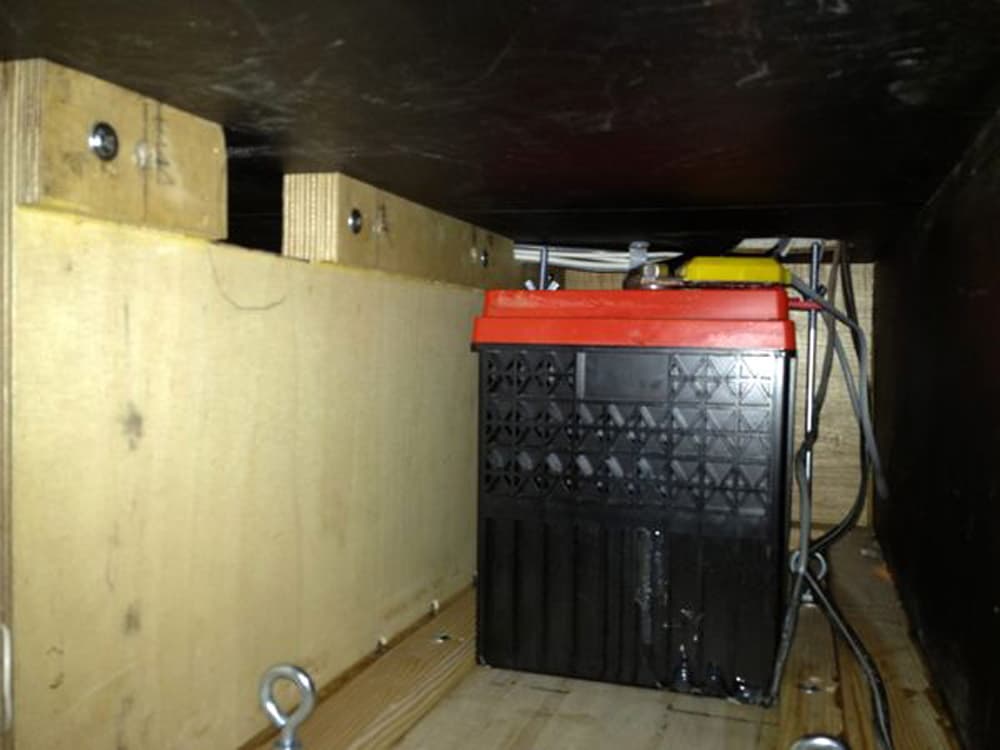
Above: The batteries are installed into the compartment through an access panel in the side of the basement.
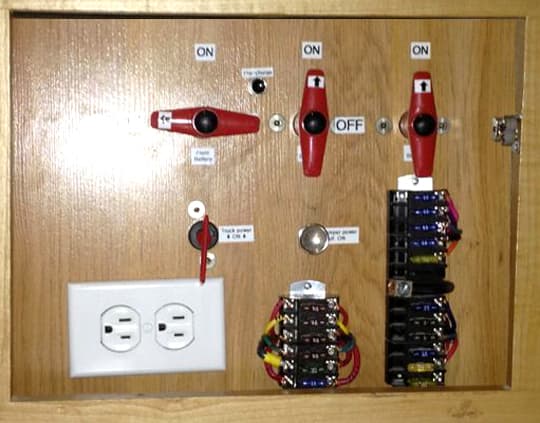
Above: The three battery disconnect switches (the red t-handles). The positive bus-bar is mounted directly to the contacts of these switches. The black pushbutton (between the left and middle t-handles) is for a pre-charge circuit which allows the capacitors in the inverter to charge slowly which prevents arcing and pitting of the contacts in the battery switches. The red handle above the Edison outlet is the electrical disconnect between the camper and truck. The silver pull-knob is the camper’s interior DC power switch.
In addition, I built a new switch panel that has a dedicated high-current switch for each battery. The switches are connected to a common solid copper bus bar. Of course I also created a negative bus bar. There are three equal length runs (36” of both positive and negative) of 2/0 gauge cable running from the switches to the batteries. This balanced wiring approach ensures equal load on each battery during both charge and discharge cycles.
The cable from the bus bars to the inverter/charger is 4/0 gauge and only one foot long. There is a fan in the truck camper just above the batteries which provides ventilation and climate controlled air to the basement.
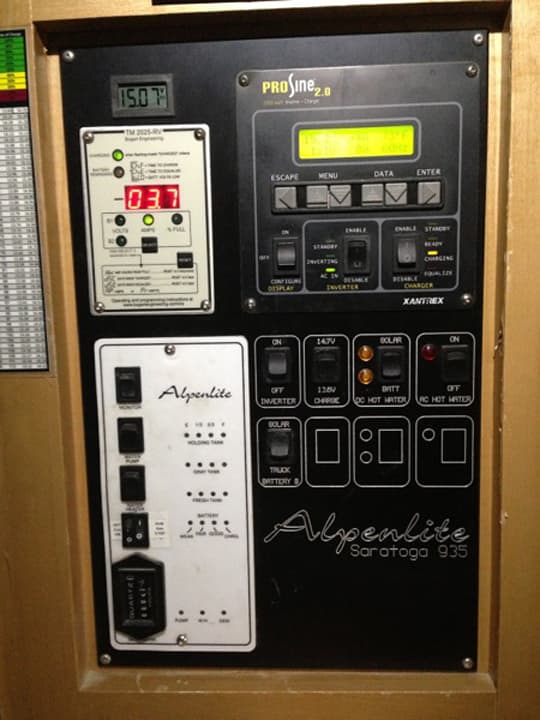
Above: The power monitoring panel I made which includes the Trimetric, Digital Voltmeter, and Inverter/Charger control panel.
To allow for simple tracking of battery capacity and performance, I also installed a precision digital voltmeter and TriMetric battery monitor and a 500A shunt.
It is very convenient to have 300A (~150A of which is useable) of battery capacity. It means that our family of four can live in the camper with the same electrical conveniences that we have at home. We use the lights, radio, television, water pump, computers, and cooking appliances without ever thinking twice about having enough available battery capacity.
Even with no solar charging, no starting of the truck engine, and no generator running, this is sufficient battery capacity for more than six days of dry camping. I can easily operate the roof air conditioner for up to four hours or the convection/microwave for an hour. This is convenient for times when the generator cannot be run, like in a campground at night.
It took me 30 hours to complete this mod and cost $1,350. In my opinion, the skill level of this mod is hard.
October 2015 Winner – Medicine Cabinet Bottle Stopper
3. John Wells, Hollidaysburg, Pennsylvania
2011 Chevy 3500
2012 Chalet Ascent S100F
For years we have suffered a misdemeanor attack by our truck camper at the end of every drive. I’m referring to the “Assault and Bottle-ry” that occurs the first time you open the medicine cabinet door at the end of a long or short trip. I’m thoroughly convinced that these bottles of shampoo, deodorant, bug repellent, and sunscreen, to mention a few of the major offenders, all conspire during the trip to leap from the cabinet at the first opportunity. The really annoying ones end up in the toilet of our wet bath.
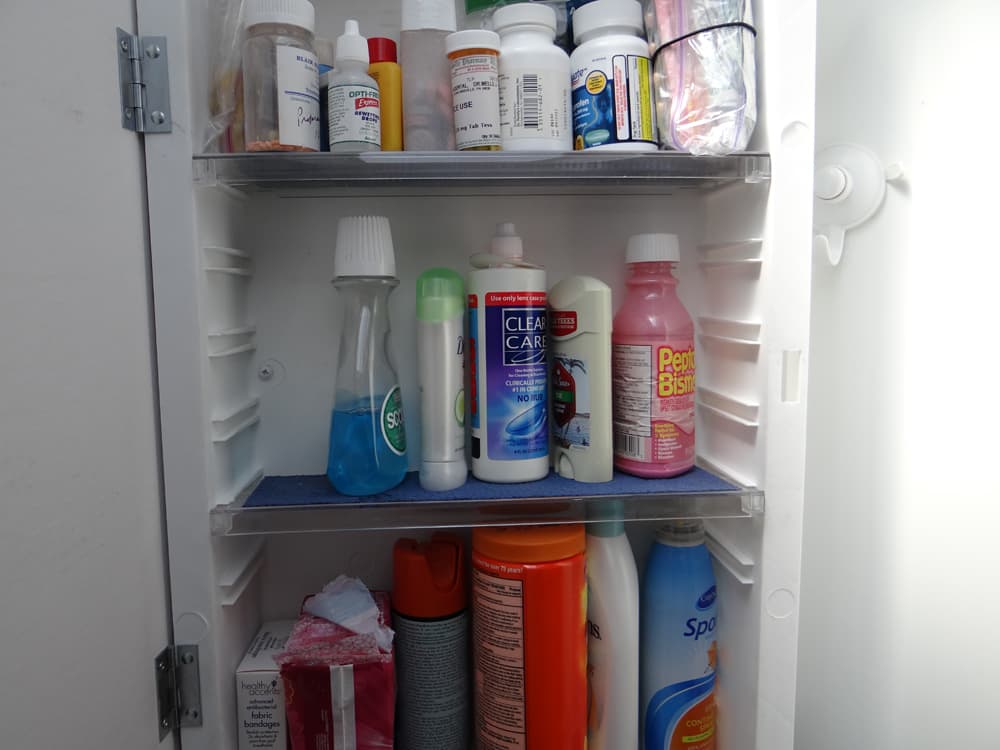
Above: Police line-up of the “Usual Suspects”. “I saw it all, Officer. It was that Big Pink guy on the right end!”. Click to enlarge.
I ruminated over the ideal solution for a few months and I stumbled upon some rigid plastic tubing that spawned an idea in my mind. Actually, the tubes were bovine artificial insemination pipettes. TMI? Hey, I’m a retired veterinarian; you use the tools you have.
You might use one-quarter inch to five-sixteenths inch rigid plastic or polycarbonate tubing available on Amazon and elsewhere. The tubing is flexible enough to allow bottles to be wiggled in behind it, yet rigid enough to prevent anything from falling out at the end of a trip.
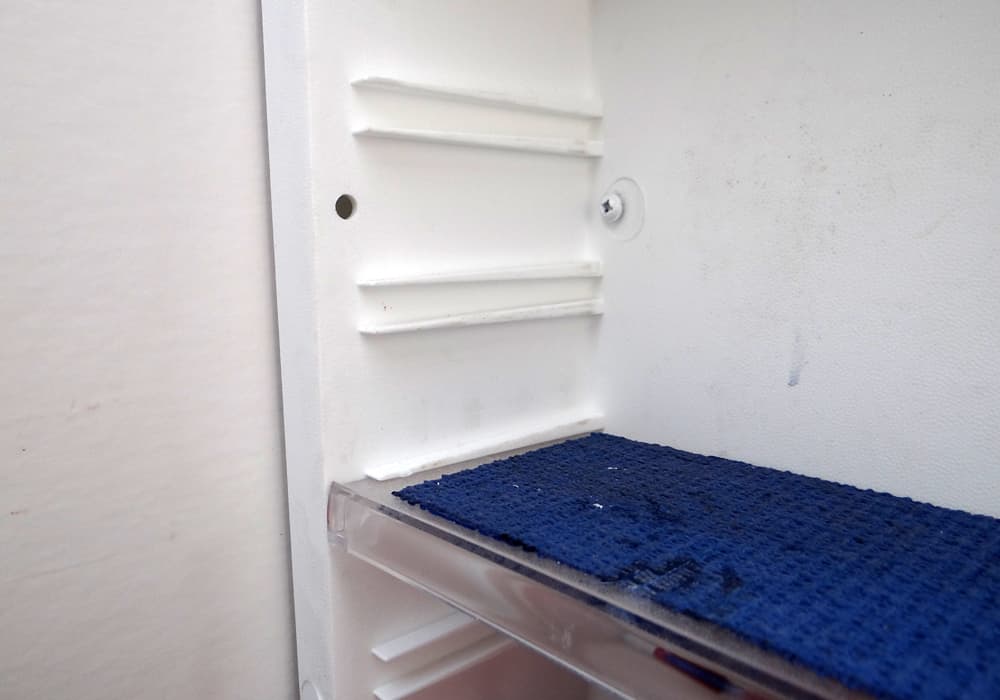
Above: Sample blind hole in side of medicine cabinet. Click to enlarge.
Holes were drilled at the appropriate height for the contents of each shelf. Our medicine cabinet has an outside flange that acts as a stop for the tubing, so the holes only penetrate the inner wall of the cabinet. If your cabinet has no flange to act as a stop, or you can’t drill the necessary blind holes, drill the holes all the way through and slip a tight fitting O-ring on each end of the tube to keep it centered within your cabinet.
Tubing is about three-quarters inch wider than the interior of the cabinet, and springs into place very securely by just flexing slightly. After several trips and a couple thousand miles, “Assault and Bottle-ry” has been effectively outlawed in our camper!
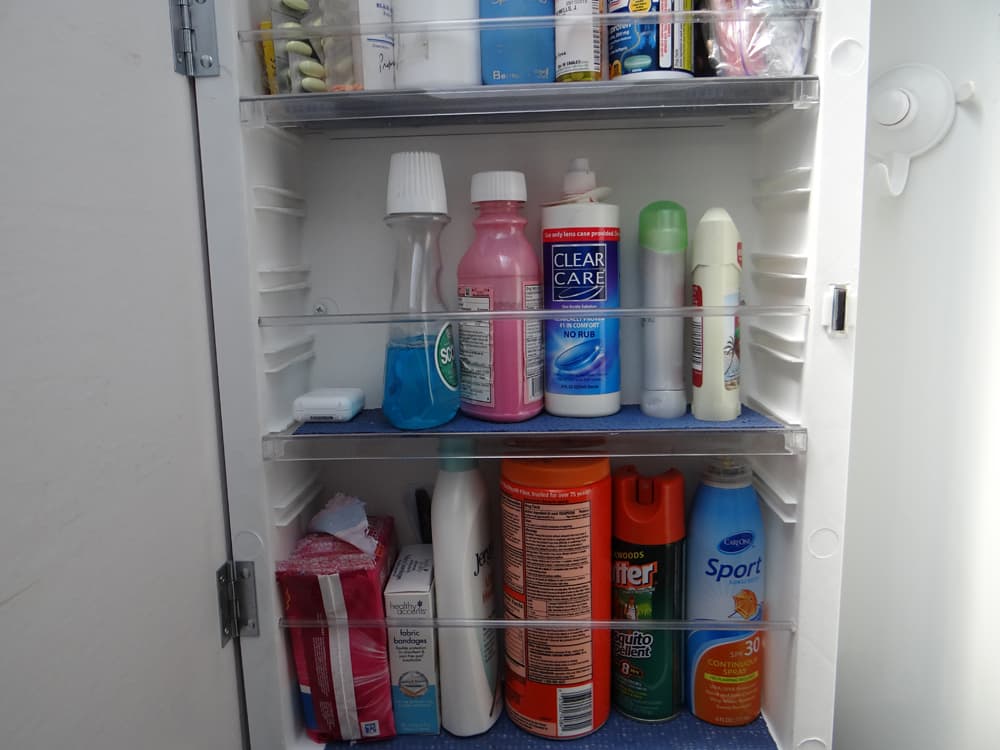
Above: All the violent offenders effectively restrained. And, the plastic rods can be sprung right in and out for easy cleaning. Click to enlarge.
It took me an hour to complete this mod, and cost five dollars. In my opinion, the skill level of this mod is easy.
November 2015 Winner – Battery Storage in Truck Bed
4. Jim Duarte, Plainville, Massachusetts
2015 Ford F350
2013 Eagle Cap 850
As we are always off-the-grid, we depend on our battery power a great deal. I have a 2500 watt inverter built into my system for basic AC needs like using my coffee maker. The twin, solar charged batteries were not getting us through a complete coffee brewing cycle, so I decided to first add two more batteries and then, if needed, increase my solar panels.
The battery compartment on the Eagle Cap didn’t have room for larger batteries. I decided I could mount a pair of identical batteries in the bed of the truck and connect them with 4 gauge cable and a large plug. I already had a really strong 175 amp Anderson Powerpole plug that I had bought as a connector for the winch on the old truck, but never used it. There’s a start!
I downloaded the data sheet on my Trojan 27TMH batteries to get some dimensions. I then did some measurements in the truck bed. This will work, I thought.
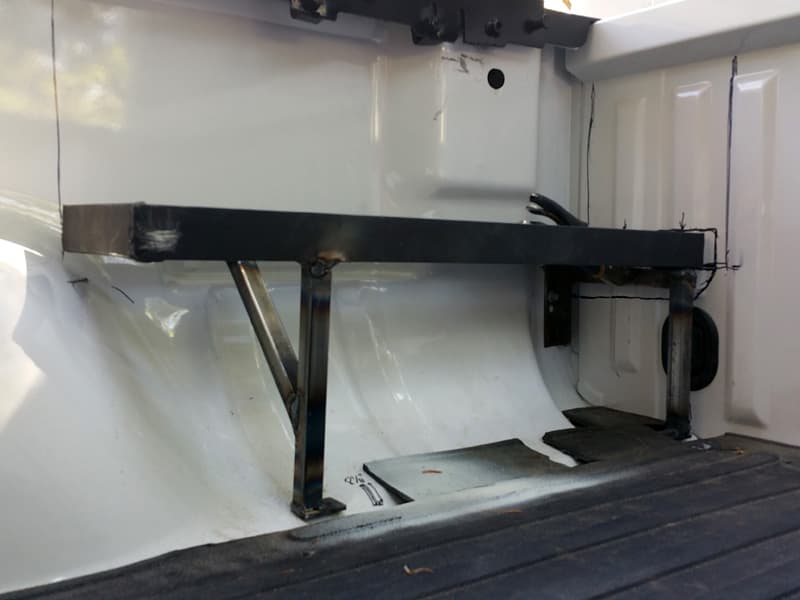
I picked up some 1.5-inch angle iron and some .75-inch square steel tubing at Home Depot and began to fabricate my auxiliary battery tray. After completion, I sanded everything down, cleaned and sprayed it with two coats of Rust-Oleum primer and three coats of black Rust-Oleum semi-gloss. I let the tray and brackets dry overnight and started fresh the next day.
I was able to use the bolts from one of the factory tie-down hooks as my front mounting point and drilled a single hole in the bed for the rear point. I mounted everything and tightened it all up. Then I called it a day.
 |
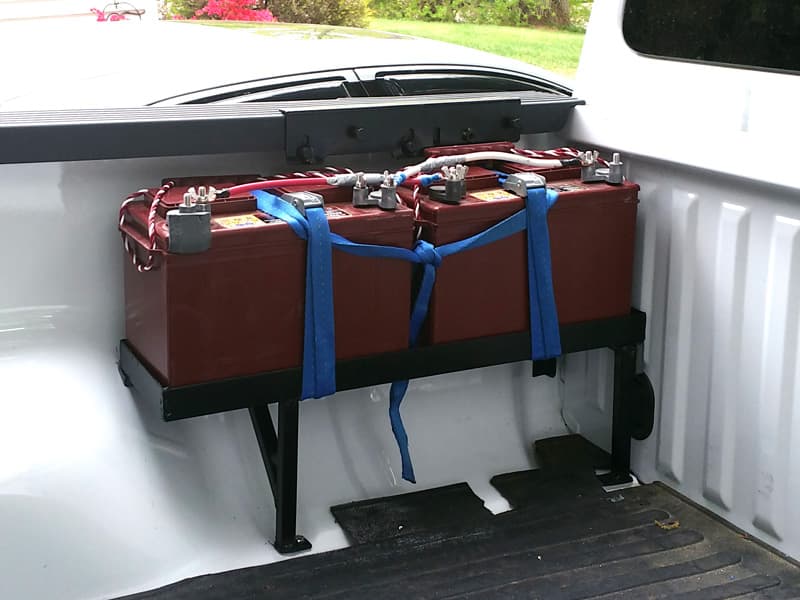 |
Above: The auxiliary tray with and without the new Trojan 27TMH batteries
The next day I bought the new Trojan 27TMH batteries, brought them home, got them mounted, and then cabled them before it got dark. I took the connector cables from the truck and camper inside and soldered the Anderson Powerpole ends on in the comfort of my workshop.
 |
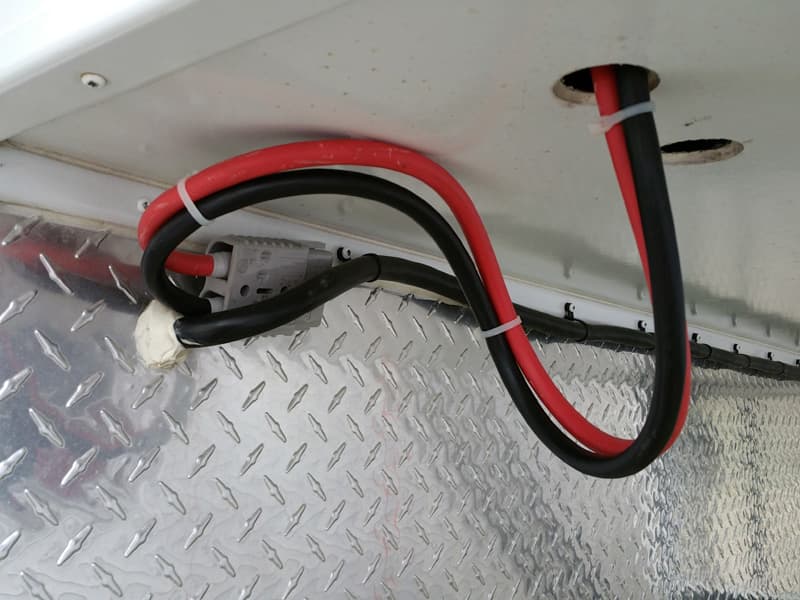 |
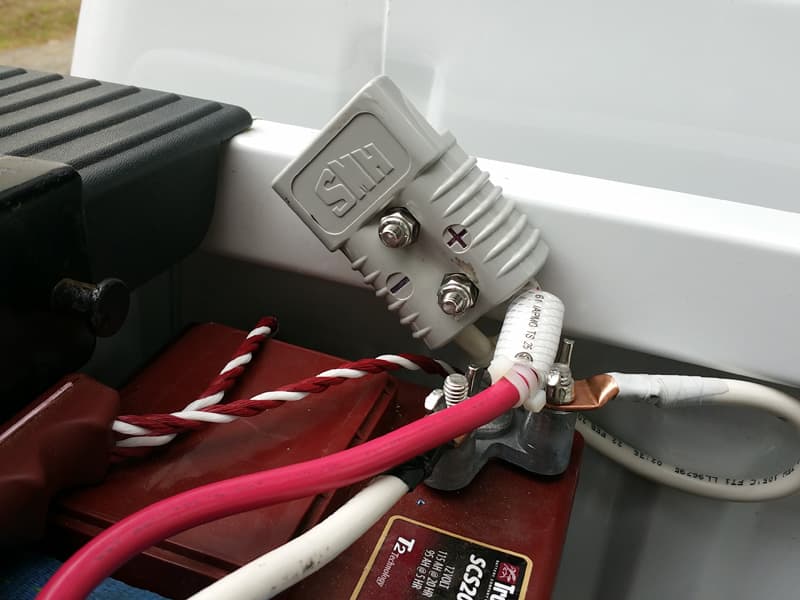
Above Left: The truck’s half of the 175 amp Anderson Plug, bolted in place for convenience, Above Right: The camper’s half of the connection, dropping down through one of the drain holes.
The next morning I went out and installed the truck connector cable and its half of the big plug. I actually bolted it to the front of the bed so that it would be easier to plug into. I then mounted the camper end up through one of the battery box drain ports and to the outboard camper battery. I tightened all battery connections on all four batteries and then backed the truck back under the camper. I checked the battery voltage in the camper, disconnected the house power, and I was ready.
I left the camper battery compartment open so that I could see any issues as I plugged the new Anderson Powerpole into the truck. Everything went together fine with no issues.
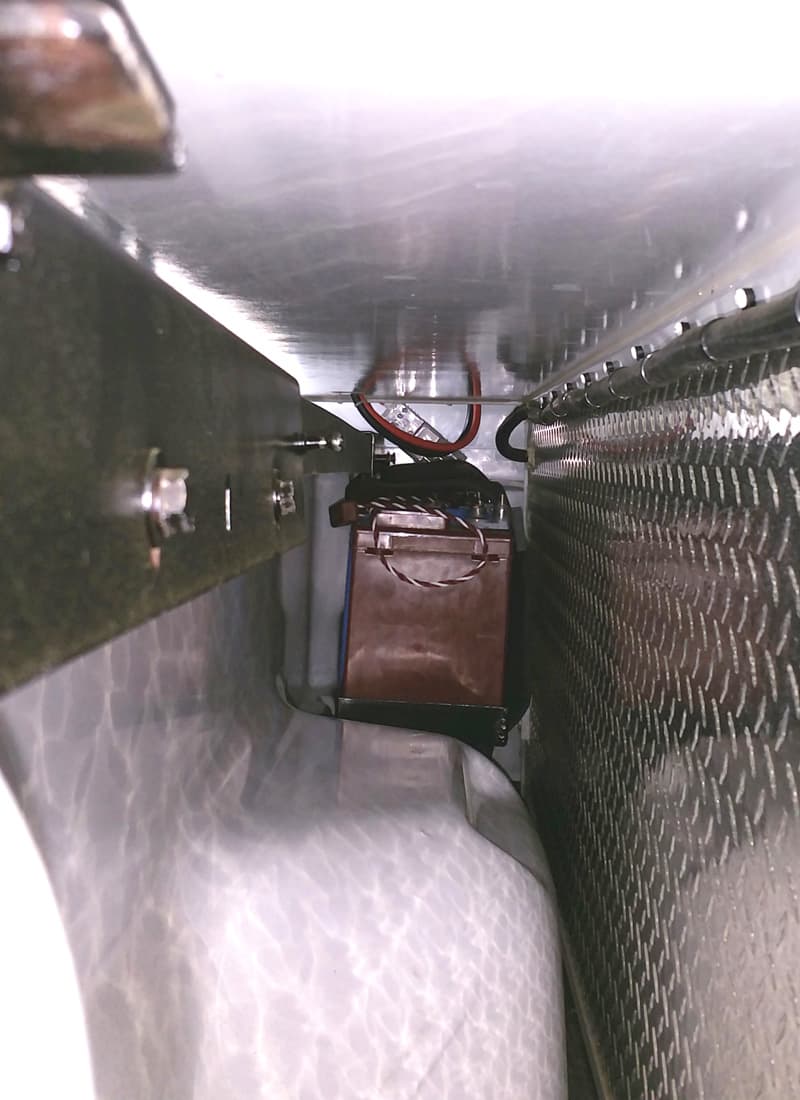
Above: The batteries inside the bed with the camper on the truck – click to enlarge
One final test before plugging the house power back in; a capacity check! I turned on all the camper lights inside and out, and the Fantastic Fan. Then, I loaded the coffee pot with twelve cups of water. I plugged it in, turned on the inverter, and turned on the pot. Fourteen minutes later, the pot was brewed (just hot water – no coffee) and my battery voltage was still reading 12.9 volts. That’s what I wanted to see. The solar panel was only giving about 0.4 amps as there was no sun!
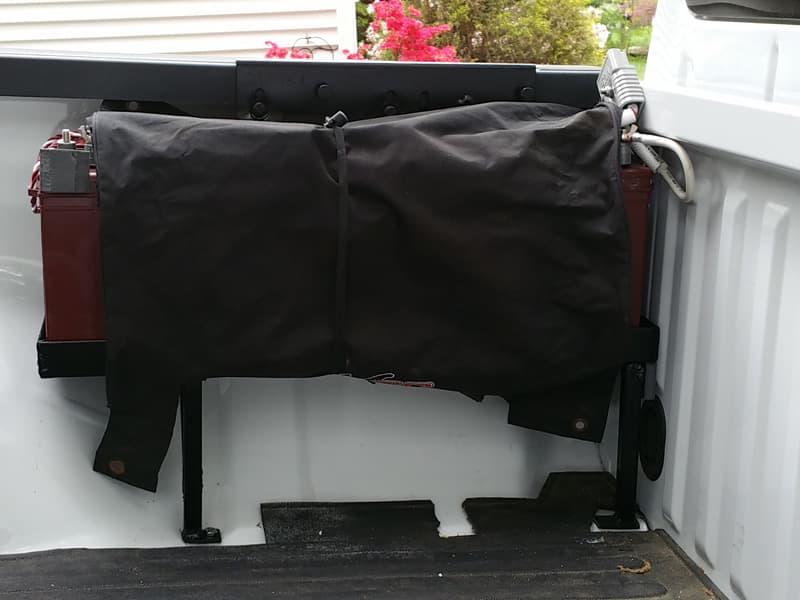
Above: The batteries are covered when the camper is not on the truck
There’s nothing like a project that does what you had hoped it would do. After checking it over the course of several days on the beach, it’s evident that the single 140 watt solar panel will keep us going. Mod complete!
This mod took me 18 to 20 hours to complete and cost $450, including the batteries. In my opinion, the skill level of this mod is hard because there is welding involved.
December 2015 Winner – Back Overhang Storage Compartments
5. Thomas Wilson, Walkertown, North Carolina
2015 Chevy 3500
2015 Adventurer 89RB
 |
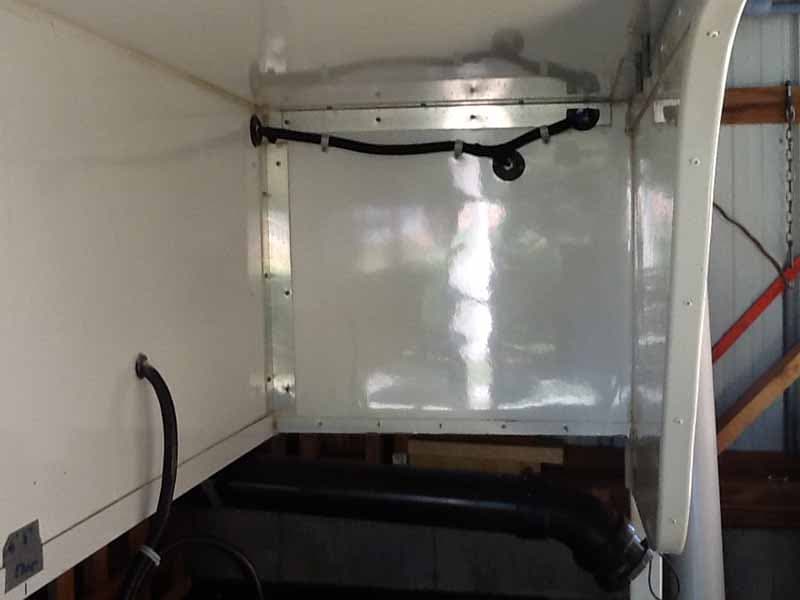 |
Above: The empty space that was in the overhang
I purchased a 2015 Adventurer 89RB, which is designed to match long or short bed trucks. I matched the camper to a 2015 Chevy 3500 short bed and wanted to make use of the space behind my truck’s tail lights.
 |
 |
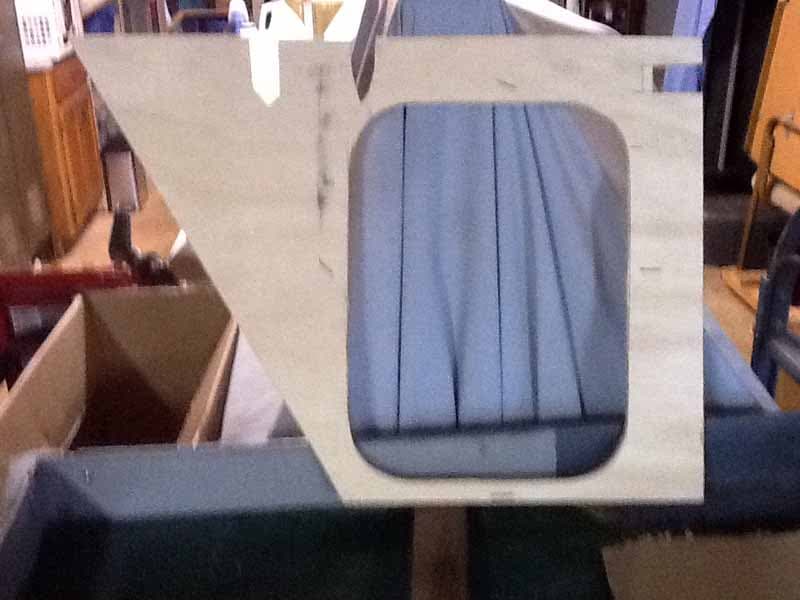
First, I made a template out of plywood. The template gave me the sizing for my inside metal and provided a pattern for the rough cut-outs for the doors. Placing the template against the inside wall on each wing, I cut out the door openings using a sabre saw. I changed blades for each door. Then, I installed storage boxes on each side of my camper.
 |
 |
 |
 |
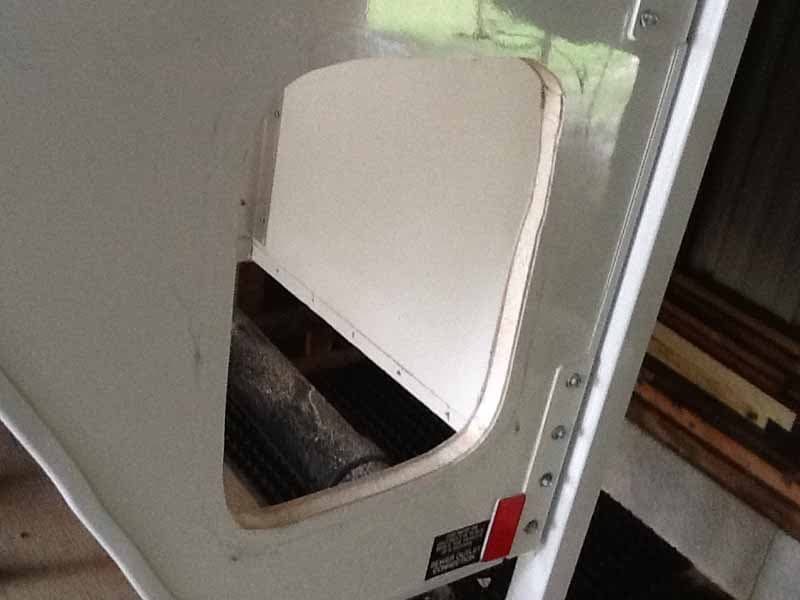
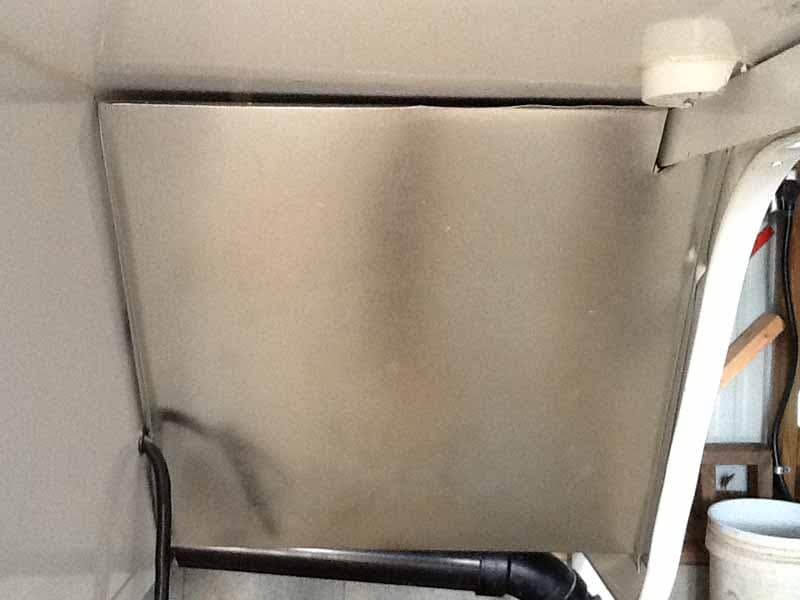
The doors are quite similar to factory doors and it has provided about 3.8 cubic feet of space on each side of camper. The result has more than met my expectations and just fits perfectly with camper loaded and unloaded.
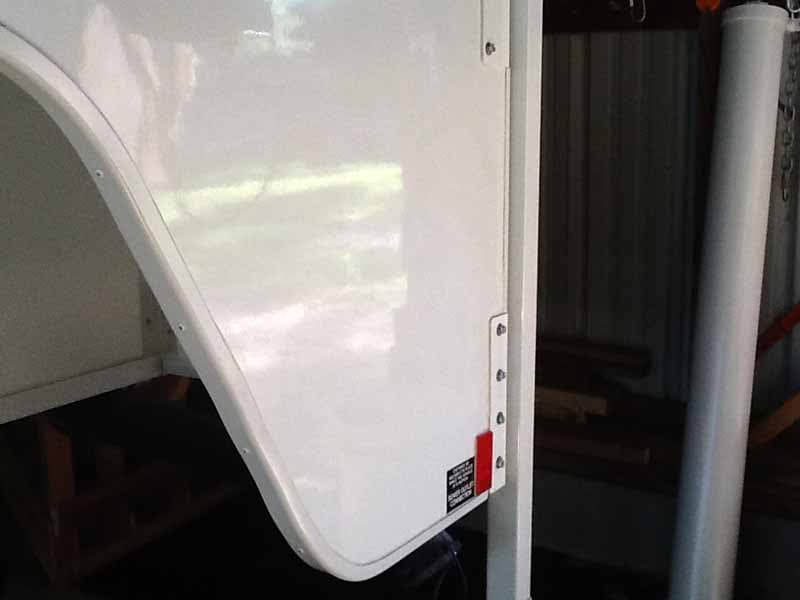
Above: The overhang doors are now on both sides of the back of the camper – click to enlarge
It took me eight to ten hours to complete and cost approximately $225. In my opinion, the skill level of this mod is hard and that’s only because I had to locate a supplier for the doors.
January 2016 Winner – Ladder Stairs To Overcab
6. Vern and Tracy Mowrey, Newburyport, Massachusetts
2005 Dodge Ram 2500
2007 Lance 845
 |
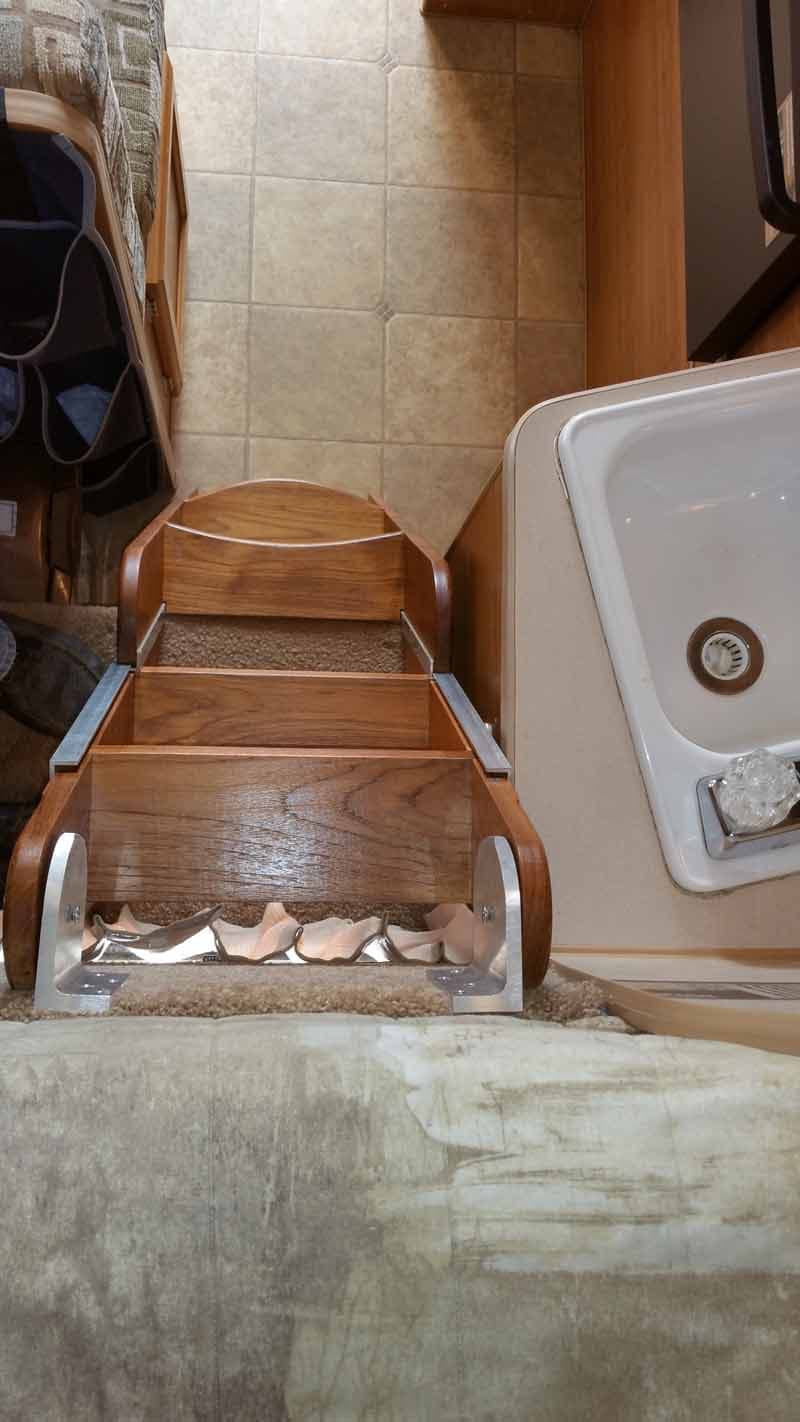 |
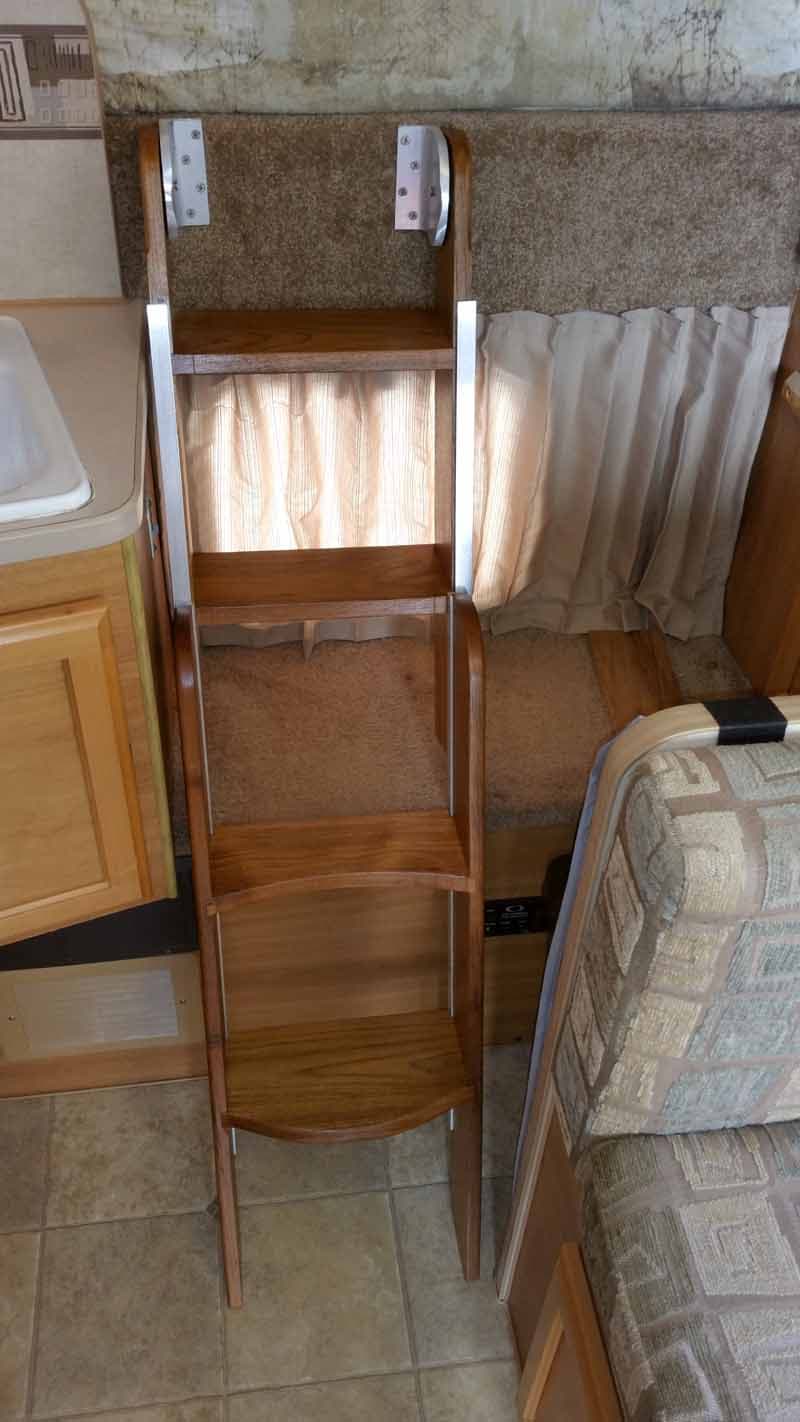
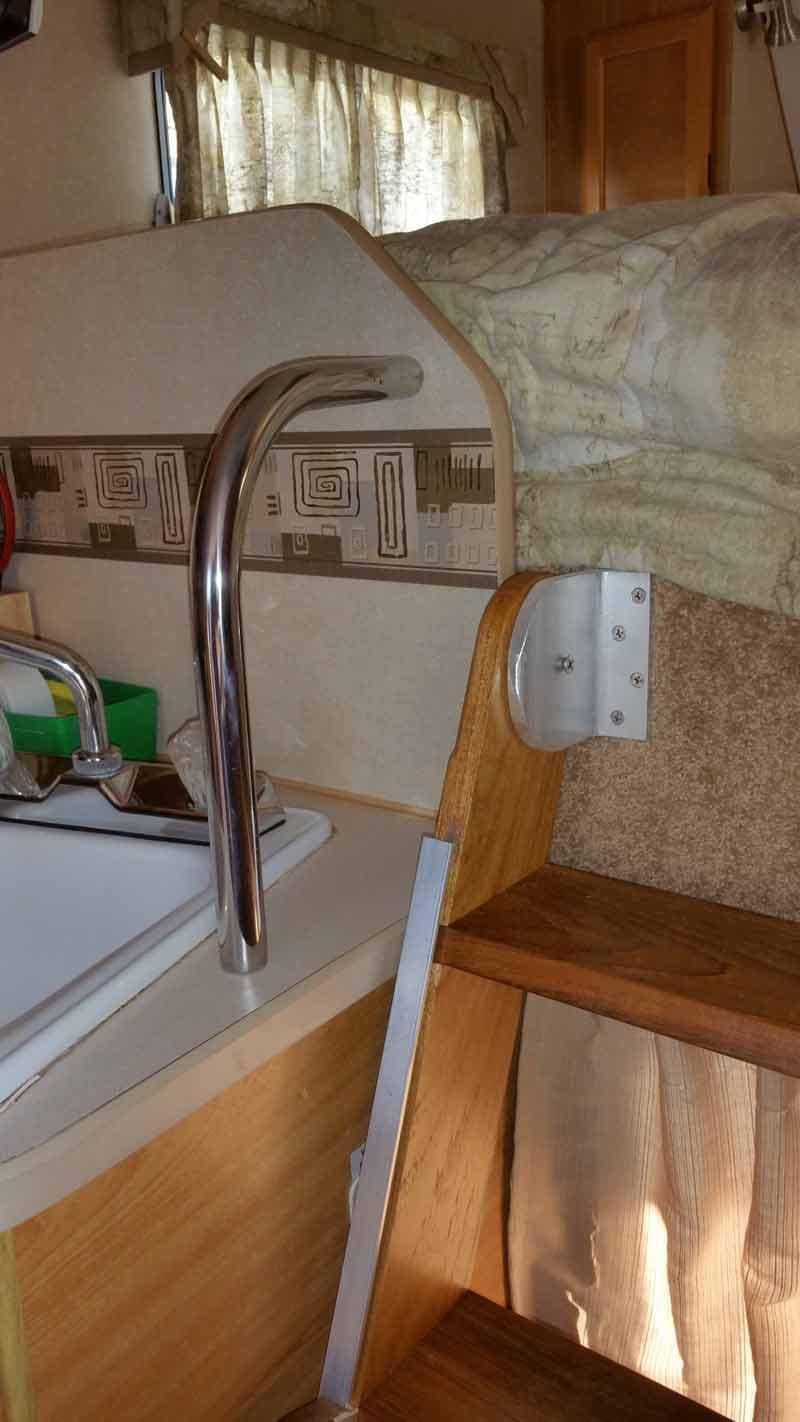
Above: The steps going up to the overcab and coming down
After both of us almost fell getting down from the cabover bed, we decided the access to our cabover in our Lance 845 needed to be easier and safer.
There were several considerations that we needed to work out. We knew we needed the cabover entry angle to be less steep. We also needed the refrigerator door to be able to open all the way with our modification.
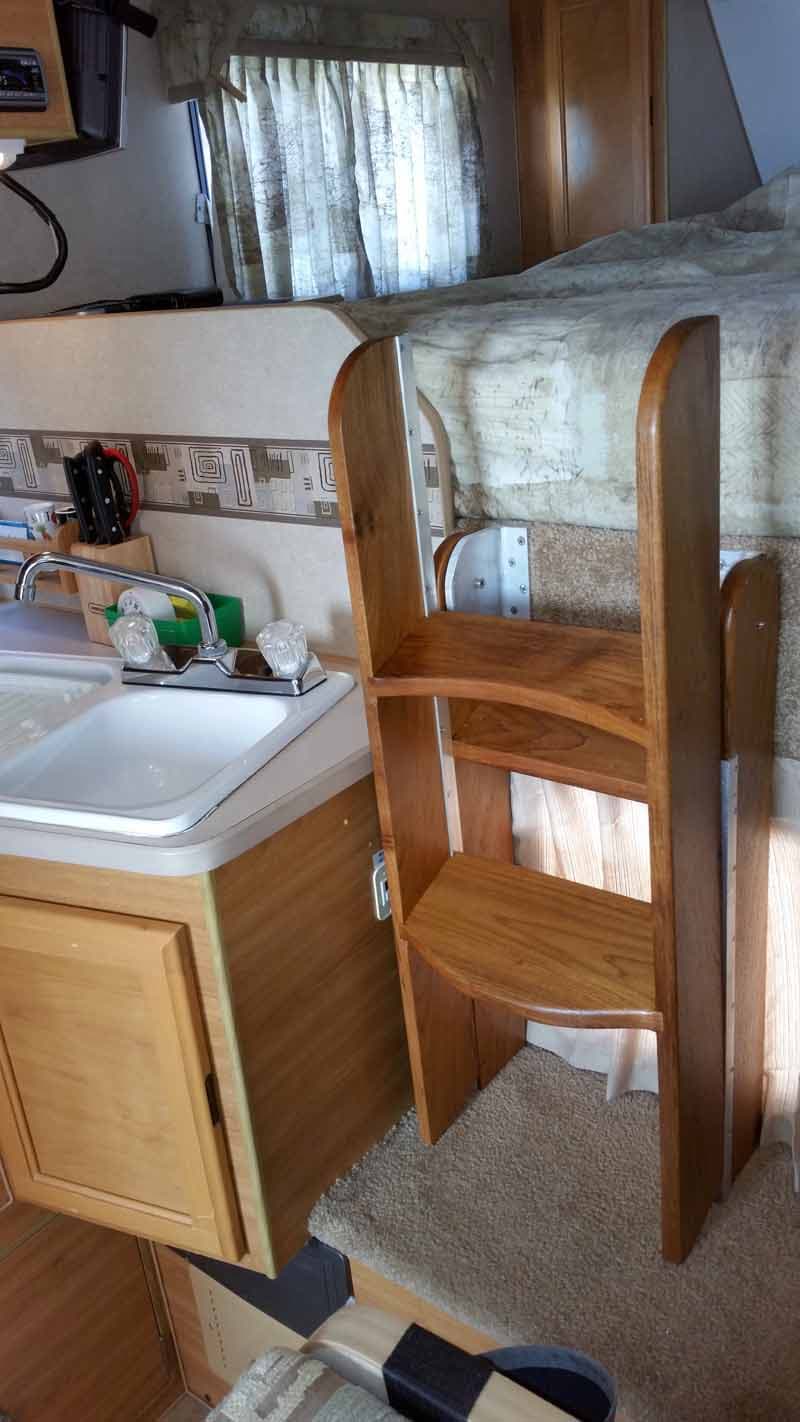
Above: The steps can be raised and folded when not in use – click to enlarge
The following universal design is what we came up with. The unit is a miniature extension ladder anchored at the top and can be pulled out and slid down when needed. Then it can be raised and folded back when not needed.
On a scale of 1 to 10 we both agree that it’s a 10. All we have to do now is scurry up the ladder and climb on the bed now. Coming down we just swing our legs over the end of the mattress and the steps are right there. Even in the dark it’s easy to find the steps.
It took me 20 hours to do the project comfortably, and cost $125. In my opinion, the skill level of this mod is medium.
February 2016 Winner – Sliding Rear Deck
7. Dan and Susan Knapp, Albany, New York
2001 Chevy 2500HD
1999 Coachman Ranger 115RB
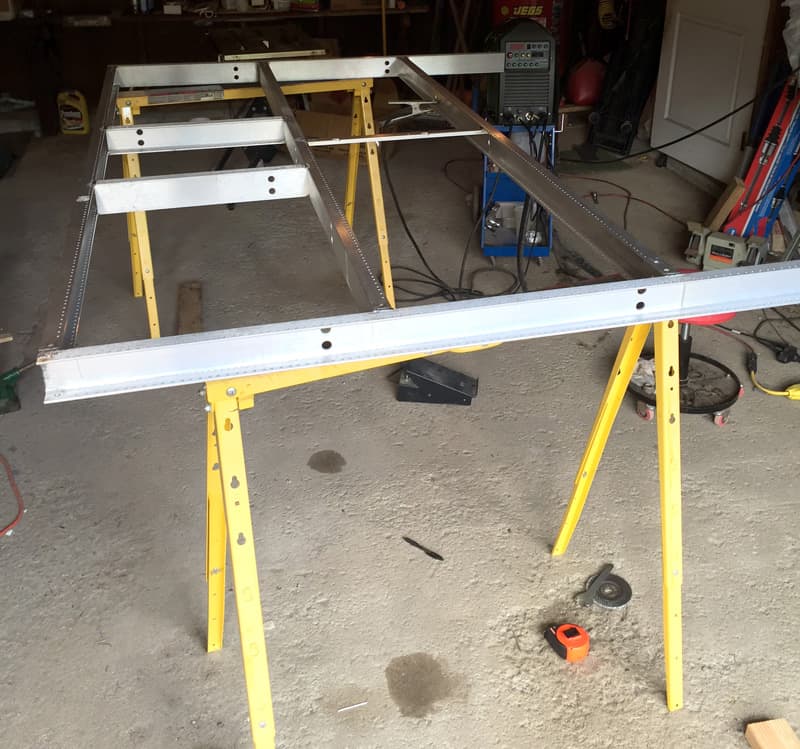
We didn’t like the 4-foot drop right out the door and we wanted an easy to clean place to help keep sand and dirt out of the camper. We didn’t like how other fold-up deck designs block the door when up.
 |
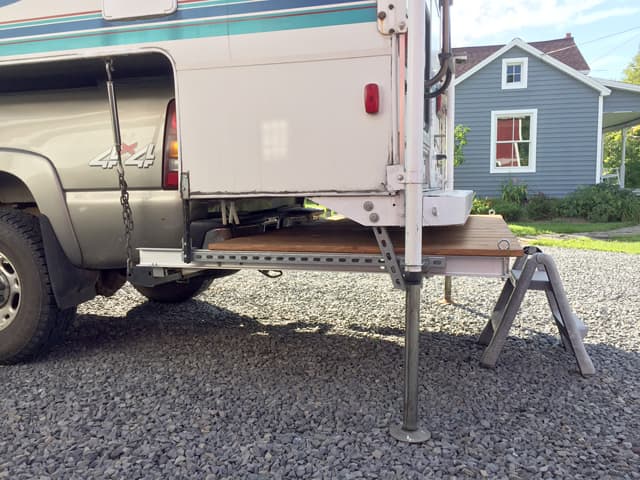 |
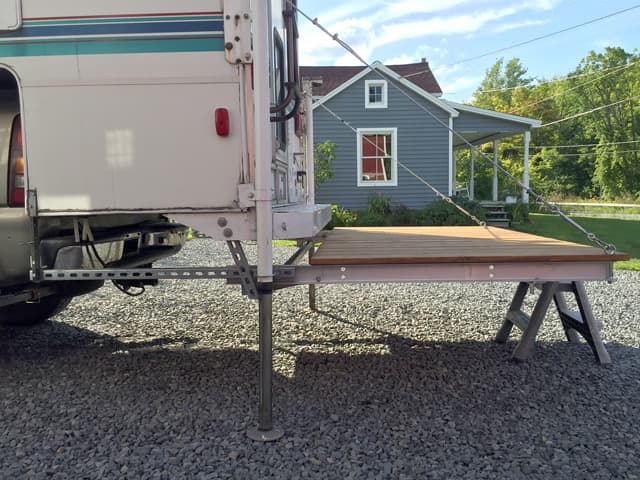
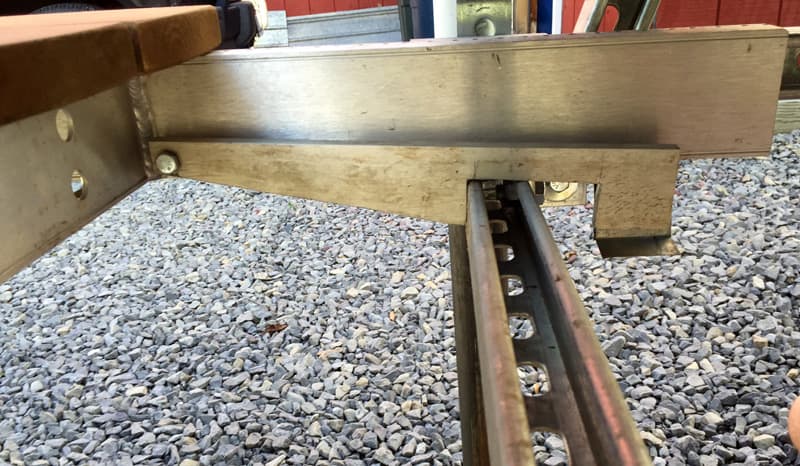
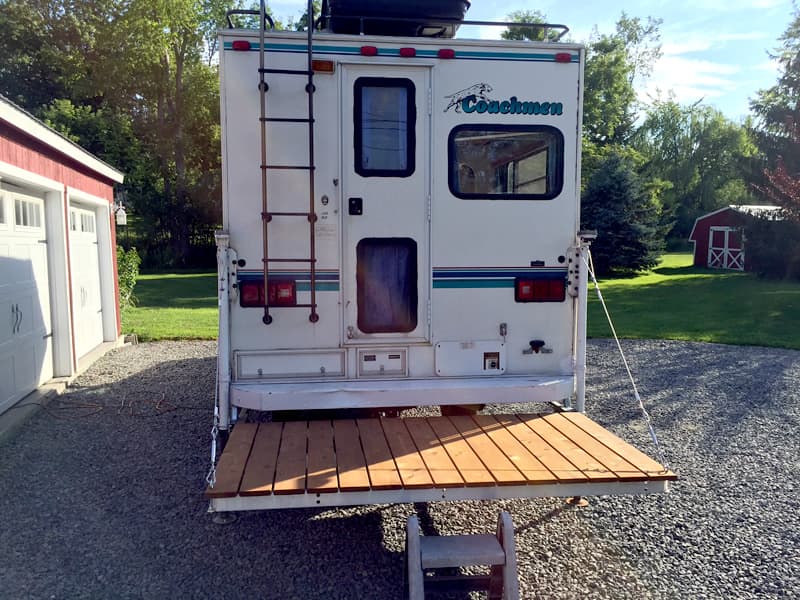
Above: The deck can slide under the back overhang of the camper
We added a rear deck to the camper that slides underneath. It is completely suspended from the camper and automatically locks in place when pulled out. We used aluminum and cedar to keep it light. It weighs about 100 pounds. The cables are rated at 800 pounds each. I have had five people sitting on it while tailgating without a problem.
It turned out better then expected. We don’t know how we lived without it. It feels very secure with almost no flex. It adds a little length but we use it as a step when retracted. The jacks are still the lowest point and hit first when on uneven ground.
It took me 10 hours to complete and cost $150. The aluminum was dumpster sourced. In my opinion, the skill level of this mod is hard.
March 2015 Winner – Grey Water Auxiliary Storage In Truck Bed
8. Bob Meigs, Huntington Beach, California
2011 Dodge Ram 1500 Bighorn
2012 Four Wheel Camper Raven
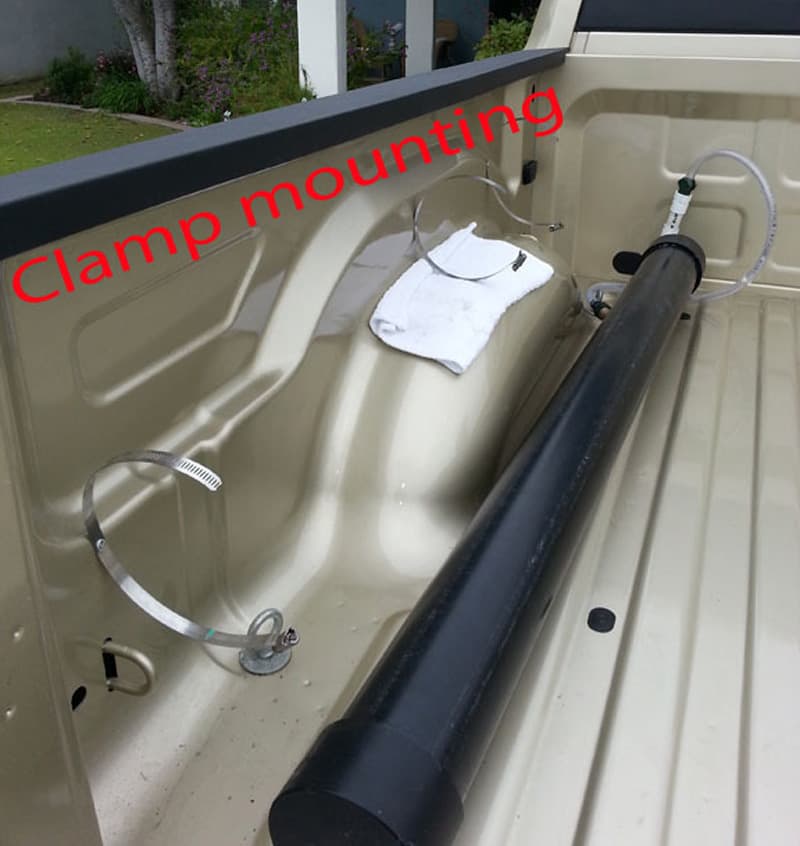
I wanted a permanent grey water storage for my Four Wheel Camper Raven pop-up camper. Since I already had dead space over my wheel wells, that was the likely place for an onboard storage tank.
 |
 |
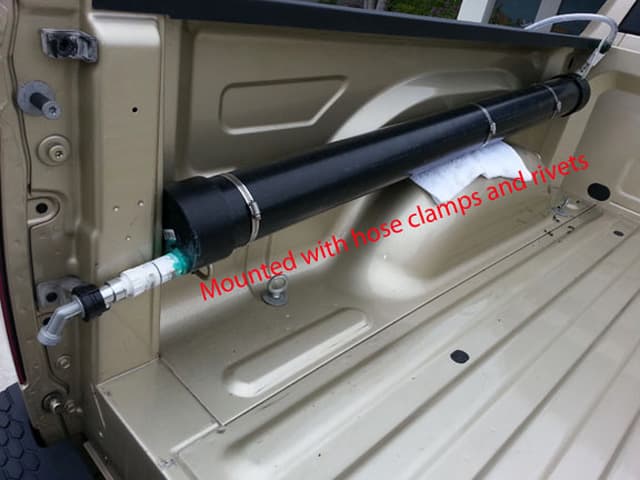
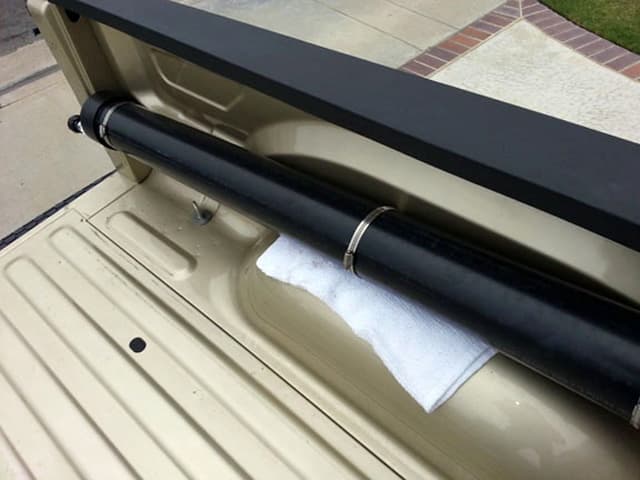
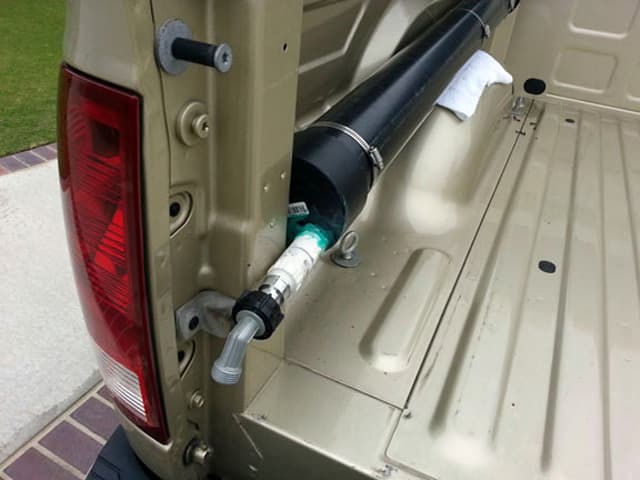
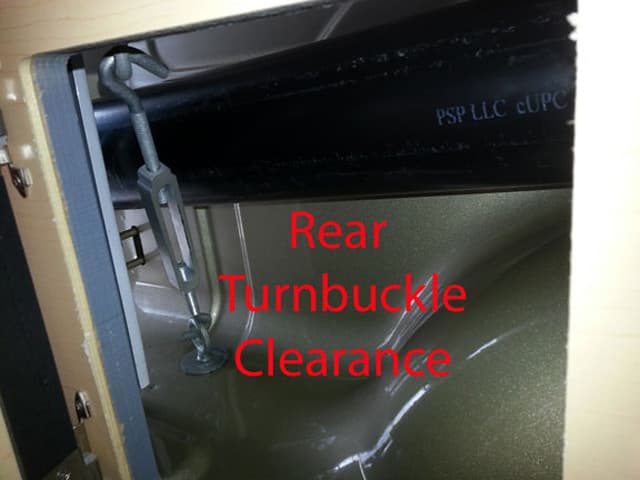
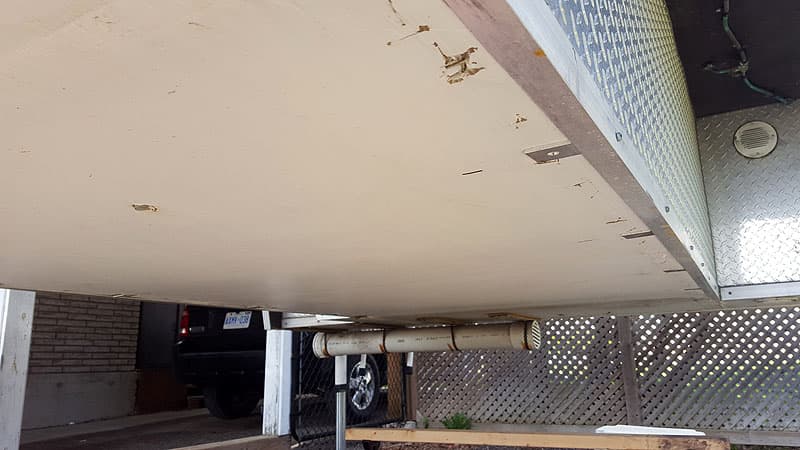
This mod is pretty straight forward, 4-inch ABS drain pipe, cut to fit the length of my truck bed and leaving enough room for end caps, fittings, etc. It is mounted at an angle so the water flows to the drain valve at the rear of the camper.
 |
 |
 |
 |
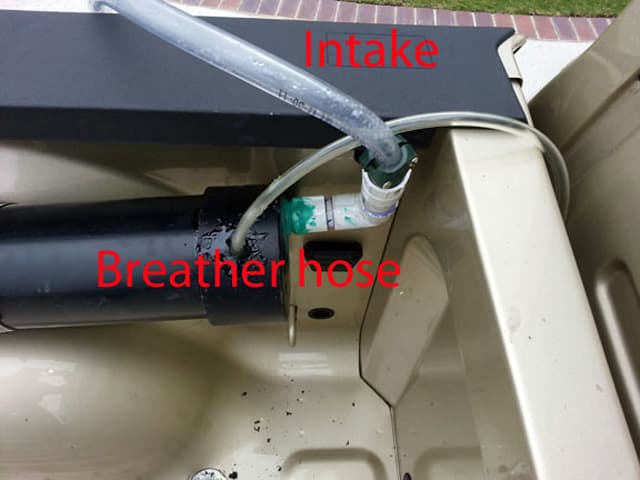
I used hose clamps to keep the pipe tight to the truck. This makes it easier to put the camper back on. I used four adhesives; ABS, PVC, silicon caulk, and a special ABS/PVC adhesive for where you bond PVC to the ABS. I got all of the adhesives at Home Depot. The silicon caulk was to adhere a vent tube on the high end so air can escape to displace the entering water.

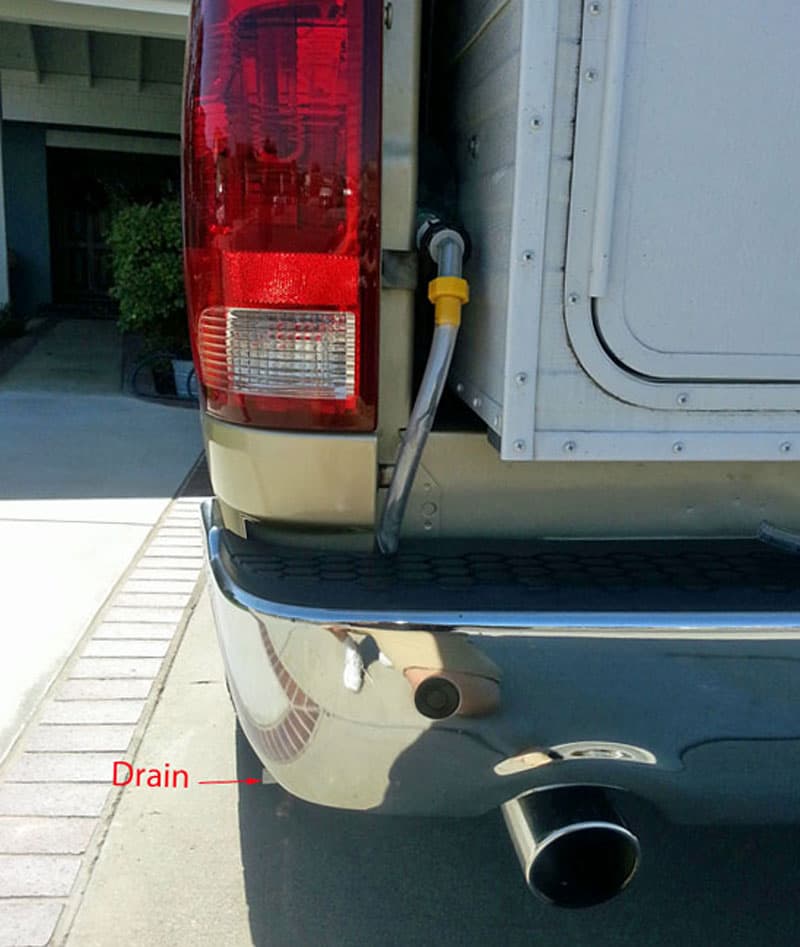
This modification works great. The tank holds 3.5 gallons on a short bed truck. If I exceed the 3.5 gallon due to long stays, I can drain into a bag or bucket. The best part is that I can now use the sink anytime without any setup.
The mod took me about two hours, since I had to take the camper off the truck, and cost $25. In my opinion, the skill level of this mod is medium.

April 2015 Winner – Keyboard Storage and Art Supplies Integrated into Dinette Table
9. Mark Siminoff, Mountain View, California
2005 Dodge Ram 3500
2004 Alpenlite Saratoga 935
We are currently traveling our with two children in a truck camper for a full year. A significant chunk of our daily routine is dedicated to education and our homeschooling curriculum, which includes music.
One of the instruments both kids are learning to play is the piano. Of course, it’s no simple task to squeeze a piano into a truck camper. So, as part of the preparation for our trip, I researched compact keyboards and came across the Alesis V49.
This MIDI keyboard is compact enough to travel with us. It has a great feeling keyboard with velocity sensitive keys, is USB powered, and can play on and through our iPad. From there it plays through the truck camper’s stereo speakers, or through headphones.
 |
 |
 |
 |
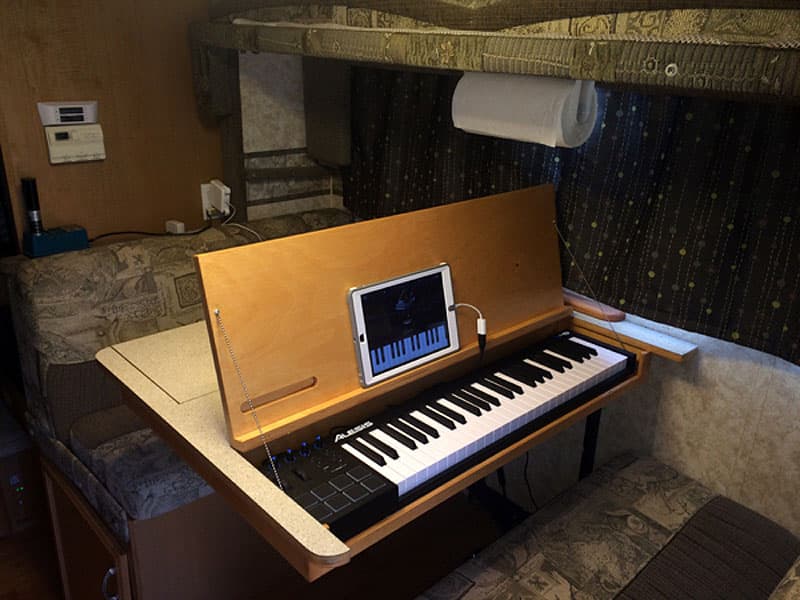
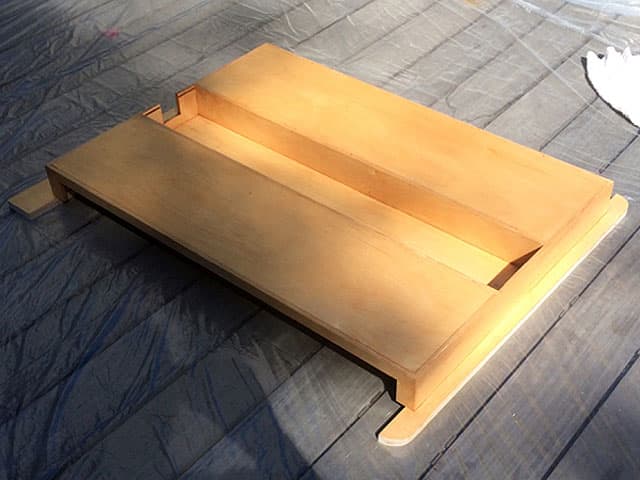
The big challenge, of course, was finding a place in our tiny truck camper to store a MIDI keyboard. After some searching and measuring, I realized that the keyboard was about the same length as the dinette table, so I decided to make a new tabletop with the keyboard tucked away inside of it.
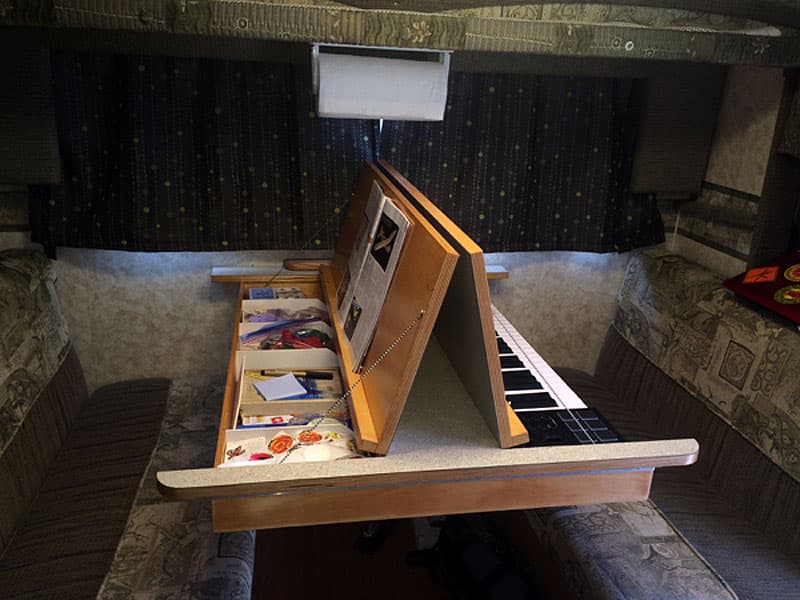
I chose to create two separate storage compartments within the table; one for the keyboard and the other for school and craft supplies. Accordingly, the tabletop has two doors. When open, each door has small ledge which can also be used to support a book, classwork, or an iPad.
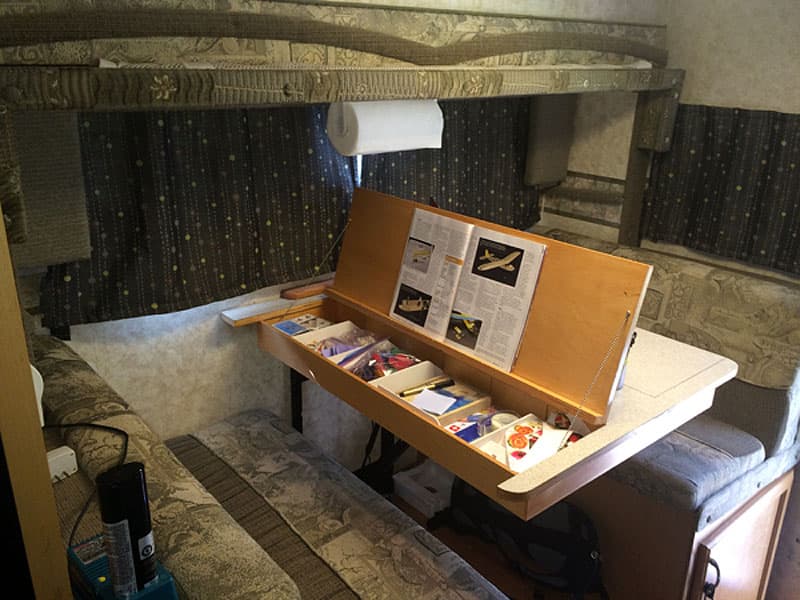
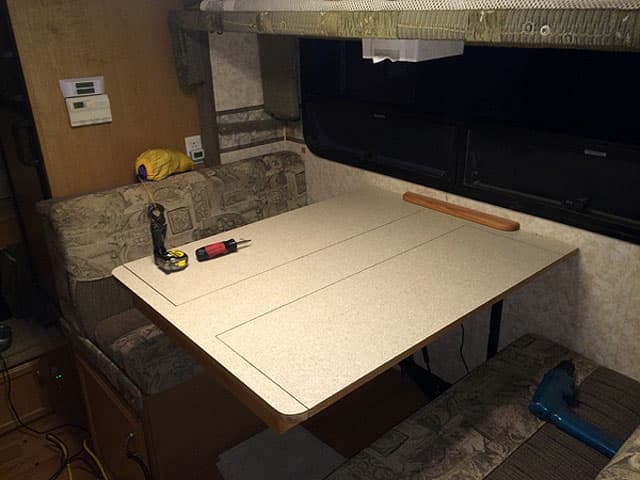
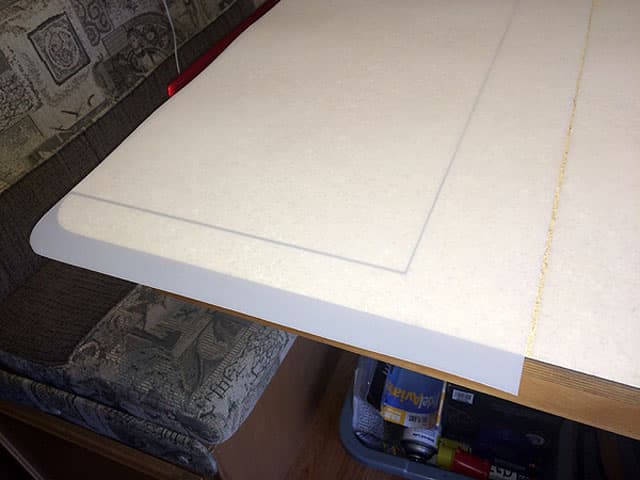
I fabricated the new tabletop entirely from scratch using 3/4-inch 13-ply birch for the top and 3/8-inch 7-ply for the boxes. The top surface is Formica high-pressure laminate and the interior and exterior surfaces have been finished with a durable satin polyurethane and stain.
For times when the kids are working on projects (or meals) that might get messy, I made a pair of 1/16-inch thick LDPE cover sheets that are fitted to the tabletop. When not in use, these sheets are stored behind the dinette’s back cushions.
The whole family uses this table every single day. We eat breakfast, lunch, and dinner on it. We also do home schooling, craft projects, and practice piano lessons. I even composed this Monthly Mod Contest application on it. In the evening, the dinette converts into my daughter’s bed.
This modification took 36 hours to complete and cost approximately $600 including the MIDI keyboard. In my opinion, this mod was hard because I had to ensure that everything would fit.
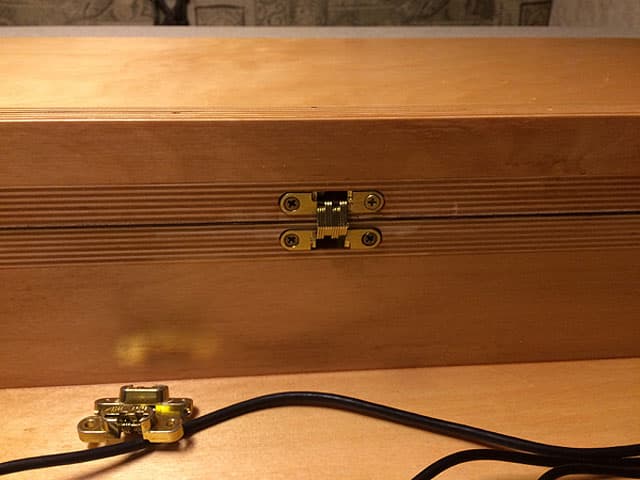
The entire assembly was designed in CAD (SolidWorks) before a single piece of wood was cut. Creating the table top and boxes required extensive carpentry skills, especially pocketing the hidden hinges. Specialized tools were needed to apply the Formica laminate and polyurethane finish.
May 2016 Winner – Fresh Tank Water Level Meter
10. Charles Coushaine, Punta Gorda, Florida
2001 Ford F350
2012 Chalet DS116RB
Our Chalet double slide has a huge 62 gallon fresh water tank, and a tank level meter that has lights for each third. These lights are not very accurate, and we usually need much less than the lowest light or twenty gallons, which is about 160 pounds of water.

To more accurately control the weight of the water in my fresh water tank, I put together this nifty metering system to dispense exactly the amount we need.
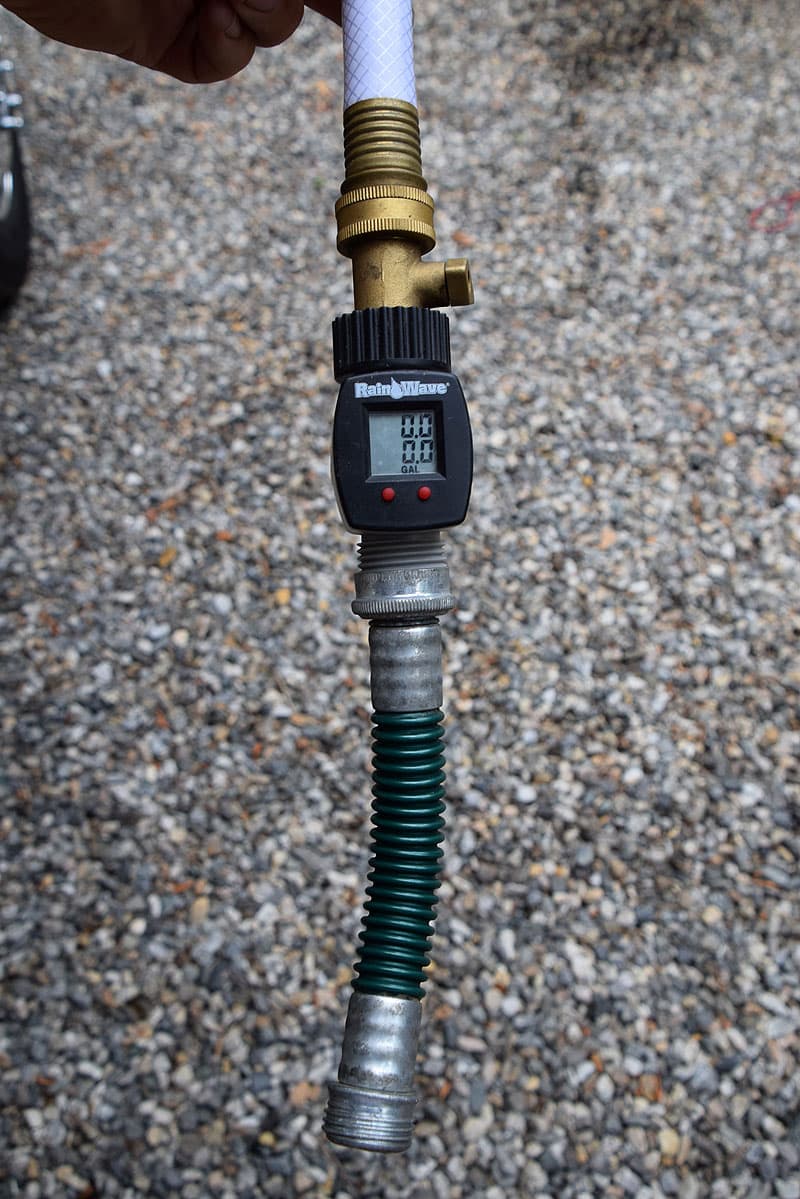
I put together a water meter with an on/off valve and a small hose extension. These were easily put together and allow for an exact amount of water to be added to the fresh water tank.
Please watch the video to see how it works:
We know from experience that we use approximately six gallons of water for each day of dry camping we do. This includes taking showers, washing dishes, drinking water, etc.

Using this metering system allows me to very accurately put water into our fresh water tank and control the weight of the water. I no longer carry around excess water and weight as I travel.
It took me one hour to complete and cost $35. In my opinion, the skill level of this mod is easy.
June 2015 Winner – Camper Supports and Storage Solution
11. Brian Sibbles, Garden Hill, Ontario
2015 Ram 1500
2012 Travel Lite 800SBX
The mod started out for two reasons. First, we needed more over cab clearance so the camper had to be raised 1.5-inches.
Second, we wanted a more portable floor support system. We didn’t want to carry saw horses around when unloading for longer stays and staying in one location.
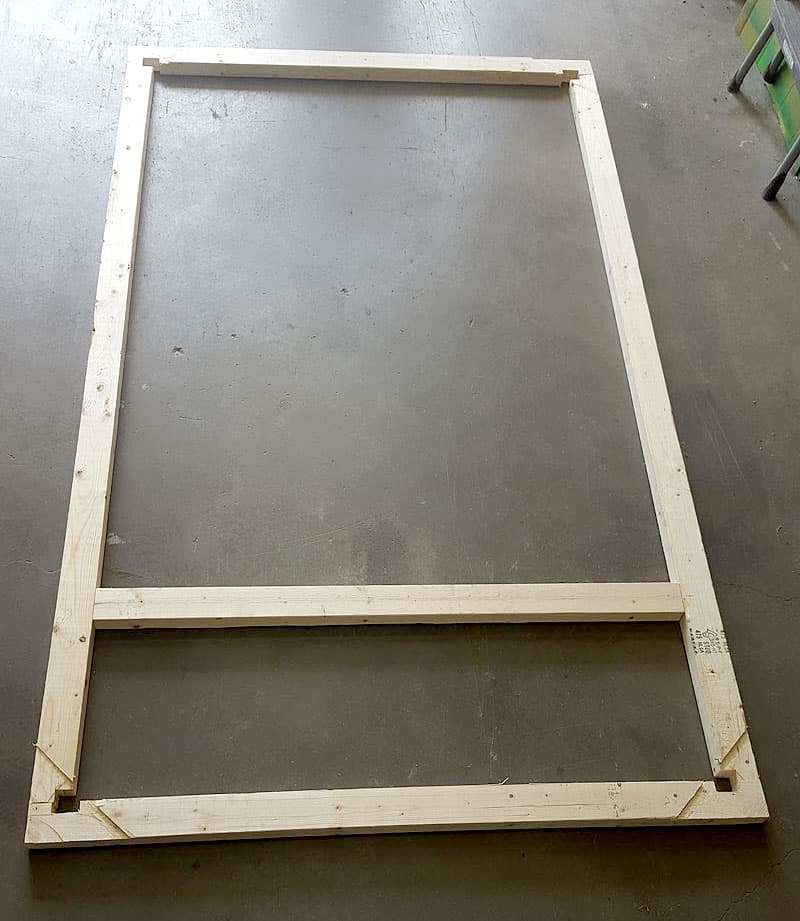
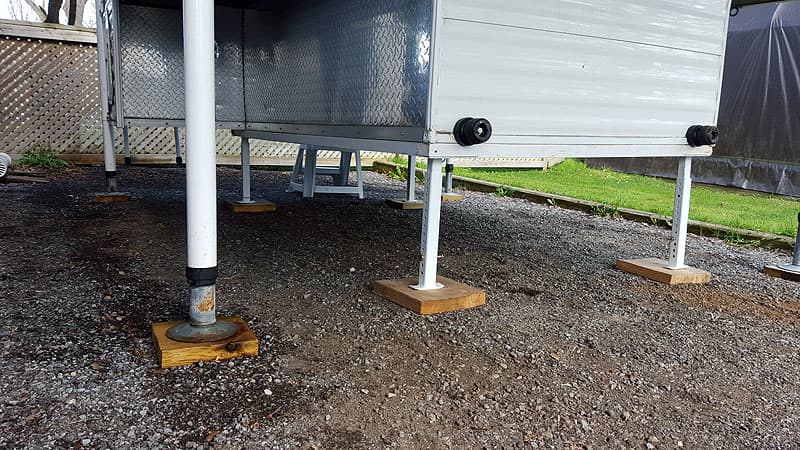
I started by building a wood frame made of 2x3s to gain the 1.5-inch lift we needed. Then, I cut out the wood to accept the steel inserts which will become the receiver for adjustable support legs.
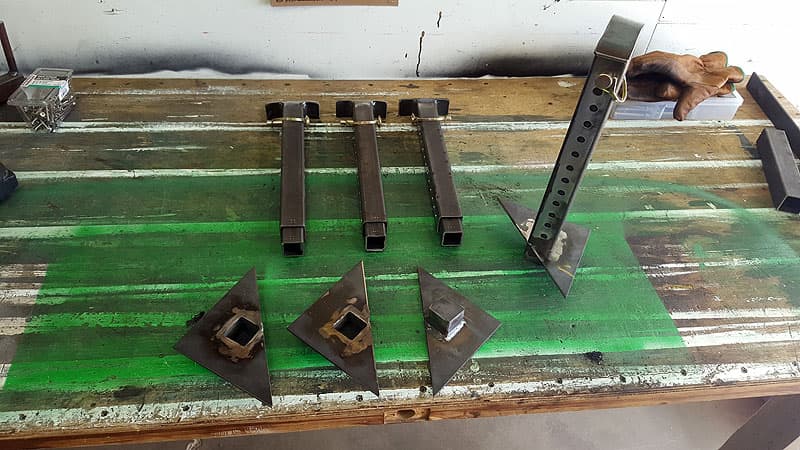
Afterwards I constructed the support legs out of 100 wall 1.5-inch and 1.25-inch tubing at 13-inches of length giving me a maximum of 22-inches in height when extended. Holes were drilled every 7/8-inch at 3/8-inch diameter to later allow for a 3/8-inch pin to be installed to hold position.

On the inner tube (1.25-inch) we drilled the bottom hole at 5/8-inch from the bottom to align with the multiple outer tube holes. This allows you to have 7/8s adjustment by going through the aligned holes or 3/8s adjustment by going through the outer tube hole and not the inner tube hole. The pin rests on the bottom on the inner tube instead of the aligned hole.
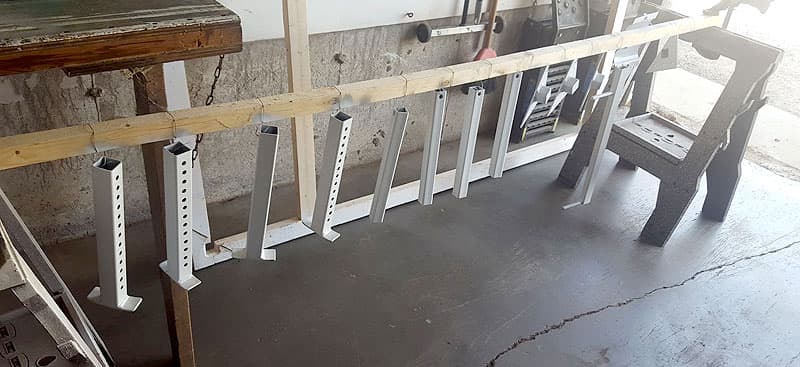
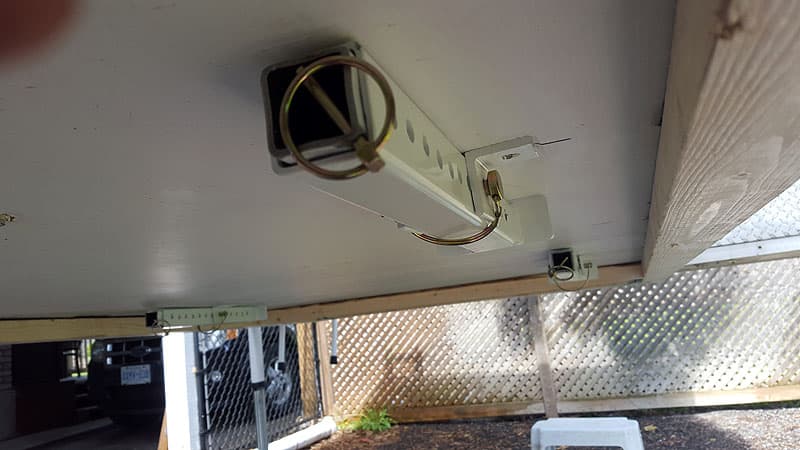
Next, we built small feet to be placed on wooded blocks for better weight distribution. We needed a way to store the legs when loaded so we installed 1.5-inch angle iron with holes to the underside of the camper.
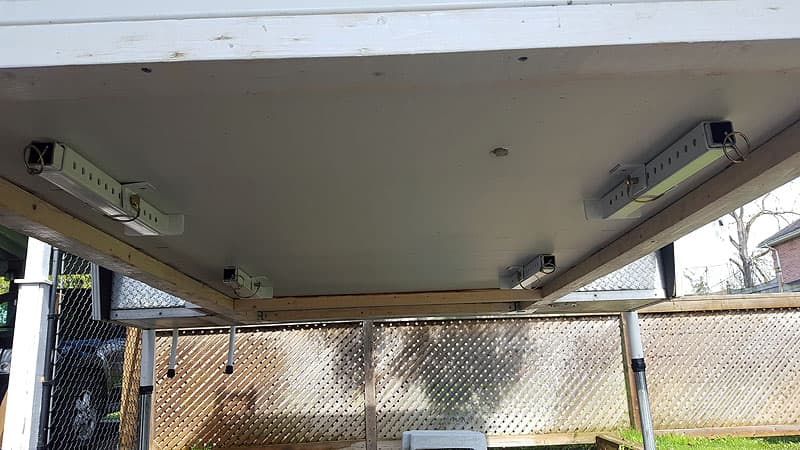
When loaded in the truck, these are tucked up just high enough to not contact the bed of the truck as we dropped the wood 2×3 spacer down 1/8-inch using the existing aluminum angle and added small spacers at every floor joist for added support.
Everything was then painted in white to match up with the camper and installed. Another cross member was added later on in the middle position for added support. Not because it was lacking, just because we had a piece of wood extra, so why the heck not? That is not seen in the photos.
If you can weld and metal fabricate, this is an easy job. You could also have a shop build the pieces required for you.
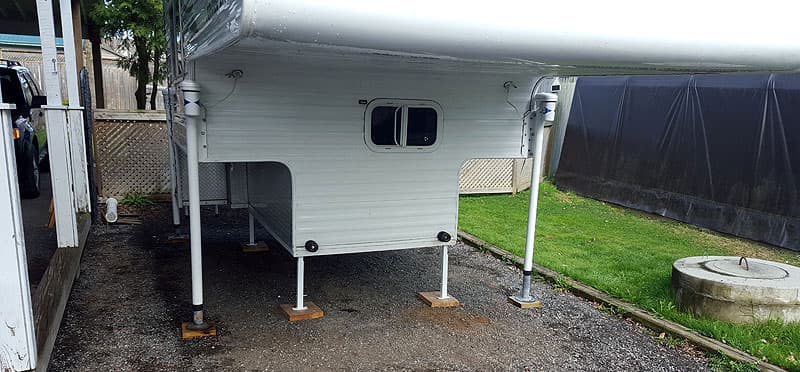
This system works really well. We stay in the camper when it’s not on the truck with all four power jacks down just enough to have weight on the four new adjustable legs. We always try to have the adjustable legs at their lowest point to reduce any lateral movement. We distribute the weight evenly to the best of our ability by adjusting the power jacks. There is almost no movement with two adults and a child staying inside. We are very happy with it and its light weight.
It took me 18 hours to complete this modification and cost me $125 CAD. In my opinion, the skill level of this modification is extremely hard.
July 2015 Winner – EZE Gutter To Keep Dirt Off Windshield
12. Jim Kauffman, Fernandina Beach, Florida
2015 Dodge 5500
2014 Eagle Cap 1160
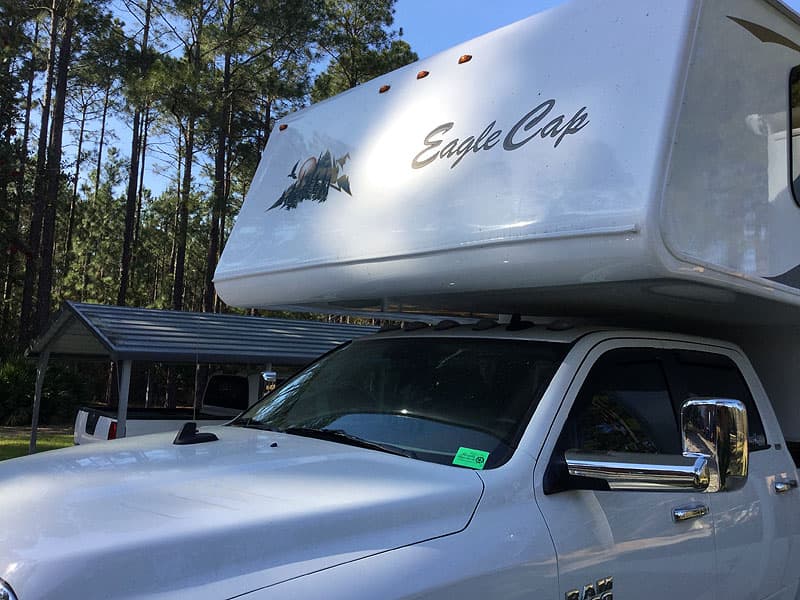
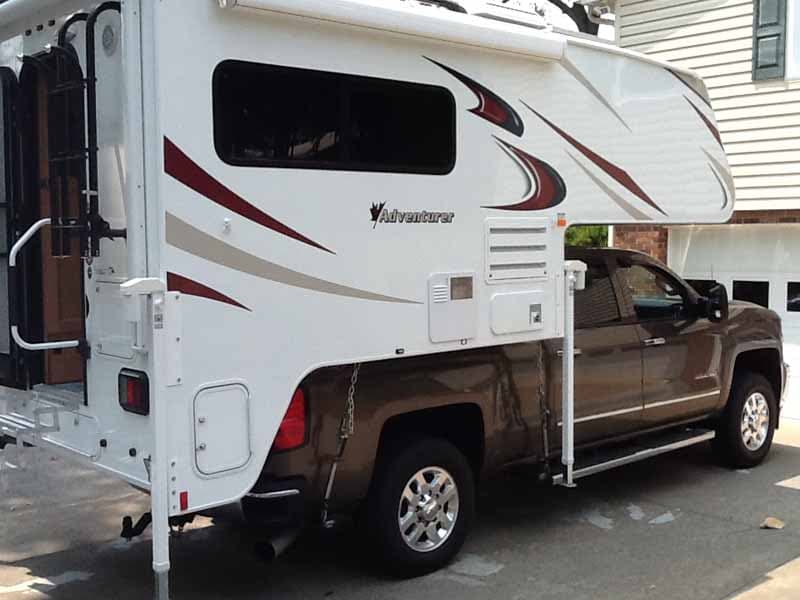
I had problems with camper wax and bug juice on the truck windshield after night dew or light rain. The stuff would mess up the windshield and required a degreaser to get it clean. To solve the problem I used a EZE Gutter sold on Amazon.com and at Camping World for around $26.
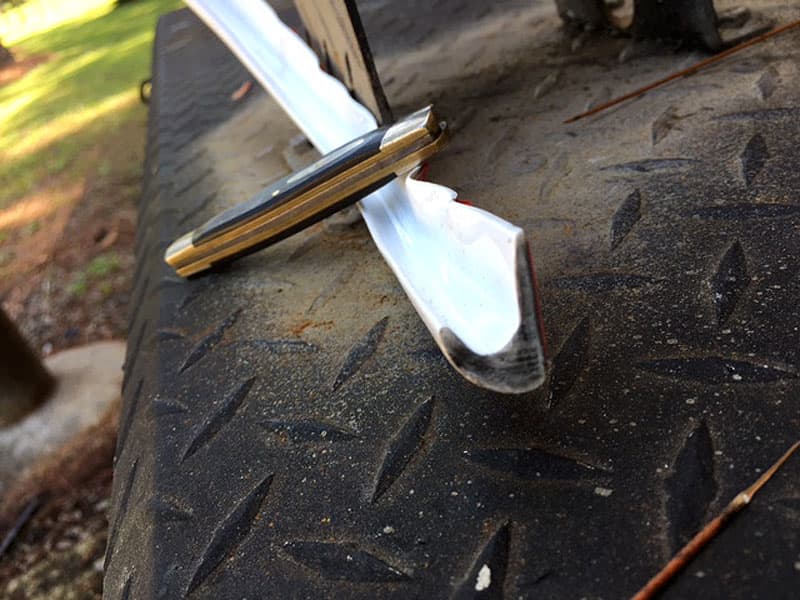
The piece above I had left after I cut it to length. I installed it with a little bit of slope so that the water will run out the trough as shown in the photograph.
The EZE Gutter works fine and was easy to install with the self packing tape that came with the gutter. It works great. Even in a hard rain, water is diverted off to the side of the camper rather then down on the windshield. There is no more mess on the windshield.
It took me two hours to complete this modification and cost me $26. In my opinion, the skill level of this modification is easy.
The vote is now over. Thank you, Jim Kauffman (#12 above), for having the best mod of 2016!