We received dozens of Level 2 truck camper mods including back-up cameras, dinette table changes, airfoils, and much more. Here’s part one of Level 2, and a stuffed moose.

Most mods begin with what can only be called a staring contest. It goes a little something like this:
1. Person goes into camper.
2. Person sees something in camper they do not like.
3. Person stares at that something for extended, sometimes awkward, period of time.
4. Spouse finds person in camper, staring at something. Spouse says, “Stop staring at the camper, it’s disturbing the dog. Fido is anxious.
5. Person finally has light bulb moment, fixes something, and enters TCM Mod Contest.
If you can relate to this story, you’re not alone. A lot of truck camper owners have anxious dogs. But since we can’t stand around talking about your anxious dog, here’s the first part of the Level 2 Top Mod Contest entries. A winner for Level 2 will be announced next week with part two of Level 2.
Level 2 Medium Mod Contest Entries Part 1
Michelle Curns, Oregon
2008 Ford F450
2014 Arctic Fox 1150
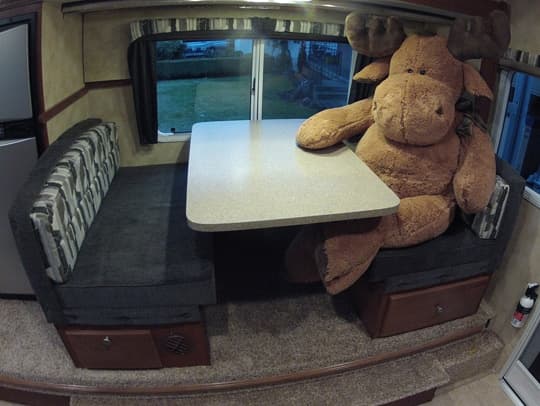
Above: Before picture of the dinette
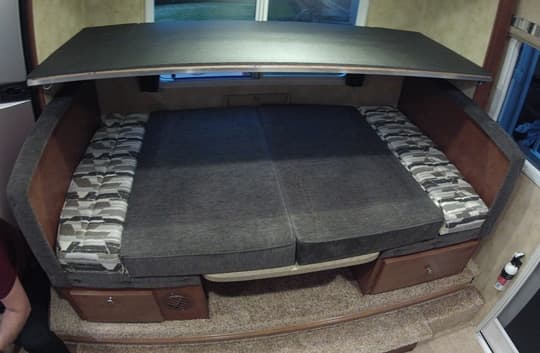
Above: How the bunk looked before
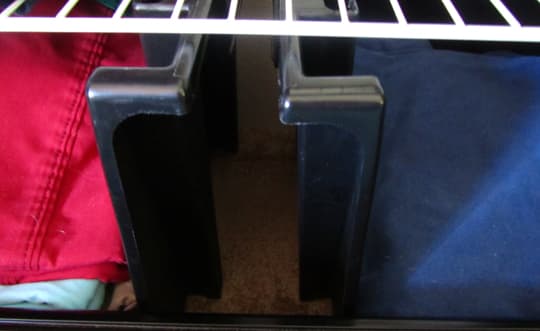
We have a two year old nephew that we want to take camping. I was concerned about him rolling out of the bed, so I made a removable screen that wrapped around the front and part of the top of the dinette once it’s been converted into a bed.
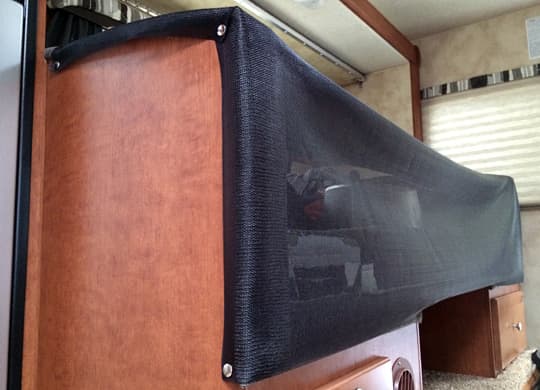
Above: The screen is removable
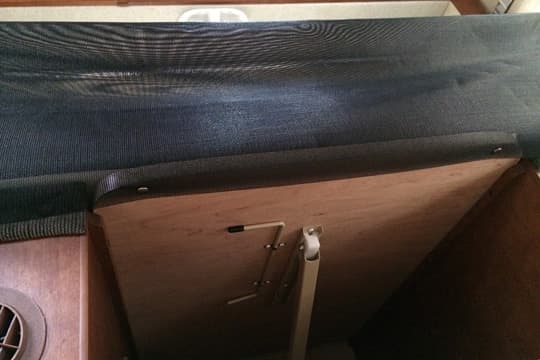
Above: Underneath there are snaps, using the dream dinette as a platform
I used pet proof door screen and heavy duty screw in nickel snaps mounted with stainless screws to prevent rusting in case of humidity. It worked out so well. We now use it every time we travel for keeping the dogs off the bed and for keeping all our gear from rolling off the bed.
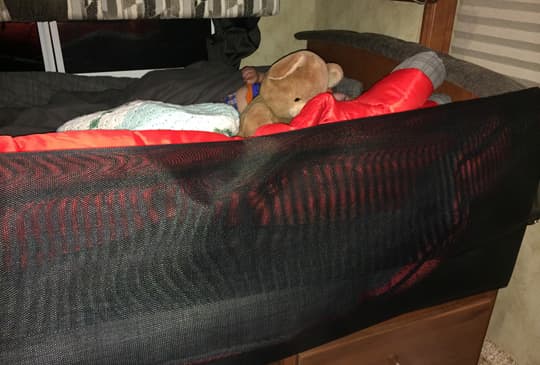
Above: Nephew using the snapped bed
Pete Weigman, Oregon
2012 Toyota Tundra
2013 Four Wheel Silver Spur Hawk
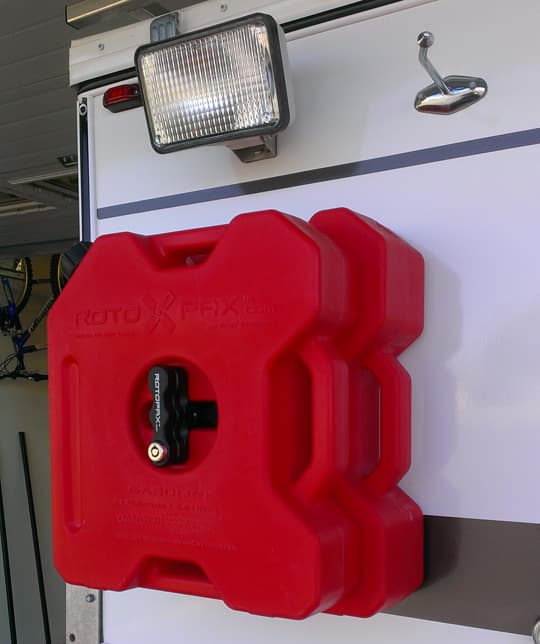
I have a 2012 Four Wheel Camper Hawk pop-up and find myself off the beaten path quite often. Many times I’m way out in the desert of eastern Oregon or northern Nevada. Gas stations are few and far between out there, so it’s peace of mind to have five extra gallons of gas for the pickup.
First, for this mod, I cut the main power to the camper, and shut off the gas. I bled the gas out of the lines by lighting the stove and letting it burn off. I confirmed that I was not plugged in to any power source. If you are, and spark something while handling the gas, a big boom may happen!
I removed the fascia control panel from the top of my Dometic three-way refrigerator and then removed the door from the unit. Next, I removed the little rubber plugs exposing the refrigerator mounting screws, and unscrewed them completely. My unit had only four mounting screws there, which made the install very solid into the cabinet.
I then used an Exacto knife and removed the silicone seal from the rear of the refrigerator. If you have a silicone seal, it acts like glue surrounding the refrigerator.
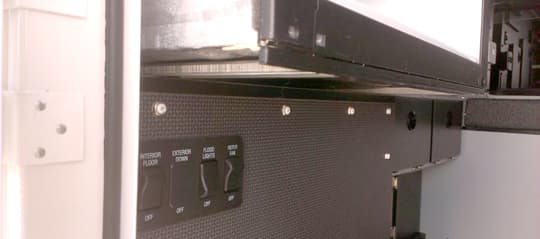
I opened up the maintenance panel on the outside. I recommend wiring the access panel up to keep it out of your way. Then I removed the two 12 volt wires going to the control panel noting exactly where they were hooked up. I simply snapped a photo of them with my phone; a picture is worth a thousand words!
After the removal of wires, I could unhook the gas line, being careful not to twist any of the brass tubing or manifolds. I unhooked the moisture drain hose and removed the wind screen covering the burner (if installed).
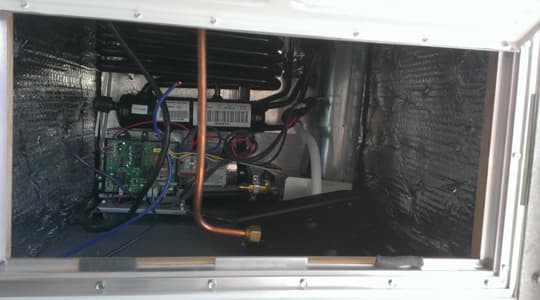
With somebody inside (recommended) I could now push the unit out a bit making sure I had enough 110v cord pulled through the cabinet to allow the refrigerator to slide about twelve inches forward. The camper’s back-wall is exposed where the nuts are at.
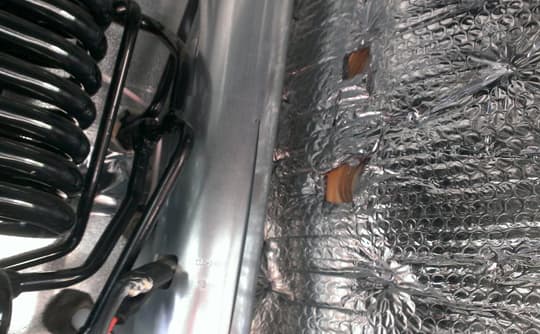
I felt with my fingers by pushing the insulation and seeing where the holes were. When I had them, I just cut away the insulation. Later I used some metal ducting tape to re-cover those holes back up.
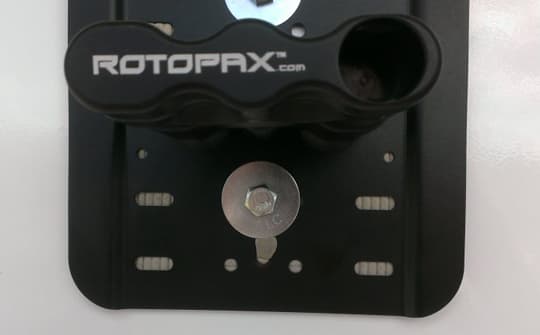
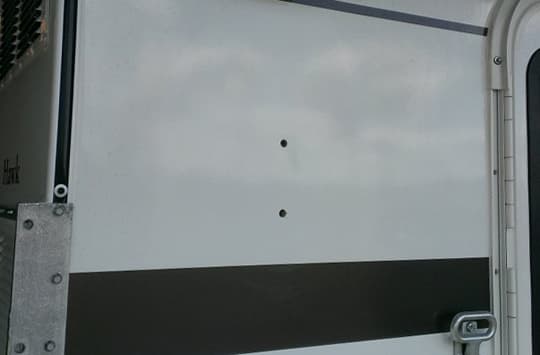
With that completed, I removed the factory option rear wall step from behind the refrigerator, caulked the Rotopax mount and bolts a bit, and installed the Rotopax mount.
When doing this, I was being careful to seal off any areas where water or dust could migrate into the camper.
I made sure not to over tighten the nuts/bolts, and used Nylock nuts so they don’t vibrate loose. I taped up the holes with metal ducting tape and re-installed everything. Then, I tested the refrigerator to make sure all worked well!

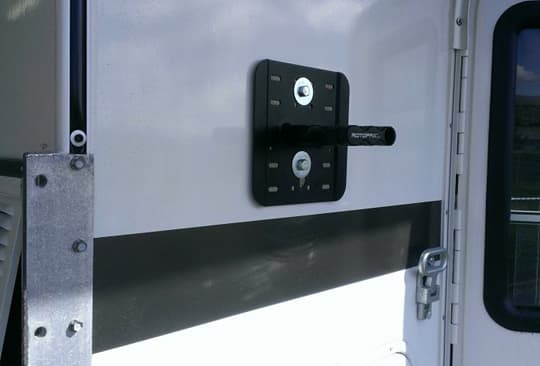
You can mount your Rotopax cans in any configuration you wish and enjoy the results.
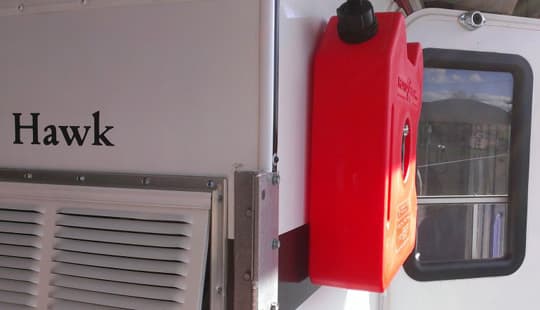
I recommend Four Wheel Campers could start offering this as an option from the factory. A camper with this mod could easily carry up to seven gallons like I plan on doing (in various configurations). If the steps can hold a 225 pound guy like me on them without even flexing, they should consistently be able to hold about forty-five gallons of gas while bouncing down the trail.
Glenn and Caite Blount, Texas
2012 Ford F350
2004 Lance 1010
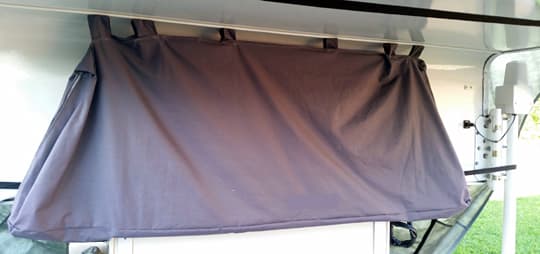
The storage bag we made fits perfectly between the camper and the rear window of the truck. We attached it by screwing the tabs of the bag to the trim strip of the camper.
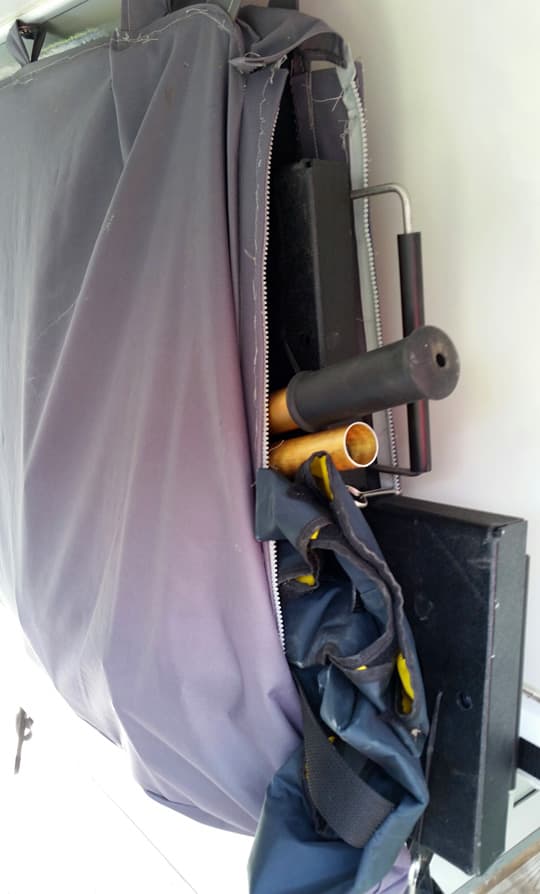
We made the storage bag from durable Codura material making tabs on the top and two large zippers on each end with a gusset on the bottom.
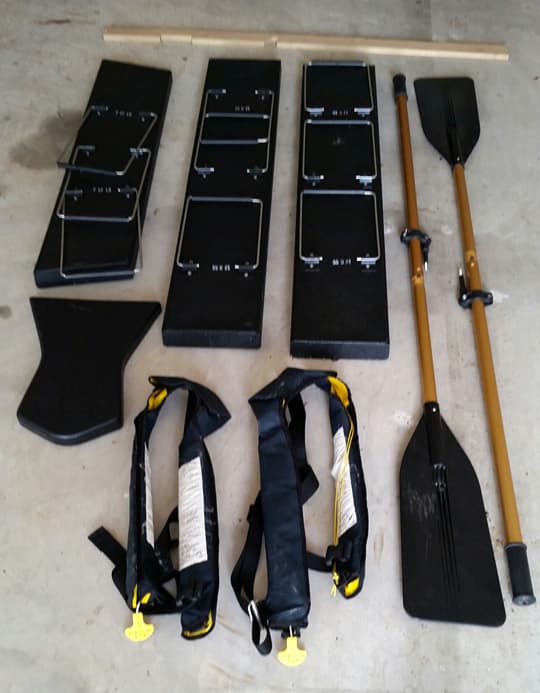
We are able to store our Porta-Bote seats, oars, and lifejackets in the bag. Above is a picture of all the items we put into the bag so people can see how much room is in the bag. It works on and off the truck. This keeps these items out of the truck and camper.
Charlie and Jeannie Coushaine, New Hampshire
2001 Ford F350
2012 Chalet DS116RB
I installed a Haier HLP21N apartment-sized washing machine in my Chalet DS116RB truck camper for use on our two year trip around the country, and it works great!
We do a small load of laundry each morning while eating breakfast, and then hang to dry our clothes all day while we are out hiking and exploring. When we come home, our clothes are ready to fold and put away. This takes no time out of our busy schedule for laundromats.
I mounted the washing machine to the end of the island in a place that isn’t affected by the opposing slide-outs. It also keeps it out of our way while we’re walking around the camper.
Mounting it to the end of the island also keeps it firmly in place while traveling, and allows for easy access to hot and cold water to fill the washer, and the sink drain for draining. Additionally, this location allows for easy access to a ground fault receptacle to draw 110V power. All in all, this install has worked fantastic!
Paul and Marceil Gathany, Ohio
2009 Chevy Silverado 1500
2007 Sun Lite
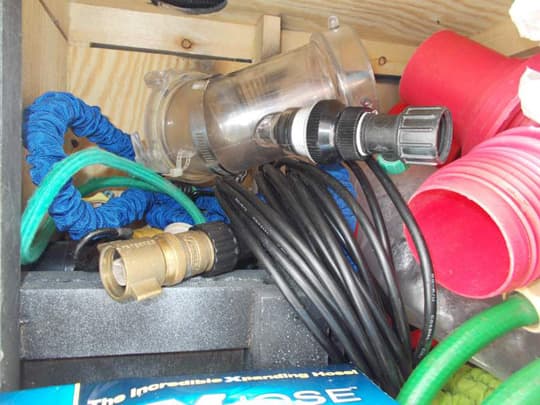
Traveling and camping in an eight foot truck camper is cause for being as efficient as possible with space and weight management. One frustration for me was the need to regularly stow the water hoses, TV cable line, electrical and sewer stuff, and associated connectors inside of the camper.
Our Sun Lite camper is designed to work with either a 6’6” short bed or 8′ long bed truck. Our truck is a 6’6” short bed.
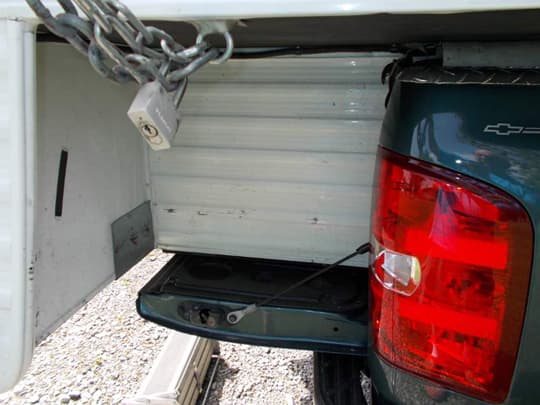
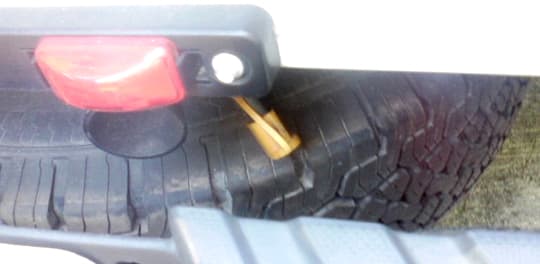
Above: This is the space that needed to be utilized
During the long cold winter, I started thinking about how I could utilize the space between the taillight and back of the camper. On the passenger’s side, we have been carrying a 2,000 watt gasoline generator. A storage unit with an access door was the answer for the driver’s side. The passenger’s side is where the generator is normally carried.
I made a simple box, from of 3/8-inch plywood to fit the space. It was glued and screwed to three-quarter inch by three-quarter inch frame material. To size an access door to the space and save on cost, I bought an outdoor shower unit online. The shower parts were discarded to make use of the door. A hole was cut in the side of the box to allow the door unit to fit.
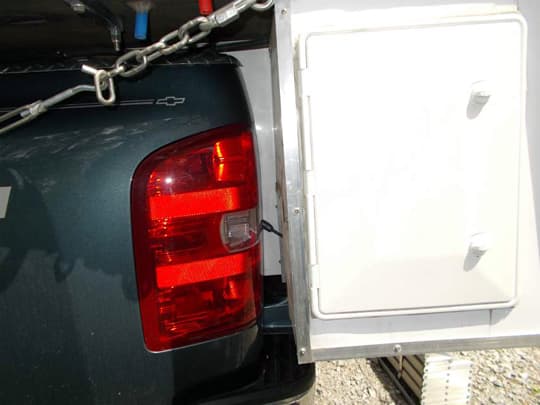
Some RV aluminum siding was located to cover the box. It was applied with small nails. During the construction of the box and applying the aluminum, in addition to glue, a generous amount of RV sealant was used on all joints. Before placing the trim pieces, the aluminum was primed and painted white. The access door was mounted and sealed.
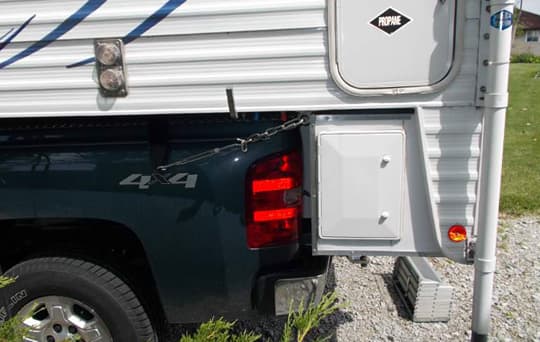
The unit fits nicely and solidly into the space behind the taillight. It’s fastened to the bottom of the overhang with two carriage bolts on the bottom of the unit through the side of the camper.
We traveled with the camper this past Spring. This modification has been a welcome convenience for those items that tend to be wet and sometimes dirty. It’s water tight and rides along unnoticed.
Bill Harr, California
2005 Toyota Tundra
2013 FWC Shell with custom inside build
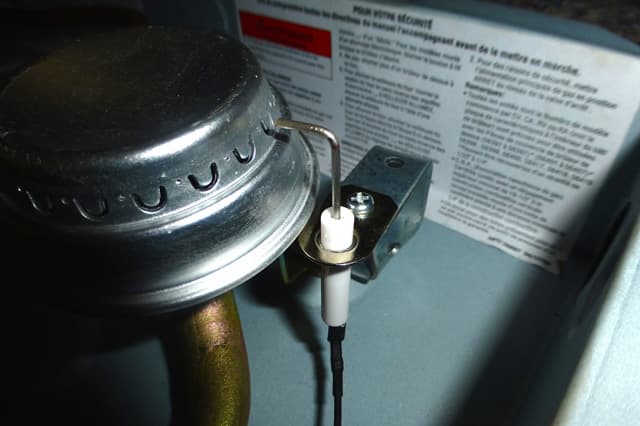
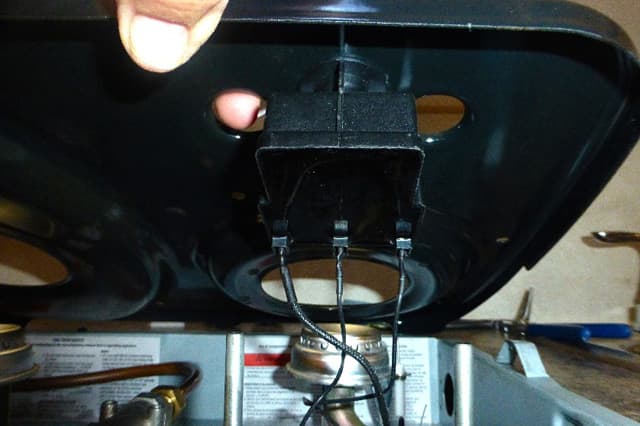
My wife and I were tired of needing a match to light the stove in our Four Wheel Camper Hawk. I purchased a universal barbecue ignitor from Walmart for around $20. I measured and made brackets to hold the ignitors by the burners.
 |
 |
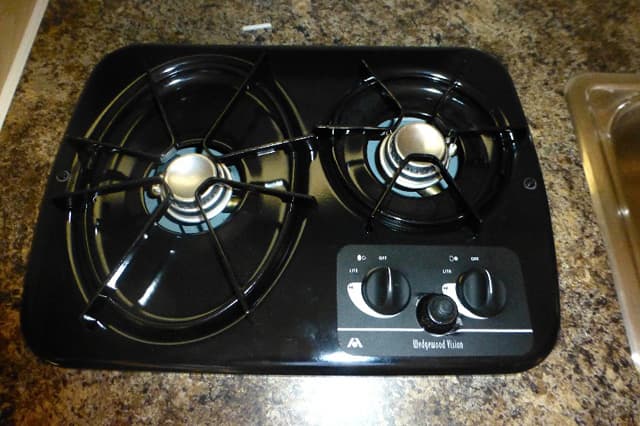 |
I mounted the module between the burner control knobs. This solution is working great and should be included in the stoves.
Daniel McNabb, New York
2003 Dodge Ram 2500
2007 Northstar 9.5 Igloo U
I decided to make a mount to keep my barbecue outside my camper. The bracket swings out to keep the heat away from the camper or out of the wind. I tapped into my truck camper’s propane to feed the barbecue. The mount is made out of 6061 aluminum. I machined all the swivel joints and TIG welded everything together. It has been in use for three years and is still solid.
Dave and Dora Donovan, Idaho
2007 Chevy Silverado 3500
2012 Chalet TS116
Our camper did not have a special place for the sewer hose. I do not like just placing the sewer hose in a storage compartment. A trip to Camping World solved the problem. I purchased two of the longest sewer storage tubes and then mounted one on each side of the camper. One is for the sewer hose and the other one is for my fishing rods.
You do have to make sure that there is room under you side overhangs for them after your camper is loaded. They worked on mine perfectly.
Jim Pippin, Florida
2007 Dodge Ram 2500
2008 Lance 825
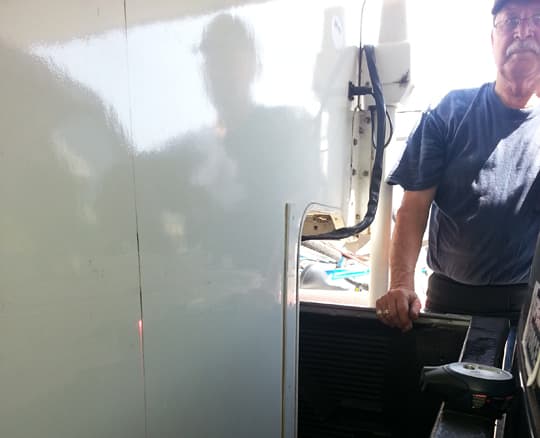
My modification is using a laser level to aid in loading my truck camper. Using Velcro we attached a Ryobi battery powered Air Grip Laser Level (around $19) to the center of the lip on the rear wall of bed of our pickup truck. We had measured and found the center of the front wall of our truck camper and marked it.
With the beam on (it creates a long red, easily seen line) we are able to back up precisely positioning our truck under our camper. We remove and store the laser just before we back in those last few inches. This has made loading our truck camper much easier.
Michelle Curns, Oregon
2008 Ford F450
2014 Arctic Fox 1150

Above: The screen door before the modification
I reinforced my screen door to protect the screen from my dogs tearing it out. Everyone knows pets and screens don’t mix, be it windows or doors, which is why every hardware store sells pet proof screen. This pet proof screen only prevents them from tearing it to shreds as they pull it out and does nothing to keep the screen in the delicate aluminum door frame.
I researched doggie-proofing RVs and found the only other alternative published was to add plexiglass to the door. Blocking air flow and adding an unsightly visual of dog slobber did not appeal to me, so instead I found decorative, perforated sheet metal that I could cut to fit quite easily into the already existing door channel.
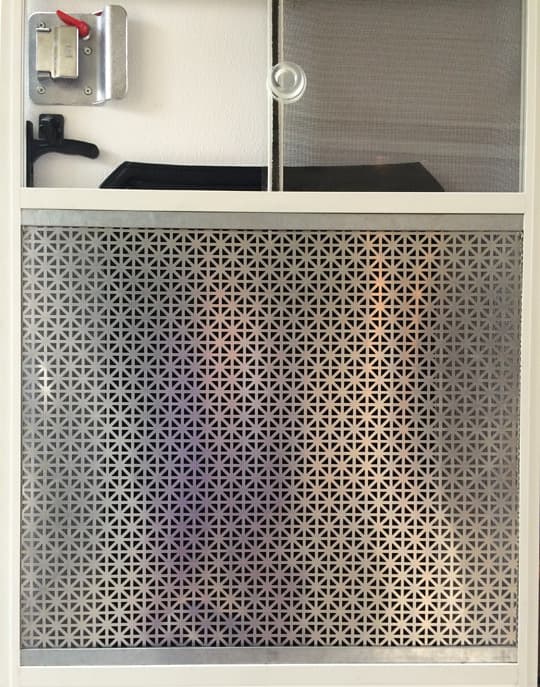
Above: The screen door after the modification
The dogs can’t claw it out and the door’s original screen remains intact protected behind the sheet metal.
Joe Dasilva, Jr., Michigan
2013 Ford F350
2015 Lance 1050S
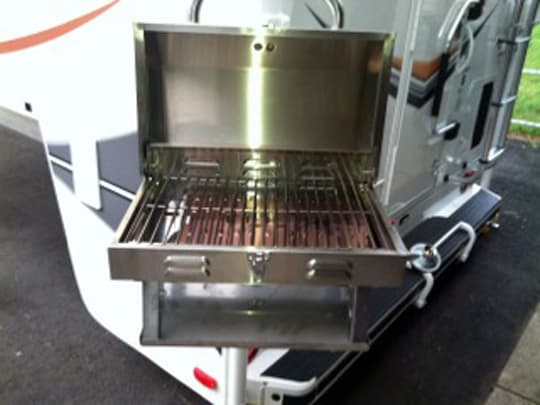
I needed a grill holder on my truck camper. So, I had an idea that I put it on paper. I made it and it works great.
It can be moved up and down and side to side.
Jeff Dieter, New York
2013 Chevy Silverado 2500
1999 StarCraft 952
My wife and I just got into truck camping last year and we were so excited to find a 1999 StarCraft 952. We enjoy the camper, but thought we would update it over the winter.
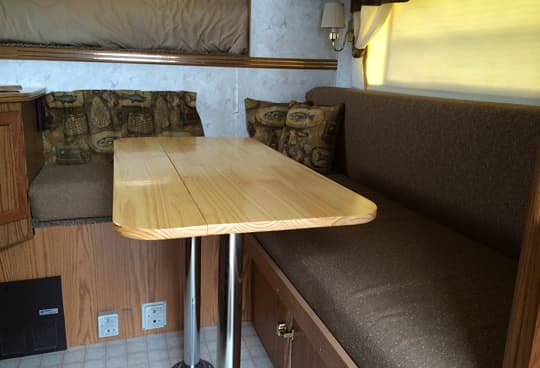
As everyone with a truck camper does, we try to make every inch of space count. We thought having a little more walking space would help.
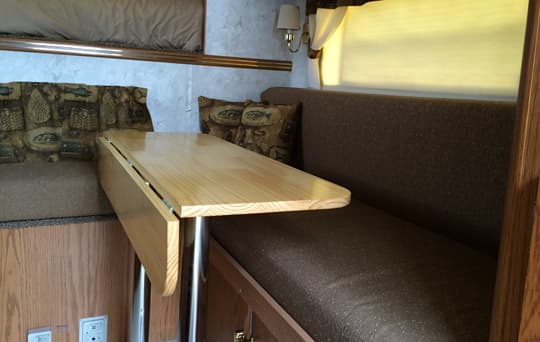
One idea was a drop leaf table which, when dropped, gives six inches of walking space over the original table. We also thought the real wood butcher block would add to the outdoors feel we were looking for. One added benefit was the loss of about ten pounds from the original table.
JoJo and Alain Larose, Quebec
2011 Ford F450
2005 Lance 1181
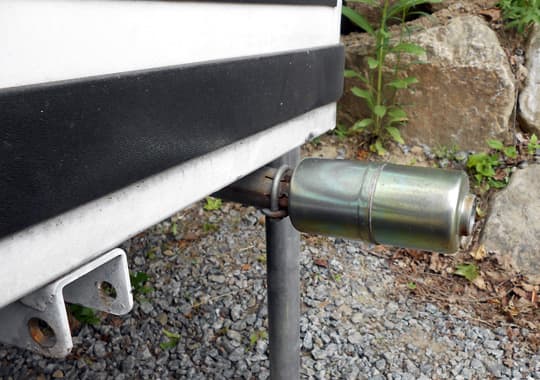
I made a silencer for my Onan 2500 LP generator with a ten horsepower snowblower muffler that was ten dollars. I put it at the end of the generator muffler tube. This is not restrictive and it is a lot quieter. We have used it for many years!
Bob Hall, California
2005 GMC Sierra 2500
1996 Lance Squire Lite 8′-6″
My camper only had one propane bottle. I added one more for my convenience. Now I don’t have to worry about running out in the middle of the night.

The second bottle is a ten pound bottle so I am saving a little weight. The bottle is attached to the camper by a three-eighths inch bolt from inside the camper wall through the collar on the bottle with a large wing nut. It sets in a plywood base.
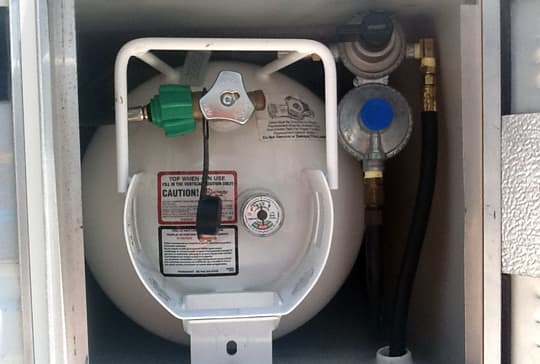
I bought new hoses and a new auto switch regulator. The regulator is hanging from the top of the propane bottle box.
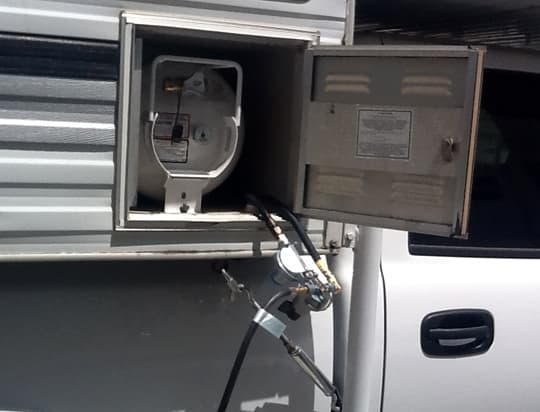
The regulator and hoses swing out of the box to clear the main bottle for removal.
Bob Morrissey, Georgia
2011 Ford F350
2012 Lance 850
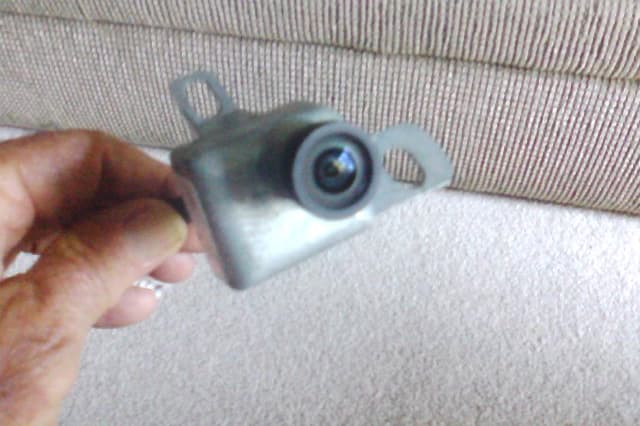
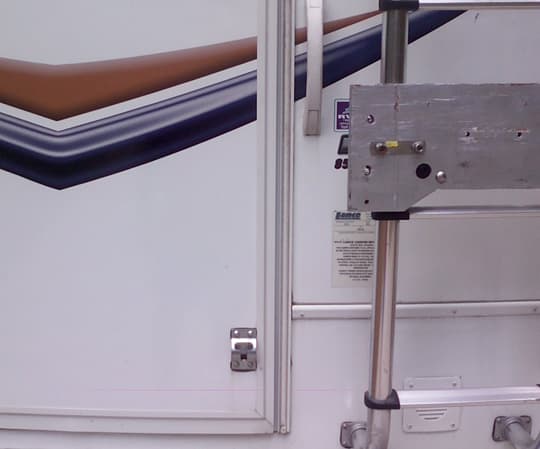
With my 2012 Lance 850 truck camper, it is impossible to use my back up camera since the tailgate must be removed. This is a safety concern since this model came without the optional entry door window and Fresnel Lens option.
 |
 |
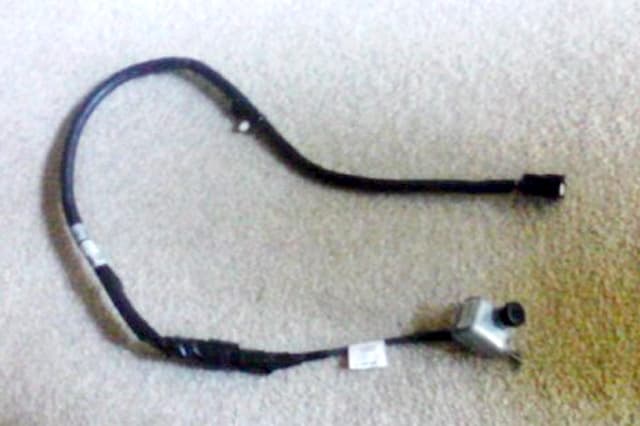 |
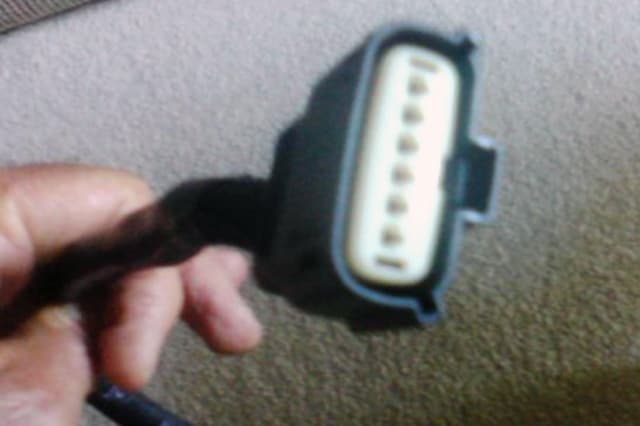
I bought the camera and pigtail (two separate items) from Ford and now have my camera available on the back of my Lance. I made a wooden bracket for the camera which attaches to the very sturdy ladder. The forty-five inch pigtail and camera easily reaches since I have only a one foot overhang. The wires could be lengthened if need be.
My total cost was $162 for both the camera ($132) and the pigtail ($30). I would assume that this can be done for Dodge/Ram, Chevy/GMC, and Toyota trucks as well.
One alternative was to take the camera and pigtail out of the tailgate. This alternative would have saved a bunch of money. However, when I use the 2011 Ford F-350 dually without the Lance, I would not have the camera in the tailgate.
Another option was to buy only the pigtail from Ford and then buy a less expensive license plate holder camera from the internet. I found one for $20 on eBay that would work. The total expense would be $50 and you would have many more feet of wire if your truck camper extended way out over the rear bumper. The drawback is that you would have to cut off the connecting plug for the pigtail and solder the wires together. Good luck on getting a schematic of the pigtail from Ford as they consider it proprietary. However, the schematic is out there on the internet.
If you own an older model truck without the camera in the tailgate, you can buy a dash mounted monitor and run a wire from the license plate mounted camera under the truck to the monitor. Also, if you pull a large trailer with your truck camper, this approach would work there as well.
Doug Jenkins, Prince Edward Island
2003 Ford F250
2003 Palomino 8801
Unfortunately, I don’t have a before photo of the original table that came with the camper. It was rather annoying as it was only approximately twelve inches by thirty inches – hardly enough room for two dinner plates. Plus, it was situated in the already small, galley area behind the sink and stove. We were forever bumping into it. Fortunately, it had an early demise and conveniently broke.
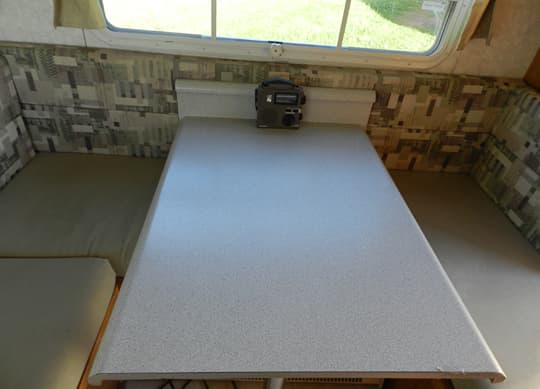
We had just redone our kitchen countertops and we were able to salvage the old bar top section and put it to new use. We just removed the hardware from the broken original table and reattached it to this custom made table top.
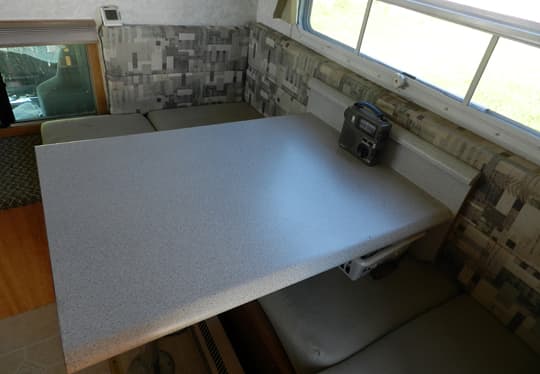
It’s perfect for the two of us because it’s steady, secure, and can be easily removed if the dinette is needed for an extra bed. It’s practical and, best of all, it didn’t cost us anything! We can now happily entertain another couple for dinner, cards, or whatever.
Jesse Taylor, Pennsylvania
2006 GMC Sierra 2500 HD
2005 Lance 815
I built a removable extension shelf in the kitchen area that we can store under the mattress while we are driving. When in place, it more than doubles the counter space.
Bill and Sue Billyard, Ontario
2000 Dodge Ram 3500
2000 Real Lite 11.5
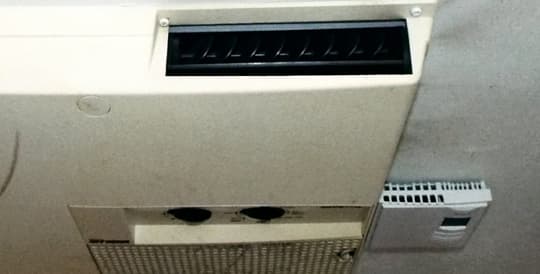
When we bought our fourteen year old Real Lite Camper four years ago, we were pleased to see it had a strip heater in the roof air unit and it worked. Unfortunately, we found out later it was an uncontrolled heater and had to be turned on and off manually.
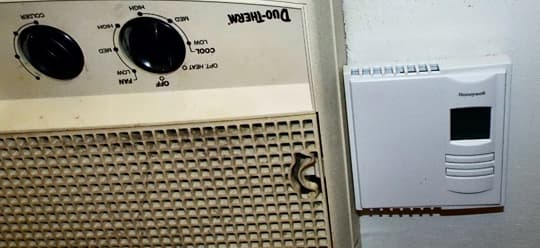
We found a digital thermostat designed for a 110 volt electric baseboard heater which we could use. Being digital, it did not have to be vertical so we could mount it on the ceiling beside the roof air unit. We broke the circuit to the strip heater and wired the thermostat inline. The thermostat is only powered up when we select the optional strip heater. We can then select the temperature we want and leave it. The roof air fan runs all the time and the thermostat only controls the strip heater.
Jerry Comfort, Michigan
2012 Ford F150 Eco-boost
2013 White Water 865
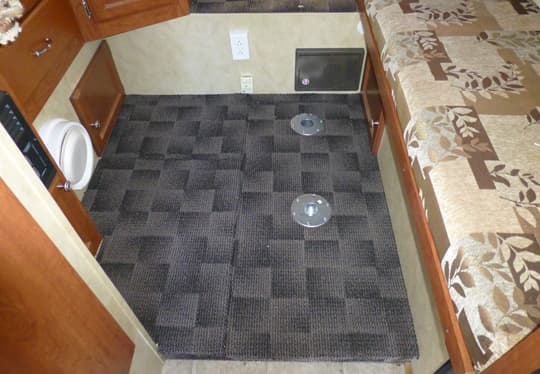
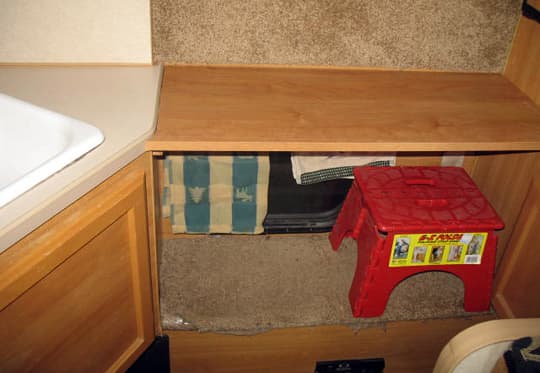
I am always looking for ways to add storage room for my truck camper. The camper came with a raised floor with storage for the table only. The rest of the floor was covered up solid.
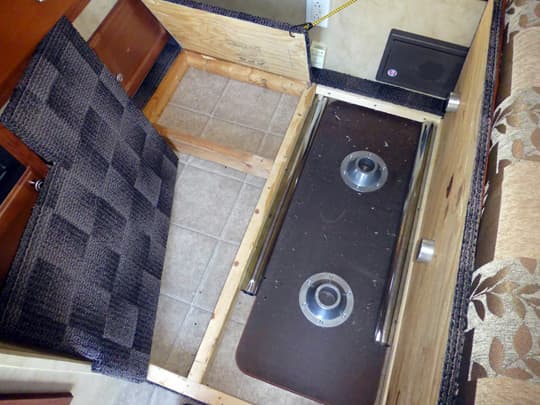
I simply took the floor apart and started over, keeping the table storage intact. I cut out more area of the raised floor to get added storage under the carpet floor. I can store a water hose, electrical cord, shoes, or other items. I now have more storage room and still have the removable table.
Jim and Anne Beach, Alberta
2009 GMC Sierra 3500 HD
2013 Arctic Fox 865
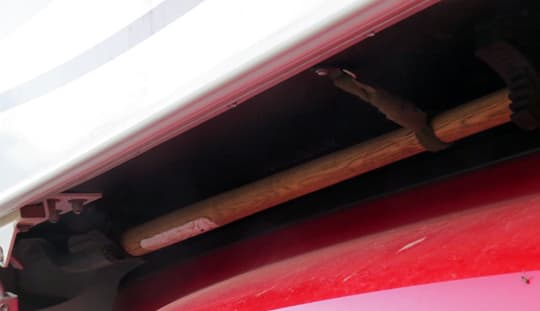
Many places we travel the Northwest Canada and United States require us to carry water and a shovel if we go off-road in forested areas. You will always have water in you camper, but maybe not a shovel. I like to use a long handled #2 shovel when possible, as it makes for less strain on the back. Where do we carry such a beast on the truck camper?
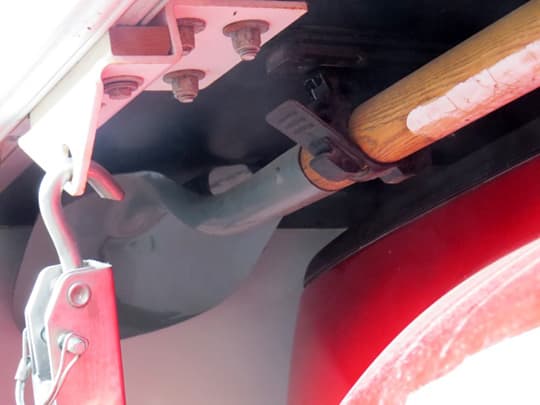
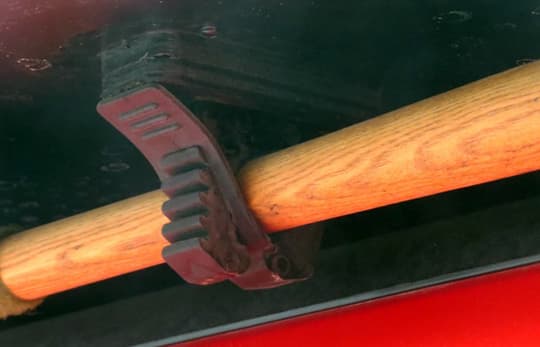
There is a lot of unused real estate on the underside of the truck camper overhangs. It is an ideal place for a long handled shovel. I used two one-inch to two-and-a-quarter inch Quick Fist rubber clamps on the underside of the truck camper over hang and three-quarter inch plywood blocks were need as packers to get the right clearance for the shovel. I also installed a velcro strap as insurance. The Quick Fists are available on Amazon for about $11 a pair, they are made in USA, are very durable and strong.
Now we comply with rules and filling those gold pans got a lot easier with a long handled #2.
Cindi Goodrich, California
2006 Chevy Silverado 3500 dually
2008 Lance 1191
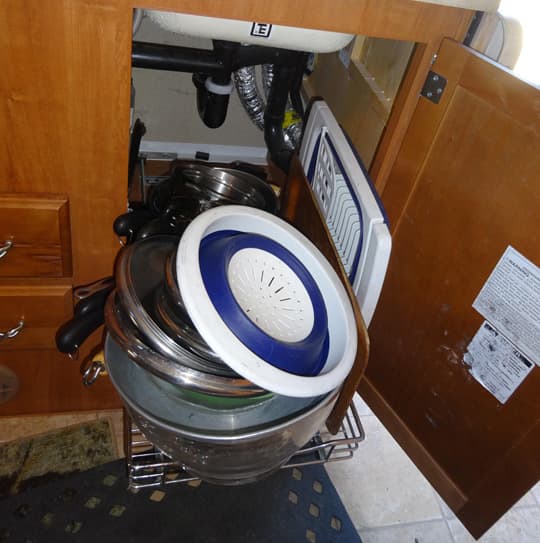
The only place for large pots, pans, and bowls was under the sink, so I installed a pull out drawer for easier access. The drawer was purchased at Bed Bath and Beyond and is a perfect fit.
Rudy Drexler, Vermont
2006 Chevy Silverado 3500
2012 Arctic Fox 1150
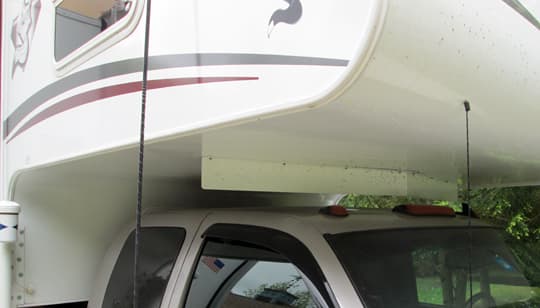
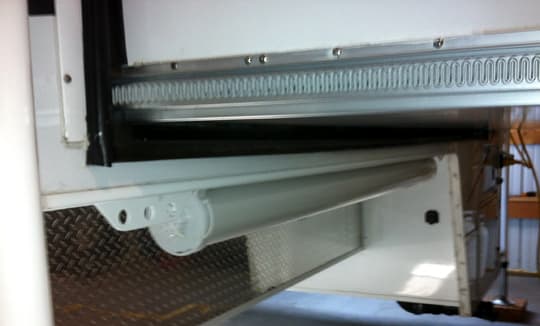
We have a bug, wind, and noise issue. There’s a large gap between my Arctic Fox camper and the Chevy Silverado’s roof.
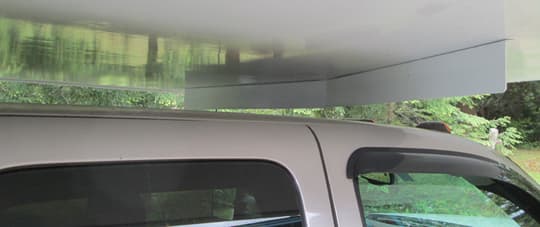
A lot of air gets trapped between camper and truck. This creates some lifting of the camper, oil canning, and noise.

To eliminate both issues and reduce bugs on the camper wall, I simply made a wind deflector with a fifteen-degree angle by 4-inch drop bolted to the underside of the camper overhang in the position shown, and “Voila”, clear noiseless motoring was my the result.
Audrey Ruccio, Georgia
2008 Ford F450
2008 Host Everest

Our Host Everest came equipped with a large wardrobe closet across the nose of the camper, in the bedroom. Clothing storage was supplied by three hanger bars that ran up and down the sloping roof.
Not being one who likes to spend time and aggravation hanging T-shirts and jeans on clothes hangers, I devised a simple set of hanging wire shelves for the space. There is room under the shelves for storage bins that easily hold jeans, towels, extra bedding, and more.
The shelves required two pieces of wire shelving cut to length, some small chain, s-hooks, and a few wire ties. This installation can be easily removed by anyone who likes the idea of hanging T-shirts on coat hangers.
David Carvalho, Massachusetts
2006 Dodge Ram 3500
2013 Alaskan 8’

In an effort to quickly unload the camper, I came up with a battery box that sits over the wheel well with a connector with 250A rating wired with 2/0 cable. The box is held in place by the lip of the bed and the wheel well. No fasteners are used to hold it in place.
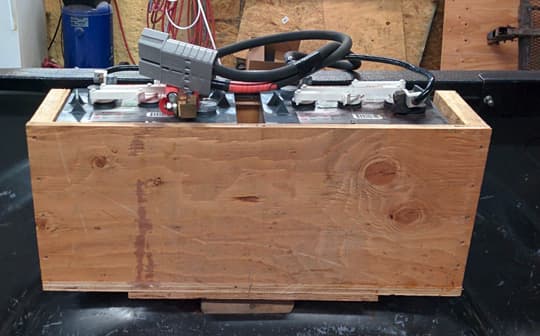
The box currently has two 6V golf cart batteries that are eight years old. When the batteries finally die, the box will be extended to the front edge of the truck and hold four golf cart batteries with a 450AH capacity.
It used to take longer to setup the batteries to load the camper. Now all I have to do is set the battery box in place and load the camper.
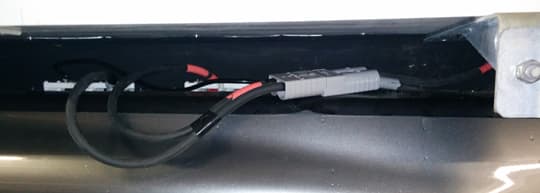
Once the camper is loaded, I just mate the two connectors. There are also external connector ports where the original camper wiring connects. These ports allow for future expansion such as solar or wind to charge the batteries.
John Stys, Brantford, Ontario
2012 Toyota Tundra
2009 Palomino 1251
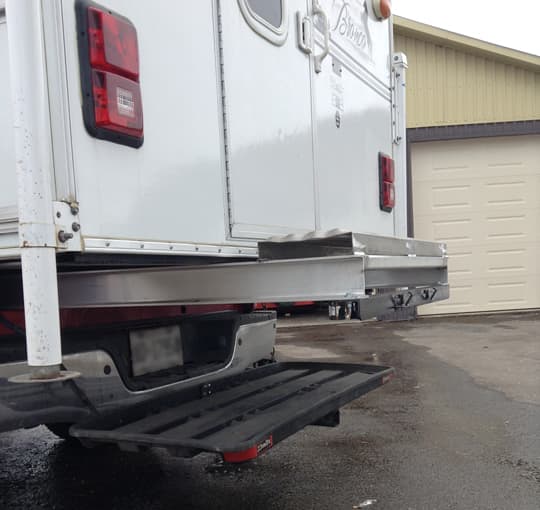
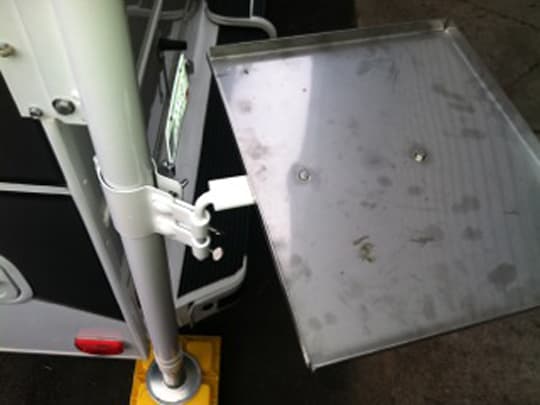
The truck bed is too deep to carry the camper. The camper needs to be raised approximately three to four inches. Most people use wood to raise the camper, but the camper overhangs the rear of the truck and the tailgate has to be removed because of the sewer connections.
To solve this, I had two very light aluminum beams extended beyond the camper to (a) make a platform to step on and (b) lower the step connection. Between the beams, a drawer is going to be installed for extra storage. Also, a luggage carrier that fits into the trailer hitch goes under the camper for more storage for a generator for our Alaska trip.
Disclaimer: The modifications above are submitted by Truck Camper Magazine readers. It is your responsibility to make sure that any do-it-yourself modification project you undertake is safe, effective, and legal for your situation.