The 2014 truck camper mod madness begins with Level 1 Big Mods including custom step systems, shell build-outs, home brew flatbeds, and more. The Level 1 winner is…

Based on our extensive research into truck camper owner behavior, we know the following Top Mod Contest articles can have some fairly intense side-effects on Truck Camper Magazine readers. If at any time you become overly excited, can’t breathe, or begin running up and down your neighborhood streets naked yelling, “I can’t wait to see the next installment of the Truck Camper Magazine Top Mod Contest!”, we honestly can’t help. This is normal readership behavior during the Mod Contest, and should be expected.
At the end of this week we will publish the first of two installments of Level 2 Medium Mods. The second installment of Level 2 and Level 3 Mods Decorative Mods will be published the following Tuesday and Friday. That’s two straight weeks of mod madness folks, so you might want to warn the neighbors. Let the streak begin.
Level 1 Big Mod Winner: Mark Siminoff, California
2005 Dodge Ram 3500
2004 Alpenlite Saratoga 935
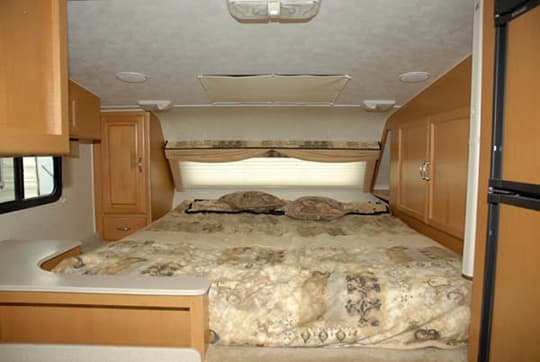
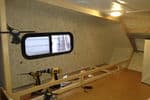
Above: The cabover before the modification
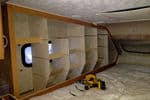
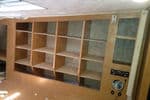
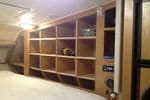
My wife, two children who are seven and nine years old, and I do a lot of extended traveling in our truck camper. We were constantly struggling with not having enough well-organized storage space. To address this need, I modified the wardrobe and cabinets on both sides of the cabover area of my truck camper so that we would have room for all of our clothing (both clean and dirty), linens, towels, toys, books, and musical instruments.
The factory installed wardrobe on the passenger’s side consisted of a small, difficult-to-access closet with a pair of doors that opened over the mattress. It only offered space for items hung on hangers or placed on the floor. The cabinets on the driver’s side were small, difficult to access, and didn’t have any shelving.
 |
 |
 |
 |
 |
 |
 |
 |
 |
 |
 |
 |
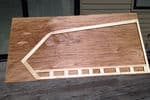
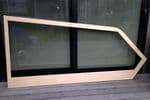
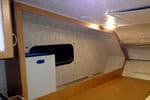
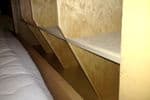
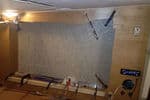
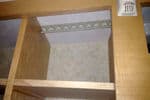
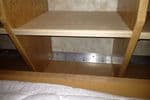
Above: The overcab renovation process – click to enlarge the photos
To better manage our storage needs, I built custom cubbies that are designed to hold folded clothing, plastic bins (for things like socks, underwear, toiletries, and personal electronics), and/or shirts and jackets on hangers.
All of the individual shelves are easily removable so that space can be made for large items if necessary. On the driver’s side there is a canvas dirty laundry hamper which can be easily carried into the house or laundromat. A spare flat-folded hamper is stored alongside the open one and can be deployed if the primary one gets full. On both sides there is a generous space along the floor where long items, like fishing poles, umbrellas, and kites, can be stowed.
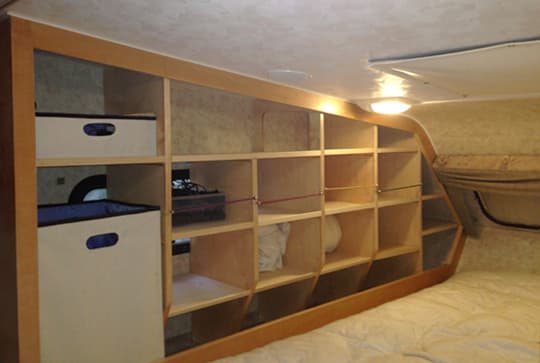
Above: The driver’s side of the finished cabover, note the bungee cords across the front of the cubbies
The top shelf on the driver’s side is designed to carry a guitar and a ukelele. In addition to the small wooden lip at the front of each shelf, there are provisions for bungee cords to be attached across the front of the cubby openings. These will prevent items like books from falling off out while on the road. By the way, to date nothing has ever fallen out. The vertical partitions and shelves are made from birch plywood and the front faces are solid maple.
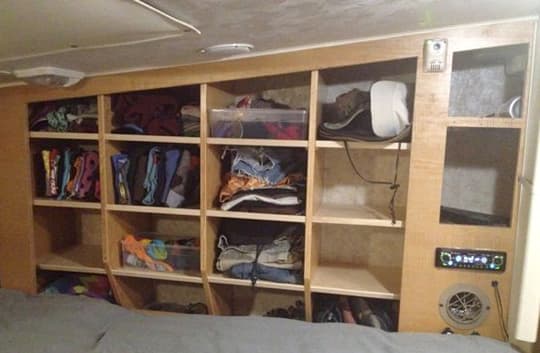
Above: The passenger’s side of the finished cabover
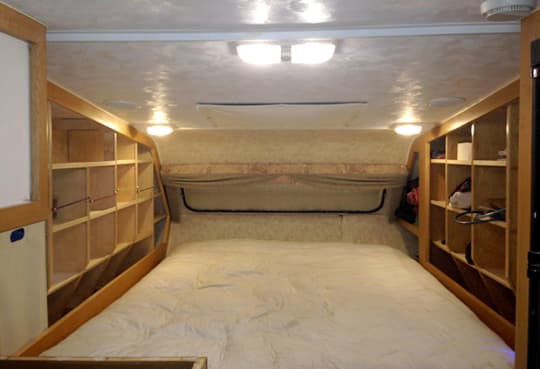
Above: The cabover after the modification
We now have lots of room for all of our stuff and each person has their own dedicated cubbies that can be used or reconfigured as they see fit. Truth be told, the best part of the whole mod is the laundry hamper.
Level 1 Big Mod Runner-Up: Denis Senecal, Massachussetts
2006 Arctic Fox 811
2011 GMC 3500 HD
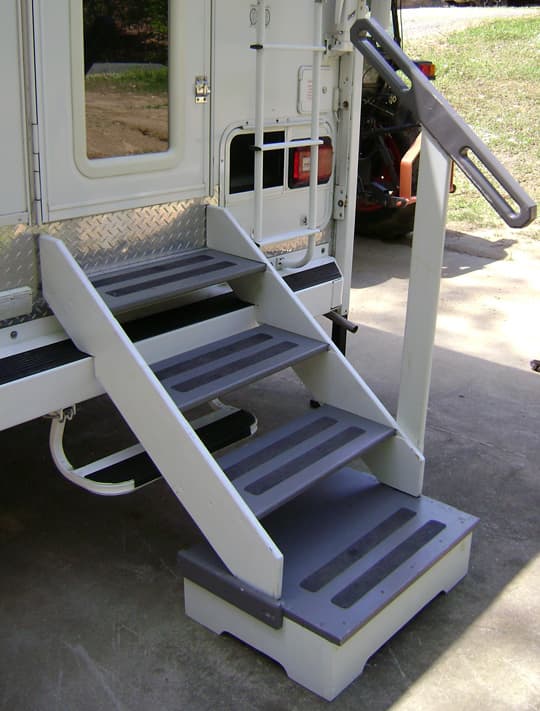
A couple years ago I decided I wanted to go vacationing. Truck campers are versatile and small enough to go anywhere but big enough to do it without excess stuff to bring or tools to use. But, truck campers are relatively hard to get into and out of with the steps.
Since wood working is my hobby, I made steps out of wood. I designed the steps to be dissembled and stored on top of my truck camper while traveling.
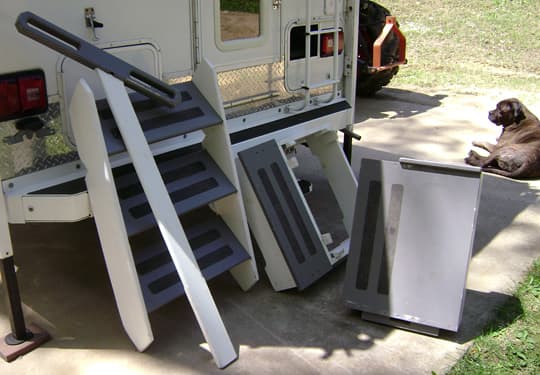
There in four different parts to the steps; the base that sits on the ground, the middle parts that sit on top of the base, and the top part which has three steps. There is also a railing to grab when entering and exiting the camper.
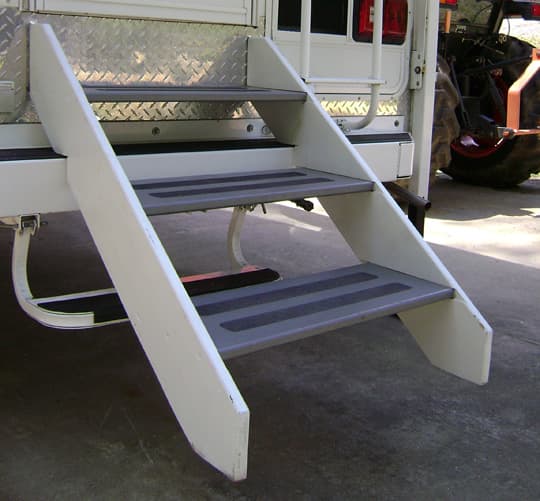
All parts of these steps are made out of one inch thick white pine boards from my property. For strength, the top three steps were grooved to accept the stairs. The stairs were then primed and painted with exterior paint. Self adhesive non-slip was added to the stairs. The whole unit was assembled with decking screws.
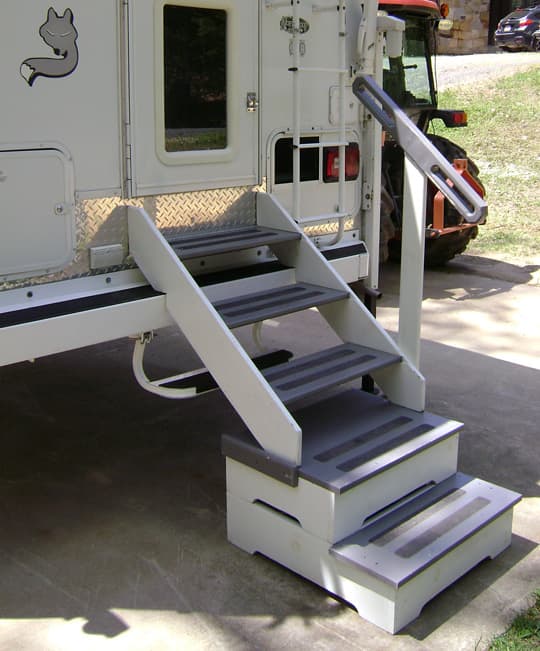
Level 1 Big Mod Runner-Up: Tony and Barbara Tavares, New Hampshire
2013 Northern Lite 9-6 Queen
2013 Chevy 3500HD
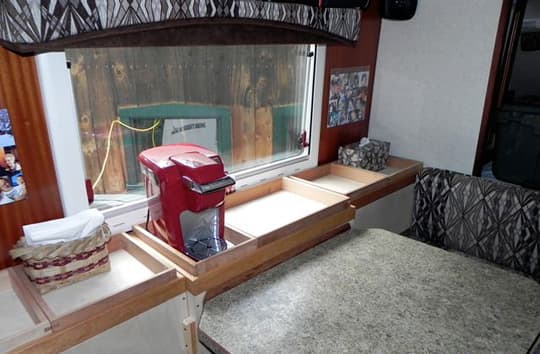
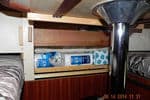
This is the modification I made to our Northern Lite 9-6. I replaced the wrap-around seating with three boxes in place of the wall-area seat cushions. The original storage box under the window seat contains our liquor closet and supports the new center console box.
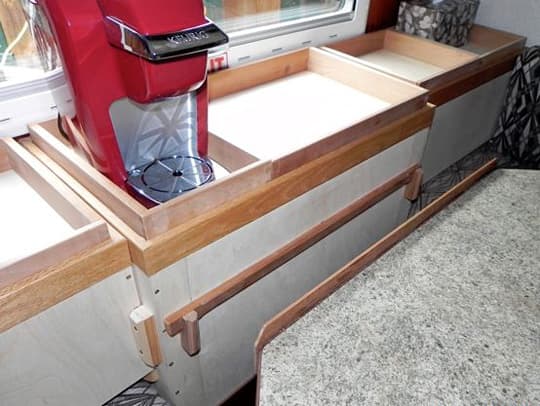
Above: The table moves out, and the wood bar is lifted up for an additional storage area
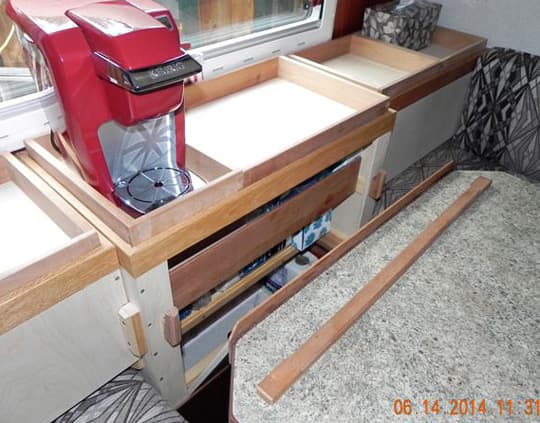
Above: The table moves out, and the wood bar is lifted up for an additional storage area
The table top had to be slightly modified by reducing the width of the underlying plywood support and adding a locking clamp to keep the table from sliding while traveling. The width reduction allows the table to slide out in order to access the liquor closet and center storage area.
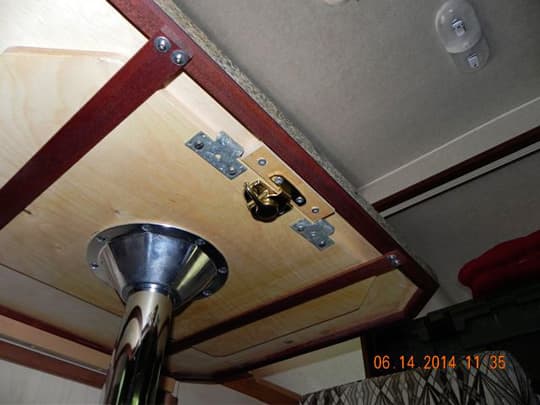
Above: The table was slightly modified for this modification
 |
 |
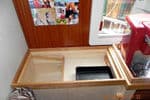 |
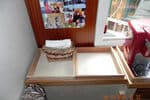
Above: Storage under the table and the end boxes with sliding trays for under the counter storage
The two end boxes have a sliding tray under the cover trays. The end boxes are used for our small personal items. The top trays on all the boxes can lift off to access the box interiors.
We used the modification during a twelve-week coastal trip this past winter. We found it very useful for storage of paper towels, toilet paper, soap, and several bottles of wine and scotch. It also provided a convenient location of our Kuerig pot.
Toby O’Neal, Florida
2013 Chevy 3500 HD
2011 Alaskan 11’
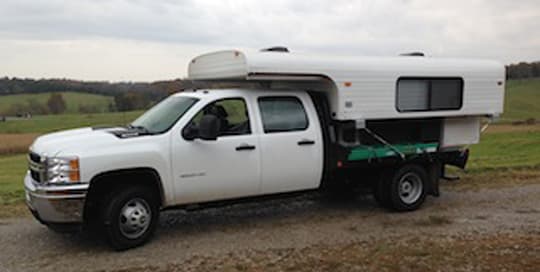
Above: Before picture of Toby’s Alaskan and Chevy flatbed
I modified the flat bed of my truck to hold a one-of-a-kind eleven foot Alaskan cabover with a dry weight of 2,200 pounds.
The problem was, on a nine foot flat bed, I had two feet of overhang. There was no place to mount a spare, carry extra propane, bikes, tow a toy, or enter the camper, let alone store my stuff.
The solution was inspired by Truck Camper Magazine’s Off-Road & Expedition articles and the help from Bryan Wheat at Alaskan Campers.
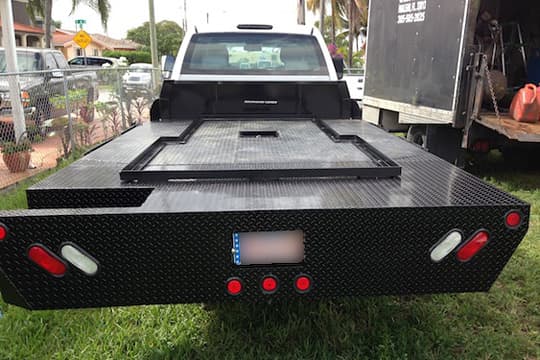
Above: Flatbed with modified headache rack and four foot extension with stairs
I built a steel frame and four foot flatbed extension to hold the Alaskan. I incorporated modifications to support life on the road.
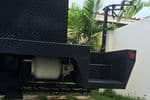
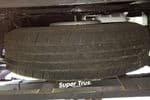
First, I fabricated a four foot flatbed extension with entry steps on the driver’s side with a propane bottle rack underneath. Second, I fabricated a steel angle iron frame to hold the camper and mount it on one inch flat bar so air can flow underneath camper. Air is a better insulator than steel. Then I installed a horizontal tire rack with access from the passenger’s side because I don’t want to be getting a spare out in traffic.
 |
 |
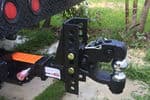 |
Above Left: Stairs, propane, and bike rack, Above Center: Spare Tire Rack, Above Right: 10,000 pound hitch
After that, I modified the existing hitch receiver to install a four foot Torklift SuperTruss for towing and installed a SuperSprings kit. I also installed a second two foot receiver hitch for a bike rack.
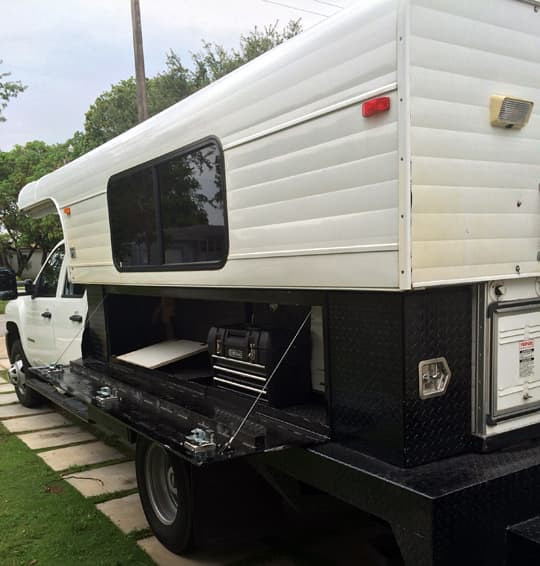
Above: Eight foot by two foot single door mounted on piano hinge with triple locks
Then I installed two eight foot by two foot piano hinged folding doors with triple locks to enclose the flat bed for secure storage.
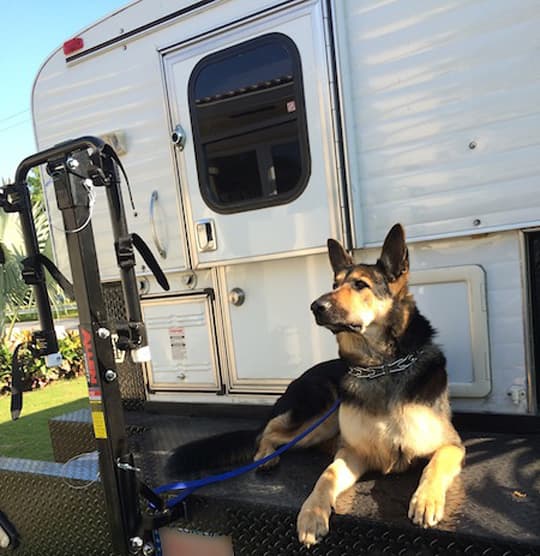
Above: Toby posing on the finished extended flatbed with the bike rack
Aside from adding Rickson wheels and a Ranch Hand winch rack, the truck is more or less finished. The camper has a Go Power solar system and Coleman Mach 8 waiting to be installed.
Bill Harr, California
2005 Toyota Tundra
2013 Four Wheel Camper shell with custom inside build
After having a used 2002 Four Wheel Camper Hawk for five years, we wanted to move up to a Hawk model that had an extended cabover. The short cabover on our 2002 just took took much room out of the camper when we got set up for bed.
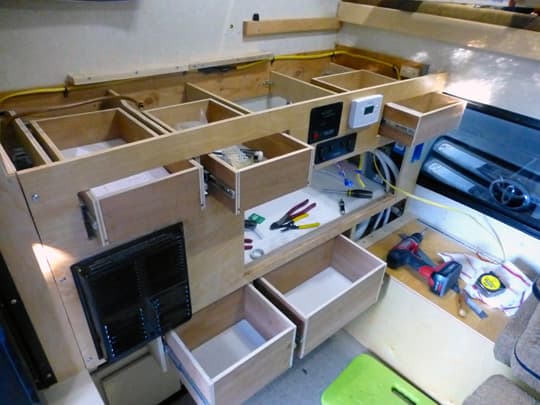
We looked and found a six month old Four Wheel Camper Hawk shell in like new condition. I like to build things and have journeyman level skills as a welder, metal worker, and electrician.
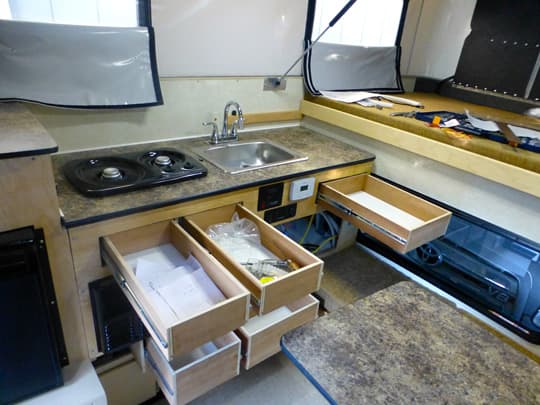
Unfortunately I am a crate maker and not a cabinet maker, but this was my chance to have a camper inside like I wanted. The shell had a front dinette, battery, heater, fan, and lights. Other than that, it was a blank canvas ready to be transformed.
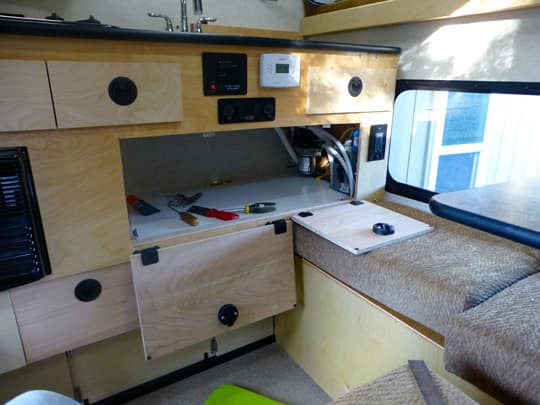
My goal was to maximize the storage area in the camper. I spent a lot of time just sitting in the camper making drawings and changing my mind.
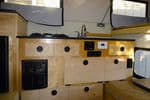
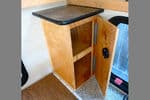
I now have a three inch wide opening to almost four feet of open storage under the counter. I have seven inches of deep storage over the DC fridge. There are three eighteen inch drawers with full extension slides and two eleven inch deep drawers under the counter made to size to fit our pots. I had a local cabinet shop make the drawer boxes so they are square and build to last. I built all the drawer fronts and cabinets. The cabinets are sized to hold what we camp with.
 |
 |
 |
Four Wheel Campers was great to work with and sold me the items I needed to make the camper the way I wanted. I purchased the counter tops, sink, water tank, water pump, and fabric to match the cushions and Four Wheel Camper monitor panel. I purchased several other items from Four Wheel Campers.
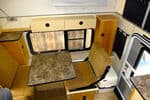
A good friend did the cushions for me. My wife made the curtains and they are great. The little things make it great for us. I put in just a little more space for the Port-a-potty so we are not cramped when sitting. There is a swivel table that moves where we want.
The slam latches from Four Wheel Campers work and look great. Four Wheel Campers uses them only on the doors, but I also used them on my drawers because I like the look. This was my winter project. It went well except for a table saw injury that cost me a delay, and part of a finger.
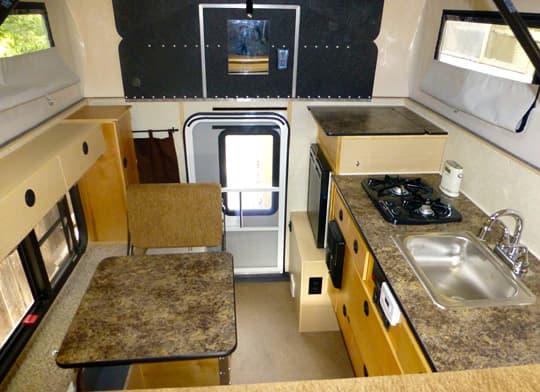
For my custom inside build, I added a side dinette and used parts from the front dinette. I rewired the 12 volt and added 110 volt wiring. I added a counter with a sink and moved the stove. I installed a DC compressor fridge, with storage on top. I also put in a water tank and pump. I improved the feed to the grey water storage tank in the truck bed. I also put in a relay so the rear lights work as back up lights. I put in outside plugs for solar in a bag 120 watts. I added a front corner cabinet and a rear side cabinet. I moved the heater and added a programable thermostat. And I built the cabinet under the counter with full eighteen inch deep drawers.
Eldon Rhodes, Texas
2008 Chevy Silverado 3500
2011 Lance 1050
In an attempt to become more independent of commercial campgrounds, and as a result of interaction with other truck campers at the Texas Truck Camper Rally, I decided to install a complete solar system in my camper.
I started by doing a lot of research on what components to install and how to size the individual components to make a working system. I decided on two 100 watt panels, a 30 amp solar charge controller, two 12 VDC 100 amp hour deep cycle batteries, and the various mounting brackets and wiring needed to install the system.
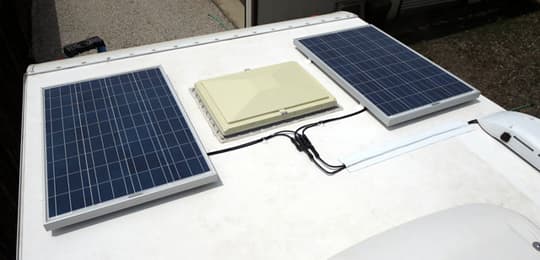
I started by mounting the solar panels on the roof as shown in the above photo.
Next, I went about preparing to install the solar charge controller. I wanted to install it on the wall next to the refrigerator but the only way to get the wiring through the wall was to remove the refrigerator, install the wiring and charge controller, and then reinstall the refrigerator.
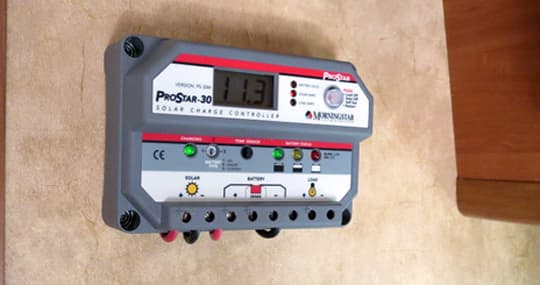
Before reinstalling the refrigerator, I ran cables from the charge controller to the battery compartment. In the photo above you’ll see the charge controller after the final installation.
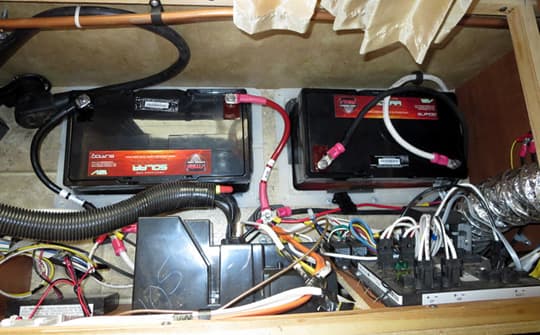
This photo above shows the battery installation.
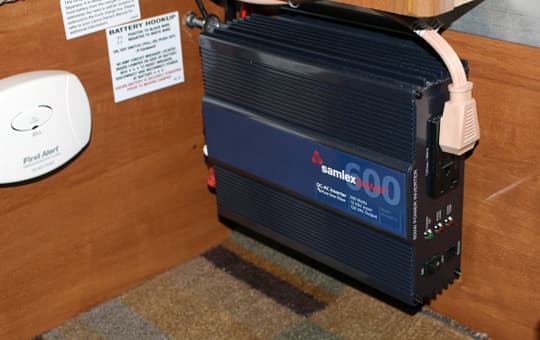
Above: The 600 watt inverter
The last part of the installation includes a 600 watt inverter with a duplex outlet installed just above the counter.
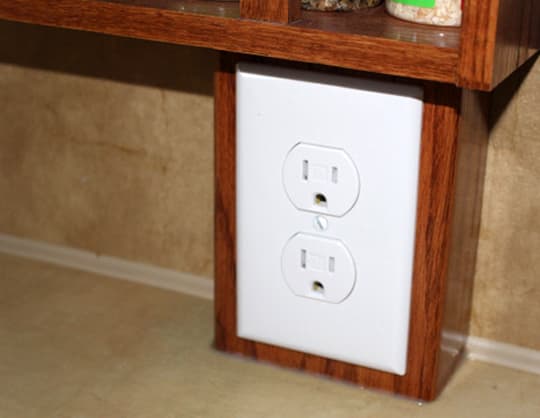
Above: The additional duplex outlet installed just above the counter
So far I am very pleased with the installation and should find out how well it works on my current ten week trip to Alaska with several nights of boondocking.
Bob Hall, California
2005 GMC Sierra 2500
1996 Lance Squire Lite 8’6″
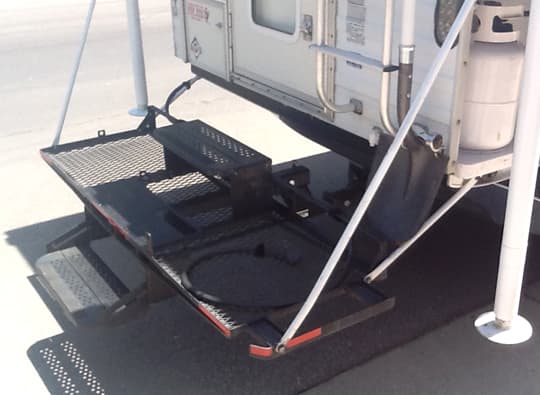
This is my cargo carrier, porch, and back step. I made it from both new parts and scrap. The cargo carrier was given to me by a neighbor just before going to the dump. I brought it home and welded it together after removing all the nuts and bolts.
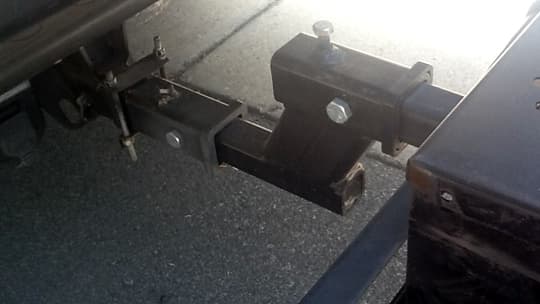
Above: One extension and one six inch riser were used
The hitch parts were bought new at the local RV store. I used one extension and one six inch riser. The steps are two single pull-out trailer steps, purchased at the same RV store. The bottom step was welded on right out of the box.
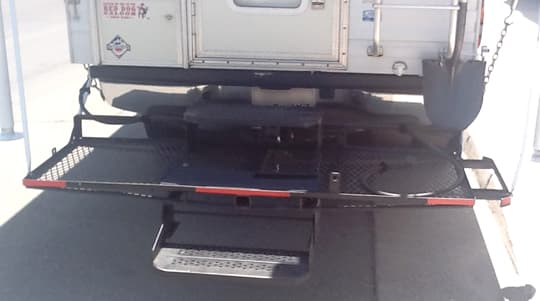
The top step was completely disassembled and re-welded with the step on top and the hangers on the bottom. It was then bolted to the top of the carrier. The middle step is a scrap step cover that had a light on it. It was also bolted on. The outside supports are half inch steel tubes, flattened on the ends and drilled. The long one is attached to the top camper jack bolt and the short one is attached to the tailgate.
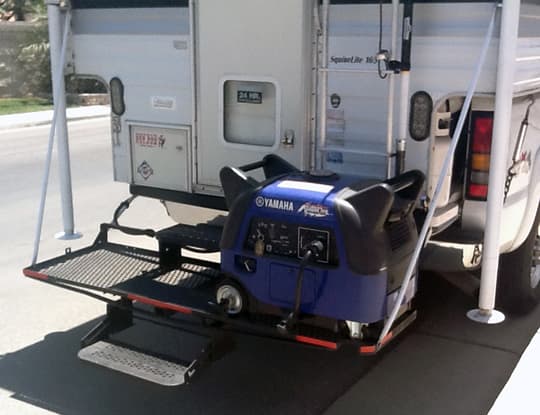
There are four tabs that are for mounting my 3000 watt Yamaha generator.
Lucien F Langlois, New Hampshire
2012 Ford F250 Super Duty
2004 Lance 1025
This modification was created because of a need to have shore power available both on the road and for extended stays in boondocking areas and campgrounds that don’t offer shore power. Let me backup for a second and say that this truck camper modification is the third generation modification. It’s sort of a transformer type mod which grew as new demands and ideas came into being.
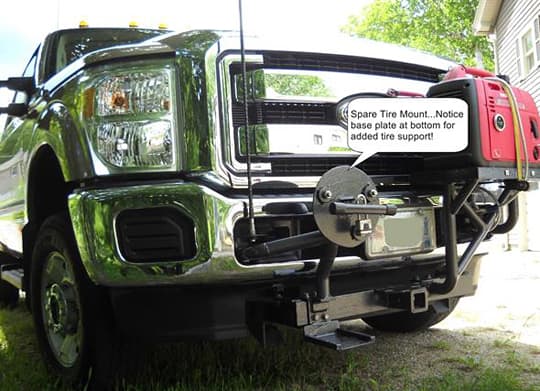
My truck is a Ford F250 Super Duty 4×4 and has a snowplow. The first need was to adapt the snowplow mount to a front receiver hitch which I fabricated. The receiver hitch had to be bolt-able. The idea here was to install a bike rack.
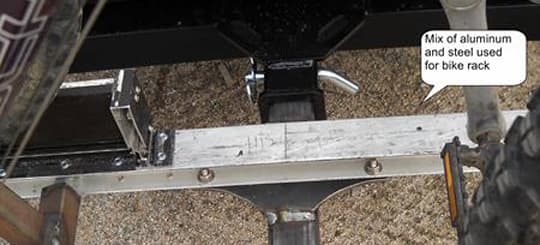
I fabricated the bike rack out of two-by-two inch steel tubing, and various aluminum store front window extrusions. This setup worked great.
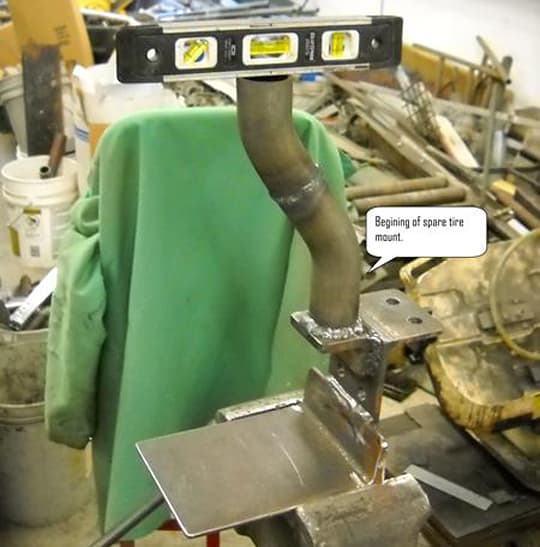
Above: Beginning of the spare tire mount
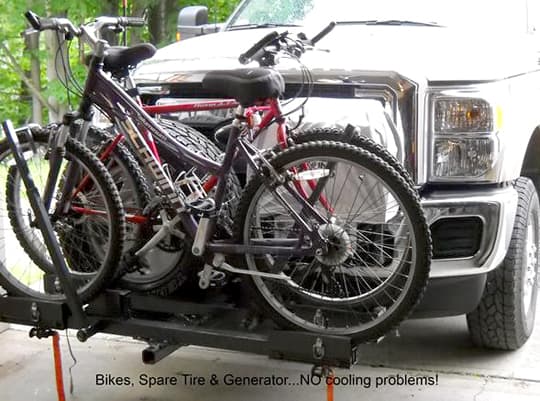
The bikes were mounted low to the ground and do not interfere with my driving view.
The next idea occurred after an extended winter stay in Key West, Florida without a generator. It was apparent that a generator would be my next truck camper modification. The logical place to store a Honda ie2000 generator was up front. I quickly came up with a design and plan. It sort of helps that I am a retired general contractor with a shop full of tools capable of fabricating almost anything.
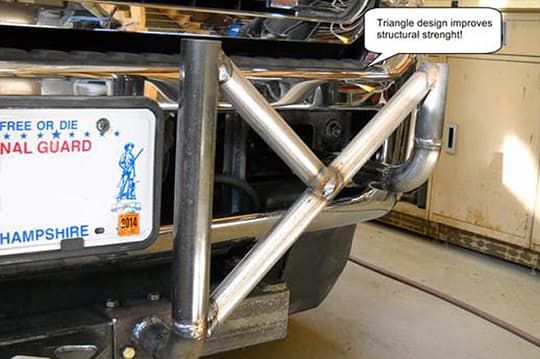
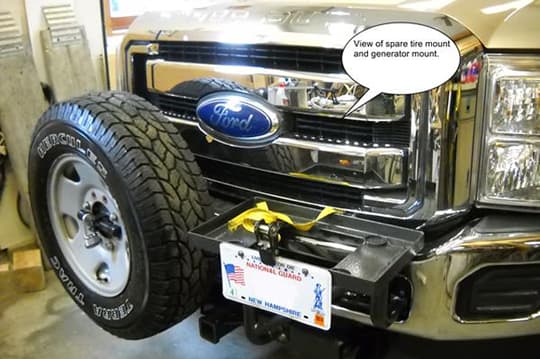
The generator mount is modular in that it can be bolted on to the fabricated receiver hitch. All mounting bolts and hardware are grade eight qualities for extra strength.
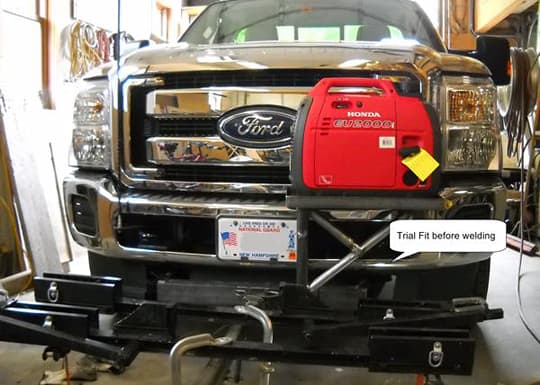
We recently took an adventure ride up into the wilds of Labrador. Although the adventure trip was cut short because of a forest fire, I had prepared myself with another front hitch modification. The trip into Labrador was to involve close to a thousand miles of gravel roads. This was definitely a two spare tire trip.
I fabricated a mount for that additional spare on the front hitch opposite of the generator mount. I can just hear Truck Camper Magazine readers saying, “Is he crazy? All that weight up front!” Well, with the spare tire, generator, and bikes, it still didn’t add up to the weight of a Fisher Snow Plow.
We have traveled 10,000 miles this past winter and all of the mods have worked perfectly!
Howard and Laurel Wilson, Missouri
2013 Ford F350
2000 Four Wheel Camper Shell Model
We bought our Four Wheel Camper shell in 2000 and built the interior to suit our needs. We wanted as much kitchen prep space as we could get, so we created a running-water system that is flexible, portable, and requires as little space as possible.
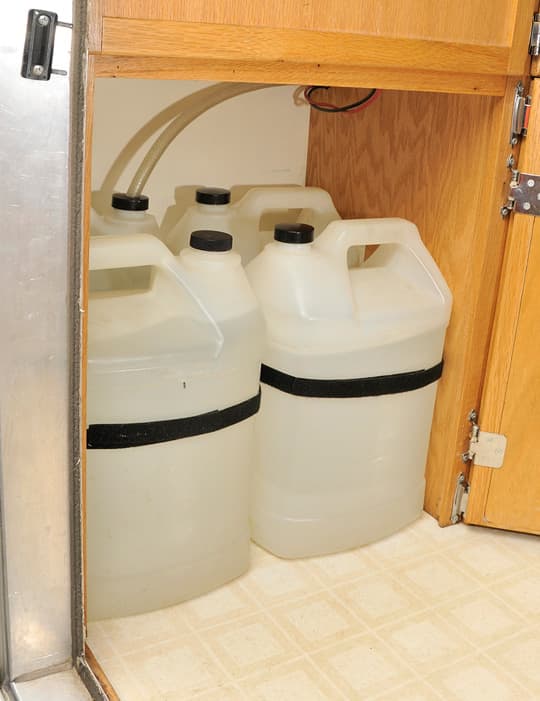
We use four 2.5 gallon jugs that can be easily transported as we grow older (we are now in our mid-60s) and can be filled at most water sources, which is important because much of our travel in the West. The jugs fit into the space just below the built-in propane storage box.
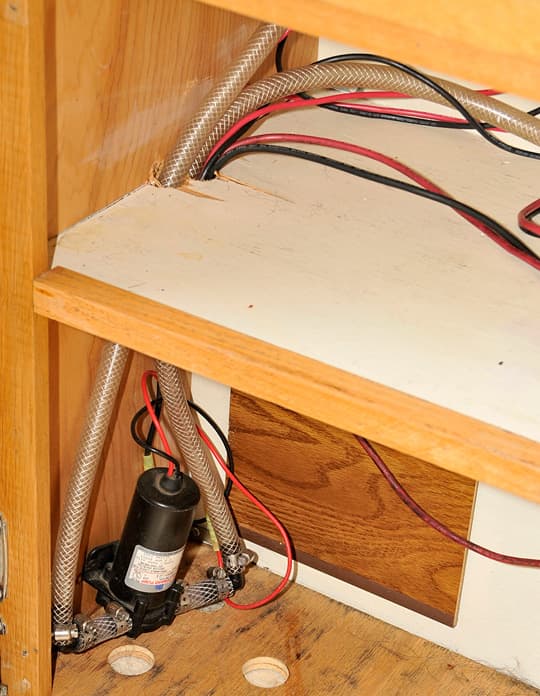
The pump is located in a cupboard adjacent to the jug storage area and the plastic hose runs through the kitchen cupboards to the faucet next to the refrigerator.
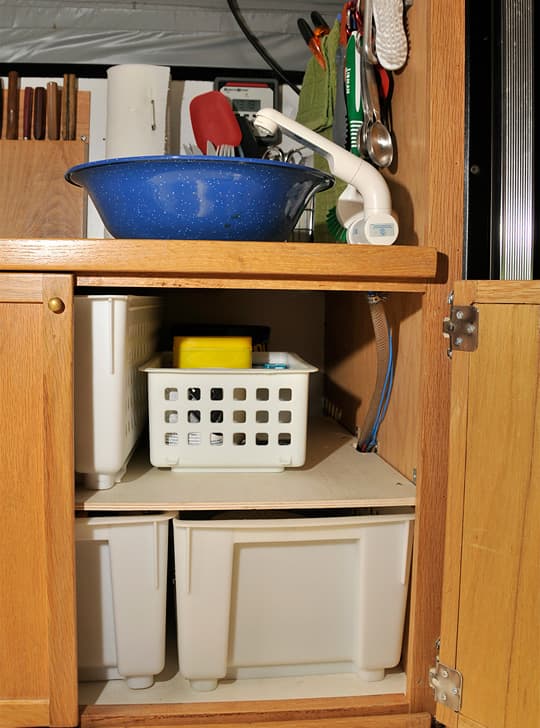
We decided against a built-in sink since we wanted as much counter space as we could get. Instead we use a basin that we move out of the way to the top of the refrigerator cabinet or the table. Since we don’t have a water heater, we can set the basin on the propane burners to heat the water. When the basin isn’t in use, it’s stored in the plastic tub in the kitchen cupboard.
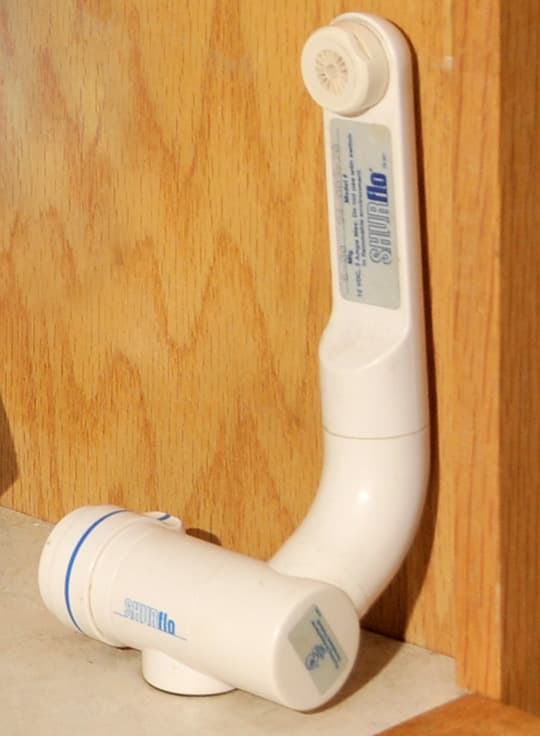
We flip the spigot against the wall when it is not in use.
Glenn and Caite Blount, Texas
2012 Ford F350
2004 Lance 1010
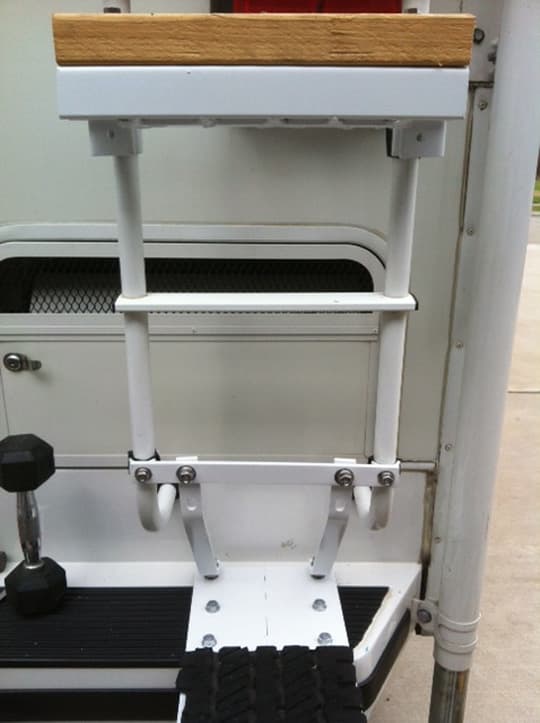
Since we have a PortaBote mounted on the side of the camper, we wanted a way to take a six HP motor with us. We fabricated a boat motor holder using the bumper and the rear ladder.
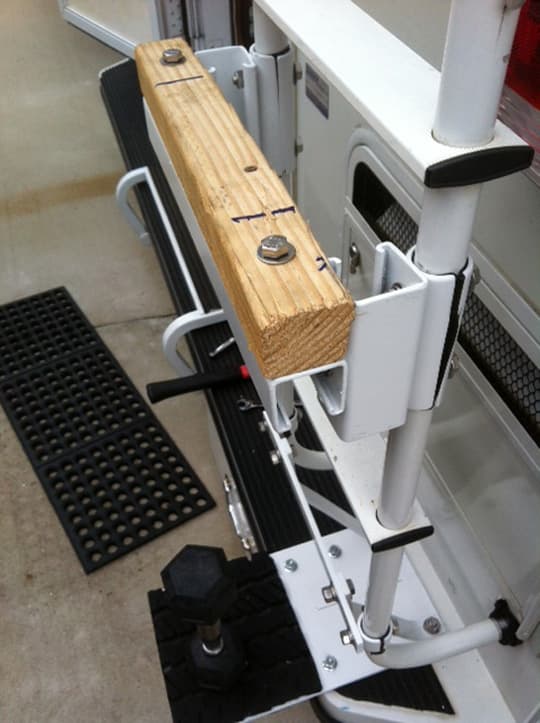
The motor mount brackets attach to the ladder and is mounted by sliding the transom mounting screws over a piece of wood. We additionally secured it by wrapping a length of coated stainless steel cable around the motor to the ladder.
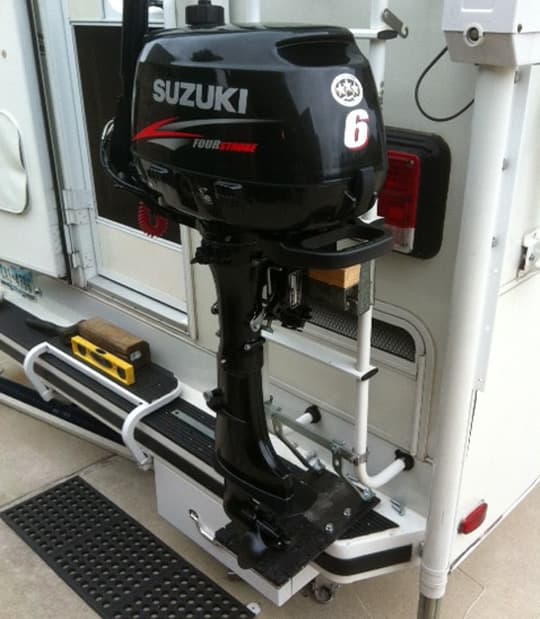
The motor rests on a three-sixteenth inch metal plate that was welded together and bolted through the bumper.
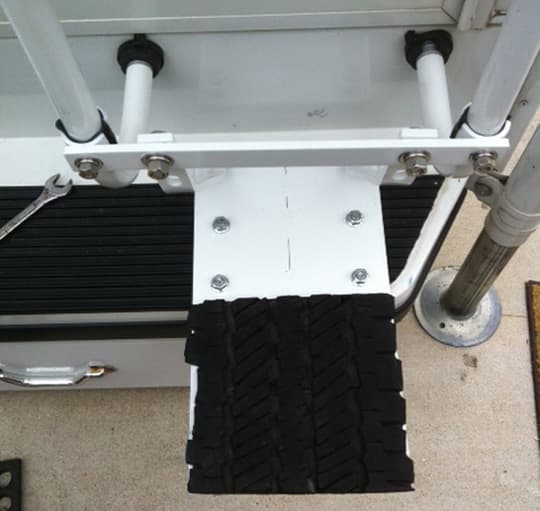
We attached a piece of rubber (piece of retread) and that is used to keep the skag resting on something that will give when driving and provides a stable resting place.
Doug Jenkins, Prince Edward Island
2003 Ford F250
2003 Palomino 8801
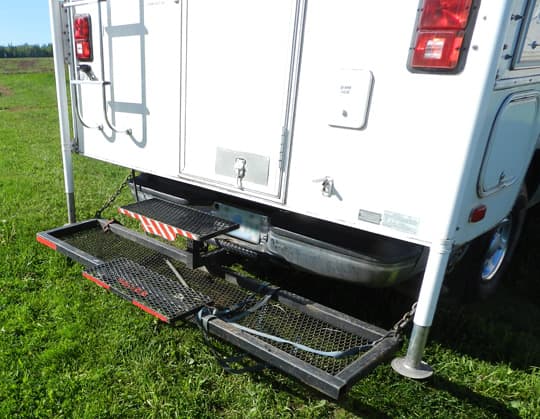
Having struggled with unsteady, and downright unsafe portable steps, I finally designed this permanent unit that fits into the two inch trailer receiver hitch. It serves four purposes that an avid camper requires on any short or long term trip. First, it serves as the rear tie-down points for the camper. Second, it offers a secure and stable two-step entry. Third, it offers extra storage carriage for totes, coolers or whatever. And last, it has a removable bicycle rack.
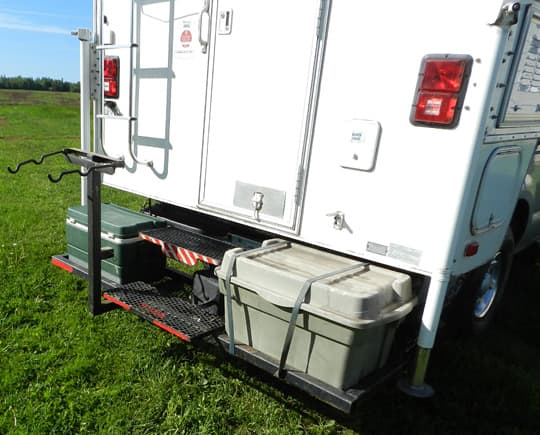
We are so pleased with this custom-made addition, which, by the way, is made of scrap metal and steel mesh for the step pads. It’s ten years old and, to the best of my memory, it cost in the range of $200. The best thing about it is that there were no modifications necessary to the structure of either truck or camper. It’s also easily removable for one person to handle. In closing, this mod has had a lot of interest from fellow truck campers. Once it’s on the truck, that’s it – no more fussing.
Gerry and Lynn Minor, Ontario
2009 Ford F150
2006 Palomino 1251
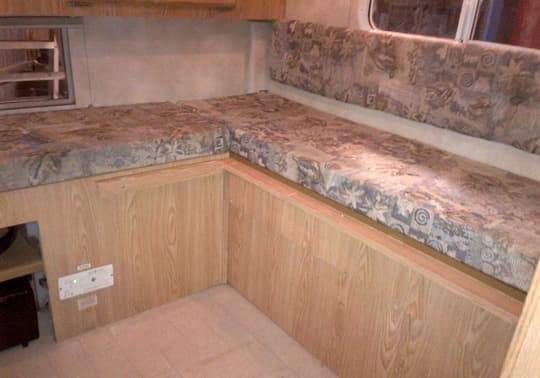
Above: The pop-up camper seating before the modification
Like most pop-up truck campers, the factory seating is meant to be functional, not comfortable. After a trip to Colorado and back last May, we both came to the same conclusion; if we were going to travel more, we needed more comfort.
I decided that I needed to build something that would make hanging out in the camper on not-so-nice days, or cuddling up to watch a movie before bed, possible.
This is a pretty big project. I needed a table saw, drill, nail gun, staple gun, upholstery fabric, foam, indoor/outdoor carpet, and lots of trial and error to fabricate it to fit the space we had. By the time I was done, the total cost was about $200 as I had all the wood already.
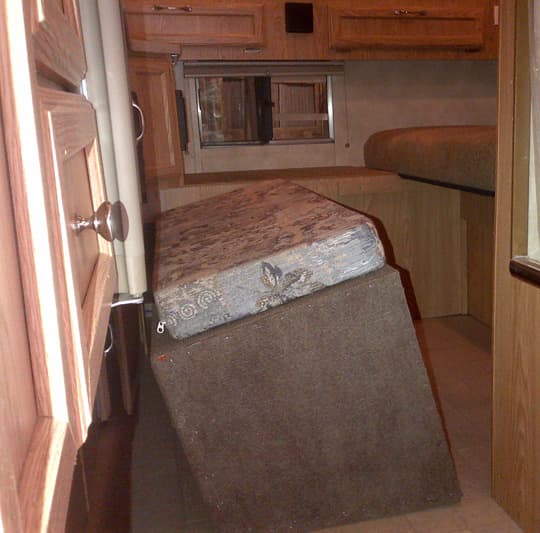
I started by making the couch. I used the same space as the table would normally be, but used high end foam mounted to particle board. This way the couch can still fold down to make an extra place to sleep, if required.
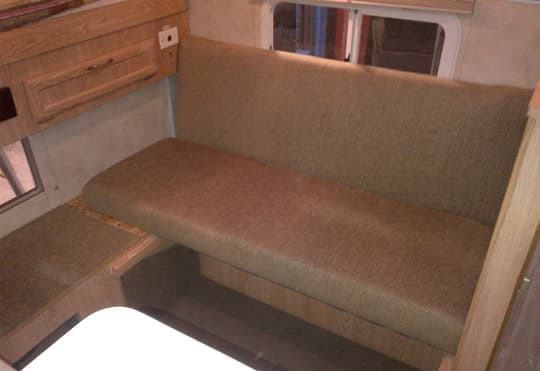
With this done, as expected, our feet did not touch the floor. Again, we wanted a space that was – while small – still comfortable. After a few nights of lying in bed thinking about it, I came up with an idea.
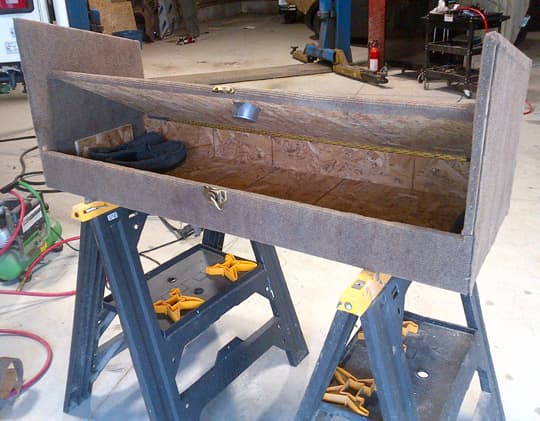
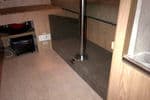
I basically built a box with a hinged lid and installed a flush mount table holder. This gave us not only more space for stuff, but a very classy looking place for our feet as well.
 |
 |
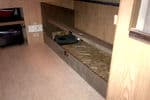 |
It’s a great place for slippers, shoes, and a broom. You might be wondering why the high sides? Well, that’s where the comfort comes in.
Howard and Laurel Wilson, Missouri
2013 Ford F350
2000 Four Wheel Camper Shell Model
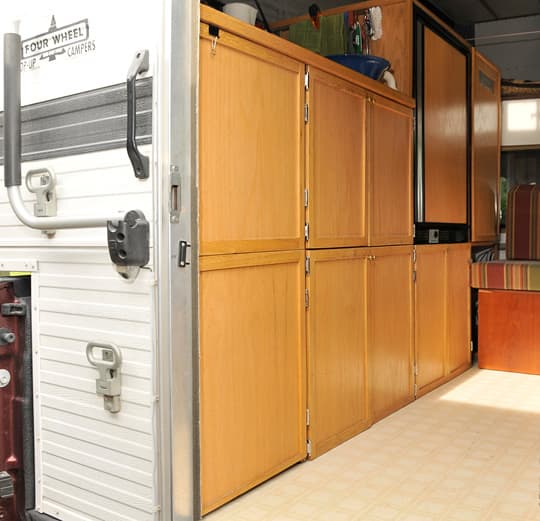
The criteria we used to design the cabinets for our Four Wheel Camper shell that we bought in 2000 were that they had to include as much storage as possible, be light, and attractive. We also knew that we wanted a two-way refrigerator (three-cubic foot Dometic) and a two-burner stove top (Princess).
The refrigerator that rests on the camper overhang determined the twenty-four inch depth of the cabinets and the height of the propane box. The desired depth (3.5 inches) to accommodate the stove top determined the thirty-nine inch height of the counter. The counter is a bit higher than standard, but having prep space is important to us.
We protected the wall over the stove top with half inch drywall covered with a leather-textured aluminum skin. The countertop is Formica with a slightly raised oak front for durability and to keep things from sliding off.
We used an elastic cord to hold the cutting board in place, have a flat knife block, and the paper towel holder is fastened vertically. We use a safety pin to keep the paper towels from unrolling.
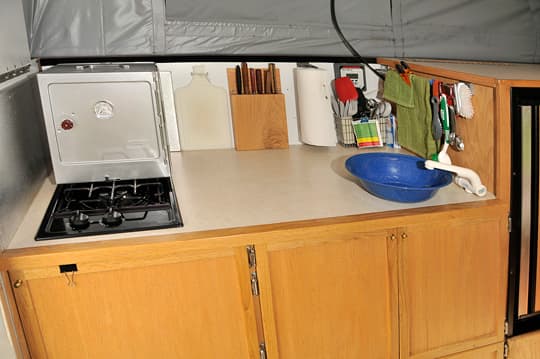
The cooking utensils are stored in a wire rack from an office supply store. The smaller handles kept falling through the rack so we lined two of them with the plastic containers in which powdered drinks are sold. The towel rack fastened to the refrigerator wall holds dish clothes and small hanging utensils.
The cabinet interior spaces were determined by the camper overhang and the wheel-well bump-out. The top cupboard, which is twenty-four inches deep because of the overhang, holds bins for dry food and cooking pots, plates, cups.
We bought stacking bins but found them cumbersome, so we added a dividing shelf. Even though that shelf does not have a lip, none of the bins have fallen out even though we travel over rough terrain.
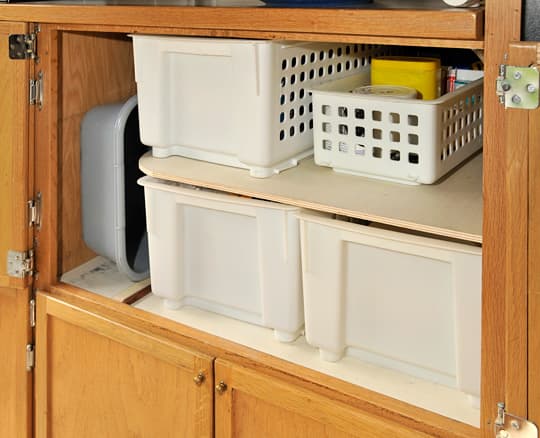
The bottom cupboard that’s fourteen inches deep over the wheel-well holds our folding Coleman oven and dog food container on the top shelf. The floor level of that cupboard is eight and one-quarter inches deep, has space for one of the two twelve-volt deep-cycle batteries that are powered by a 130 watt solar panel, as well as dog treats.
The cabinet doors are a simple frame and panel style. The frame is oak and the panel is one-quarter inch oak-faced plywood. The refrigerator door is also covered with an oak-faced plywood panel and the wardrobe cupboard next to the refrigerator also blends in. The face-frames holding the hinges are hidden by the doors providing a simple, uncluttered appearance. The oak has stood up well to back-country travel in the West, our usual travel destination.
We have been using the camper for the last fourteen, going on fifteen years. Most of our early decisions have functioned well but we don’t hesitate to make changes for improvement when necessary.
Up Next: Part 1 of Level 2 Medium Mods. The mod-madness continues.
Disclaimer: The modifications above are submitted by Truck Camper Magazine readers. It is your responsibility to make sure that any do-it-yourself modification project you undertake is safe, effective, and legal for your situation.
