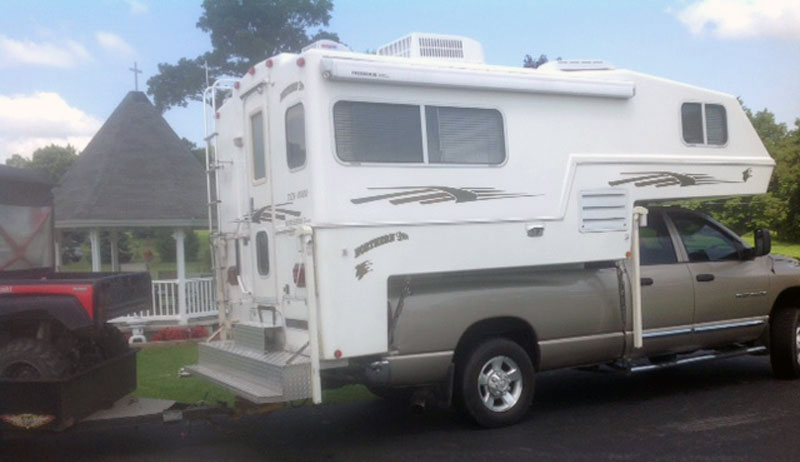
Think you’ve seen it all? Not even close! Check out the 6-inch monster sewer hose holder, thermostat-controlled electric heater, and a lookout box for a Chihuahua. Pull the carpet! Screw the towel rack! It’s another mod, mod, mod contest!

Welcome to the fifth 10X10 Mod Tournament. Please review the following ten medium mods and vote for your favorite.
We will announce the winner next week. Click here to enter a modification you’ve completed on your truck camper.
1. Russell Berquam, Clever, Missouri
Electric Heater or Propane Furnace Switch
2014 Ford F-350
2015 Arctic Fox 1140
Whenever we are in a campground with shore power we like to conserve our propane and use our electric heater to keep the chill off.
The problem is that the small electric heaters have a temperature control that is almost useless. Since the temperature control is on the heater, it’s hard to set for comfort in the bedroom area. It always seems to be too hot or too cold.
To solve this problem, I modified the heater control on an electric heater so I can switch from the propane furnace to the electric heater.
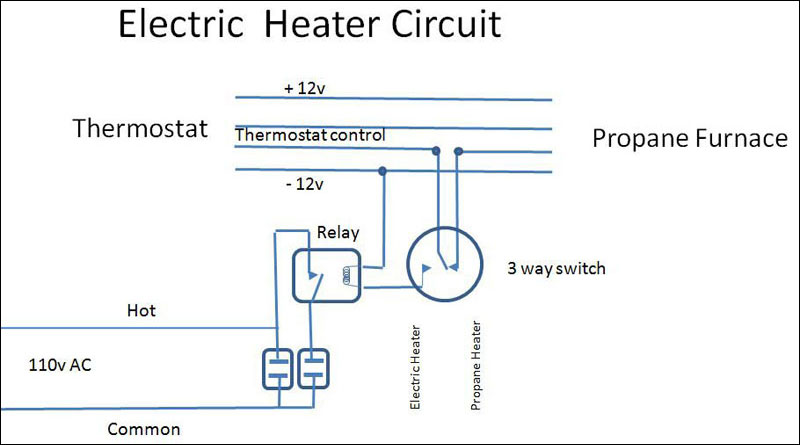
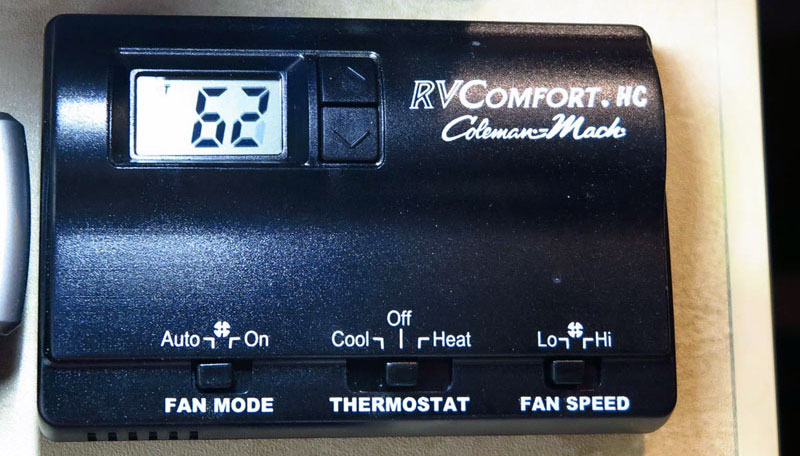
Now with the switch in the electric heater position, we can use our wall-mounted camper thermostat to turn the electric heater on and off at the same temperature setting that we would use for the propane furnace.
I have recently upgraded our wall thermostat from mechanical to digital, but this mod will work with non-digital and digital thermostats.
Our truck camper’s basement holding tanks are heated with re-circulated warm air from the main living area. The wall thermostat controls the basement fan as well as the furnace so warm room air heats the holding tanks. As long as we use the thermostat for temperature control, either heat source will heat the holding tanks.
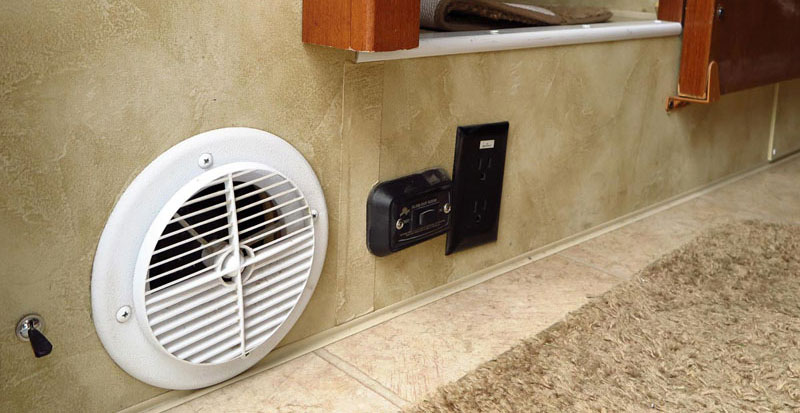
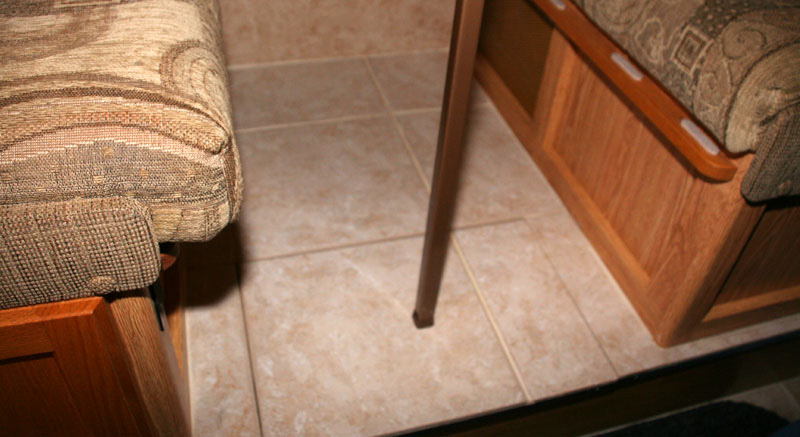
Below is the original outlet inside.
I connected the common of the three-way switch to the thermostat line with one contact returning to the furnace and the other contact to the relay coil.
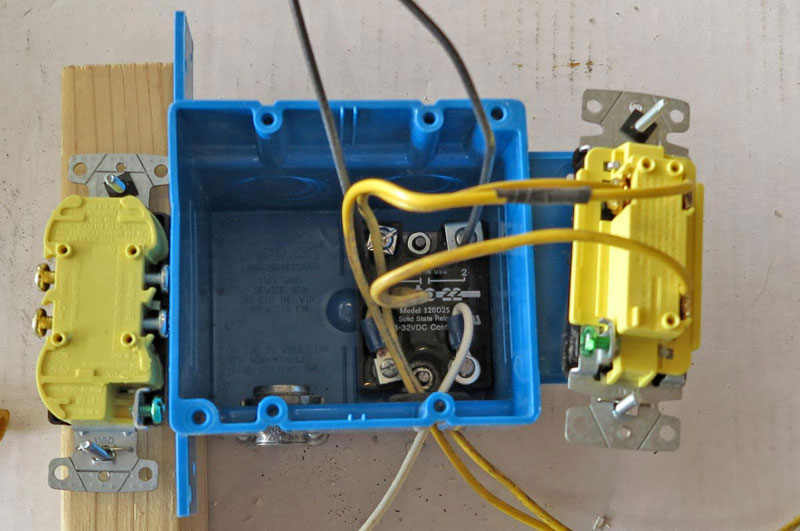
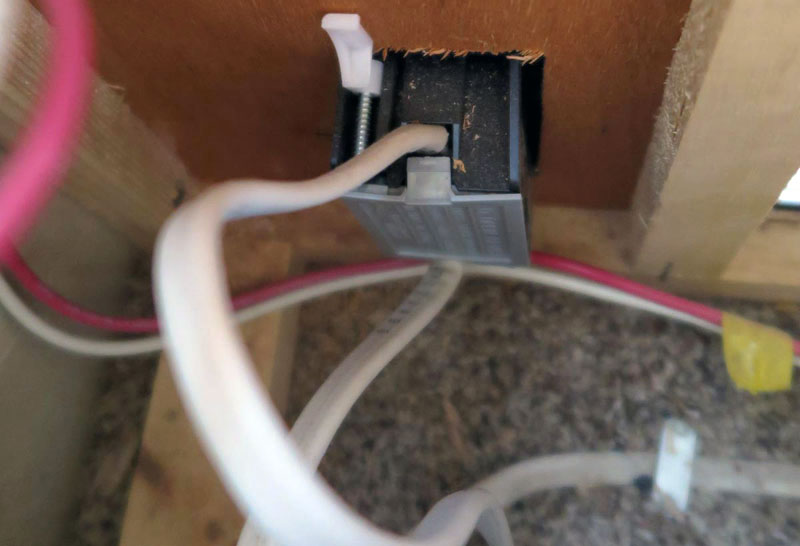
The normally open contacts of the relay were then connected to the AC power and a new outlet.
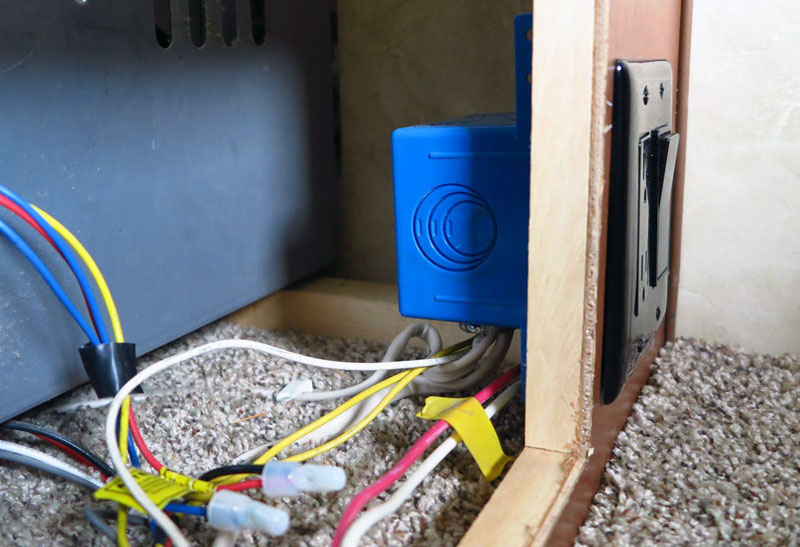
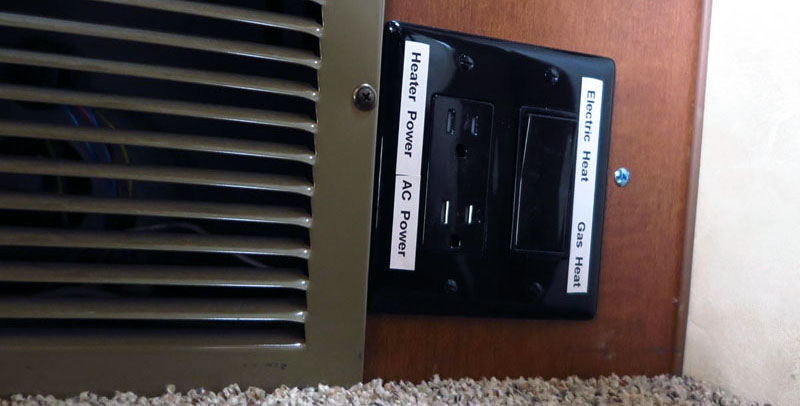
I used a new duplex outlet with the hot side separated so one half of the outlet is still 110-volt and the other half of the outlet is controlled by the relay.
The electric heater is an inexpensive portable model that puts out 750 or 1,500 watts and costs about $20.
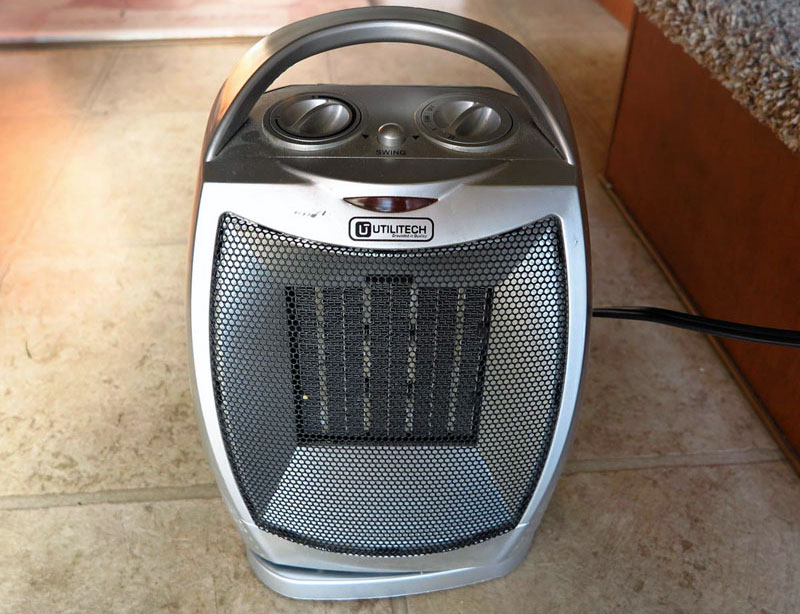
The simple controls are off, low and high with a rotatable temperature control that sets the temperature at the heater.
When we use the electric heater with our new controller, I set the heater on either low or high with the temperature controller set to maximum. This way the camper’s thermostat will control when the heater is on and off.
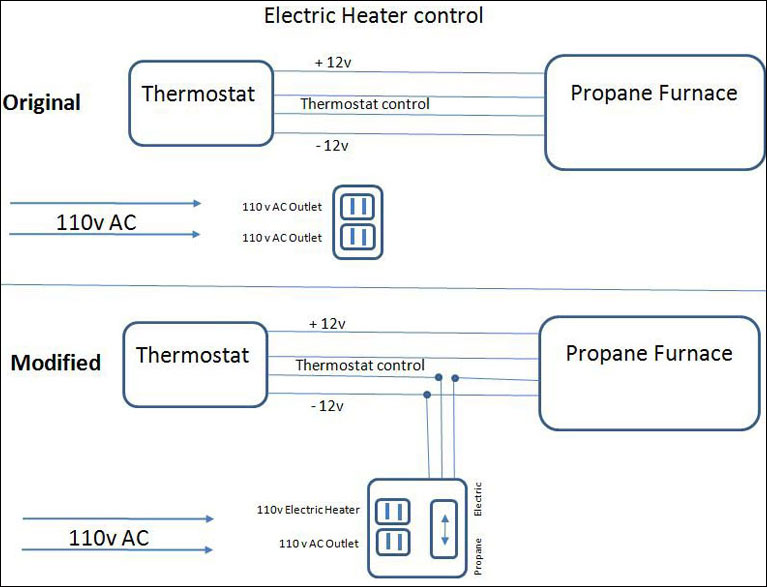
When we camp with shore power, we just switch over to electric heat and the thermostat controls the portable electric heater and the basement heat without changing our desired comfort setting.
It took me four hours to complete this modification and cost me $20 for the relay, outlet, switch and electric box. In my opinion, the skill level of this modification is medium.
2. Mike Tassinari, Peabody, Massachusetts
Additional Towel Racks In Dry Bath
2002 Ford F350
2016 Lance 1172
I wanted a towel rack that would not fall off the wall. The wall has no structural strength because it’s just an Azdel composite panel.
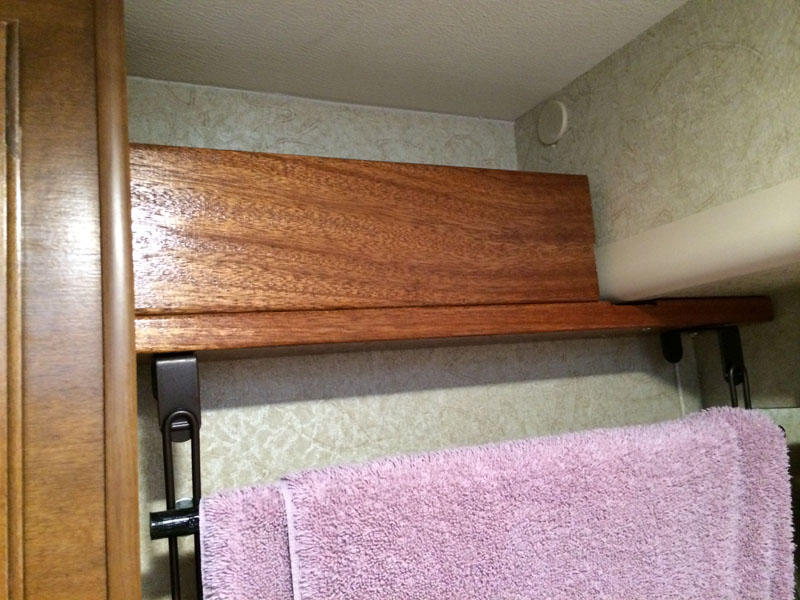
My solution was to buy mahogany wood from Home Depot. Then, I applied two coats of spray polyurethane. I cut the mahogany to size and made one board horizontal and one vertical for strength. This wood was then screwed into the cabinet on the left and into the wall on the right.
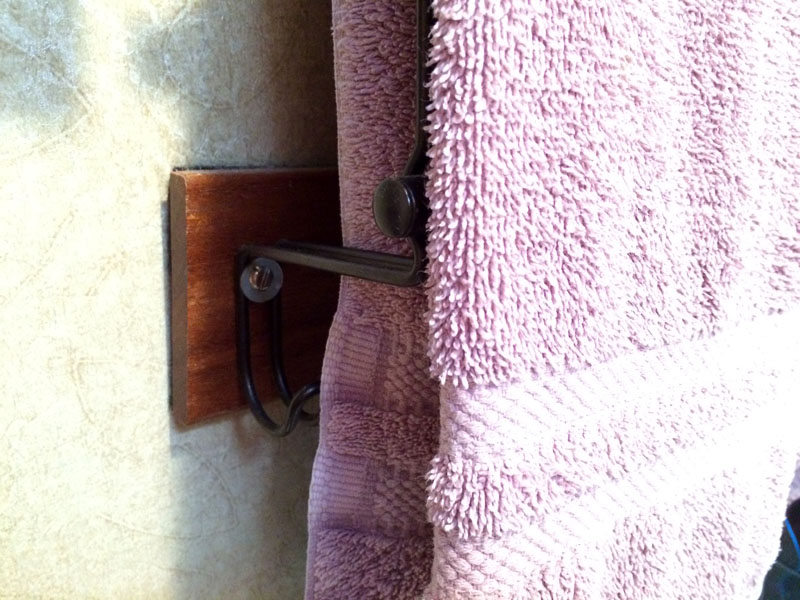
On the bottom, I velcroed a wood piece to the wall to support the towel rack to the wall. Then, I hung the towel rack to the wall. Any towel rack will work as long as you measure the width of your wall.
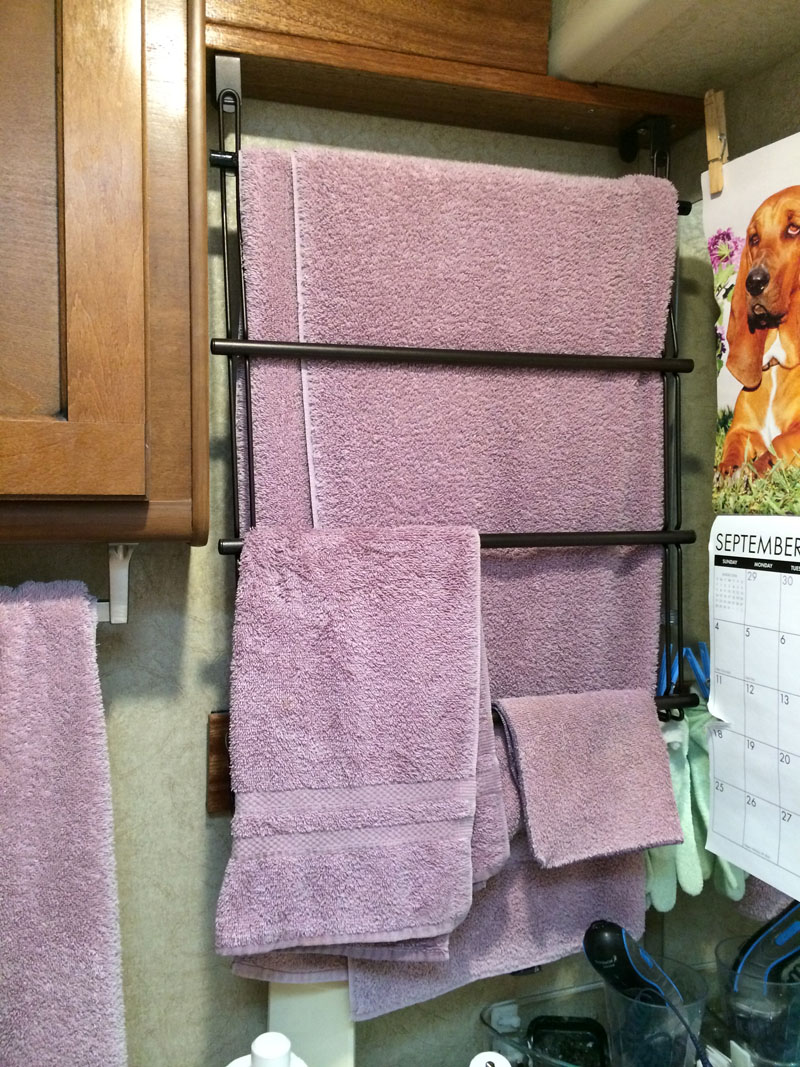
The towel rack is great. Now we can hang multiple towels.
It took me four hours to complete this modification and cost me about $45. In my opinion, the skill level of this modification is easy.
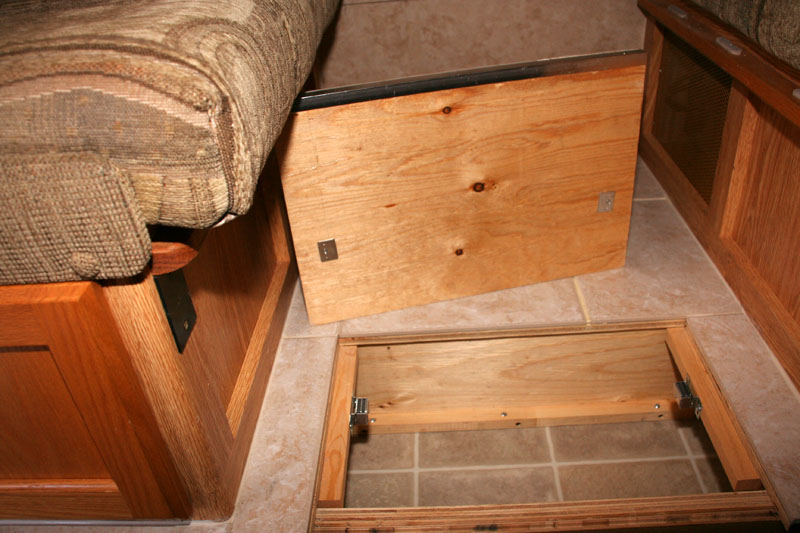
3. Lyle Tremblay, Spruce Grove, Alberta
Carpet Removal and New Flooring
2004 GMC 3500
2006 Bigfoot C9.4
I wanted to eliminate the carpeting in our camper.
After a few years, the carpet under the table and on the step to the bed just looked worn and dirty all the time. We were tired of the carpet looking that way and we could never really clean it well.
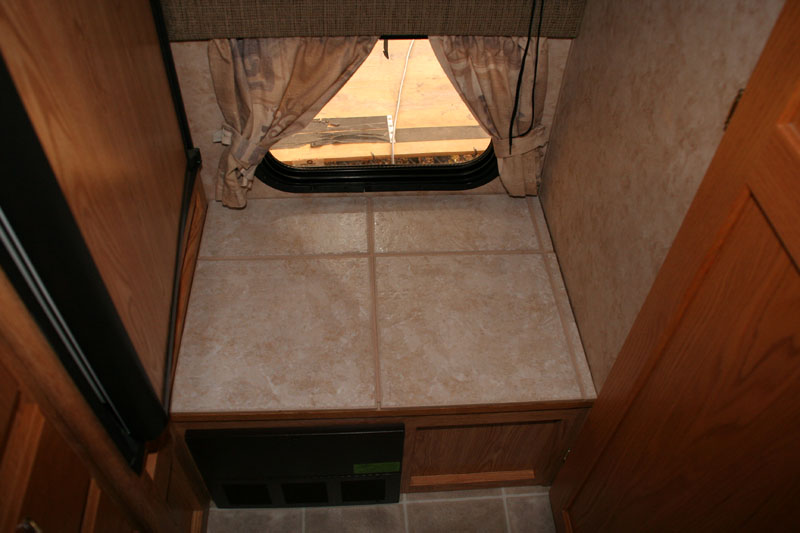
I removed all of the carpet down to the bare wood under the table and did the same for the cabover step. I ended up replacing the cabover step with a new piece of 3/4-inch plywood cut to fit.
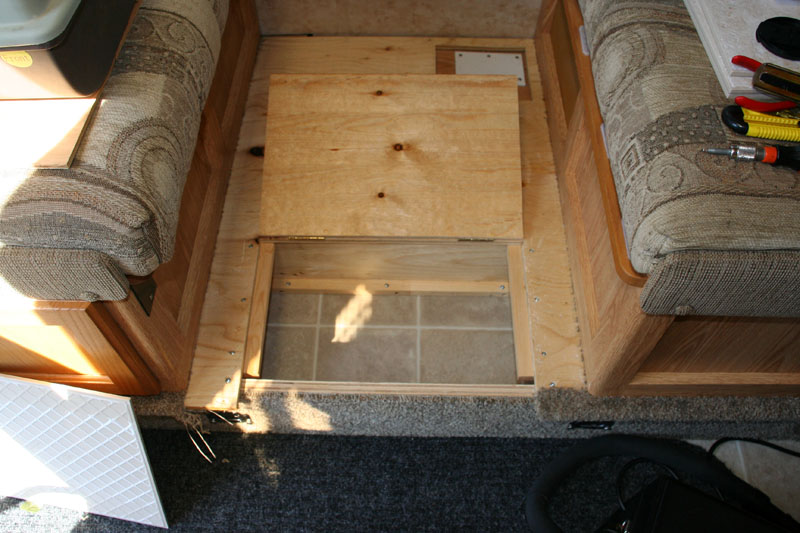
When I removed the carpet under the table, I discovered a factory cubby hole for storage. The carpet had never been cut so we never knew it was there. Now we use it for storing footwear. Bonus!
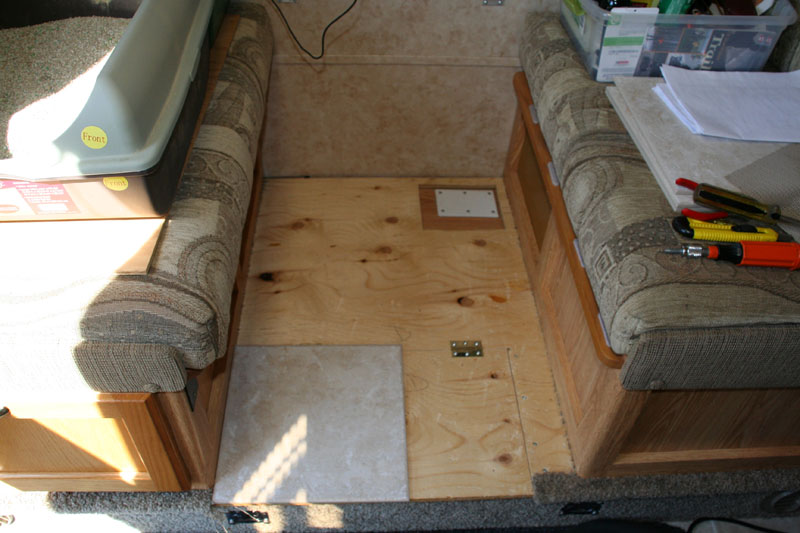
I replaced the vertical carpet surfaces with hardwood flooring and the horizontal section with tile.
This brightened up the interior. You have to be careful with your cuts here.
The carpet on the bed step was also replaced with tile. The edges were covered with an iron oak veneer. Cleaning the floors is much easier now.
It took me ten hours to complete this modification and cost me $50. In my opinion, the skill level of this modification is medium.
4. Sean Calcote
Dinette Storage Box For Dog To See Out Window
2014 Ram 3500
2015 Cirrus 820
My wife and I have a Chihuahua. The first time we took her camping we left her inside the camper when we went fishing. She wanted to see out and would jump onto the dinette table to look out.
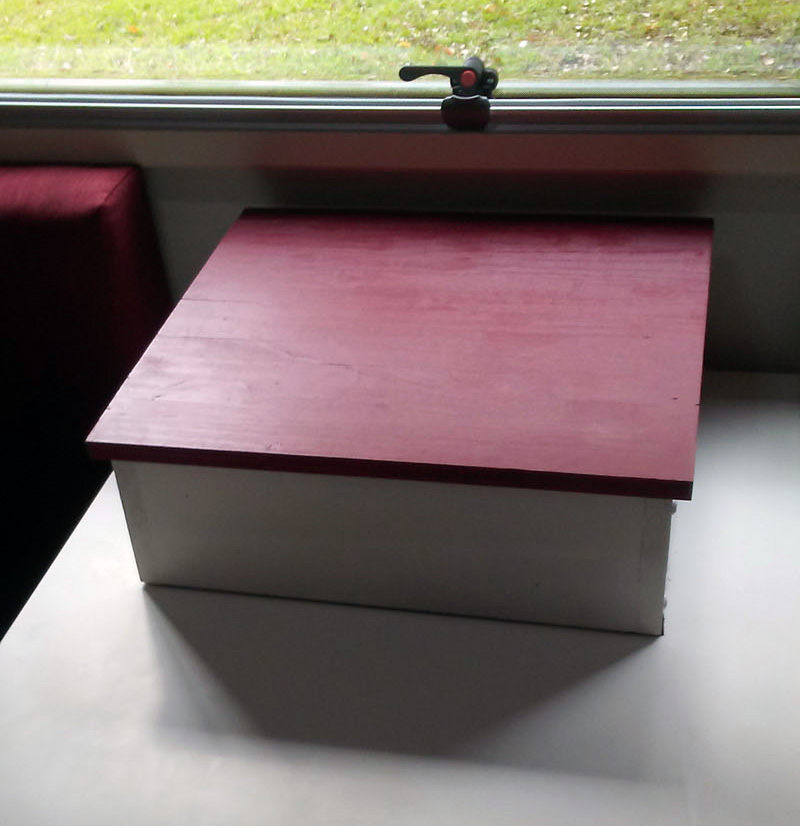
Putting her bed on the dinette table wouldn’t let her easily see outside, so I made a box to elevate her bed and provide a little storage for hand towels and other items.
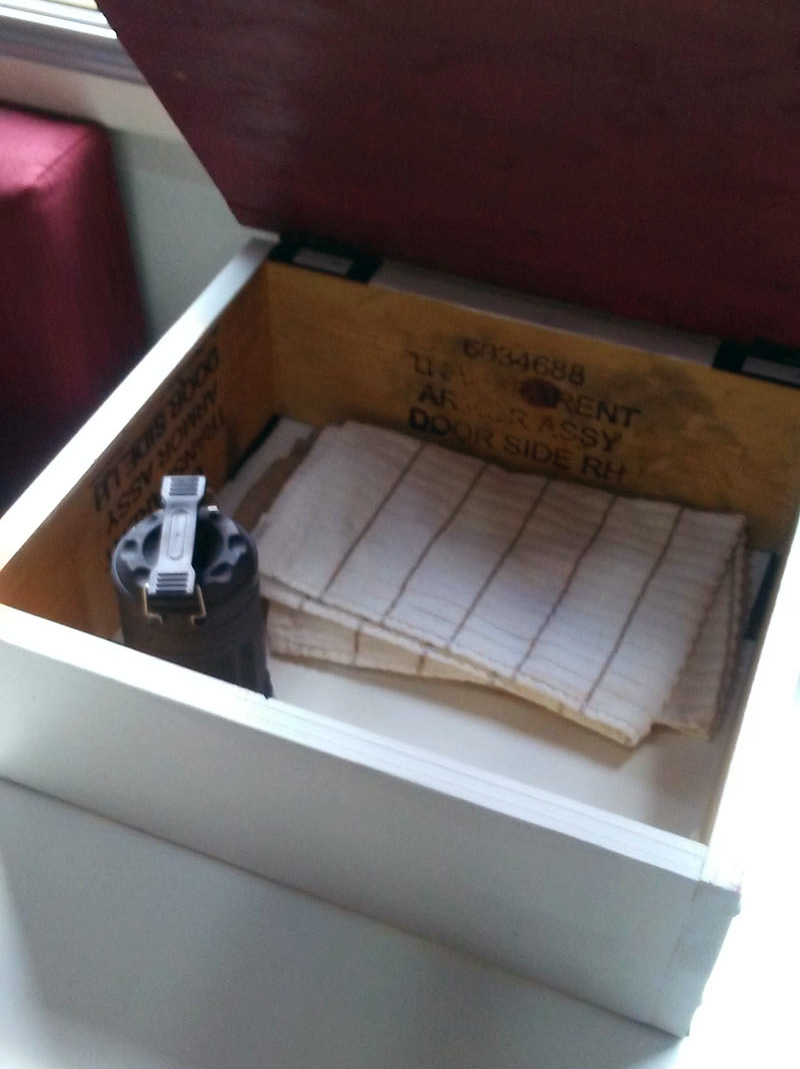
I used velcro, which is ridiculously strong. I only used four little pieces and will probably make another hole so I can pull from both sides at once. Scrap wood was used for the body. I painted it the same color as the interior and attached some hinges.
The box cost less than $10 and took maybe an hour, plus the paint drying time.
5. Mark Motsko, Powell Butte, Oregon
Refrigerator Switch To Solve Phantom Battery Drain
2016 Silverado 3500
2016 Bigfoot 1500
I was experiencing a phantom battery drain on our new Bigfoot that would draw down the coach battery overnight. After some research, I traced the draw to the Dometic refrigerator’s climate control function.
There is a heat tape between the freezer and refrigerator doors that is designed to reduce condensation. Older Dometic models have a switch to disable this function, but newer models do not. The draw was significant, reducing my battery capacity to 50% overnight.

I located the schematic for the refrigerator and determined that the climate control function was activated by the door switch. There are two leads, one for the interior light and the second for the climate control heat tape.
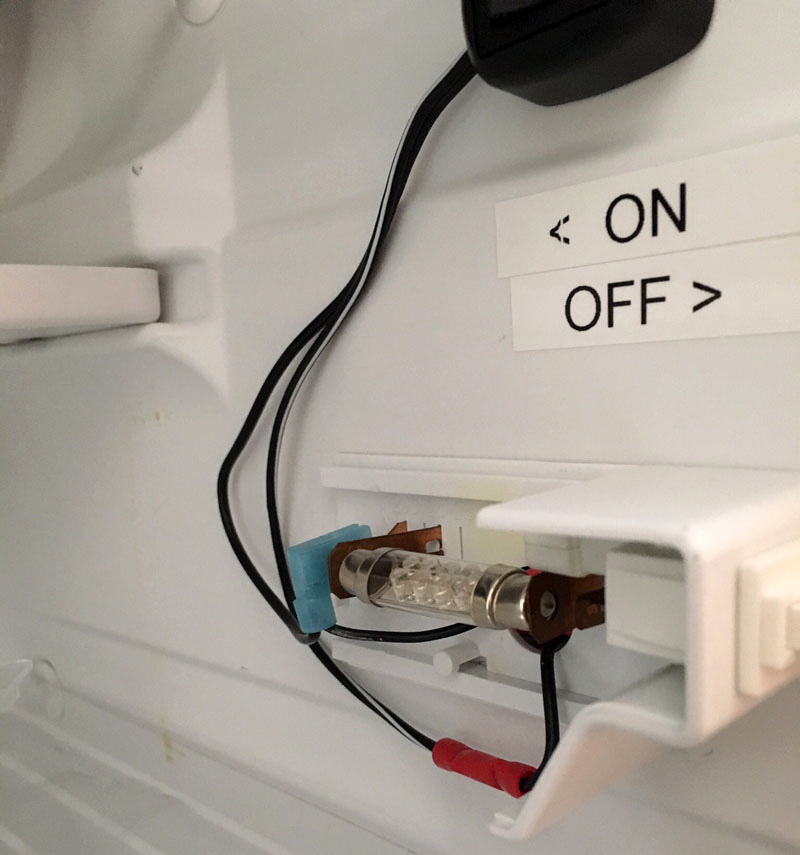
I inserted a secondary switch that breaks the heat tape circuit.
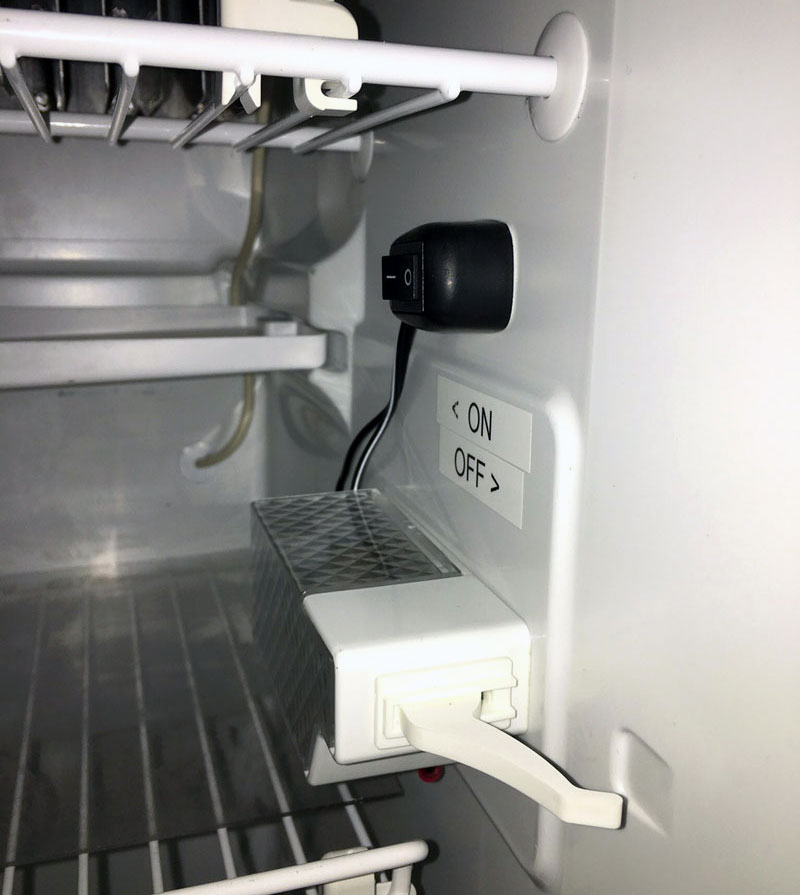
It worked like a charm! Our battery no longer discharges overnight. I also replaced the interior refrigerator light with an LED bulb.
It took me two hours to complete this modification and cost me $5. In my opinion, the skill level of this modification is medium.
6. Gib Upole, Oakland, Maryland
Aluminum Diamond Plate Steps Over Bumper
2005 Dodge 3500
2001 Northern Lite 10-2000
We did not like the long set of steps required to get out of our basement model truck camper. When towing there was nowhere to put steps because the trailer was connected to the hitch.
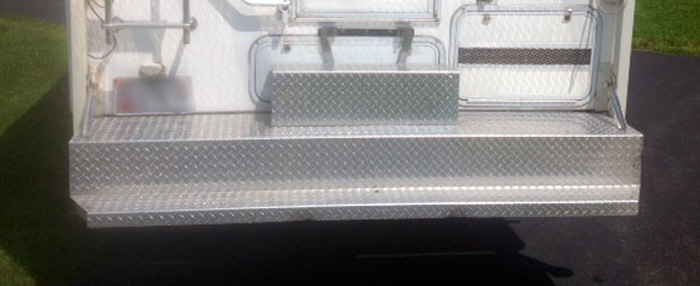
I had a piece of aluminum diamond plate left over from previous project. I had seen the porch made by the manufacturer and thought I could do basically the same thing.
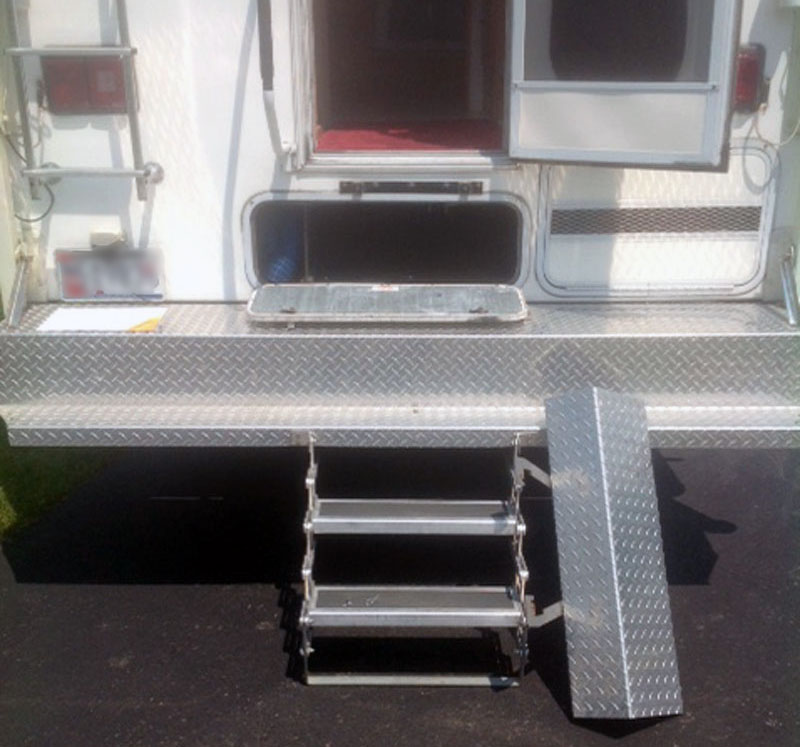
I took the aluminum to a metal shop and they made the 90-degree breaks at my markings. I brought it home and attached it to the jack bolts and to the bottom of the camper with stainless angle. I also made a removable step over the basement door.
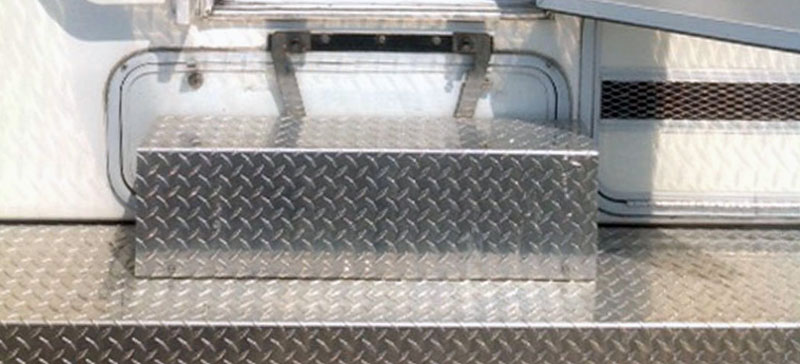
When towing, we step on the trailer tongue that has diamond plate installed to the frame. When we are not towing, we use two steps attached to the diamond plate with pins.
This modification has been outstanding. We can turn as we come down holding onto the camper’s fold-out bar. I loosen two thumb screws to access the basement. The two steps fold to go into the basement.
It took me four hours to complete this modification and cost me nothing. My wife says that I am a junk collector, so I had everything on hand. In my opinion, the skill level of this modification is medium.
7. Matt Rubin, Westlake Village, California
Factory Back Up Camera Used On Fox Landing
2013 Ram 3500
2017 Arctic Fox 811
One thing that frustrated me was having to use a separate backup camera when the truck camper was loaded on my truck. With the camper on, I had a big and bulky 7-inch monitor sit on top of the dash. When I removed the camper, I had the added chore of taking out the backup camera’s monitor.
I said to myself, “Wouldn’t it be nice if the factory 7-inch screen in the dash could be used with the truck camper?” So I got to work!
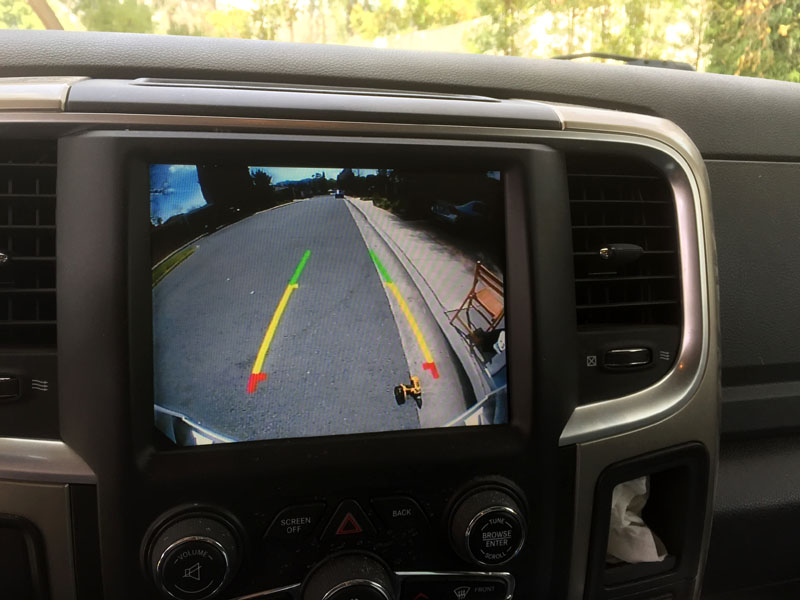
With the tailgate off for truck camping, I have access to the factory plug for the OEM backup camera in the back of the truck. The solution was simply to wire the OEM camera and fabricate a custom fixture and brackets to connect it to the back of the truck camper.
To do this, I had figure out the parts. It turns out I had to purchase two OEM wire harnesses and the OEM camera for my 2013 RAM 3500. These parts ran around $200, and getting the part numbers was tricky!
Once I had the wire harnesses, one of the two had to be lengthened about four-feet to reach the back of the truck camper. So I removed the factory tapping and cut the wires in the harness. In all, there were six wires that I lengthened.
The next challenge was that the RAM factory camera was not designed for outdoor use. So I made a custom housing using a PVC junction box from Home Depot.

I cut the box down in height by 50-percent, drilled a hole for the camera in the lid and spray painted it gloss white to match the white paint of our truck camper. Then I got some flat stock from Home Depot and made custom brackets so that the camera housing could be mounted to the back of the Fox Landing bumper. These were also painted gloss white.
I love it! I no longer need to have a huge bulky monitor sitting on my dash.
It took me six hours to complete this modification and cost me $250. In my opinion, the skill level of this modification is medium.
8. Bill and Kira Jones
Additional Storage To Transport Sewer Hose and 90-Degree Fitting
2018 Northern Lite 9-6Q SE
2017 Ford F350
I figured that TCM readers might be interested in this solution for carrying a sewer hose and a 90-degree fitting (elbow/adapter that fits into the in-the-ground sewer connection) on a truck camper.
We use a 15-foot sewer hose and elbow; Valterra kit D04-0250. While the truck camper has a square storage tube (built into the porch) for sewer hose storage, it is too small to accommodate the wider dimensions of the Valterra sewer hose couplers.
We were storing the hose (with end caps) and elbow (with one end cap and inside a ziplock plastic bag) in the basement storage compartment’s sliding plastic tray. We did not like using the basement compartment for this purpose from both a waste of space standpoint and for obvious safe hygienic practices.
We considered using 4-inch diameter PVC tubing to build storage, but that tubing was about 1/4-inch too small. We were not able to find 5-inch PVC, so it was onward to 6-inch. The 6-inch PVC tubing from Lowe’s (Charlotte Pipe 6-inch x 10-foot solid PVC sewer drain pipe) works well to hold the sewer hose and the elbow with plenty of spare room for ventilation.
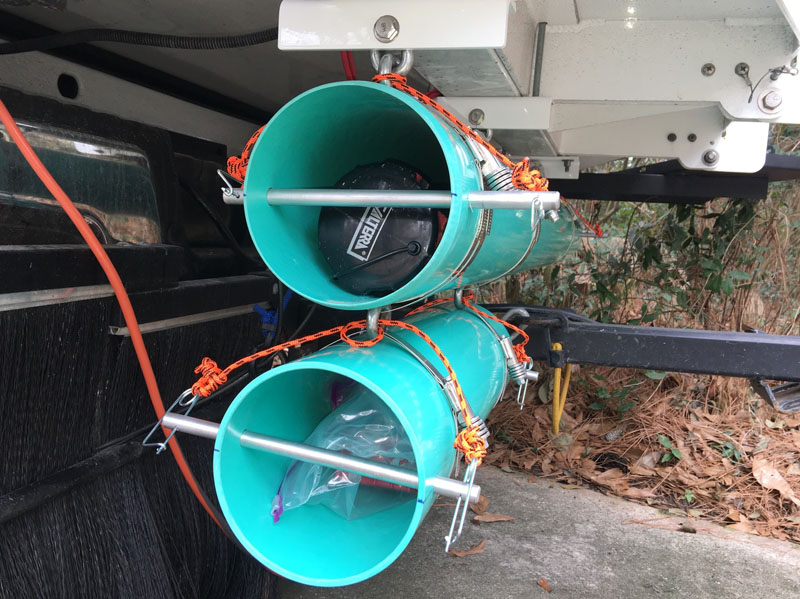
The upper PVC tube is suspended by 3/8-inch chain links and secured to the porch by bolts. It is held to the tube by 6-inch (SAE 712) stainless steel hose clamps. The lower tube is attached to the upper tube, in two places, by two hose clamps joined by a single chain link. The sewer hose and elbow, are retained in their respective tubes at each end, by 1/2-inch x 10-inch aluminum rods, with safety pin clips at each end.
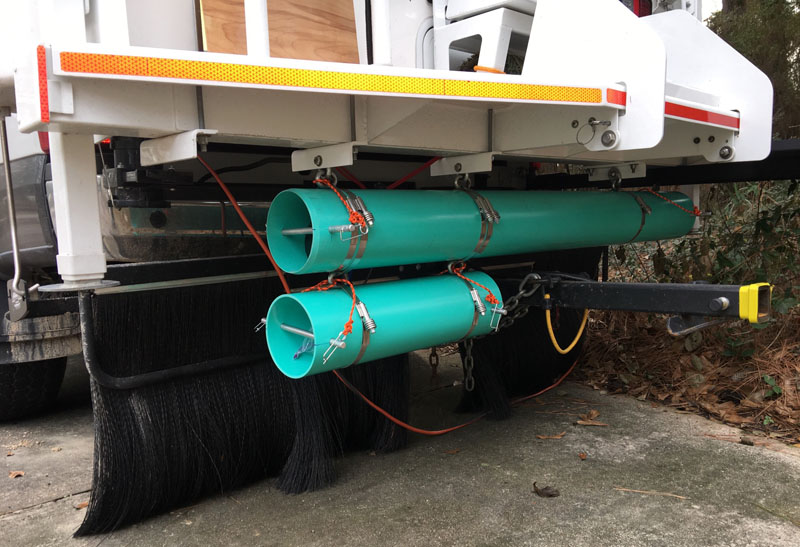
The planning took 90 days while on the road. The acquisition of materials, construction, and installation took about 14 hours. It cost about $100. In my opinion, the skill level of this modification is medium.
9. Ray and Brenda Fair, Massachusetts
Exterior Storage Organization Shelves
2016 Silverado 3500
2015 Eagle Cap 850
Before leaving home on our current trip, an inventory was made of the stuff we might need. Tools, lap compound, and assorted related stuff was placed in one outside compartment. One-pound LP bottles, campfire starter kits, fishing equipment, and more stuff was in another. During the trip, we accumulated additional stuff that went into one of the compartments.
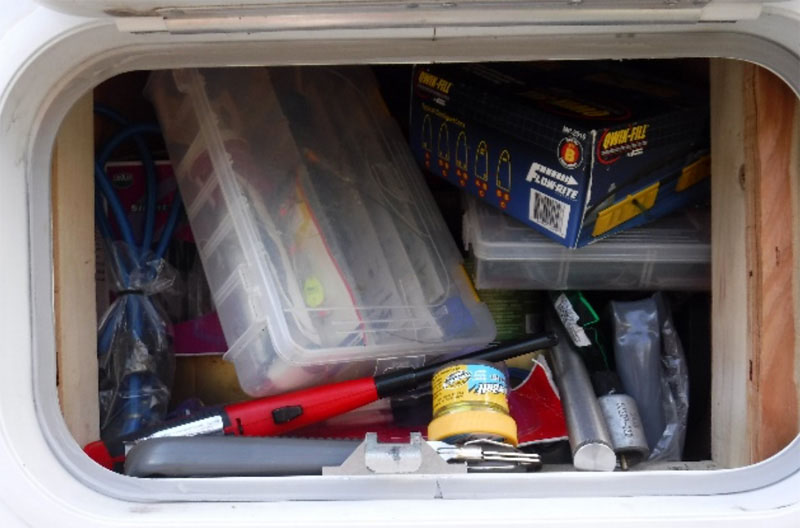
Days later, when looking for the new stuff, I could not remember which compartment it was in. Shifting of the stuff in the compartments during travel did not make looking for things any easier.

I’m not even going to show the other two compartments.
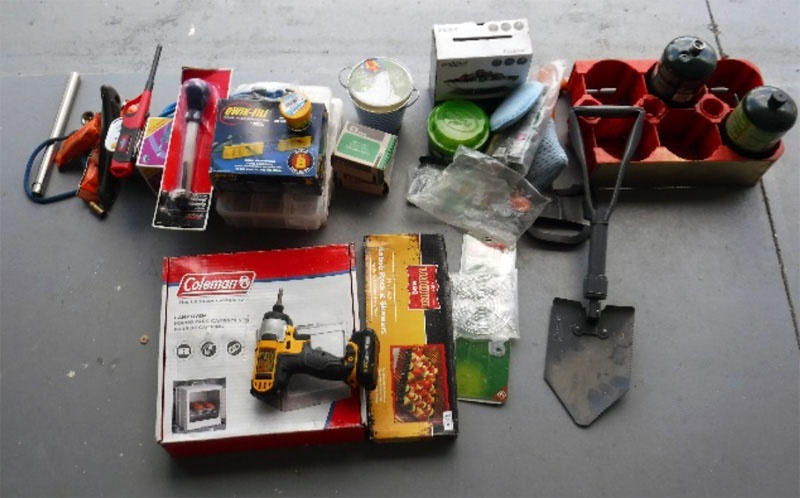
When the stuff was removed from the compartment and lined up it looked like we were going to have a mini garage sale. Action was needed.
A shelf was required for each compartment. I purchased a 4′ x 4′ plywood that was 1/8” thick, a 1x1x8 pine strapping, hasps, four small brass hinges, and a tube of construction glue.
A 1/8-inch piece of plywood was cut to width and half the depth of the cabinets. 1-inch x 3/4-inch stock was glued to the sides and to the back of the cabinet to support the shelf.
I cut two 2″ strips for a lip on each shelf. Cut the strapping to match the length and width of the shelf. Then I screwed two hinges to the bottom of the shelf and lip.
A 4-inch high fence was hinged to the front of the shelf to prevent items from falling off. A latch was screwed to the left side to secure the fence in the up position. When installing the latch, I failed to pre-drill the screw hole and the wood split.
When planning, you need to consider the high of the tallest item expected to be stored under the shelf. I glued the strapping to the sides and rear of the cabinet to support the shelf.
After the glue dries, fasten a hasp to one side of the lip and drill a hole in the cabinet sidewall so the lip can be locked in the up position. Repeat the sequence for the second cabinet.
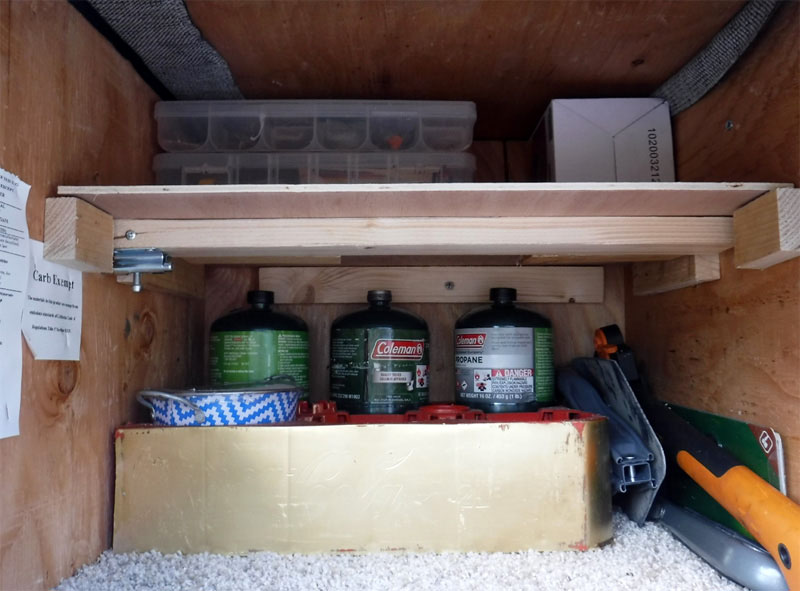
Above is the left compartment finished. The shelf fence is in the down position, the LP bottles are secured in a quart soda bottle holder (provided by our local convenience store), and the item on the left side of the holder is a Citronella candle. My fishing equipment is on the shelf. Life is good.
The project took three hours and the cost was under $35. In my opinion, the skill level of this modification is easy.
10. Dale Wilson, Lynchburg, Virginia
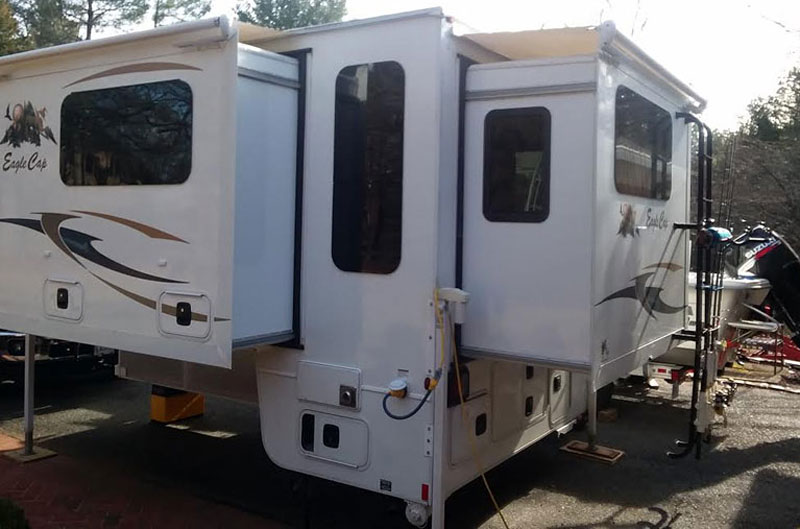
Added Window To Slide-Out in Eagle Cap 1165
2016 Ford F350
2017 Eagle Cap 1165
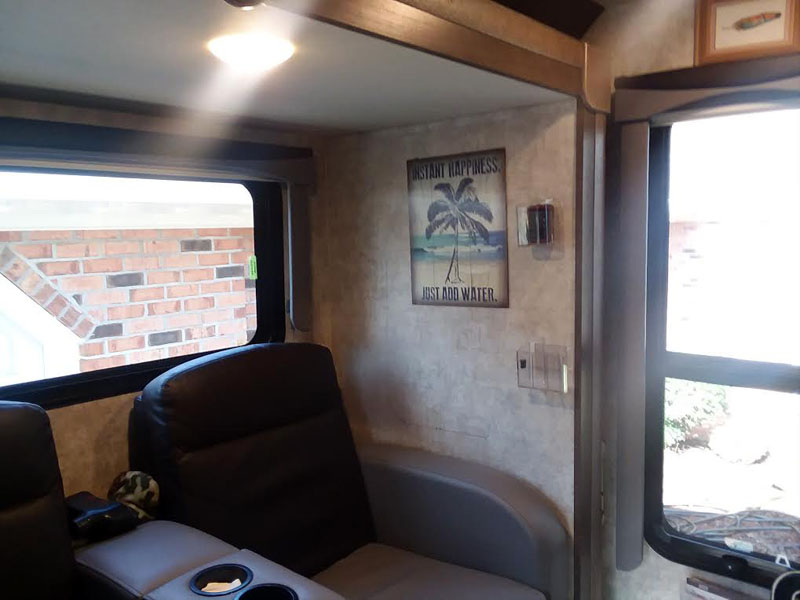
I could not see outside when sitting in the theater seats of our Eagle Cap 1165 triple-slide, so I wanted to add a window.
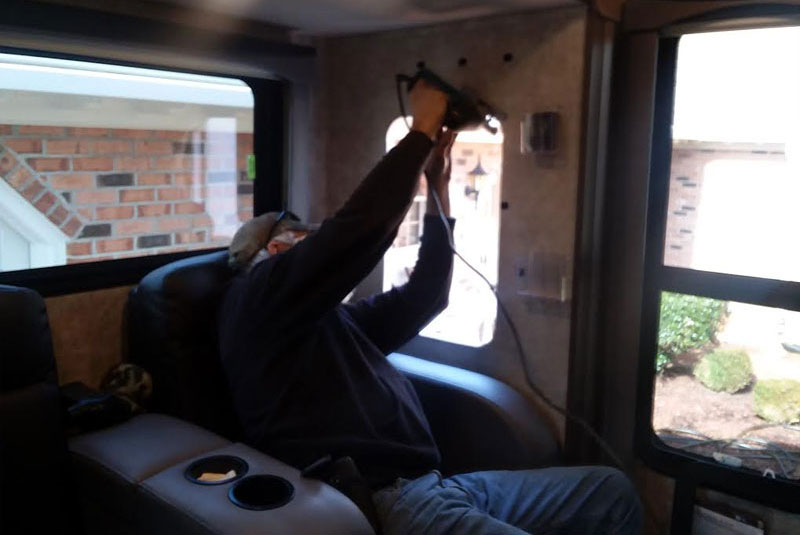
First, I found and bought a window online. I used a drill to start the cut and then used a jigsaw to cut it out.
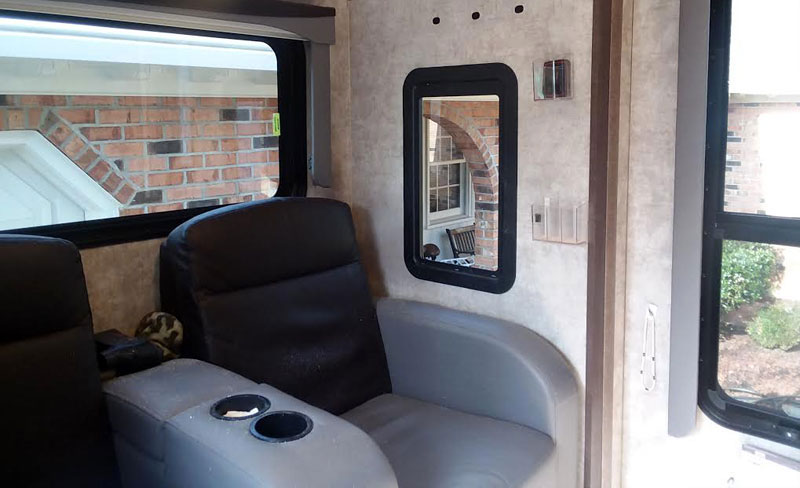
It worked out great! It took me two hours to complete this modification and cost me $100. In my opinion, the skill level of this modification is medium.
Disclaimer: The modifications above are submitted by Truck Camper Magazine readers. It is your responsibility to make sure that any do-it-yourself modification project you undertake is safe, effective, and legal for your situation.
Enter Your Mods Now!
Click here to enter a modification you’ve done on your truck camper. You can enter as many mods as you want, at any time. Good luck mod makers!


