After discovering a catastrophic leak in their fifth wheel toy hauler, Tom and Ann Mikan salvaged what they could and built a custom composite panel hard side camper from the ground up. Full of ingenuity, their homebuilt camper is truly one of a kind.
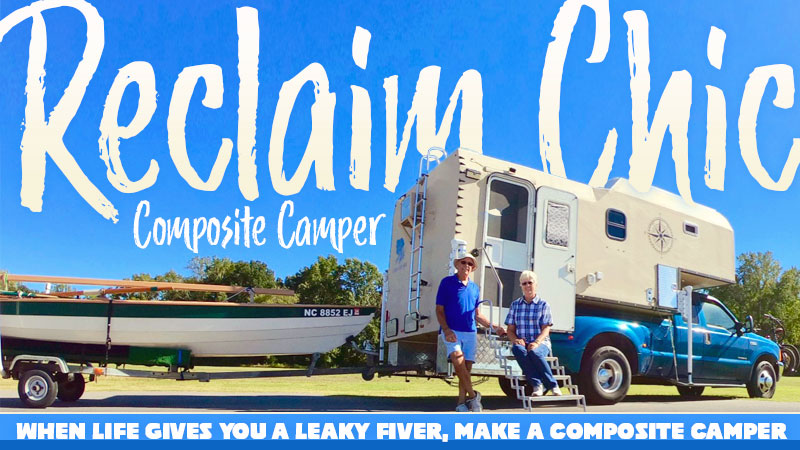
Tom and Ann’s original plan was to buy a brand new truck camper but circumstances – and an unfortunate roof leak with their fifth wheel toy hauler – presented an opportunity to go in an entirely new direction. Of course, that’s probably the nicest way to describe that life moment. It’s a bit like saying that an auto accident or house fire presents the opportunity to get a new car or move to fresh digs. In real-time, it’s not that fun.
Our parents and school teachers all told us, “When life gives you lemons, make lemonade.” From Tom and Ann’s remarkable example, we hereby coin a new term. “When life gives you a leaky fifth wheel toy hauler, make a composite panel truck camper.” Try it next time your kids or grandkids complain.
What sets this custom build apart is the use of salvaged materials, Nidaplast composite panels, and a creative and practical approach to design. If you’ve ever dreamed of building your own camper, you are sure to get some ideas from Tom and Ann’s design, materials, construction approach, and finished camper. It’s singular.
If nothing else, Tom Mikan’s recount presents a simple but clever idea. If you want to build your own truck camper, consider buying a camper, trailer, or RV that’s been structurally damaged and use the refrigerator, stove, furnace, water heater, windows, cabinets, tables, dinettes, and other items for your new camper. Not everything will translate, but an otherwise totaled RV might yield a bargain of components, and inspire design possibilities you might not have considered.
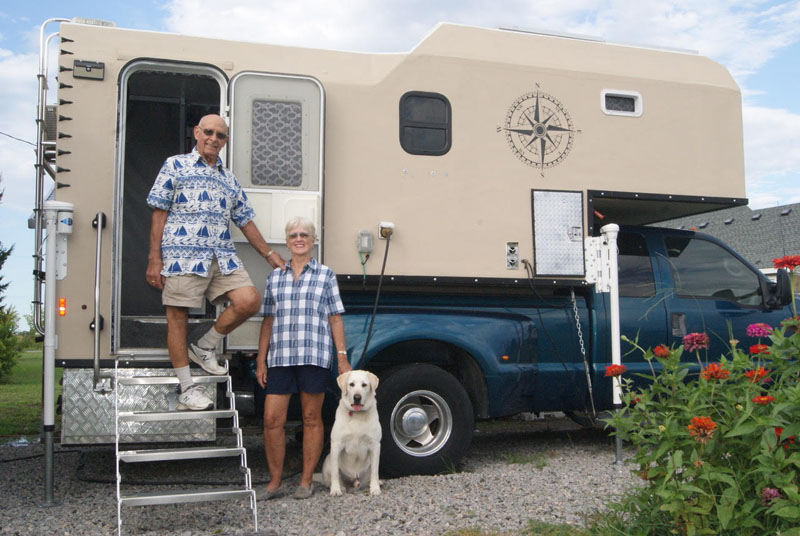
Above: Tom and Sue Mikan with their yellow lab and homemade composite camper
Where did the idea to build a composite truck camper come from?
Both Ann and I have been camping in one form or another since we were kids. Previously we had a travel trailer and then a fifth wheel toy hauler.
The idea for our own truck camper started with a sailing dory we built and wanted to take with us. With that goal, we attended an RV show and were considering some of the high-end truck campers. The plan was to sell our toy hauler, buy a truck camper for our Ford F-350 and tow the sailing dory.
There was only one issue. I had to fix a leak in the roof of the toy hauler. It should have been a straight-forward job, but there was quite a rude awakening. When I removed a roof section, the fiberglass insulation was black with mold and mildew. Even the roof supports and studs were black. I would not sell it to anyone in that condition.
At that point, I came up with Plan B. I decided to salvage what I could from the toy hauler and build my own composite truck camper.
What’s your background?
My background is in corporate management and I was a business owner. In my spare time, I have always enjoyed working with my hands versus pushing paper around a desk. I find it therapeutic.
I built a dinghy in the 70s from an article in Popular Mechanics. Through the years I’ve built a 30-foot catamaran sailboat, a paddle board, another dinghy, and a double-masted 19-foot sailing dory with red sails that I previously mentioned. That can also be powered with an electric outboard without the masts/sails for fishing.
How did you go about designing the camper?
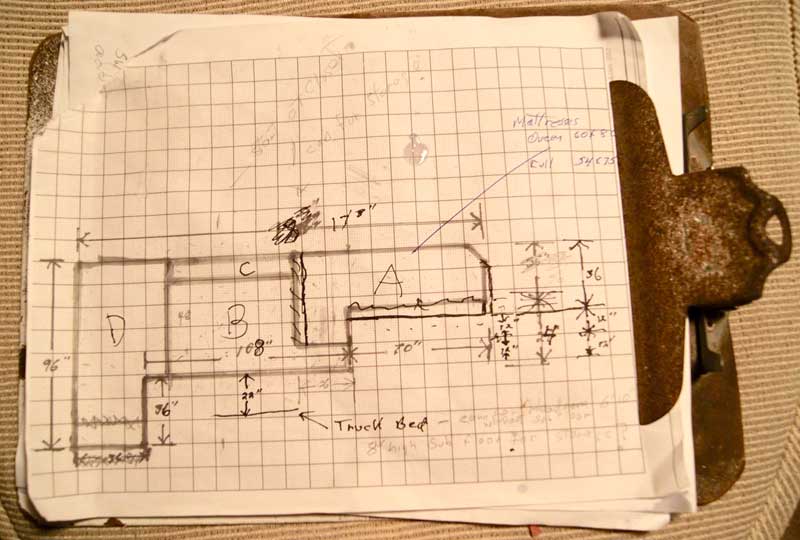
I watched a couple of YouTube videos of smaller and more spartan builds and thought, with my boat-building experience, I could build a bigger camper. I played around with a free CAD program but realized I could be half done with the camper build by the time I mastered the software. Glen-L sells boat plans and I remembered seeing Glen-L truck camper plans that were at least 30 years old. I spent $60 and ordered a set to study.
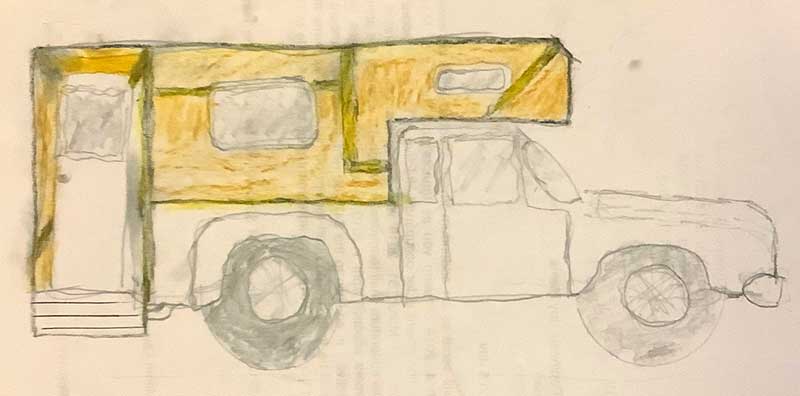
None of the dimensions, measurements, or materials from the Glen-L plans were used, but areas where extra support might be needed were noted. I knew what I wanted and could envision the finished camper in my mind. My actual plans consisted of very rough sketches.
Did you have some design criteria?
Yes. I wanted to salvage what was possible from our old 29-foot toy hauler fifth wheel that we owned for 13 years. The plan was to build a custom expedition camper for my Ford F-350 turbo diesel dually that has a trailer hitch to bring the sailing dory with us.
For the camper design itself, we wanted that wonderful feeling of crawling into our own bed and we wanted to be able to take a hot shower. We have a wet bath with an on-demand hot water, a face-to-face dinette that converts to a single bed, and dinette seats with 45-degree backrests for lounging and watching television. Four people can be tightly accommodated in our dinette in a pinch.
Ann is a good organizer. We have been on five outings so far and have been very comfortable. We came to truck camping with experience living on our sailboat cruising for as long as a month at a time with a very energetic Yellow Lab, so we know how to be organized and comfortable in a small space.
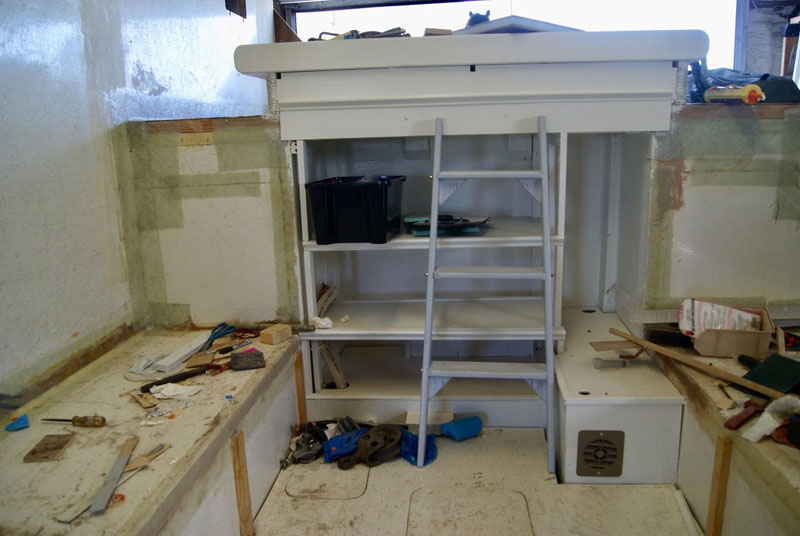
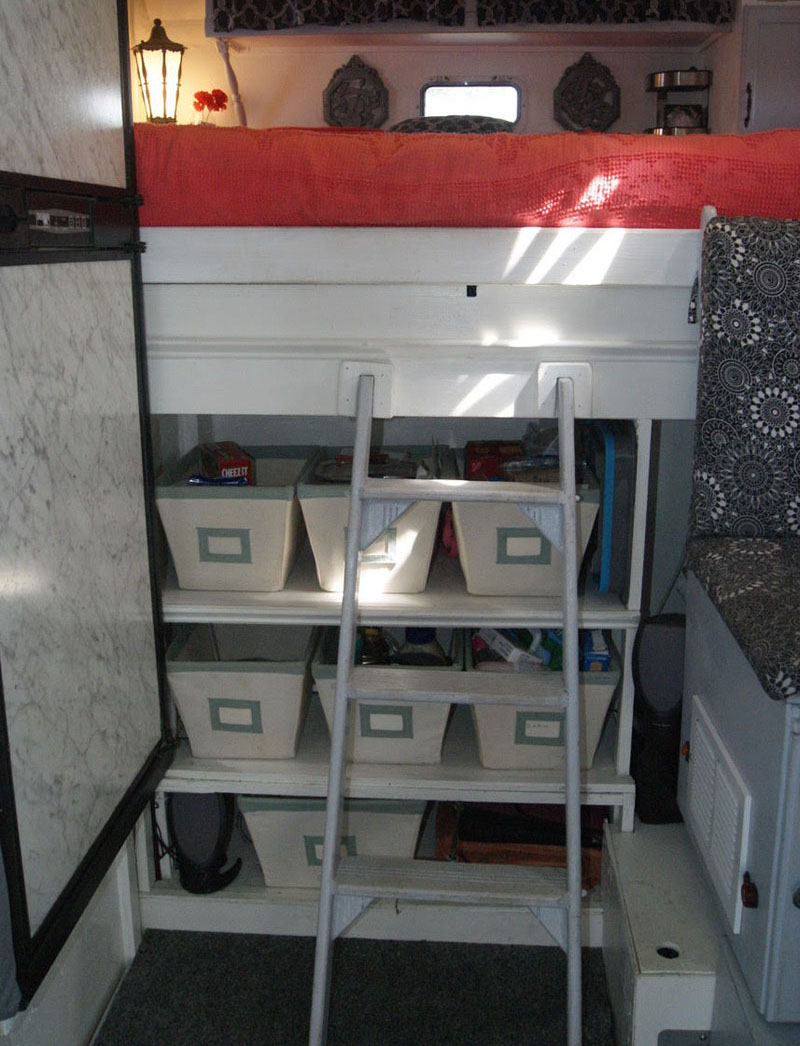
Above: Ladder and bed area, storage shelves are behind the ladder
What exactly were you able to salvage from the toy hauler fifth wheel?
The 20,000 BTU propane furnace, the 6.3 cubic foot two-way refrigerator with exterior access panel and roof cowling, 18.5-inch television with a rotating antenna on the roof, a two-speed MaxxFan, two 80-watt solar panels, the stove vent, kitchen window, door and screen, queen mattress, water pump, cabinet doors, one drawer and hardware, the 110-volt electric cord, 30 gallon propane tank, and a few storage bins were all taken from the toy hauler.
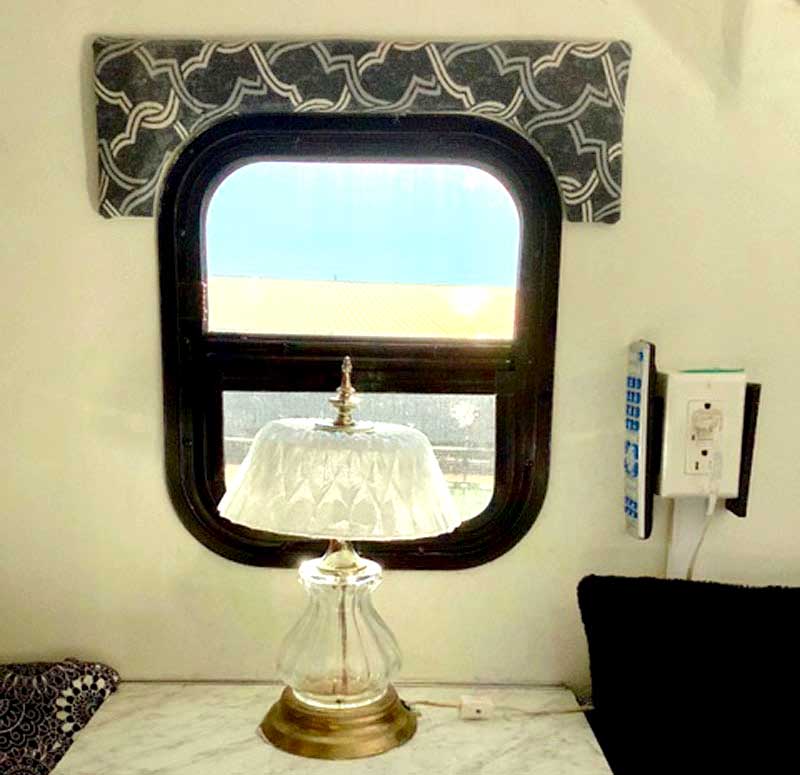
Ann upholstered the old cornices (pictured above) for the window and door to match the new decor. I actually thought more could be used, but it didn’t work out that way.
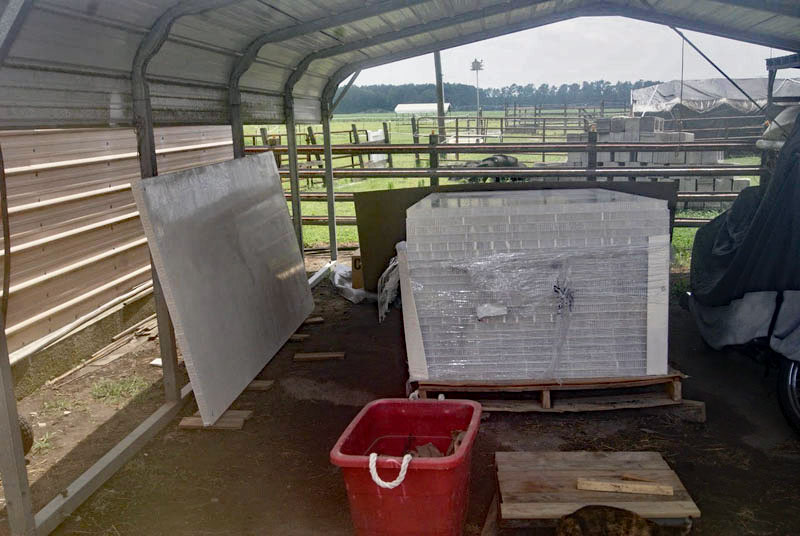
Above: Composite 4X8 sheets on skid; fiberglass and honeycomb sandwich 1.5” thick
Other than using the toy hauler, what else was used to build it?
Our camper is built from seventeen 4-foot by 8-foot sheets of 1.5-inch thick composite Nidaplast panels. Nidaplast has polyester honeycomb sandwiched between biaxial fiberglass cloth. The panel seams are joined with adhesive and then epoxied with 4-inch, 18-ounce biaxial fiberglass tape. There is a double floor joist system for strength in consideration of the overhang off the rear of the truck and storage under the floor.
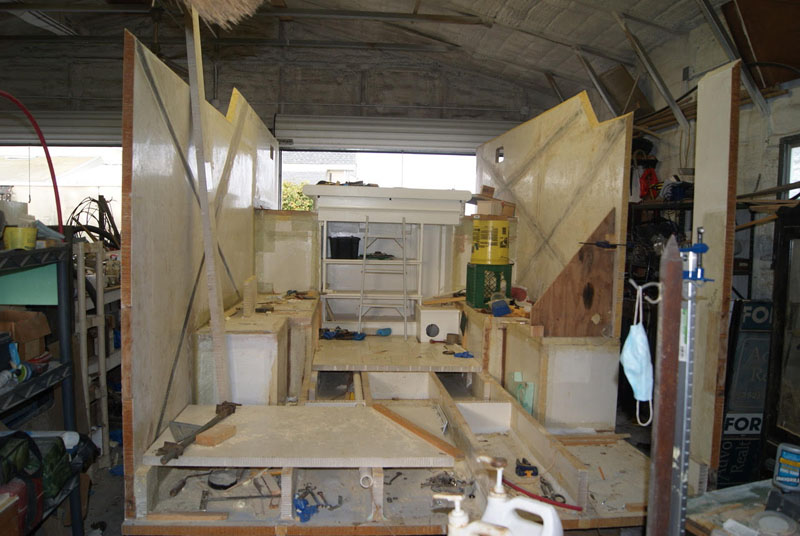
Above: The are sides attached looking forward; you can also see the storage in the basement area
One of the challenges I anticipated was the concealment of electrical wires and plumbing with composite panels. They mostly have to be exposed internally and externally. Keeping the camper looking good versus busy and sloppy with wires and plumbing showing kept our minds busy.
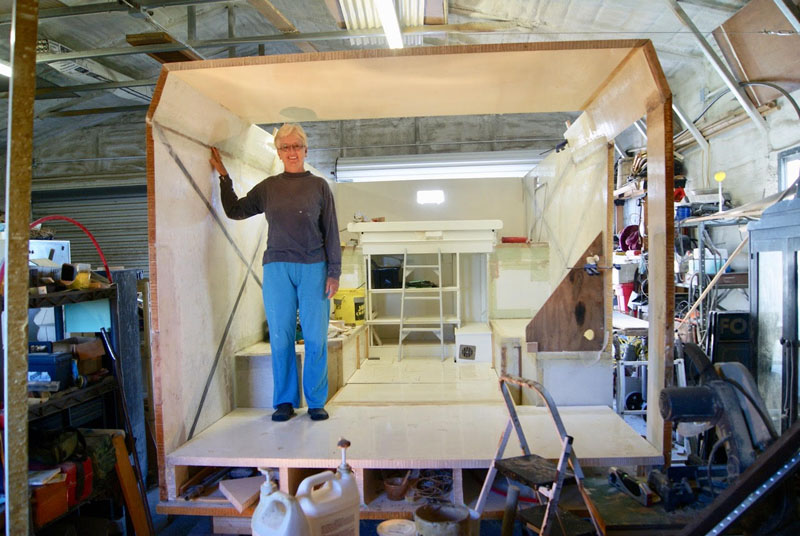
Above: The sides and roof on the camper
The camper is a monocoque design similar to an egg shell. The double floor joist system supports the wall, which supports the roof and the roof holds up the walls which tie into the floor. There are also internal bulkheads or walls to further contribute to the support of the structure.
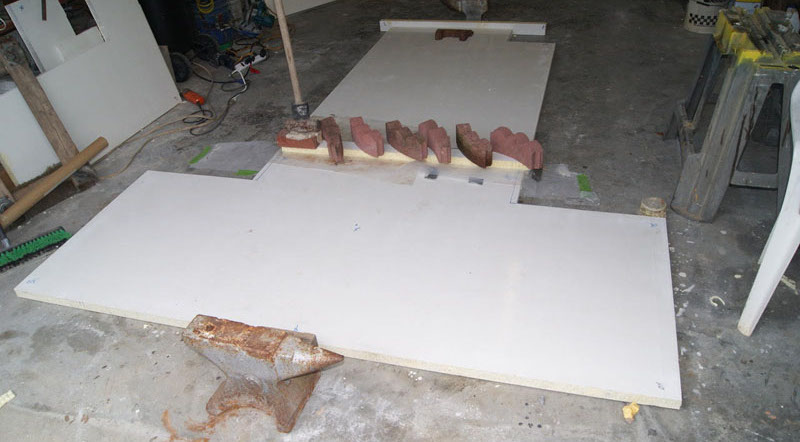
Above: Floor epoxied and glassed together
Epoxy was used for strength and integrity. I have experience using epoxy from boatbuilding. Some Sika adhesive was also used in certain areas. It is spec’d as a replacement for fasteners in certain applications.
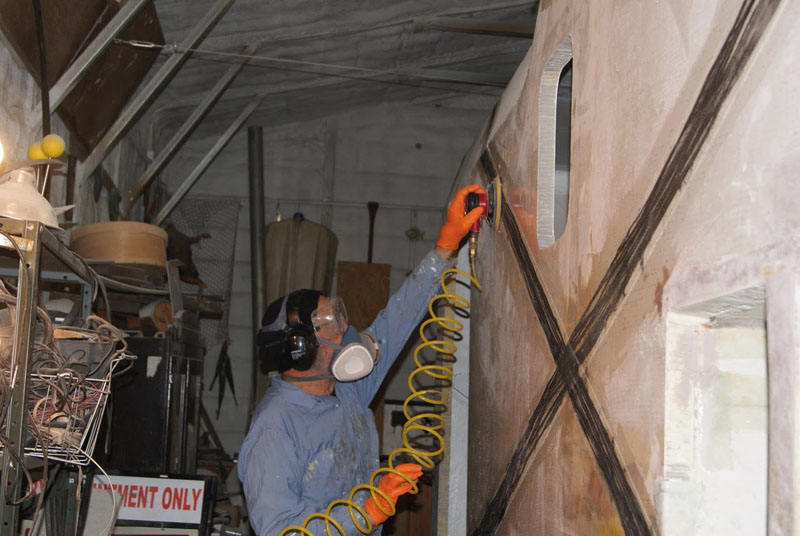
Above: Tom sanding the side of the camper
Why did you make the roof taller in the cabover?
That was done for some additional headroom. It is a tight sleeping area. It took some adjusting as we initially banged our heads a bit the first night or two. Each time we would hit our heads, Ann and I would both break out in laughter. I wonder what the neighbors thought! We have adjusted to the tighter quarters compared to the old toy hauler and have no problems now.
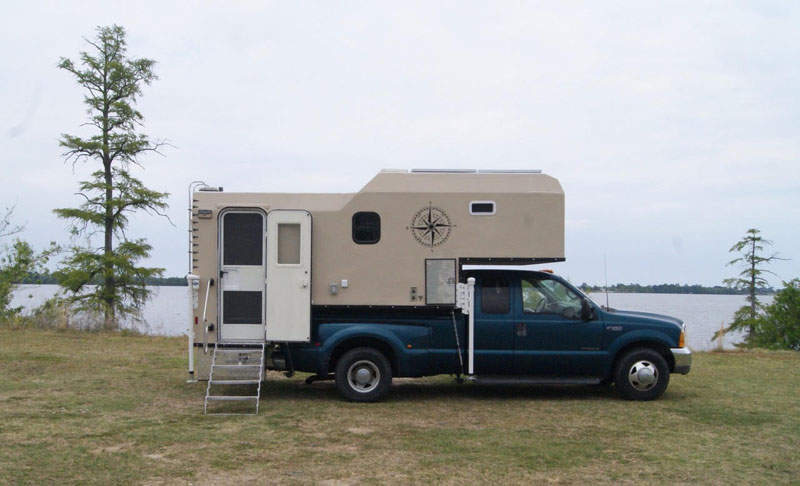
The roof design allows for additional strength and aerodynamics. This is similar to the principle of corrugated cardboard where sheets of paper, which are weak on their own, are assembled by incorporating bends or folds for strength. Properly applied angles can decrease the overall size of a span and distribute the load/stress, in addition to adding some streamlining for aerodynamics.
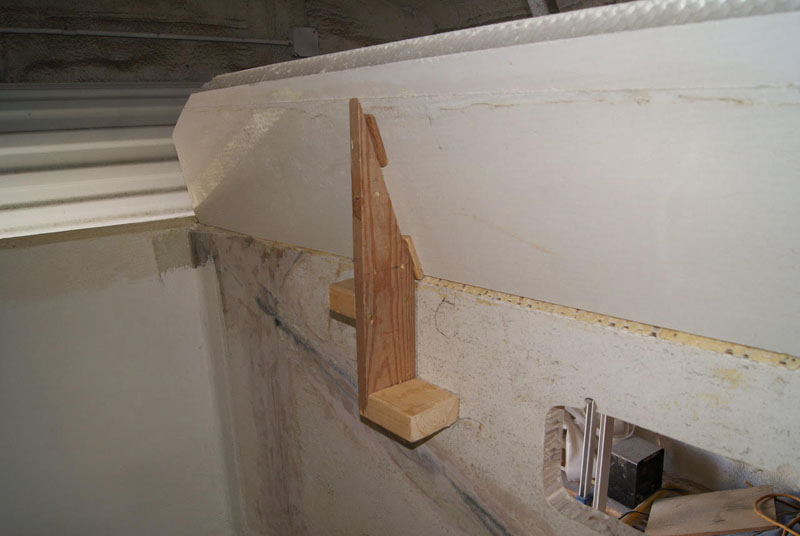
Above: The building of the angled roof for strength, aerodynamics and aesthetics
Tell us about the electrical system in your camper.
The space between the floor joists holds three lithium batteries, an inverter, buss bars, a shunt, a circuit breaker, a fresh water pump/actuator tank, and the grey water sump (bilge) pump.
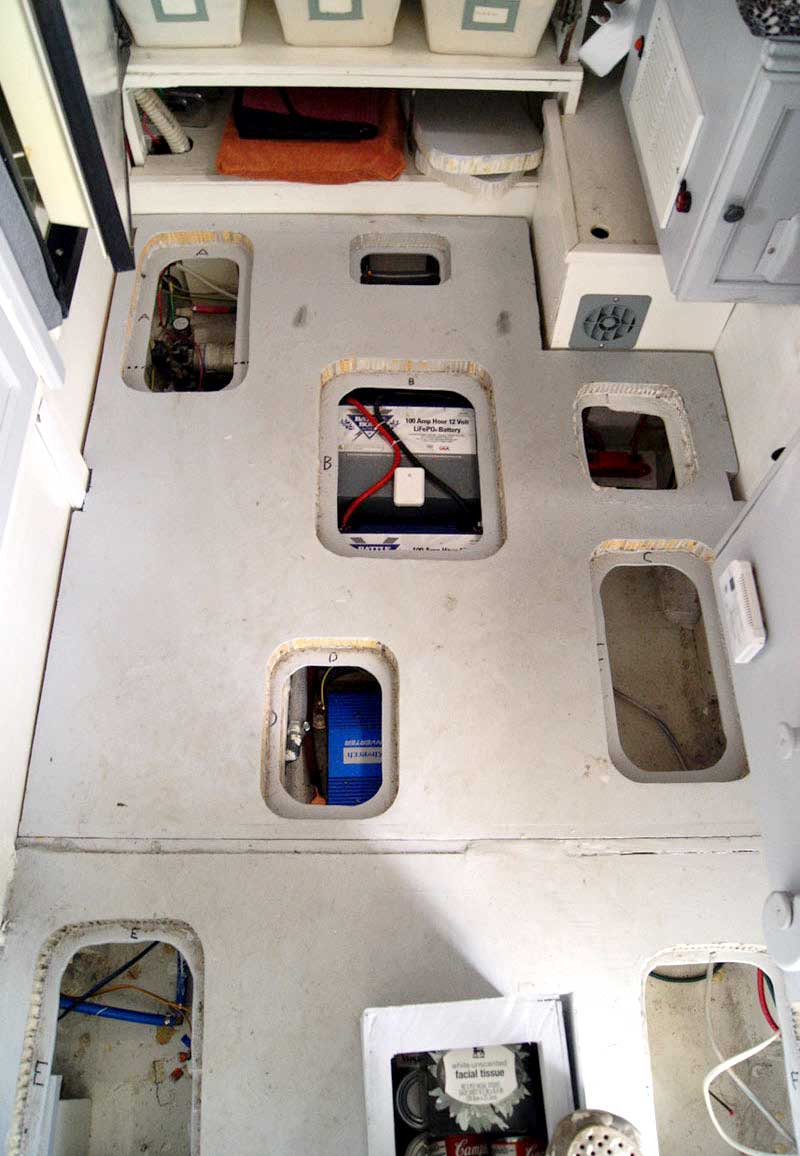
This section of the floor is removable for inspection and maintenance. There are smaller access points in the floor (see picture above) for inspection and maintenance without having to remove the large floor section.
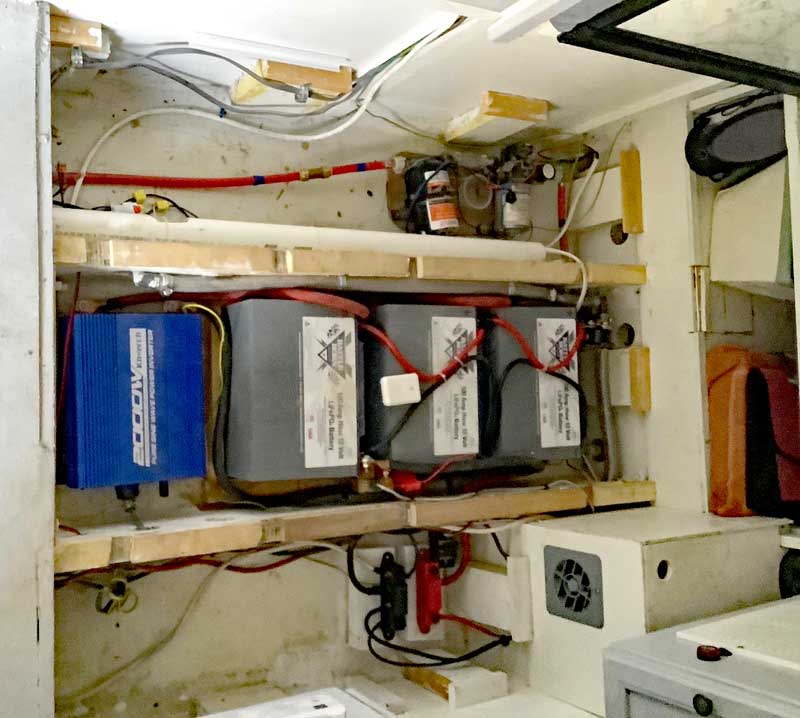
The camper has the ability to run off 110-volt AC or 12-volt DC using three 100 ah Battle Born lithium-ion batteries (pictured above). When plugged into electricity, a converter charges the battery bank and provides AC power. When on the road or boondocking, our 2,000-watt inverter converts DC to AC when needed.
When not plugged into shore power, our battery bank is charged by 560-watts of solar panels on the roof. Most of the components run directly on 12-volt DC.
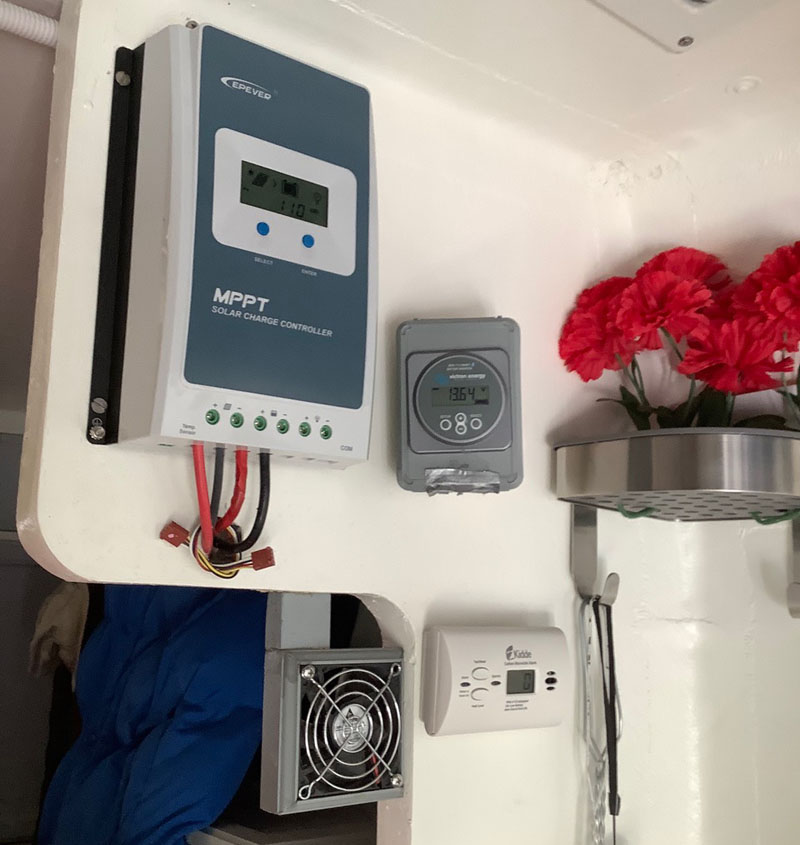
We have a 40 amp MPPT solar charge controller (pictured above) so we know our solar panel status. It also prevents overcharging the batteries. The Victron BMV712 battery monitor has Bluetooth to show the current status. We also have a 2,000-watt generator.
What does your camper weigh?
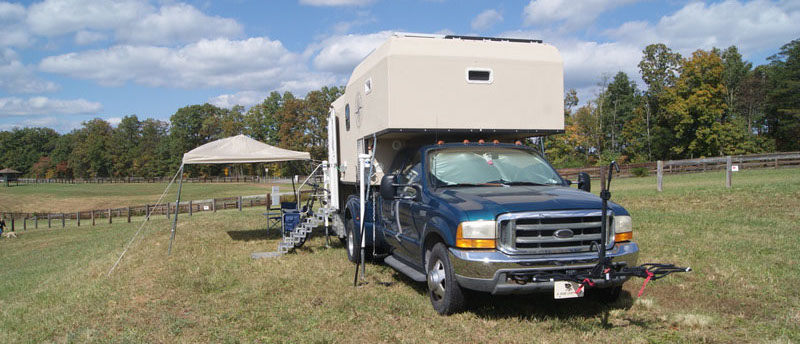
The loaded rig comes in at 11,800 pounds with Ann, me, our dog, ebikes, and full fresh water. The camper alone is 4,840 pounds. That’s heavier than I thought it would be, but the F-350 handles it well. The overall length of the rig is 24 feet, not counting the bike rack. Our height is 11 feet and the width is 8.5 feet.
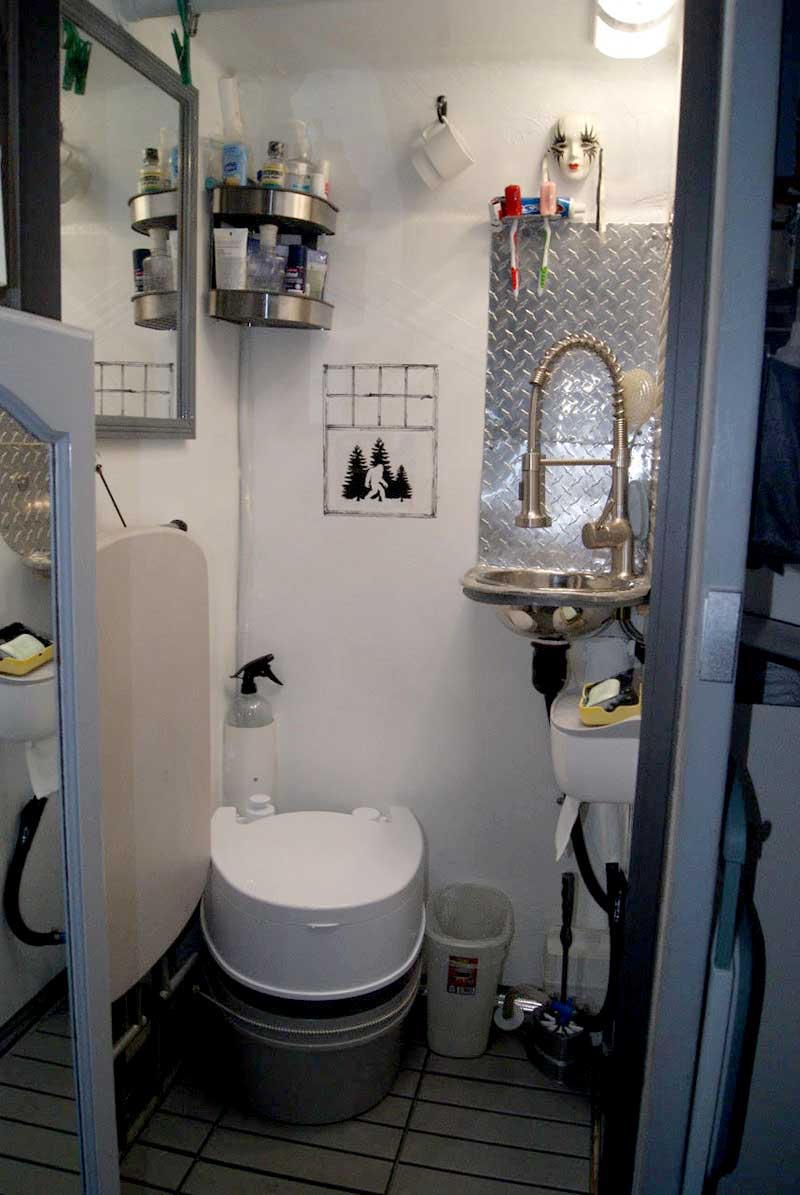
Above: The et bath has an instant on-demand hot water and a high capacity porta potty
What are your tank sizes?
We have a 25 gallon fresh water tank, a 17 gallon grey tank, and a 5.3 gallon Camco portable toilet that can be emptied at any dump station or toilet.
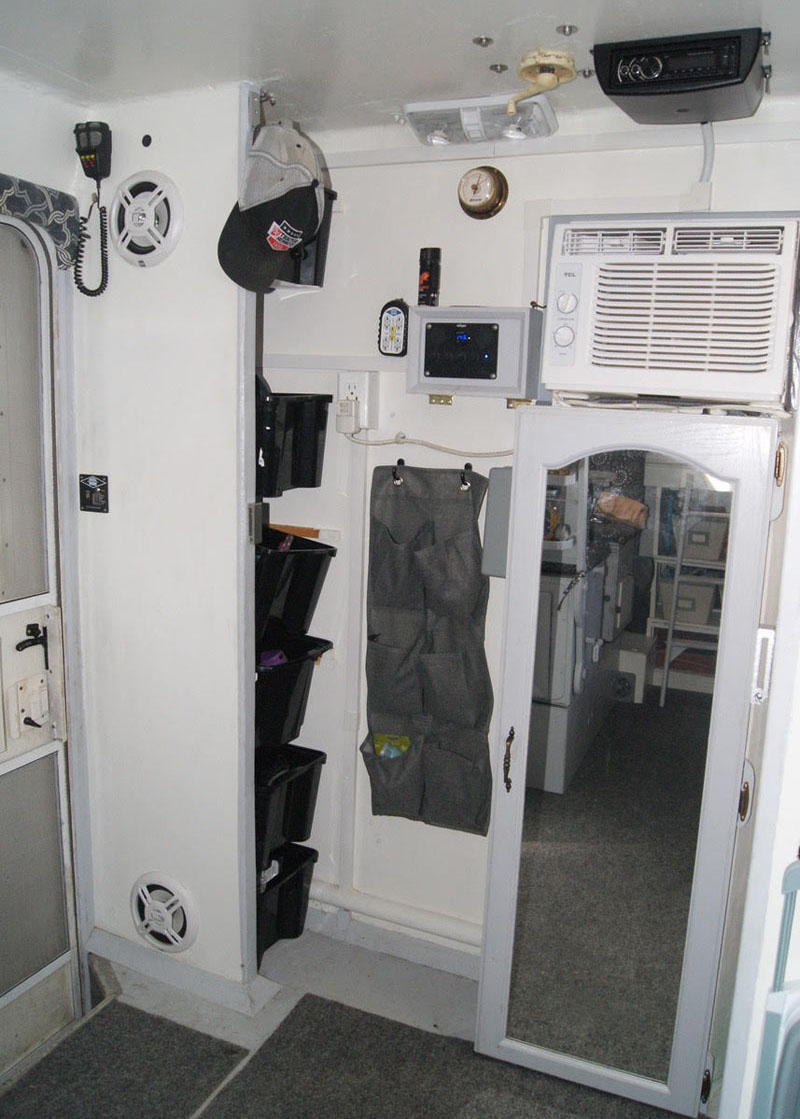
Above: The back wall of their camper, the bulkhead on the left was positioned so the IKEA storage bins would fit behind
A rubber washing machine trough with plumbing to a sump pump was used to capture the water from the shower. I installed a pump with a float switch (bilge pump) that automatically pumps the bathroom, kitchen sink, and shower water slightly up to the grey water tank entry point. Our bathroom doubles as a wet locker/mudroom for wet rain gear, boots, etc. There is also the usual skylight vent with a fan in the bathroom.
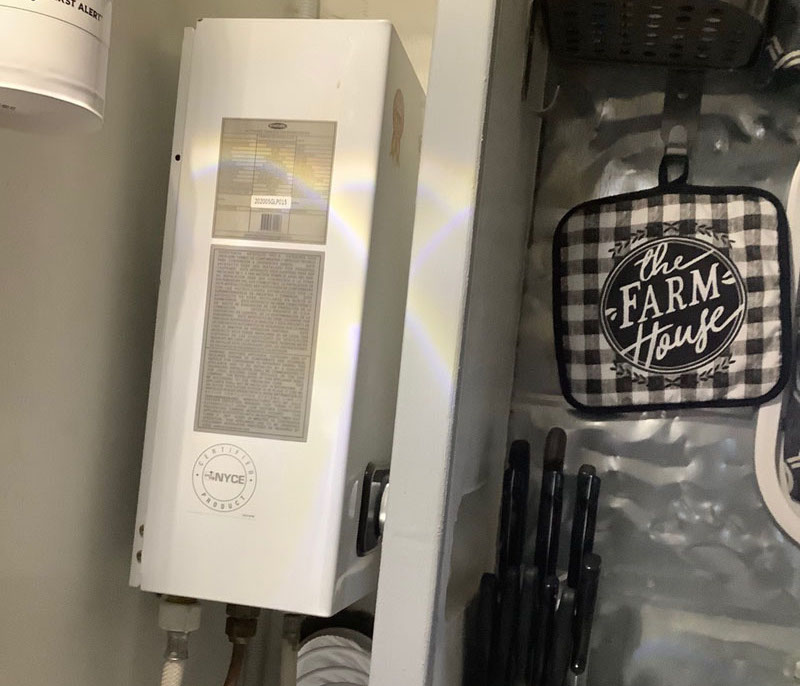
Above: The on-demand water heater module
Tell us about your propane tanks and other camper features.
The camper has a 30-pound propane tank, propane and carbon monoxide monitors, two burner propane stove, 110-volt AC 5,000 BTU air conditioner, rear view and backup cameras, AM/FM radio CD/DVD player, and a television.
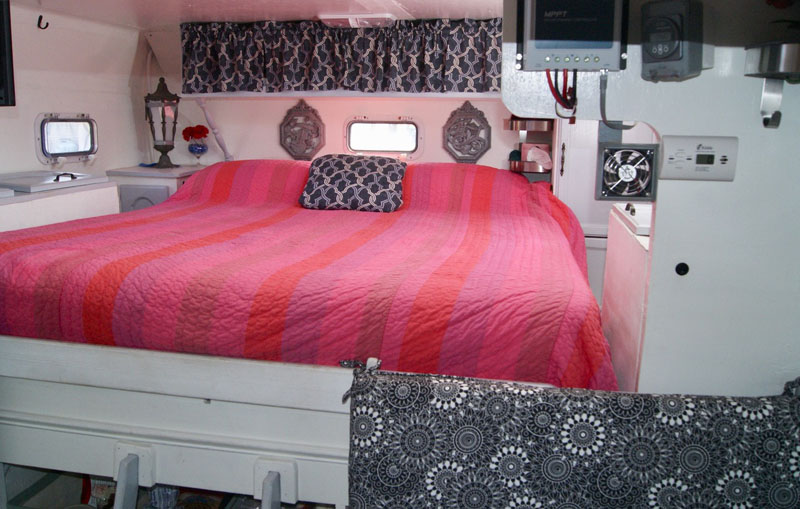
Above: Queen bed with boat window ports they had in inventory and lattice for aeration under the mattress. There is a piston assist for storage under the mattress and a ladder to the bed with storage baskets behind it (see below).
Over the bed, there is a roof hatch vent that allows for access to the roof for maintenance, or elevated observation of wildlife and sporting events.
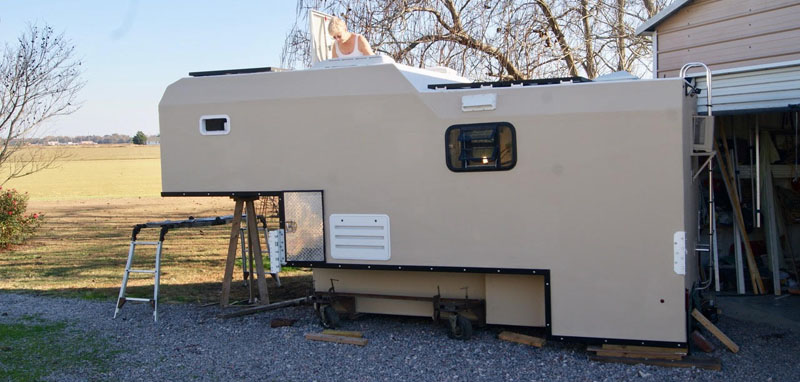
It is also an emergency escape exit if ever needed.
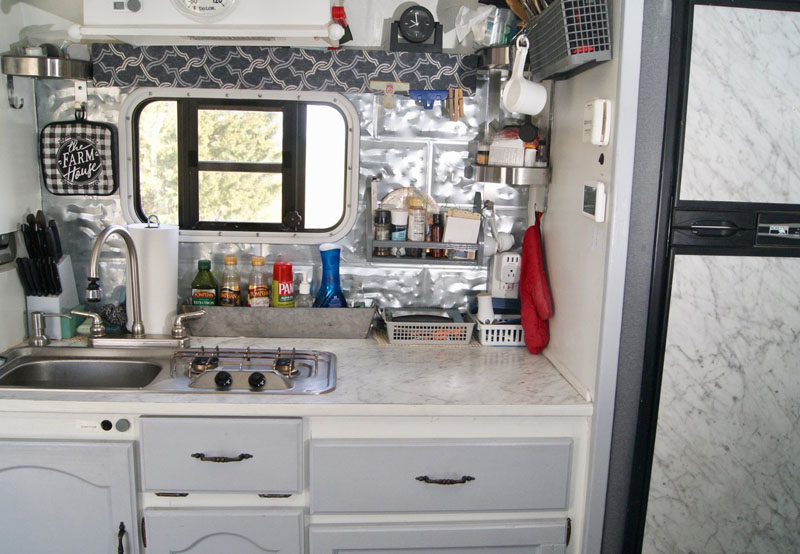
In addition to the two-burner propane stove, we have a portable single induction cooktop that can be used inside or outside to prepare a meal. There is a four-way temperature and humidity monitor that I got from Amazon for $20. The sensors are inside, outside, in the battery compartment, and in the refrigerator.
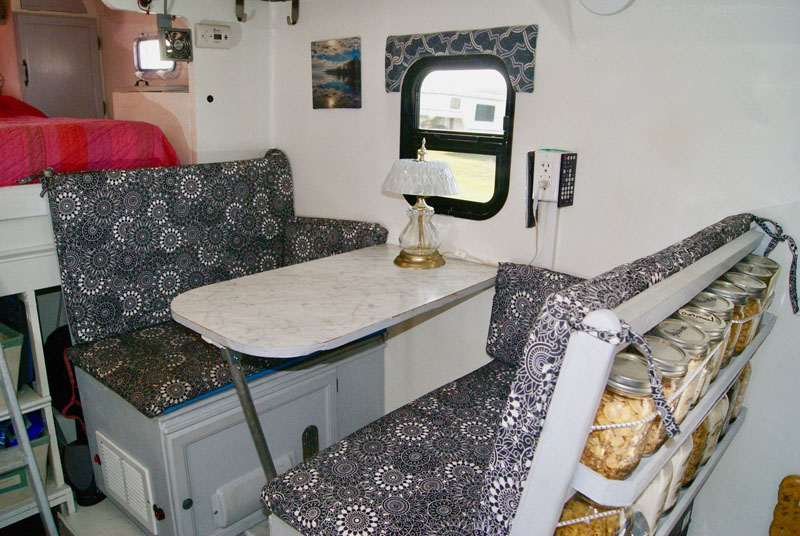
Above: Dinette converts to 45 degree lounge for watching TV or flat to a single bed with an adjustable backrest and Mason jar storage behind it
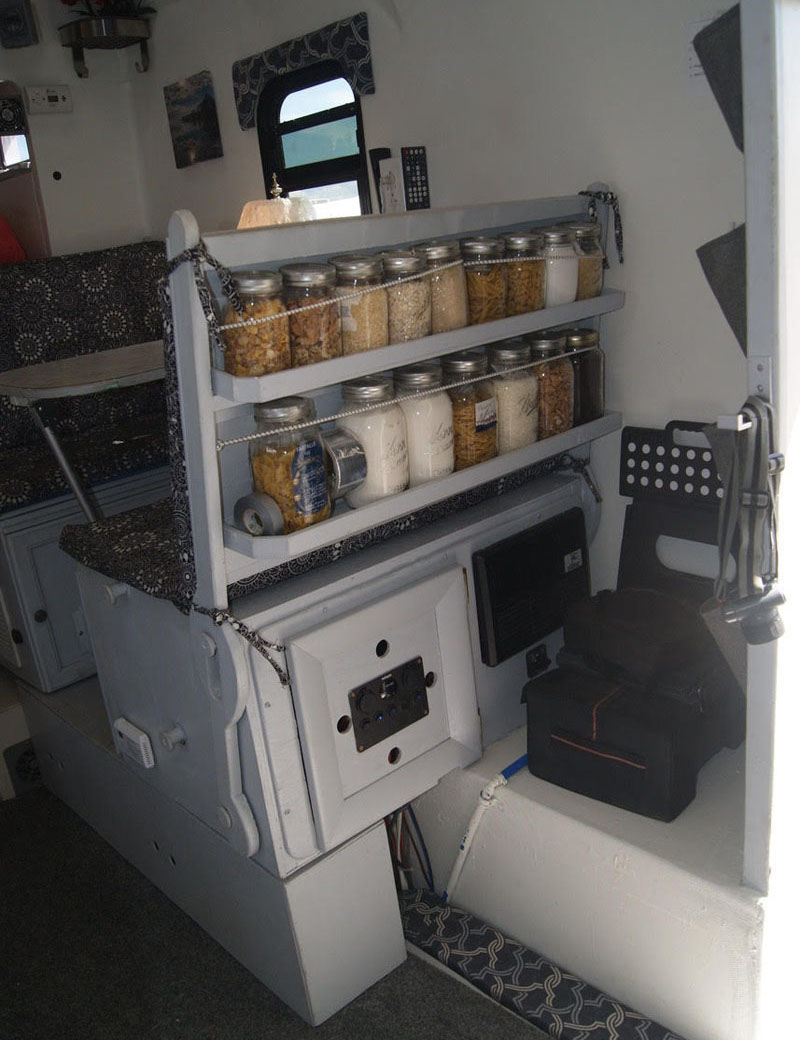
I installed two brushless muffin fans that are rated at .2-amps each to help circulation in the bed area. There is also a brushless muffin fan over the refrigerator coil with a thermal sensor for use in extremely hot temperatures if needed.
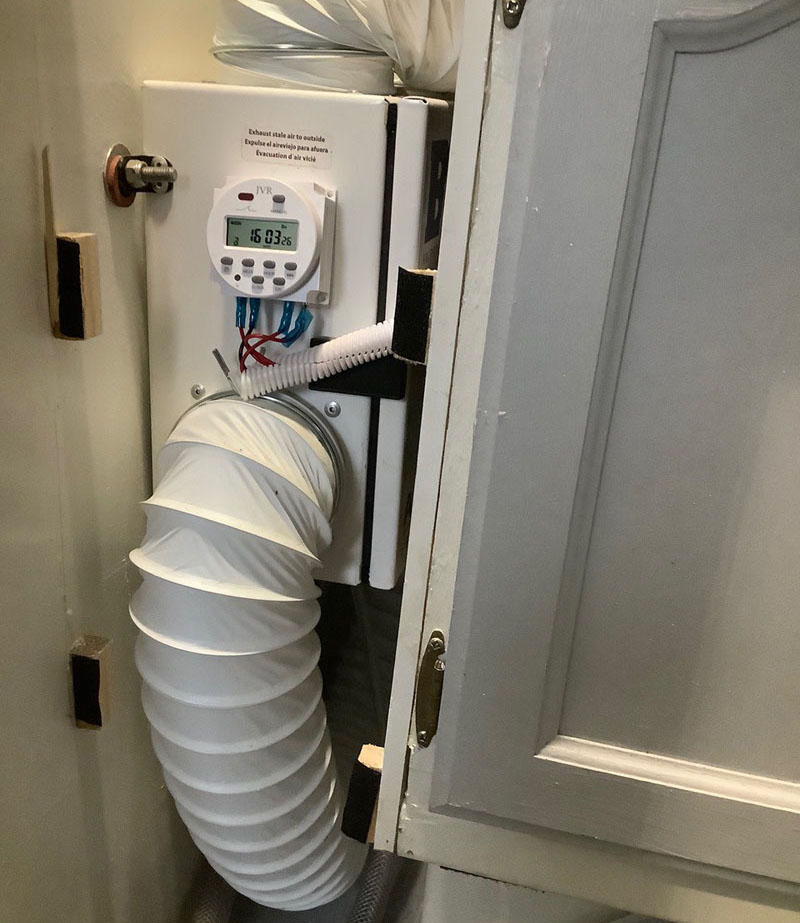
Above: The air exchanger with digital programable timer
A fresh air exchanger with a digital timer was installed for humidity/condensation and possible chemical outgassing control.
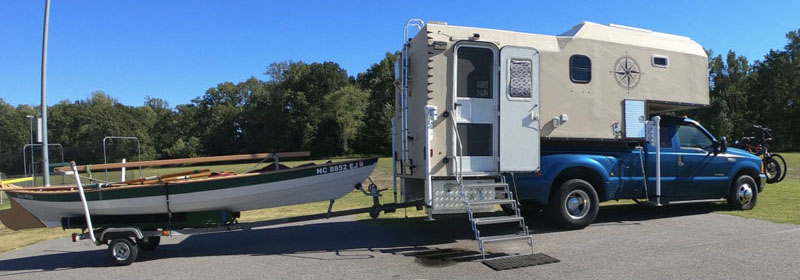
We have a 34-inch trailer hitch extension to compensate for the rear camper overhang. This allows us to tow a boat or trailer. We also bring along a separate screened dome dining enclosure with custom sun shades.
There is a strobe light and a siren module on the roof in the event of an emergency. It also has a mic with an outside loud speaker. The most recent RV park we visited had 700 sites. If we or anyone required emergency services they would need a guide, map, or GPS to find the site. I got lost twice on my bike. With the strobe turned on, the camper could be seen for over a mile facilitating a quicker response.
Have you ever needed to use this feature?
No, and ideally we never will.
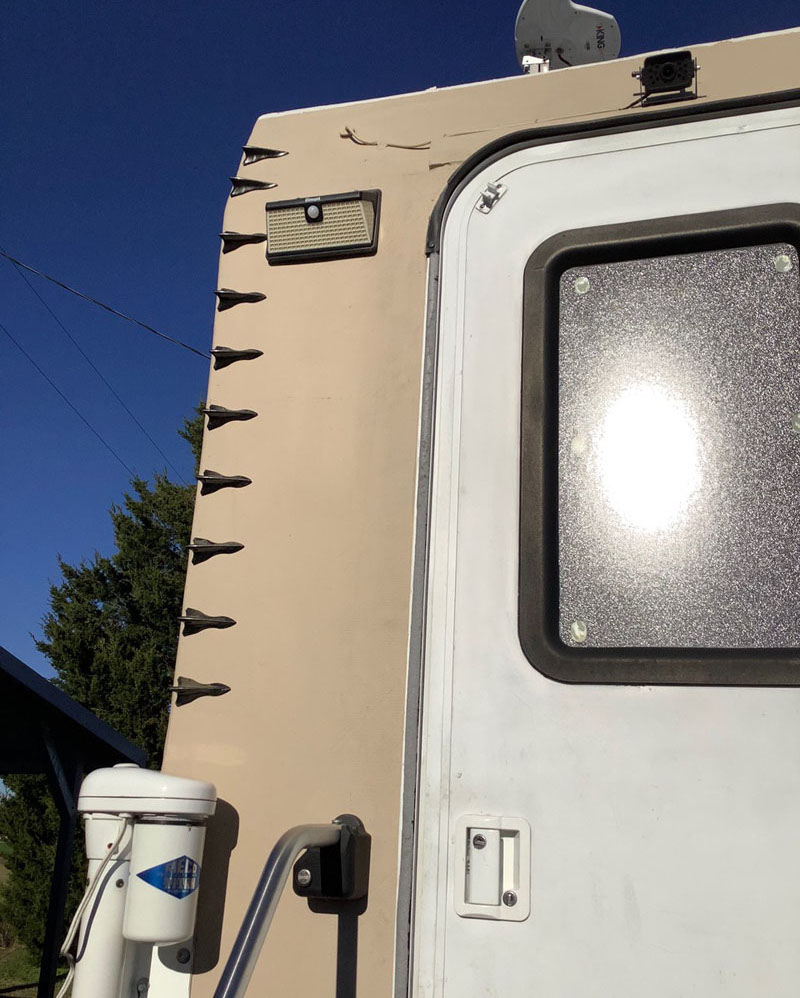
Above: The mini vortex generators on the rear side of the camper
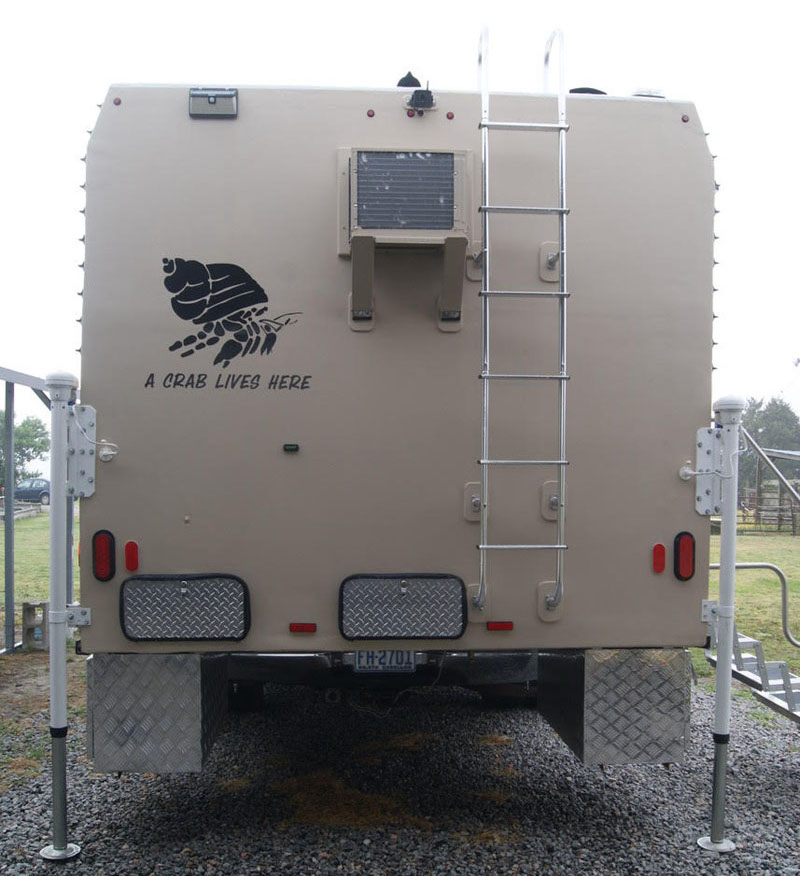
We also have ten mini-vortex generators to help mitigate inefficient drag at the camper rear when driving and to minimize blow-by from large passing/oncoming vehicles. It should also help keep the rear of the camper clean.
Have you found that these mini-vortex generators are helpful?
It is only a guess. At the last rally, a fellow camper who was a retired physics teacher came over to the rig as we were leaving and wanted to know where I sourced them and I told him that they were on Amazon. He was probably one of the few people there who knew what they were.
The paint job is Sherwin Williams flat house paint. I fully expected to see the back of the camper getting dirty with road dirt from the vacuum created by the square rear of the camper, but this has not happened. I can only speculate that the vortex generators are making some contribution. My FM radio antenna is a shark fin type and is on the back of the roof. It is also a vortex generator. They are on the roofs of cars to contribute to aerodynamics as well as for radio reception.
Tell us about the pull-out storage tray and how it was implemented.
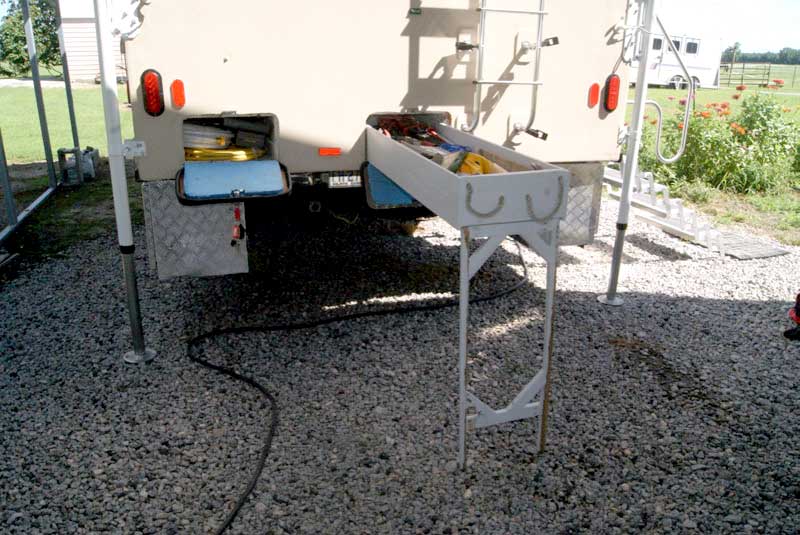
The slide-out storage drawer is 60-inches by 14-inches had to be thought out in advance. Long slides for the drawer were obvious, but if there was ever a problem, major surgery would be necessary to access the area under the floor. The KISS formula provided the solution.
I found a couple of small wheels in the shop and attached them to the innermost end of the slide-out drawer. To access the contents, we lift up the front of the drawer a half-inch and pull the drawer out as long as we need. All the way out requires leg support that is Velcroed under the drawer and easily accessed.
The slide-out drawer stores a farm jack, come along, axe, machete, a camp saw, some tools, line, and bungees. The other compartment has the water hose and electric hook-up line cord.
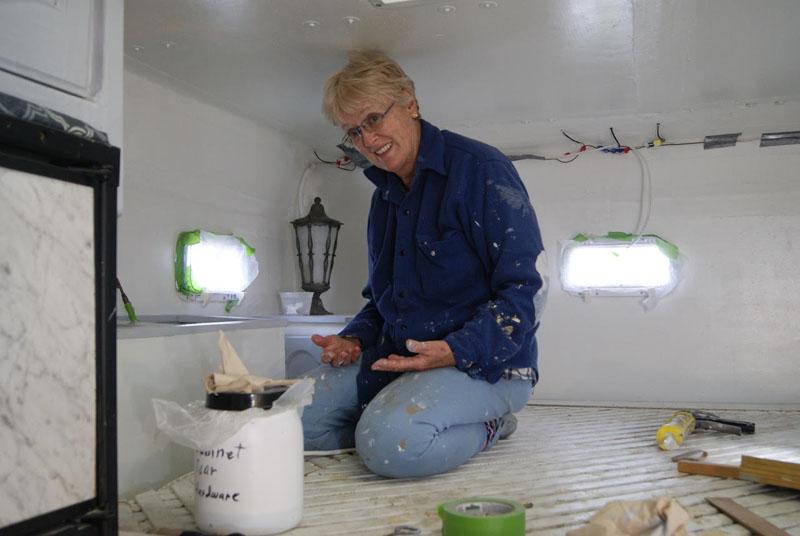
Above: Ann painting the overcab area
What are some things you learned from this project that you would share with others considering their own camper build?
A good helper makes a big difference. I have Ann who understands the process and is a good worker. I call her, “tool girl”. I am a big picture guy and Ann is a detail person. Most of the time that combination works well.
You should have twice the space you think you need; which ideally would be climate controlled for summer and winter. When it’s hot and humid, hot breath from a respirator fogs your goggles. Respirators are required when sanding fiberglass and epoxy. The ideal working temperature for working with epoxy is 70 degrees.
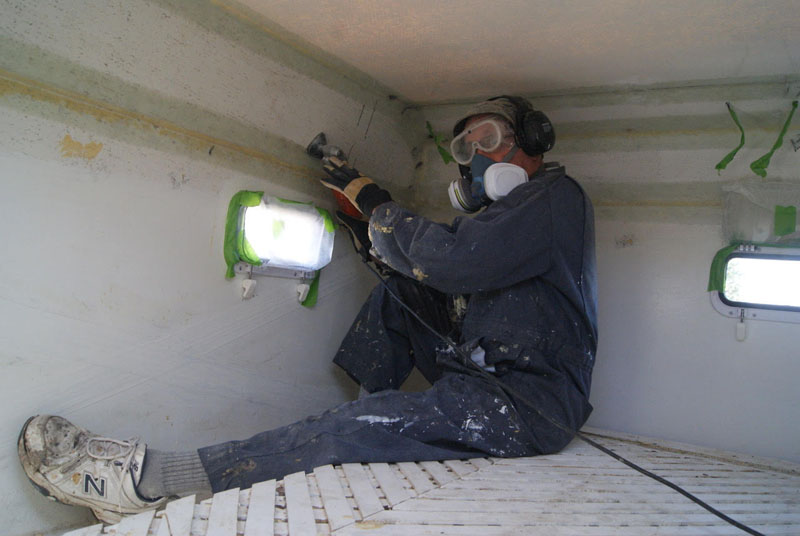
Above: Tom sanding the overcab area
At 85 to 90 degrees you had better hustle and have all your ducks in a row. If you mix too much epoxy and/or work too slowly epoxy will start to kick in the mixing cup due to the exothermic effect. The resin and hardener in the can get hot and start to smoke.
Resin at 70 degrees has a viscosity of pancake syrup. At 40 degrees it pours like molasses just out of the fridge. In cold weather, we would bring jugs of resin and hardener into the house at night because the shop does not have central heating. During the day we carefully used heating pads and lamps near the jugs so the epoxy pumped. That was also in the area where we are working. One becomes very creative with work arounds and solutions.
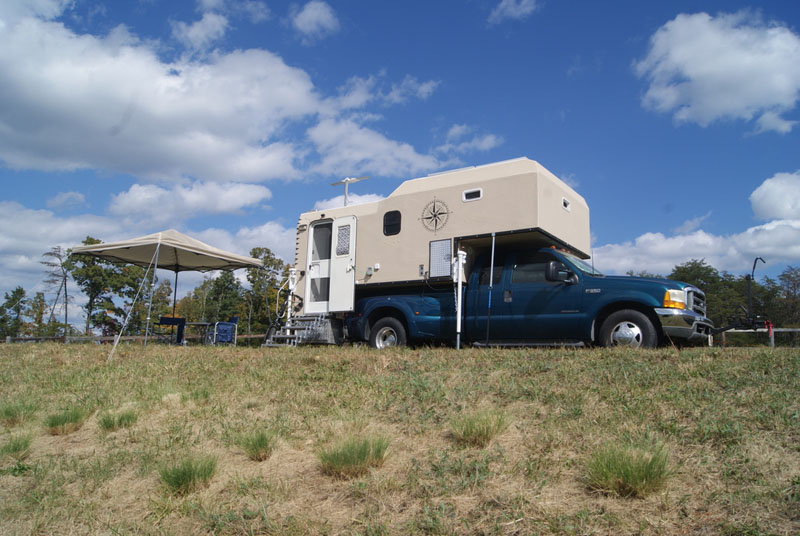
Building the camper was hard work, but a great project. The positive feedback we have received has been overwhelming and very gratifying. We have met a lot of people who have been interested in the camper and we have made new friends along the way.
