Arn Chamberlain shares the story of how he upgraded his truck camper power converter. With a little help from his friends, the install was relatively easy, and yielded great results.
A Truck Camper Converter Installation
by Arn Chamberlain
Boondocking and stealth camping are a lot of fun, but not so much so when your on board batteries quit working. This recently happened to us. Even though we have a 200-watt solar panel system to charge our battery, our battery did not have enough power to run our 2004 Palomino Maverick truck camper all night. Additionally, I had a recurring problem of my LP and CO alarms going off. I was certain this was caused be the out gassing of my flooded, lead acid on board batteries as they were being charged.
I checked the solar system and it seemed to be working fine. Suspecting my deep-cycle marine battery had gone bad, I spoke with the owner of Remy Battery in Milwaukee. He told me the two worst things you can do to a battery is drop it or overcharge it.
Well, I hadn’t dropped it, so I suspected my 14 year old Elixer-ELX45 Power Converter had overcharged the battery and ruined it. Upon checking further, I learned that the Elixer-ELX45 was a single stage charger.
Single stage chargers were fine for the flooded batteries used when my camper was built, but they are a very poor choice for charging more modern batteries. A new power converter with smart charging technology would sense the state of charge of the battery and apply exactly the right amount of charge to keep the battery operating at peak efficiency.
However, I had one other problem. The power converter in my camper is located in the front bulkhead of my truck camper. Because this area also stores my battery and my fresh water tank, the power converter had to fit into a space that was less than 7-inches deep.
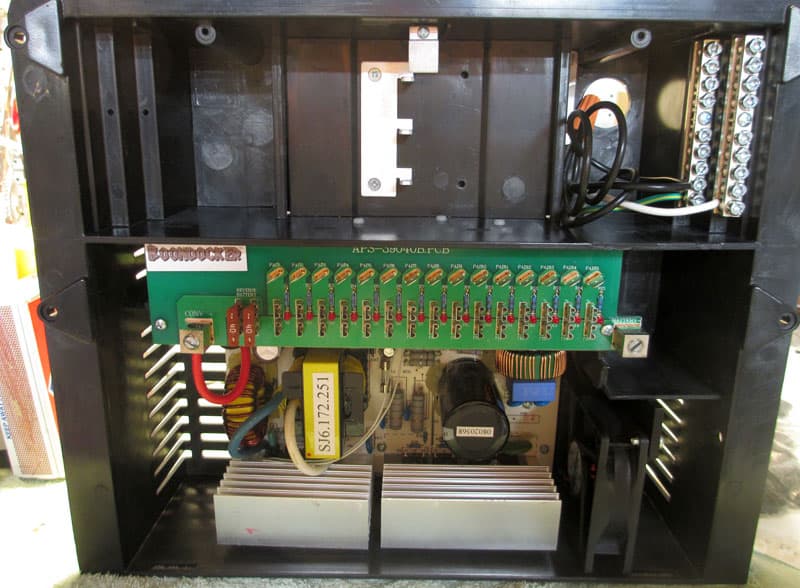
An internet search for power converters led me to Best Converter. They had a replacement converter (Boondocker BPC1260) that had smart charging technology and was a direct replacement for my old Elixer.
After further research, this was the only converter I found that would fit into the same space the Elixer had occupied. Randy at Best Converter assured me that I could do the installation myself and that the Boondocker would be compatible with my solar system as well as the AGM battery I planned on installing. At $230 including economy shipping, the Boondocker seemed like a good deal to me. My new converter arrived ten days after it was ordered, but had a blemish. I notified customer service of the problem. They immediately sent me the replacement part and I had it in my hands two days later.
The installation was very straight forward. First I disconnected and labeled all the wires from the old Elixer. Secondly, I removed the old Elixer from the interior wall of the camper. The circuit breakers that were used in the Elixer were compatible with the Boondocker so I was able to simply switch them over.
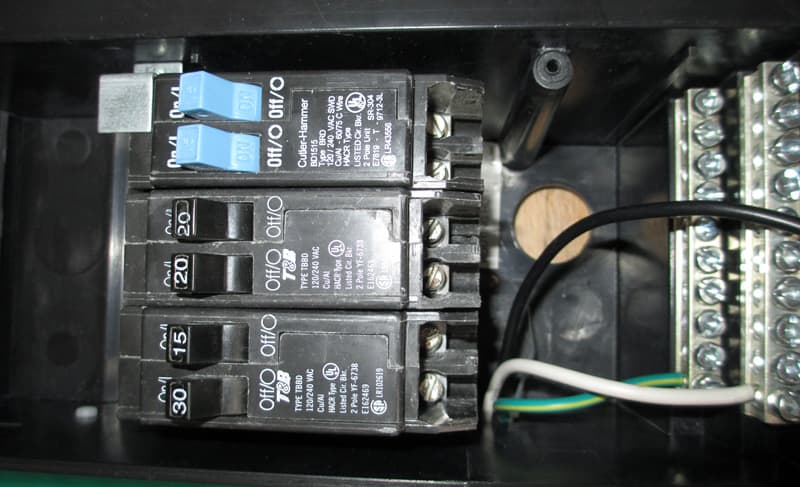
Above: Circuit breakers and incoming 120-volt line
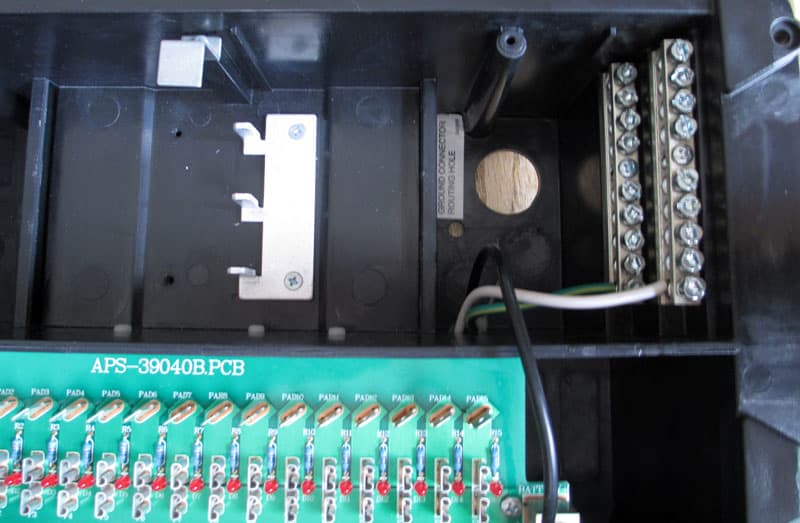
Then I encountered a few problems. The connection bar for the circuit breakers was located in such a place that the breakers had to be located on the left side of the 120-volt distribution chamber. However, the knockout for the incoming wire as well as the neutral buss bar and ground connectors were on the right side of the distribution chamber. If left like this, every circuit would have required a wire to go under the bottom of the circuit breakers in order to be connected to the circuit breakers (see above photo).
Above: The repositioned circuit breaker
The solution to this problem was simply to move the circuit breaker connection bar to the other side of the distribution chamber. The holes for the connection bar were already there. Once this was done (see above photo) all the 120-volt connections were made on the right side of the distribution chamber.
This made for a very clean wiring installation (see above photo).
The other issue I ran into was in finding and installing the correct strain relief inserts for the DC distribution chamber. I finally found plastic strain relief inserts at Home Depot, but all the inserts were round whereas the knockouts in the back of the Boondocker power supply were rectangular.
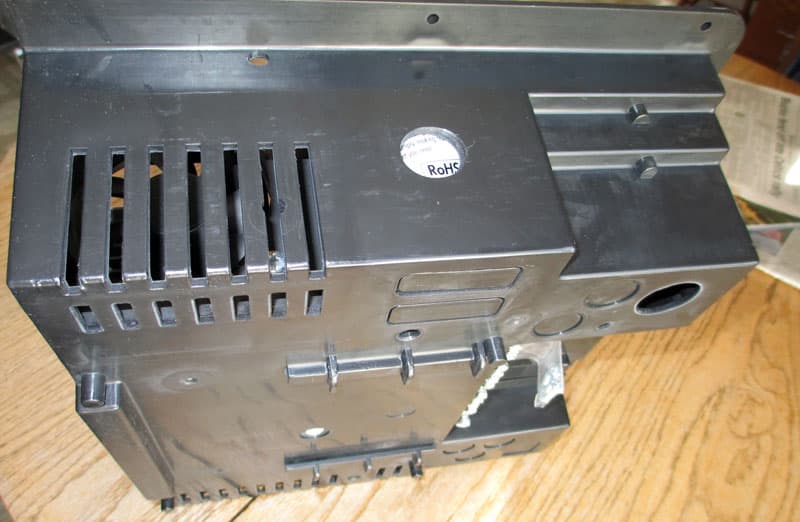
Fortunately, these knockouts had not yet been removed, so I left them in place and simply drilled the appropriate sized hole in the side of the case to accommodate the insert and wires (see above photo).
With these minor issues out of the way, it was a simple matter to connect the wires from the various DC circuits into the DC distribution chamber. Because I had labeled them carefully when I disconnected them from the old Elixer, I automatically knew what circuit each wire was used for and how big of a fuse to use.

The Boondocker slid right into the cut out used by the old Elixer and even the screw holes used to hold the power converter to the frame of the camper lined up! Randy was right, this was not too bad of a job! The final result worked as good as it looked.
The last thing I needed to do was to purchase and install a battery. I knew I wanted an AGM battery for several reasons. First, AGM batteries are sealed and will not outgas into the camper. Second, AGM batteries are much more rugged than conventional flooded batteries. Third, I spoke with a number of people at several RV shows regarding batteries. The consensus was that two six-volt, AGM golf cart batteries connected in series were the best battery bank solution for my situation.
I contacted Mike Moehler, President of Remy Battery, and he suggested several different brands and styles of batteries that I might consider. He also gave me the specifications of all the batteries.
According to the data Mike gave me, one AGM golf cart battery weighs 75 pounds. I was reluctant to install 150 pounds of batteries in the bulkhead of my camper as that area is already holding 250 pounds of water as well as the weight of any person sitting on the bench or climbing into the cabover.
I spoke to Mike about my concerns and he suggested I consider one, 12 volt, deep cycle, AGM battery instead of the two, 6 volt batteries. He had a wide selection for me to pick from at very good prices. I ended up with a Full River 12 volt, 115 aHr battery. It came with a two year warranty and fits my battery compartment well.
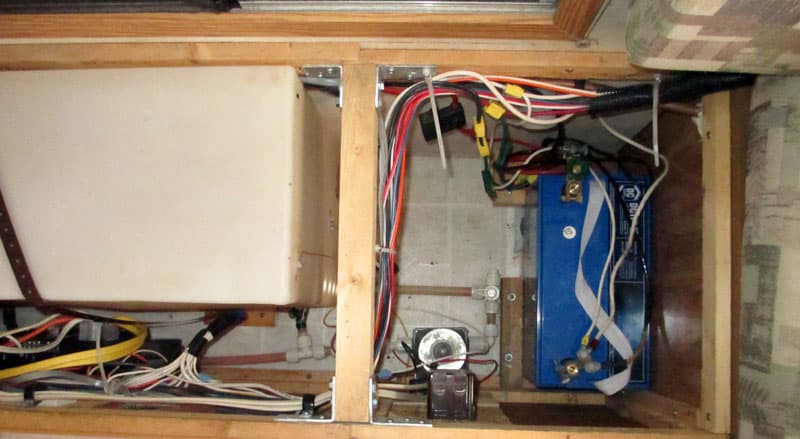
Above: Camper’s battery compartment showing back of new Power converter (left by water tank) and AGM Battery
With only one battery, the compartment has a much cleaner and neater appearance. The new power converter works well with our 200-watt, roof mounted, solar system.
I have used this set-up for the past three months and have experienced no problems. I no longer have the issue of unwanted LP and CO alarms going off and with judicious use of my electrical power, I run out of beer and water before I run out of electricity.
I was actually surprised at how easy this project was to complete. Only simple tools were required and everyone I dealt with was more than willing to take the time to explain things to me and help me along. This work helps to bring my 13 year old truck camper up to state of the art electrical standards!
Bring on the boondocking!