With unprecedented power requirements, Steve Hericks pushes the RV electrical envelope with a salvaged battery system from a Nissan Leaf electric car. Prepare yourself for inconceivable off-grid electrical possibilities, and amp hours beyond imagination.
For part two of Steve’s remarkable RV power system project, he installs a Nissan Leaf EV battery system into a 2000 Lance 1130 truck camper.
This is a bit like shoehorning a modern Porsche 911 engine into a Volkswagen Beetle (Type 1). Neither was designed for the other, and the results are almost hard to comprehend.
Before proceeding, be sure to read about Steve’s concept and required calculations in part one, “Future Shock: A Bold Vision For RV Power Systems”.
A Word of Caution: Extremely Dangerous Voltages
Most electric car batteries are constructed with 48-cells in series (48S) to output 360-volts nominal and over 400-volts fully-charged. This is lethal territory.
This information is provided for informational purposes only by a highly-trained professional with decades of electrical and battery experience. Do not attempt this project under any circumstances.
Nissan Leaf EV Batteries For RVs and Campers
by Steve Hericks
The Nissan Leaf is the most widely produced electric vehicle (EV) in the world. It also has the benefit that the battery pack is not liquid-cooled (like a Chevy Volt or Tesla).
Reconstructing the Nissan Leaf’s Battery Bank
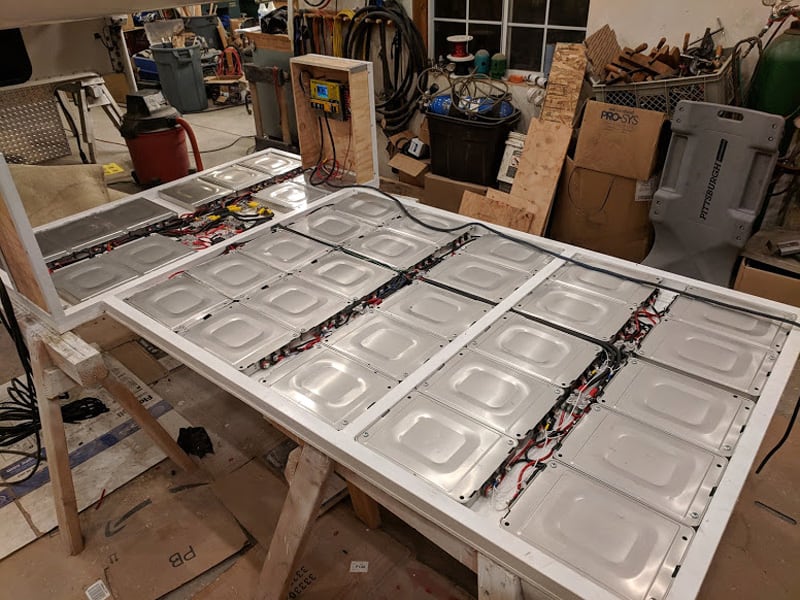
The Nissan Leaf’s battery weighs 665-pounds and is a closed-steel container. Inside are 48 battery packs, connecting buss bars, and some control equipment. In each pack, measuring a little over 12-inches by 8-inches x 1-3/8-inches and weigh 8.5-pounds, are four cells wired; two in series and two in parallel making each pack 7.5-volts / 64-amp-hours.
The battery packs are very compact and convenient to reuse. A key driver in my choice to use Nissan Leaf batteries was that I could get them into a flat configuration to work in my project camper relatively easily.
I made a quick calculation to see how many of these batteries would be needed for my off-grid power requirements (detailed in part one).
1. Each battery pack has 7.5V x 64ah x 80% = .384kwh capacity
2. 13.077kwh (our energy needed)/.384kwh/battery = 34 battery packs
3. With 48-packs in the Leaf’s battery, we will have some spares.
The 12-Volt Challenges of Lithium Oxide Batteries
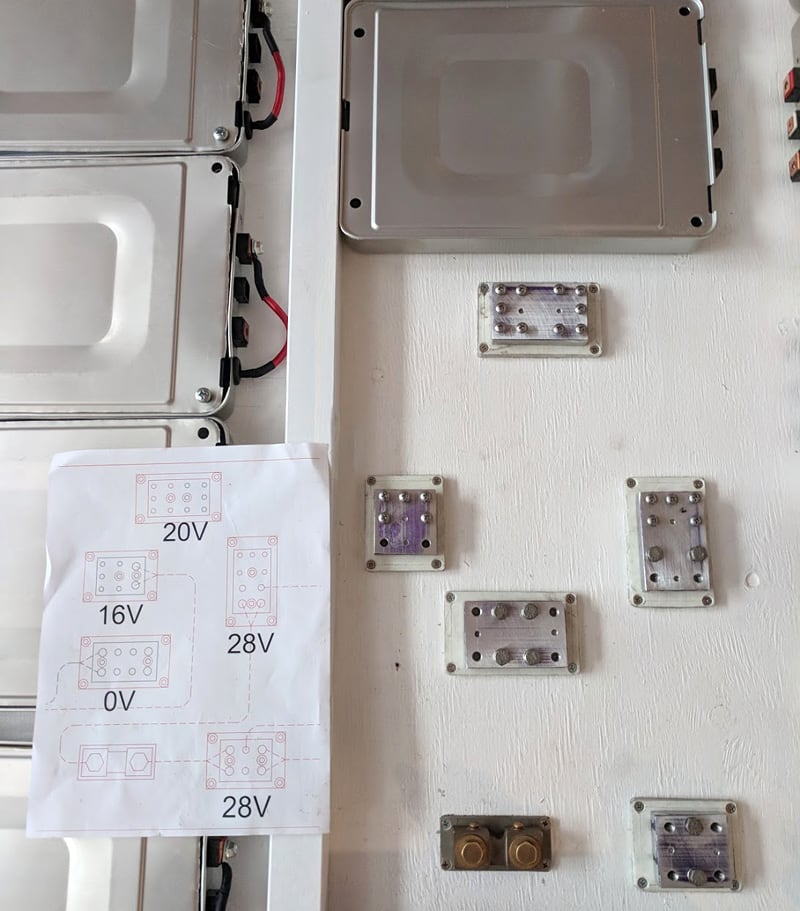
One key issue regarding using Leaf battery packs is that the packs cannot be disassembled into a usable cells below the pack’s level. For example, a 7.5-volt battery pack operates between 6.0-volts and 8.4-volts.
That raises an important question; Can you make a 12-volt compatible battery with a Nissan Leaf RV battery? Answer; No, you can’t. In fact, you can’t make a 12-volt battery with a Leaf battery or any lithium oxide technology.
The solution I developed is quite technical and required difficult modifications to the batteries that should not be attempted by anyone without the education, skills and extensive professional experience that I have been fortunate to obtain over the past four decades.
The completed battery has 35-packs (140-cells). 30-packs are connected in three series sets of 10 parallel packs making 6S20P. The remaining five packs have been opened and reconfigured to 1S4P, and then connected in parallel making 1S20P.
6S20P + 1S20P = 7S20P. The resulting battery bank has a capacity of 140-cells x 3.75-volts per cell (VPC) x 32Ah = 16.8kwh. The usable portion of this is 80% x 16.8kwh = 13.44kwh.
The simplest solution is 48-volts. Seven packs in series gets you 42.0-58.4V which typically works well with 48-volt inverters.
I settled on a 24-volt system because my power system will eventually be on a custom camper and on a former military truck that can wire directly to the 24-volt vehicle power. That was rigorous and quite possibly mind-bending. I hope you are still with me.
Installing The Leaf’s Batteries
There was not enough space in the Lance 1130 for the number of required Nissan Leaf battery cells. They certainly would not fit into the battery compartment.
I briefly considered putting some of the batteries in the generator compartment. I was already planning to remove the generator, so that space was available.
Due to the generator location on the passenger’s side rear corner, I didn’t want the weight that far rearward – or on one side. I also didn’t want to modify the camper irreversibly since it will eventually be reverted to the factory configuration and sold.
Another possibility was mounting the batteries on the truck. I rejected this approach because the batteries would stay with the truck when the camper was dismounted. I needed a solution to keep the Nissan Leaf’s batteries with the camper.
Thirty-five batteries at 8.5-pounds each weigh 297.5 pounds. That kind of weight has to be kept as low as possible. I finally hit on the idea of making a spacer and attaching it to the bottom of my camper.
I also discovered some unused space to the rear of the wheel wells. This space could accommodate the required control equipment and cable runs.
Building and Mounting the Battery System
The spacer is made from a 1.5-inch by 16-gauge steel square tube, arranged into a tray with a half-inch plywood bottom.


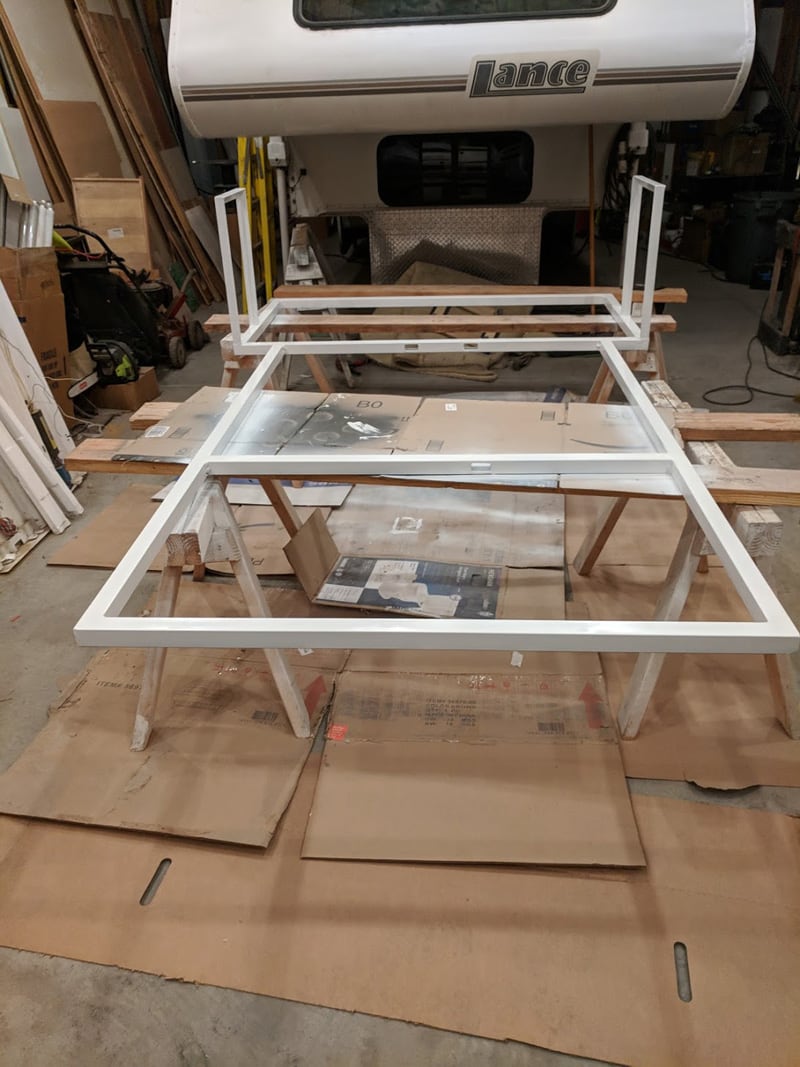
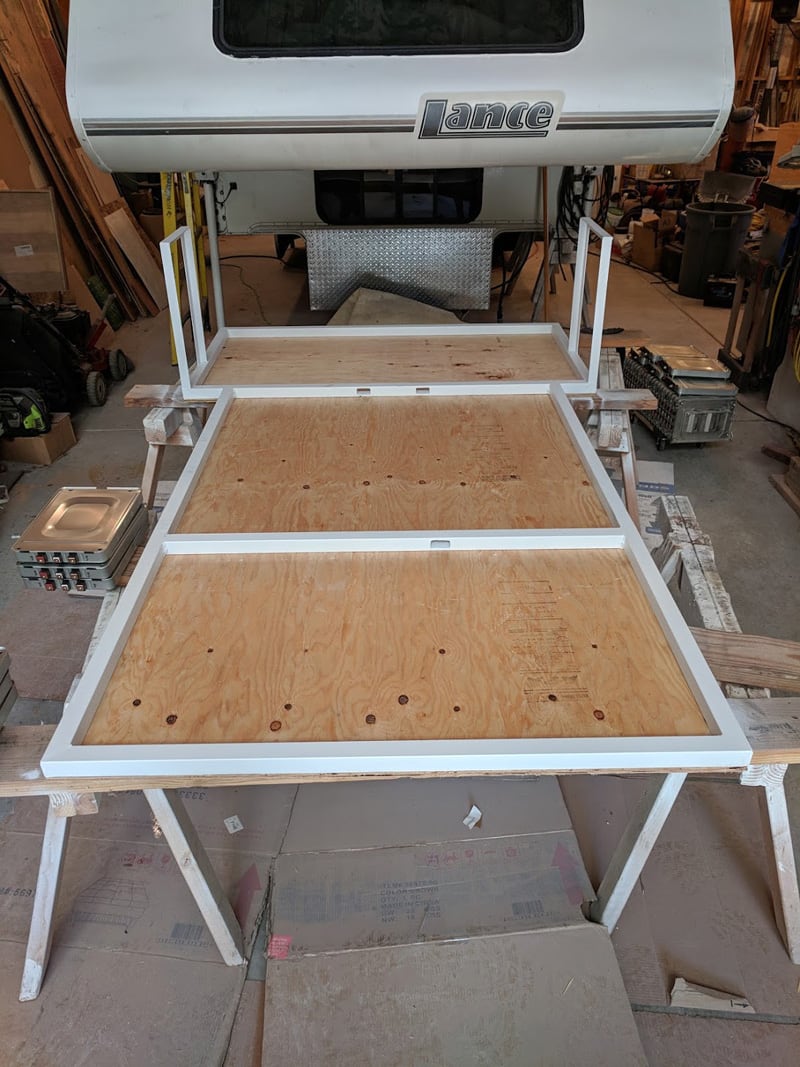
The spacer is then is divided into compartments to provide weight bearing cross supports for the floor of the camper.


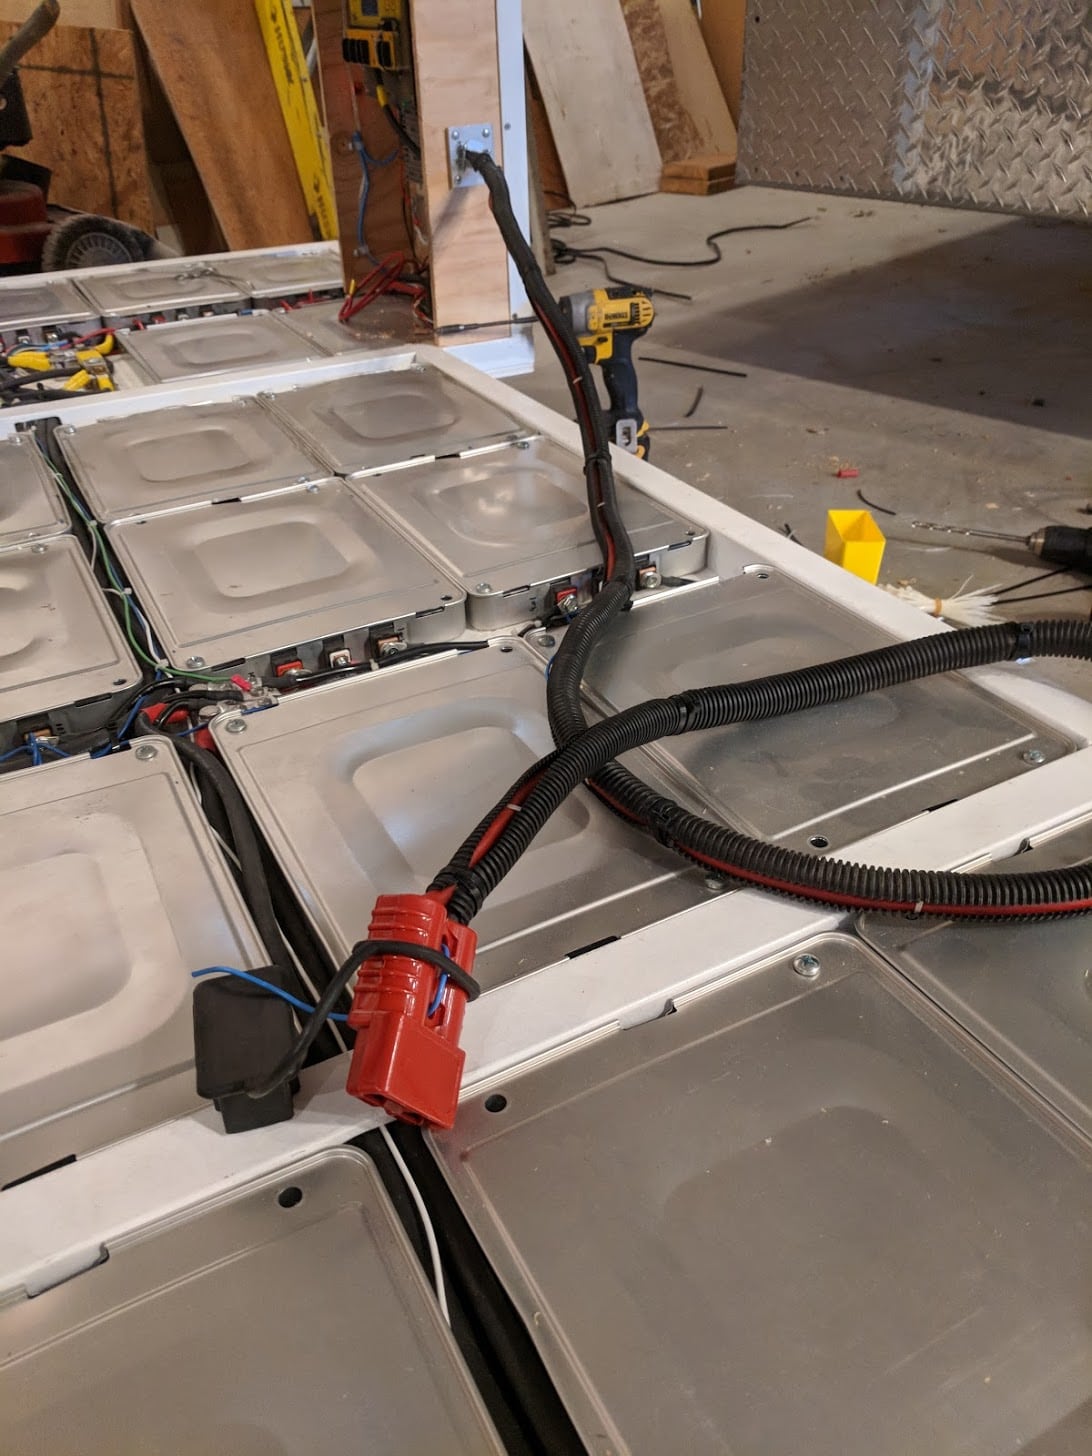
Above: Cable pass-throughs were made by cutting through the 1.5 square frame and reinforcing with a 1.5l piece of 1h x 2w tube, fully welded and ground on both sides.
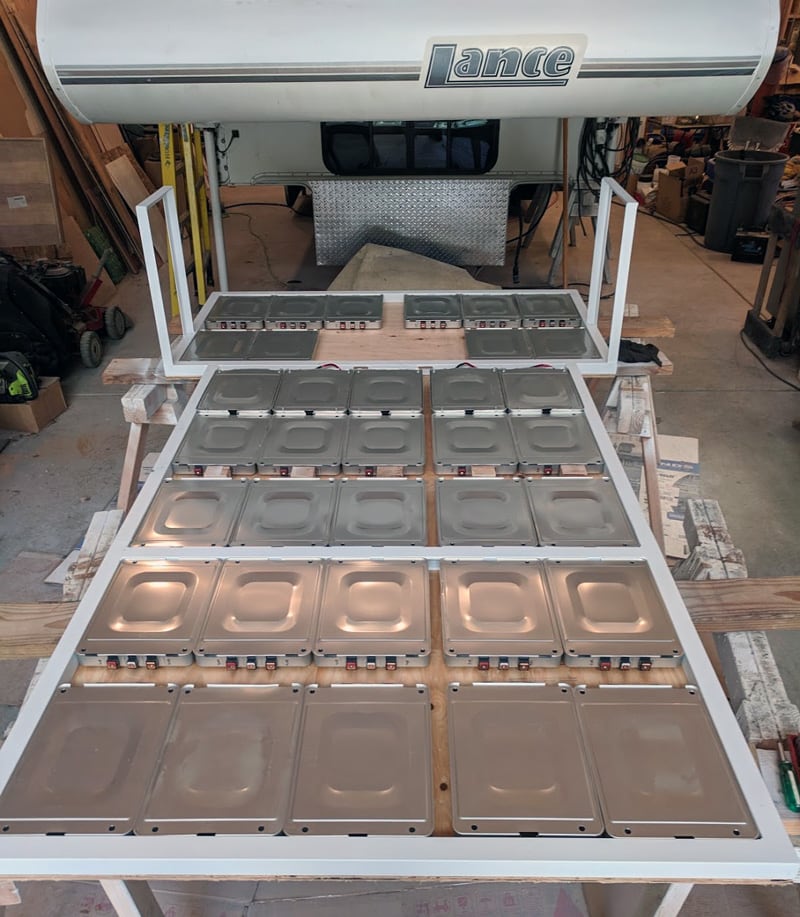
Above: Pack layout is 10-2S2P packs in the front compartment, 10-2S2P packs and 5-4P packs in the second compartment and 10-2S2P packs in the rear compartment.
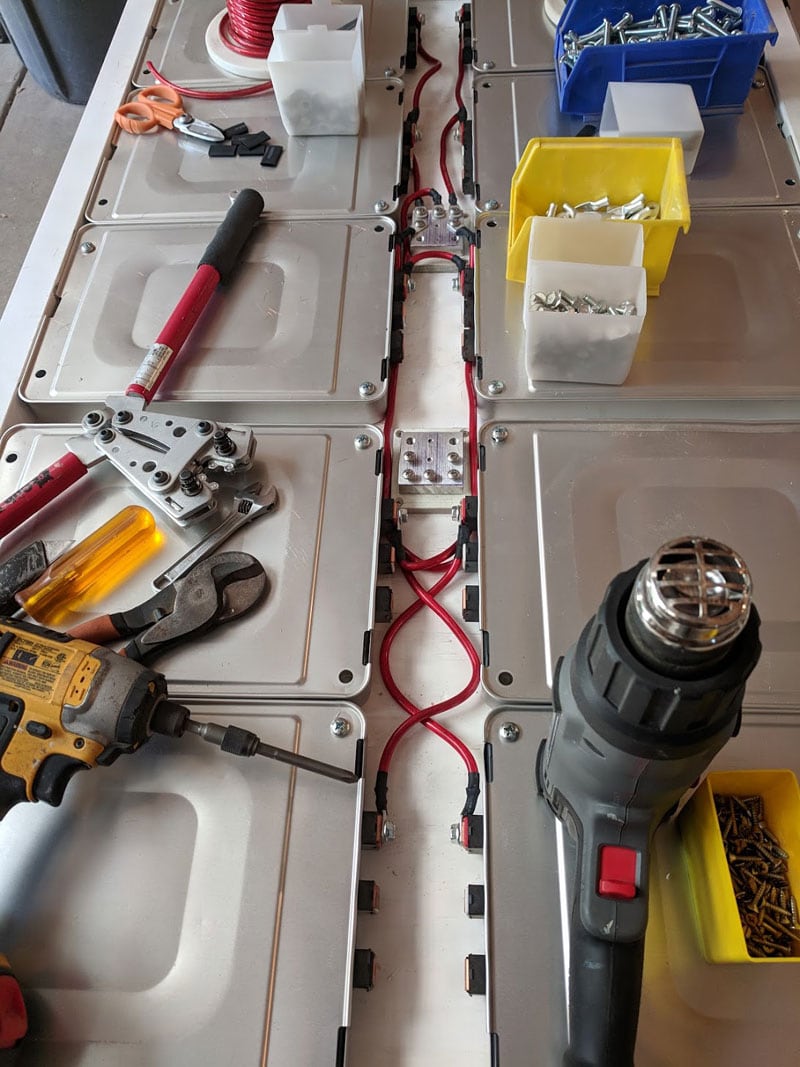
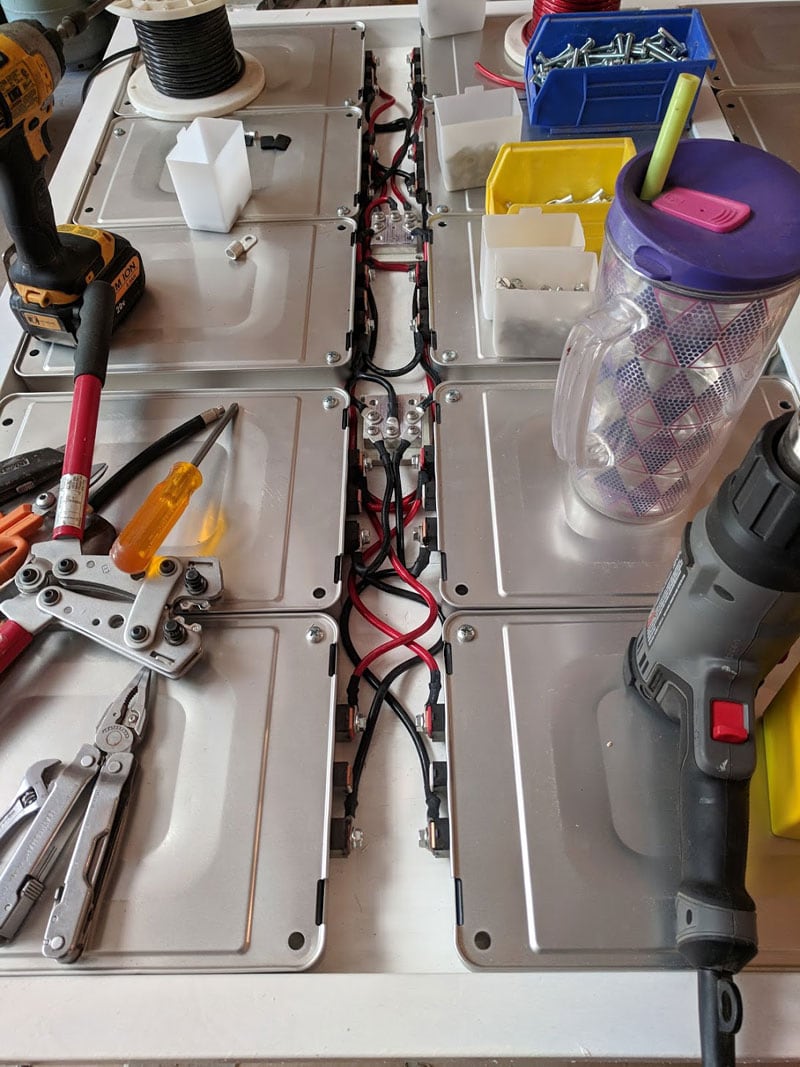
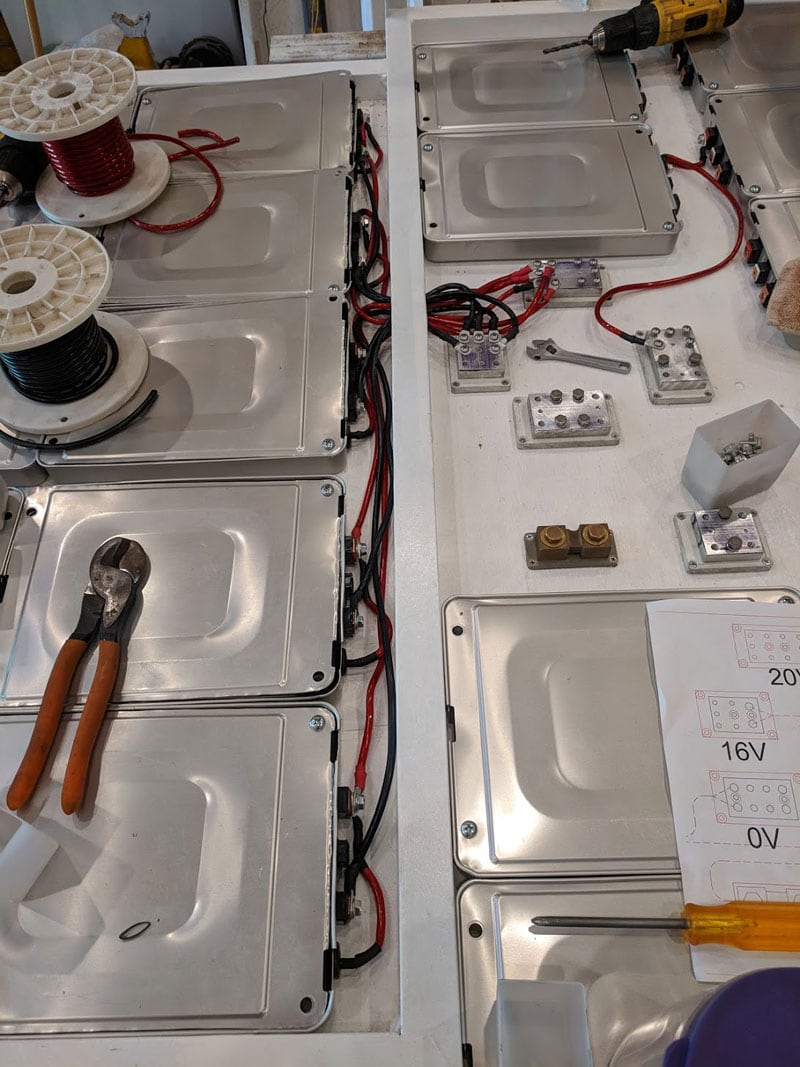
Ten battery packs are connected in parallel to a common buss bar with 8-gauge wire. The buss bar is connected between parallel sets with a pair of 2-gauge wires.
In the Leaf’s car battery, each pack delivered up to 90-amps. In the camper battery set-up, the same batteries deliver a maximum of 23-amps. The inverter can draw up to a continuous 190-amps, with a 5-second max of 267-amps.

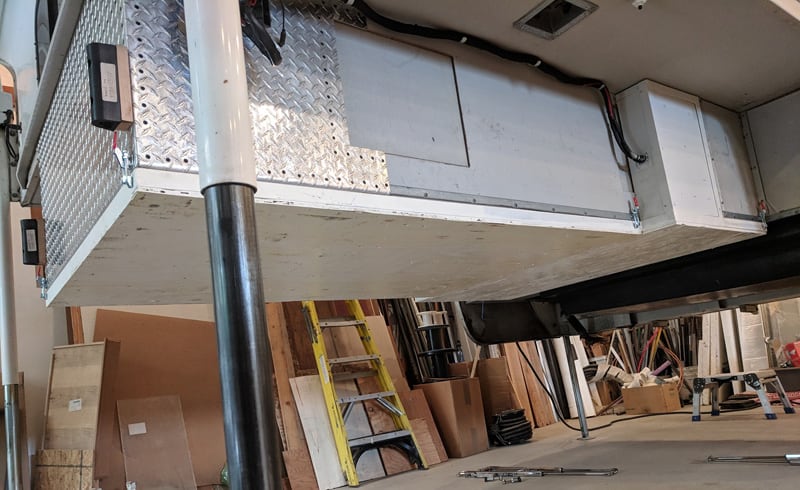
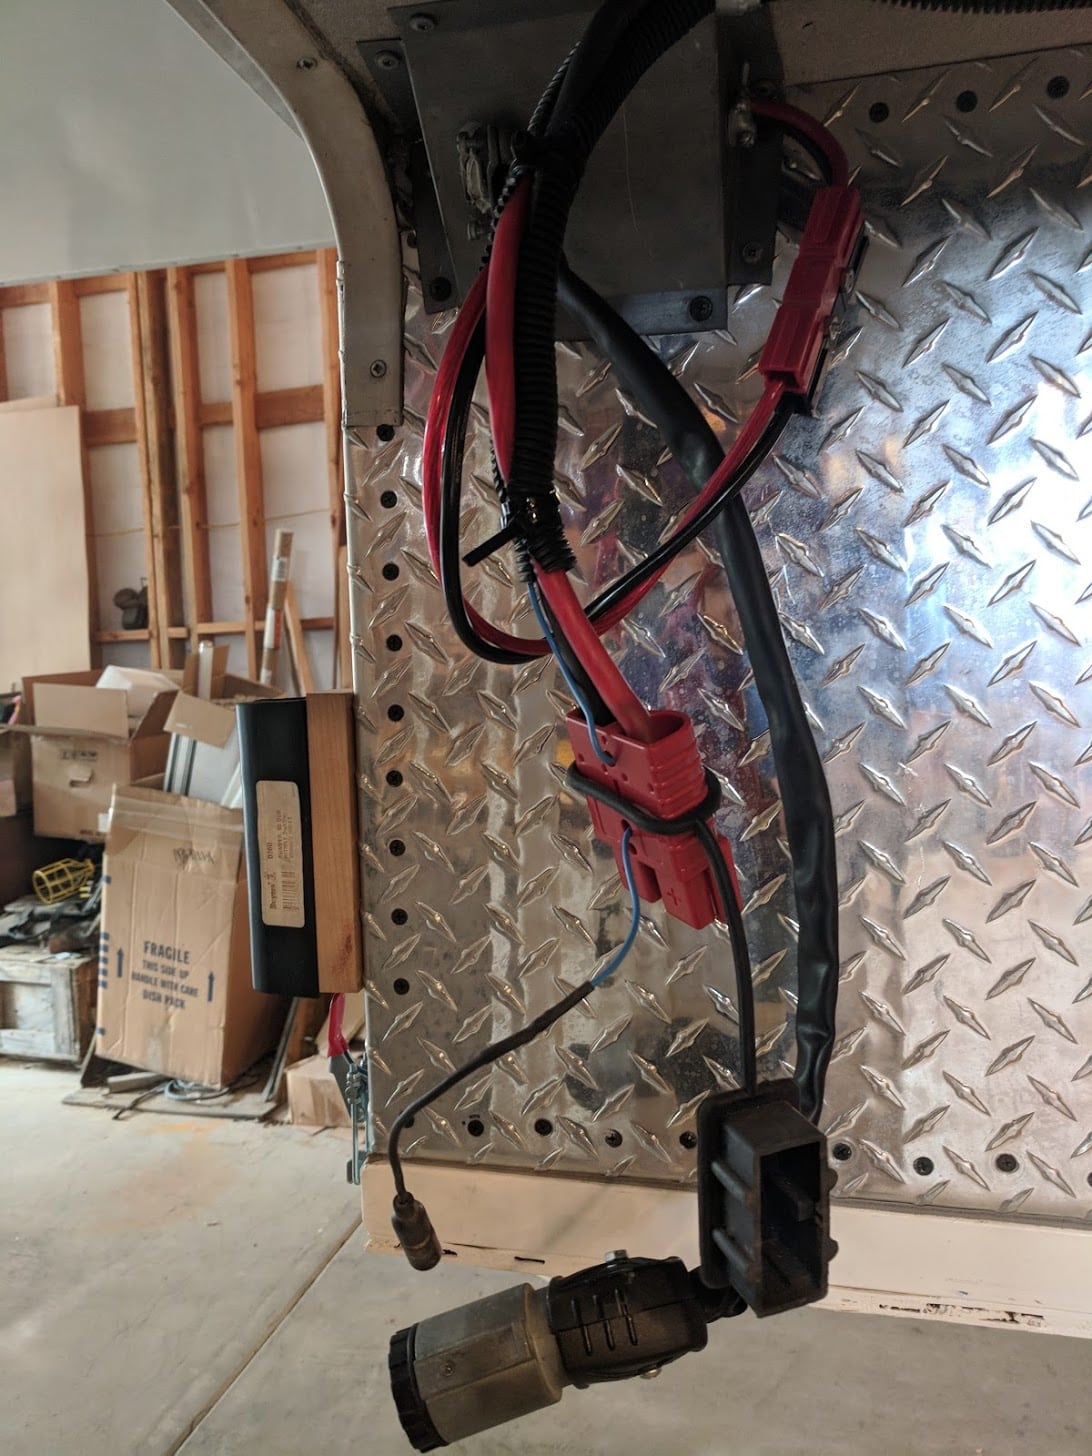
The finished spacer attaches to the bottom of the camper with six toggle clamps. Power connections have high current connectors so the battery can be completely removed in a couple minutes by sitting the camper on 4x4s, releasing the clamps, and lifting the camper off the spacer using the jacks. I have not needed to remove the battery system since I installed it.
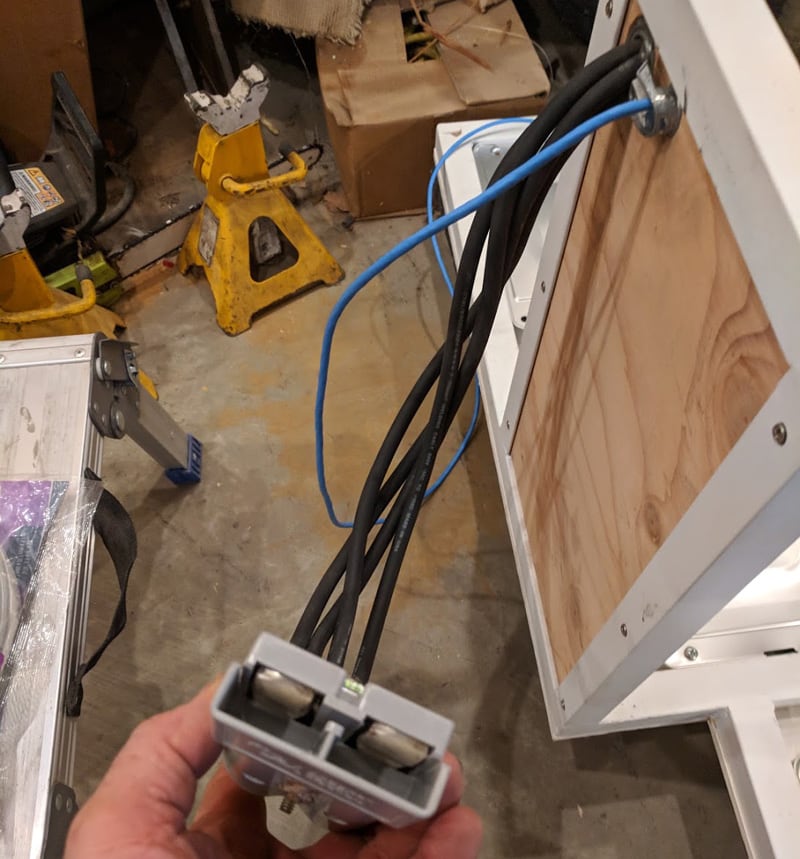
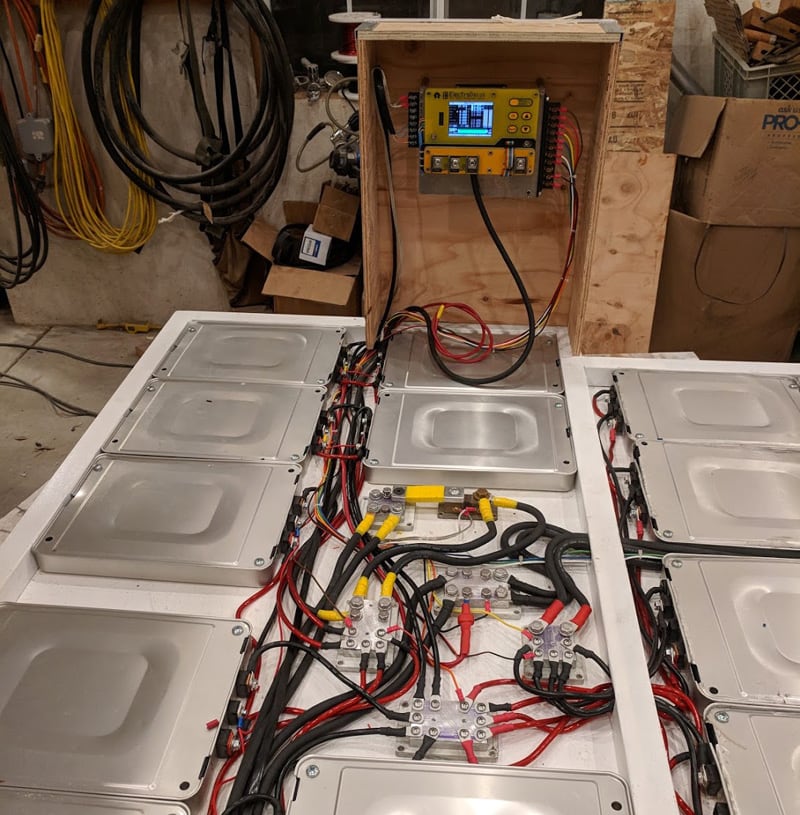
Above: On the passenger’s side is a blue CAT5 cable connecting the BMS to the inverter to communicate ‘okay to invert’ and ‘okay to charge’.
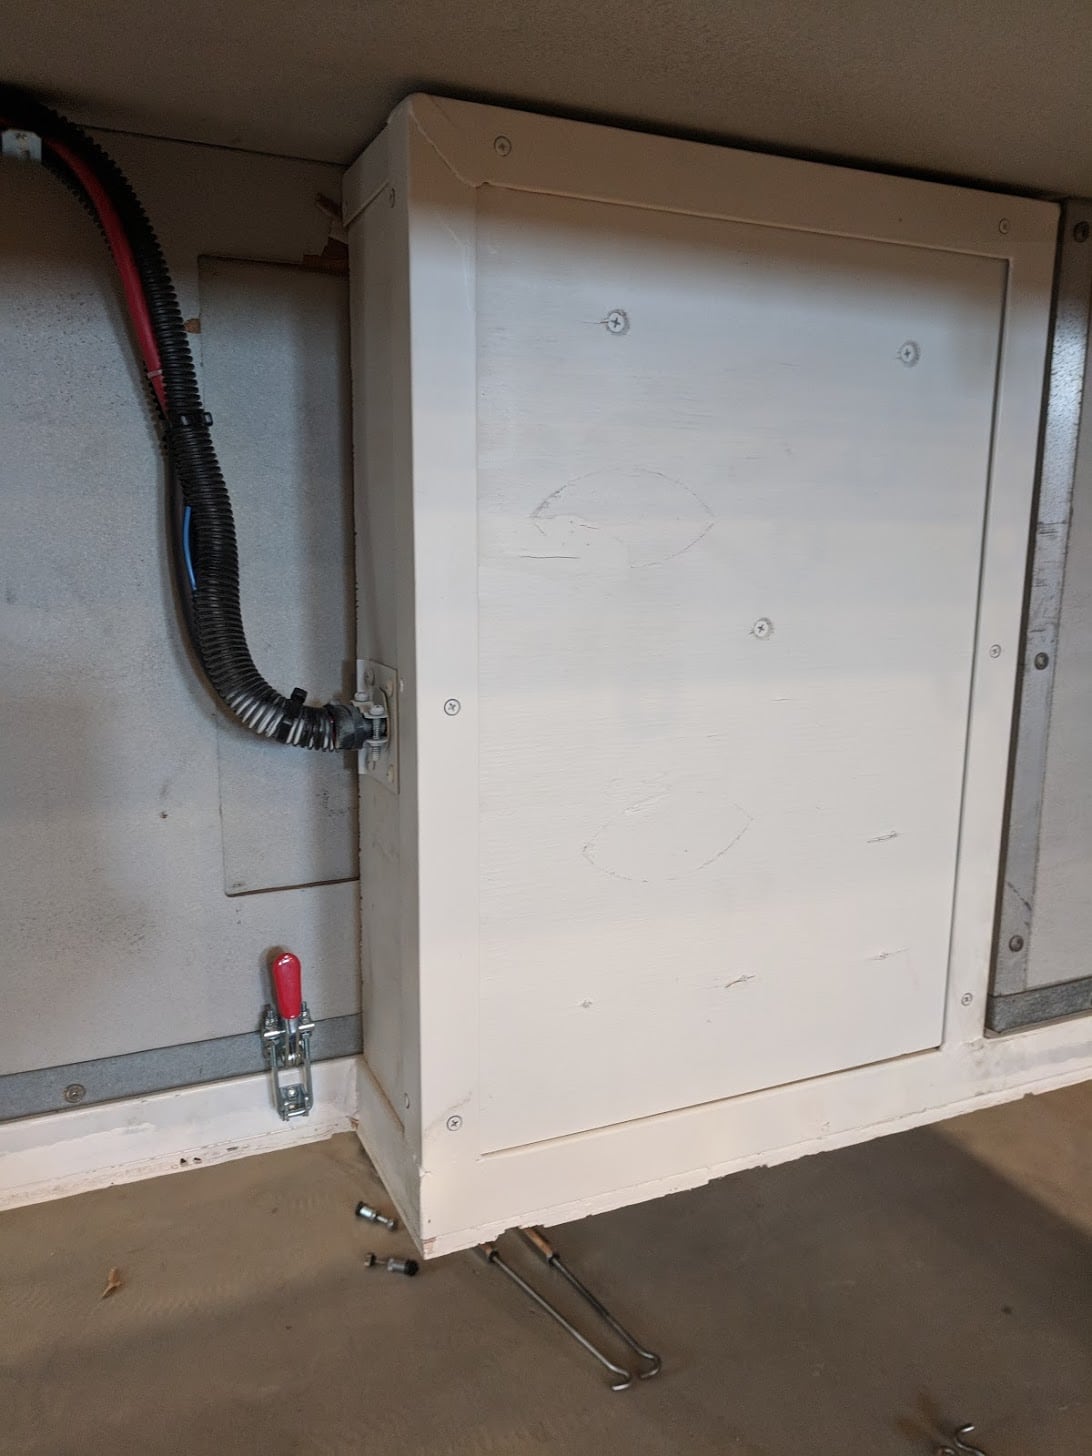
The door to access the driver’s rear side of the wheel well is now covered by an electrical panel attached the battery pack. It contains the BMS (Battery Management System) and power management equipment.
How Is the Battery System Managed?
If you have only used lead acid batteries, then the words Battery Management System (BMS) might be new to you. A BMS is a necessity if you plan to use lithium batteries. Lithium batteries are not the dumb bricks that lead acid batteries are and require active management to keep them healthy and operating safely.

If you buy a 12-volt lithium ion Group 27 or Group 31 replacement battery, a BMS is located inside the battery and operates without your knowledge or involvement. Any other lithium battery construction will require a BMS in the battery design and construction.
Every BMS does at least three things; stops discharge at low voltage cutoff, stops charge at high voltage cutoff, and balances cell voltages. Most do more, including preventing excessive current draw. The first and second functions should be self explanatory, but cell balancing is something new.
As cells discharge, the cell voltages drop differently. As cells charge, they do not all take the same charge and return to the same voltages. Over time and charge/discharge cycles, the differences become large enough to affect battery performance and are not self-correcting.
In order for batteries to maintain their high capacity, the cells all need to be kept in the same voltage range artificially to maintain equivalent power contributions to the battery. To do this, a simple BMS will bleed off the voltage of the higher cells. A more complex BMS will actually use a higher cell to charge a lower cell.
The BMS I selected has many additional control parameters. It can stop either the AC or DC battery charger. It can shut off the inverter. It can engage the solar charging. And it monitors all DC power used in the camper.
How Am I Going To Charge A Battery Bank This Big?
I need two significant, reliable and redundant means to charge this large battery bank in addition to whatever I can get from solar. Solar is just not powerful enough or reliable enough to meet my robust goals.
The most cost efficient and quickest charge will be from AC shore power. The camper has a 30-amp/120-volt shore power cord. If I were able to charge with everything the shore connection can provide, that would be 120-volts x 30-amps = 3.6kW.
With 3.6kW input and a 95-percent charger efficiency, I can probably expect to get 3.6kW x 95-percent = 3.42kW delivered to the battery.
Assuming an average charging voltage of 28.8-volts (normal for a 24-volt system), I can expect to power a charger capable of 3.42kW/28.8-volts = 118.75-amps.
I very purposefully chose a large inverter with an integral charger that could handle lithium profiles. The Samlex EVO 4024 inverter has a 110-amp built in charger. At maximum charge rate, this charger can recover a fully discharged battery in; 13.44Wh (battery capacity) / 3.168kW (charger capacity) = 4.24-hours.
My second charging source could be an onboard AC generator. A generator running four about four-hours would also charge the batteries, but that’s a lot of noise for a long time. I just don’t want that.
I never really wanted to give up the weight or space for an onboard generator anyway. It is also not a fully redundant system since it shares a common charger with the AC shore system.
Instead, I decided to use a DC-charging system by adding a second, dedicated alternator onto the truck’s engine. F-series Ford trucks offer a second alternator as an option. I was able to buy an entire drive and mounting set from a used parts dealer and installed it.
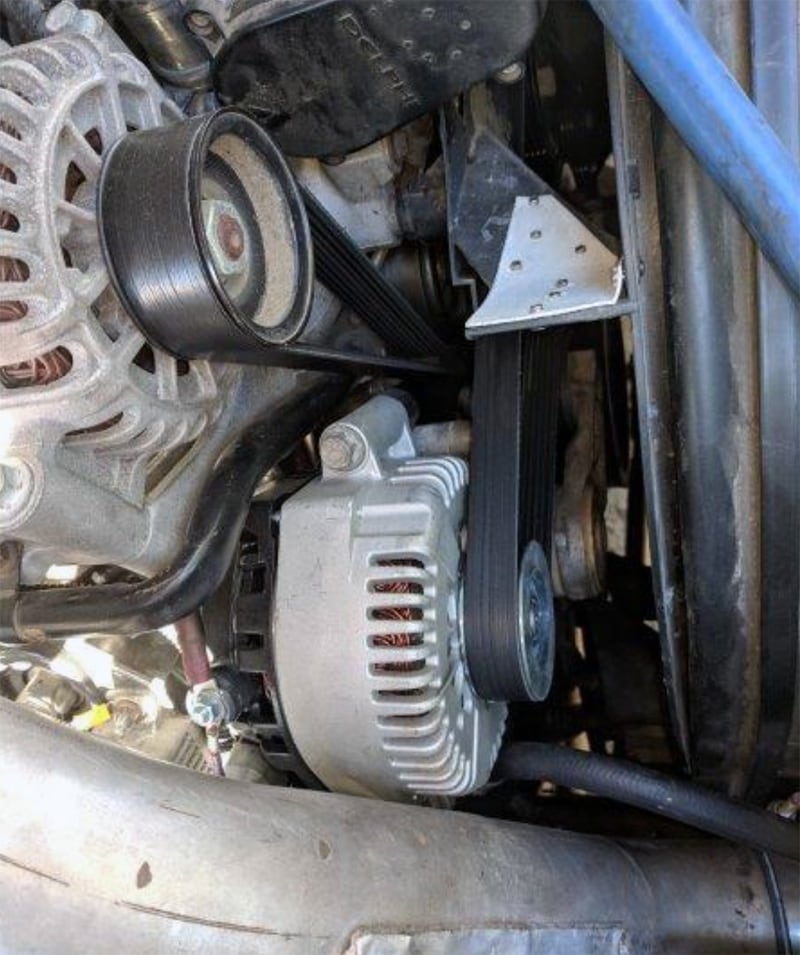
The second alternator belt system is completely separate from the engine equipment belt system. I bought a new stock alternator (120-amp) and converted the internal 14.4-volt constant voltage regulator to an external constant, but adjustable voltage regulator set to 29.4-volts.
This is not as optimal as a special battery-charging regulator used on sailboats, but is one-fifth the cost and works pretty well. It provides 60-amps when the battery is nearly full and up to 150-amps when the battery is nearly empty.
I have a 4-gauge cable with a 175-amp connector beside my vehicle’s light harness. This connects to the camper and allows me to charge at the same time that I am moving to a new location. I tend to do this every three to four days.
This is not the most economical method, but it is quite painless and simple. This system also has a manual shutoff, alternator temperature cutout, and is controlled by the BMS.
A Vision For The Future
Without my extensive military and professional background in electrical systems, battery technology, and recreational vehicles, I would have never attempted this project. It’s far too expensive, impractical, and potentially dangerous to be viable under anything resembling normal applications. As the saying goes, “Don’t try this at home”.
I have conducted this exercise to test the boundaries of what’s possible, and to project a bold vision for what may be possible in the future with lithium battery technology. Personally, I am very excited to have this system completed, and to test it in the field. Will I actually be able to do everything outlined in part one? Will further modifications be necessary to improve the capability and reliability of the system? There’s only one way to find out.
For anyone out there who is interested in the advantages of lithium batteries for truck campers and RVs, I encourage them to look into Group 27 and Group 31 lithium-iron phosphate batteries sold by Battle Born, Smart Battery and RELiON. I have no personal experience with these batteries, but they offer a self-contained bridge to this exciting technology. Make no mistake, the future will be powered by lithium.