It’s spring and you open up your camper. You turn on the water. It smells awful! Were eggs left in the camper?
Why does the camper smell like rotten eggs?
Anaerobic bacteria reacts with magnesium or aluminum anode rods to produce a rotten egg smell. That’s why peroxide, which is a germicide, is commonly used for flushing water heaters. Yes, the same stuff some folks gargle with, and others use to clean wounds, works wonders to eliminate the egg smell from water heaters.
We recommend having at least one 16 ounce bottle of hydrogen peroxide for this task, preferably two. If you don’t want to use hydrogen peroxide (which is toxic if swallowed) you can also use household vinegar.
To further prevent the rotten egg smell, use an aluminum-zinc anode. The zinc in a aluminum-zinc anode helps to eliminate the bacterial activity that produces the hydrogen sulfide, and the dreaded egg smell.
You are not alone. Most people who own RVs smell this awful odor at least once.
Important Water Heater Safety Note |
Never turn on a propane water heater or water heater electric heating element when a water heater tank is empty. Even a brief power-on to the electric or propane heater element while the tank is empty can damage or destroy the heater element and/or water heater tank. |
Using A Flushing Wand For Calcified Sediment
At least once a year, as part of your routine RV water heater maintenance, it’s a good idea to flush your water heater with fresh water. Flushing will help rid any calcified sediment and deposits that collect in water heaters over time.
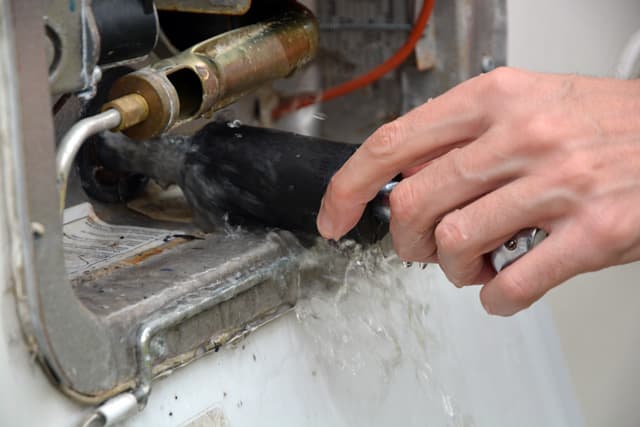
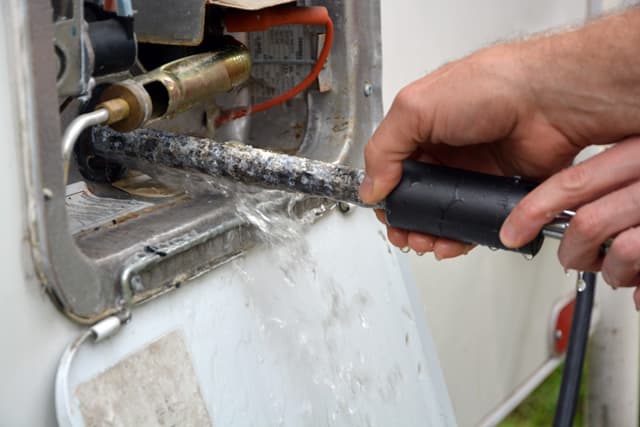
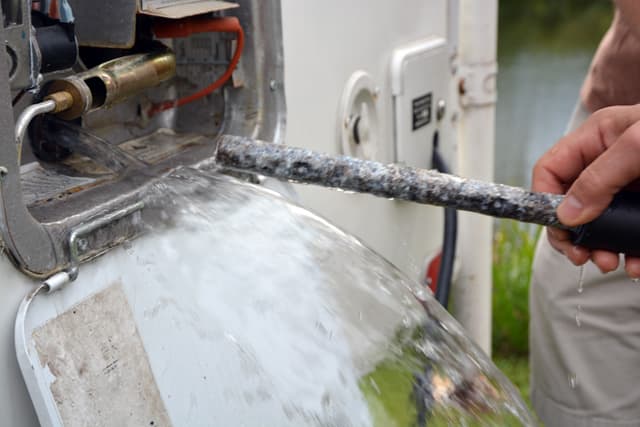
A flushing wand is optional, but highly recommended as it helps to increase the pressure of the fresh water and direct it deeper into the part of the water heater tank that is below the drain. This pressure will also do a better job of loosening any calcified build-up inside the tank.
Above: A flushing wand will loosen and flush debris in your water heater
Steps To Eliminate The Awful Water Heater Smell
1. Before you start, check that the water inside the water heater to make sure that it is not hot to prevent burning yourself. Then, turn off the water pump and/or city water, and make sure your water heater is off.
2. Open the hot and cold water faucets in the camper to drain any remaining water out of the lines. This is an important step to relieve any pressure in the plumbing system.
3. If your water heater system is equipped with a bypass, use it to close off the water to the water heater. That way water from the fresh tank cannot possibly enter the water heater.
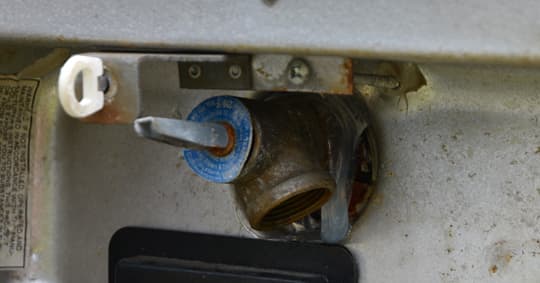
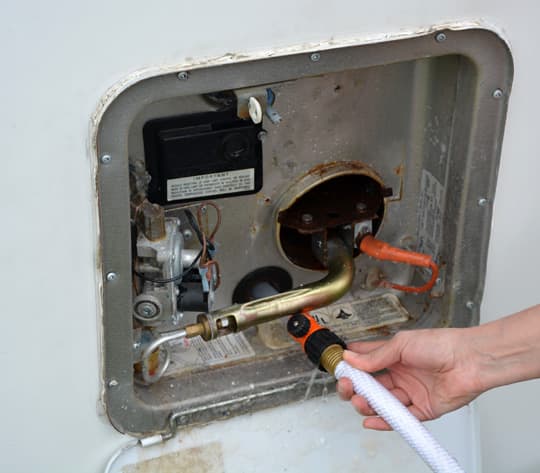
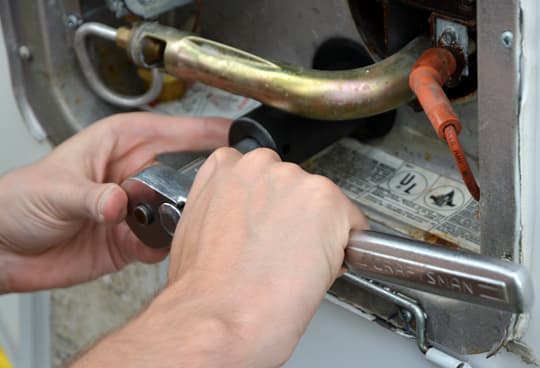
4. For our Suburban water heater, we used a 1-1/16” deep well socket on a 3/8” ratchet with a 3” socket extension to remove the drain plug and anode rod.
Other water heaters may need a different socket size to remove the drain plug (Atwood) or drain plug and anode rod (Suburban). Please check the water heater owner’s manual to determine which socket size you need.
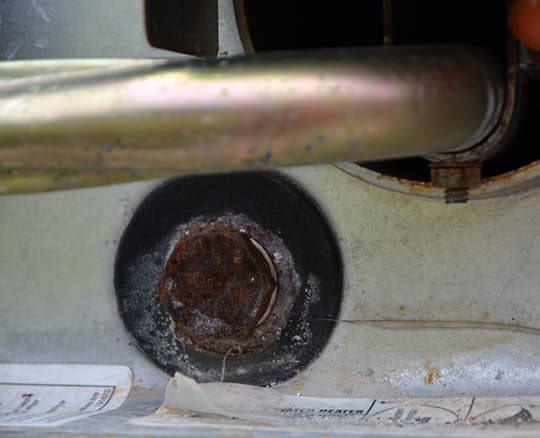
In the picture above you will notice that the drain plug and anode rod in our Suburban water heater appears quite rusted. This is an indication that the anode rod needs to be replaced.
Above: Plastic water heater drain plug on an Atwood water heater
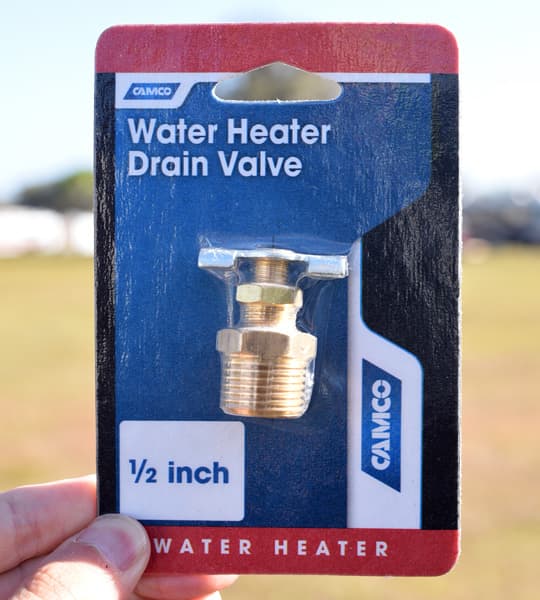
Above: Brass water heater drain valves can be used to easily drain the water from the heater (without getting out the wrench) between camping trips. Doing so will help to prevent smelly water.
Drain Plug Rant |
Water heater drain plugs are notoriously difficult to access and remove. This can be particularly frustrating if you need to access a drain plug to drain a water heater for winterization. There you are, freezing your butt off, trying to reach a plug that should be a straight shot. We have used many choice words for the folks who decided to put these drains where they are obstructed from clear access. |
 |  |  |
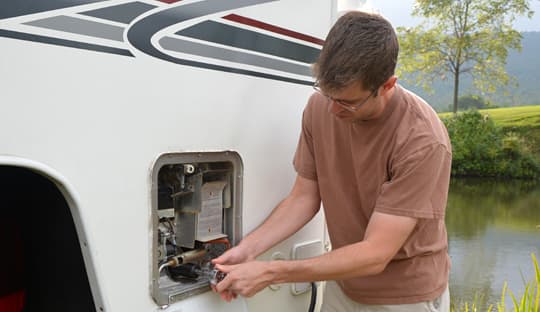
Above: Draining the water heater – click to enlarge
5. Once the drain plug (Atwood) or drain plug and anode rod (Suburban) is removed, allow the water to drain completely from the tank. You can open the relief valve to allow air to speed up the draining.
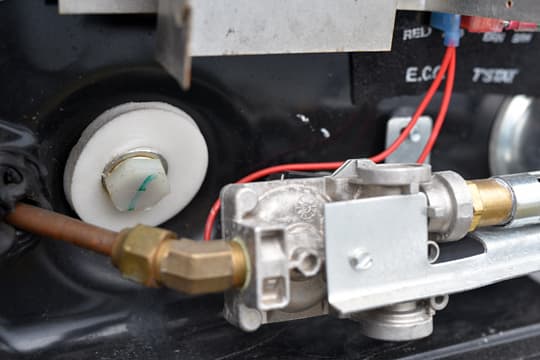
Above: The relief valve on our Suburban water heater
Tip: TCM reader, Rex Carroll, sent in the following tip about this part of the process.
“Since the water may have rust in it, or water deposits that might stain your driveway, you may want to use a large bucket to catch the draining water, or at least be ready to hose down the driveway. Also, a 1 and 1/16” socket is not commonly included in most home socket sets. You can either buy a set of large sockets at Home Depot or Lowes, or go to your local auto parts store and purchase an individual socket.”
Having had our fair share of rotten egg water on our shoes, we agree with Rex about being careful with the water that comes out of a water heater, especially if the water has been sitting for any period of time. Smelling like rotten egg water is an excellent way to loose friends.
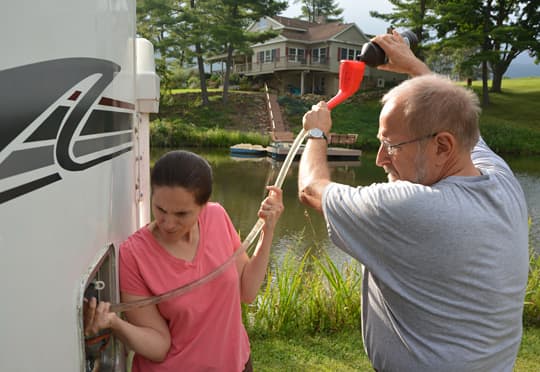
6. Next, spray fresh water into your tank with your fresh water hose. We did not have a flushing wand on hand, so we used the old “put the hose in the tank, plug the tank until it’s full of water, and then let the water rush out with the sediment and debris” process. It worked great, but a flushing wand would be even better.
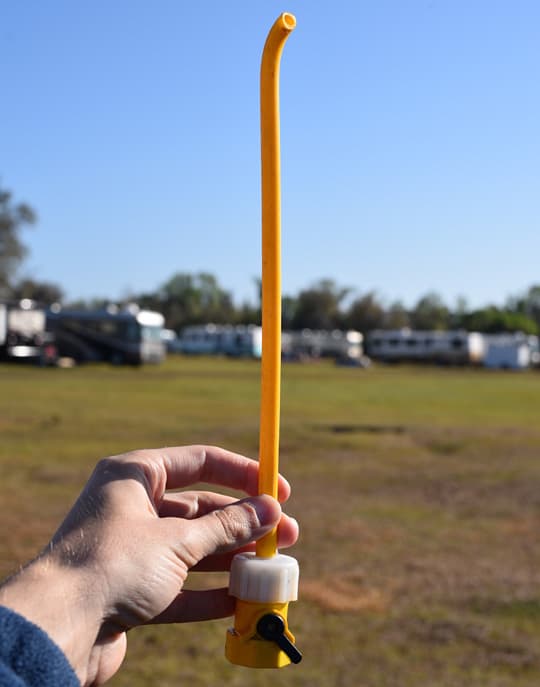
7. Once the flushing was complete, it was time to put the hydrogen peroxide (or vinegar) into the tank and eliminate the egg smell. To put the hydrogen peroxide into the tank, we used a polyethylene tube with a J-shaped funnel.
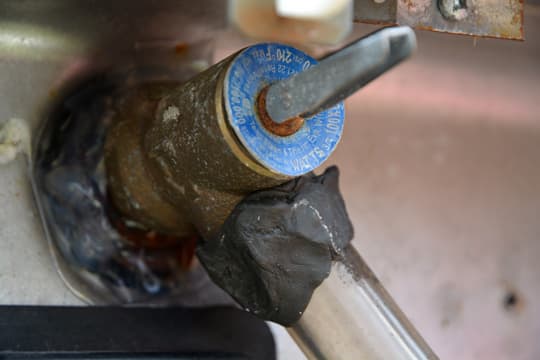
We used Duxseal reusable sealing putty around the tube and relief valve to create a seal.
Above: We used the funnel and the tubing to add the hydrogen peroxide to the water heater.
8. Once the entire bottle of peroxide was in the water heater, we turned the water heater bypass back to normal and filled the water heater with water via the camper fresh tank. We also turned off the faucets in the camper and turned the relief valve off.
Then we turned the bypass off again and let the water heater sit with the hydrogen peroxide. Peroxide kills bacteria almost immediately, but we let it sit in the tank for a while for good measure.
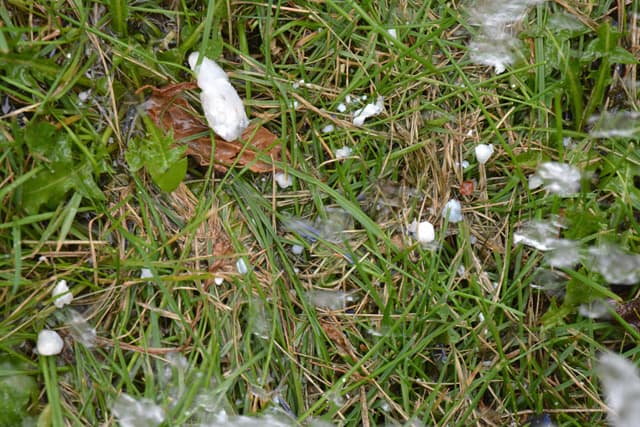 |  |  |
Above: The debris that came out of our water heater – click to enlarge
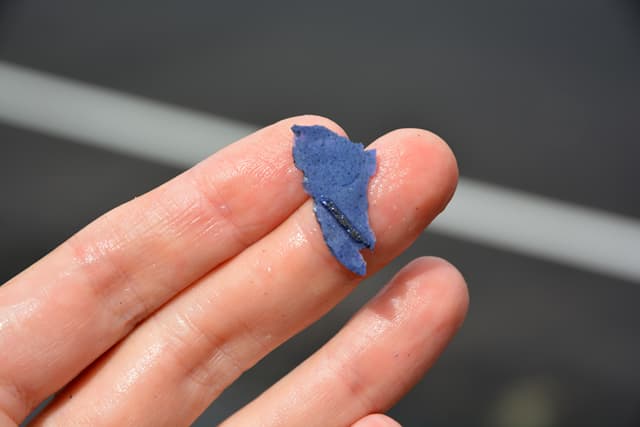
9. A few hours later, we took the old plug off and allowed the water heater to drain the peroxide-water mix. In the pictures you can see debris and blue lining of the Suburban that has been shed. Unfortunately, lost lining indicates that we need to replace the eleven year-old water heater in our camper.
10. Once the water heater tank was drained, we flushed it again with the fresh water hose. More debris and blue lining flakes flushed out.
If you are merely flushing your water heater tank (no hydrogen peroxide or vinegar), you can skip steps 7 through 9.

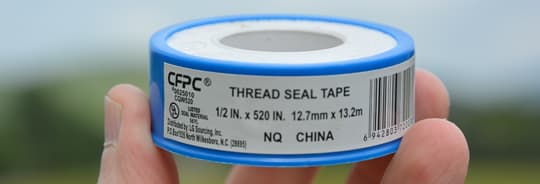
11. With the hydrogen peroxide drained, and the tank flushed until no more debris came out, it was time to insert a new anode rod in our Suburban. Before inserting the anode rod into our Suburban, we wrapped the threads with white teflon tape to create a tight seal, and prevent possible leakage.
Above: White teflon tape to creates a tight seal and makes it easier to remove the anode rod later
Again, Atwood owners may not need an anode rod, unless they are experiencing odor problems. If you have an Atwood water heater and opt to use an anode, we recommend an aluminum-zinc anode.
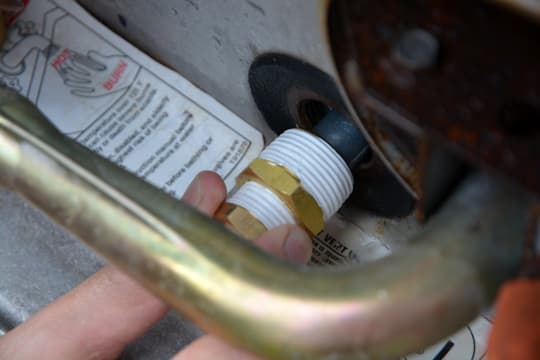
Above: The brass adapter on the anode as it was being inserted into the water heater
The aluminum-zinc anode rod came as a kit with a brass adapter for use with either Atwood (small thread) or Suburban (large thread) plugs. The kit included a small drain valve, but we opted to plug this hole with a 1/4” NPT thread brass plug instead. Removing the anode rod completely is much faster for draining, and allows for the recommended twice a year inspection. The brass plug also won’t corrode, and will last longer.
Above: Tighten up the drain valve and you’re done
12. Before refilling the water heater with fresh water, we opened the pressure relief valve to allow air to bleed from the tank. Then we turned on the bypass valve and turned on the camper water pump (you can also use city water, if available) and allowed the tank to fill until water came out of the pressure relief valve.
Close the pressure relief valve and open the hot water taps in the camper’s sinks. That removes the remaining air in the camper’s plumbing. Fill the tank with water. Tuen on the propane or electric heat to supply clean hot water.
When the water pump stops, slowly open up a hot water faucet and run the water. If you get spurting water, then there is air in the plumbing system that needs to be purged. That process should only take a minute or less. The air will be purged and water will be flowing through the plumbing system.
Hydrogen Peroxide Flush |
If you used hydrogen peroxide (which is toxic), you may want to fill and drain your water heater a few more times to completely rid the water heater of hydrogen peroxide. |
The tank is now fully operational, egg smell free, and ready to go with a new anode rod. To practice what we preach, we will be doing our routine RV Water Heater Maintenance at least twice a year to make sure that it is in good condition.
Why You Need An Anode Rod | Types of Water Heaters
Paul Harris, Lance Camper’s General Manager of Customer Service, worked with TCM on an article called, “Truck Camper Holding Tank Systems”. Paul’s article gives some excellent tips on properly maintaining fresh, grey, and black holding tanks.
Also, don’t forget to maintain your camper’s seals!