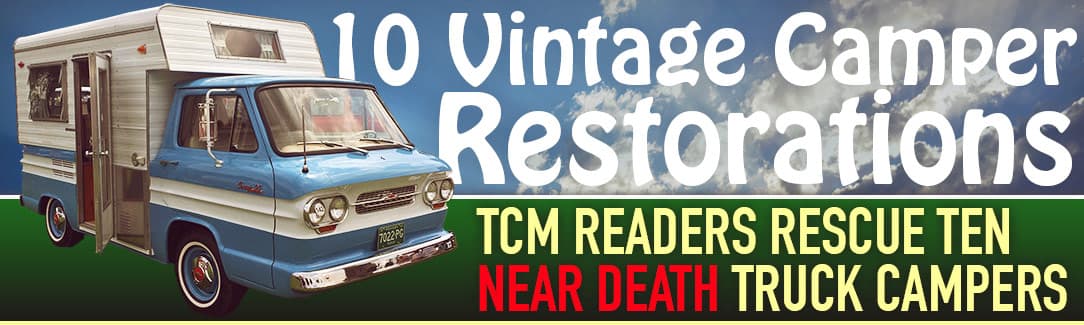
Here are 10 incredible truck camper restorations including a 1963 Sani-Cruiser, 1966 Avion C-10, 1971 American Road, 1972 Caveman, 1974 El Dorado, and more. Get your tools out. You’re going to need them.
The colorful electrons on your screen can’t possibly communicate the blood, sweat, and tears that go into a truck camper restoration project. A laptop can’t help you feel the disappointment of discovering yet more water damage behind the camper skin. A smartphone can’t help you fully appreciate the discomfort of working a 30-year old refrigerator inside of a compartment just big enough to hold it.
If you want to know what it’s like to restore a truck camper, you have to put the laptop down, step away from the smartphone, and pickup some tools. From the dozens of folks we’ve talked to over the years about such a project, you also need to clear your schedule, and apologize in advance to anyone who might want your attention in the near future. Sorry honey, the camper needs me more.
So let’s take a moment to raise our coffee mugs (or whatever you’ve got handy) in respect for those who have dared to take on such an enormous project. It’s hard enough to keep a modern truck camper caulked, sealed, and properly functioning. Bringing back a camper that’s likely been neglected for years is something that few of us are bold (or crazy) enough to tackle. To those who are, we salute you!
Last week’s Question of the Week was, “Is restoring a classic or vintage truck camper worth it?”
Jim and Cathy Holcomb
1963 Chevrolet Corvair Rampside
1963 Sani-Cruiser
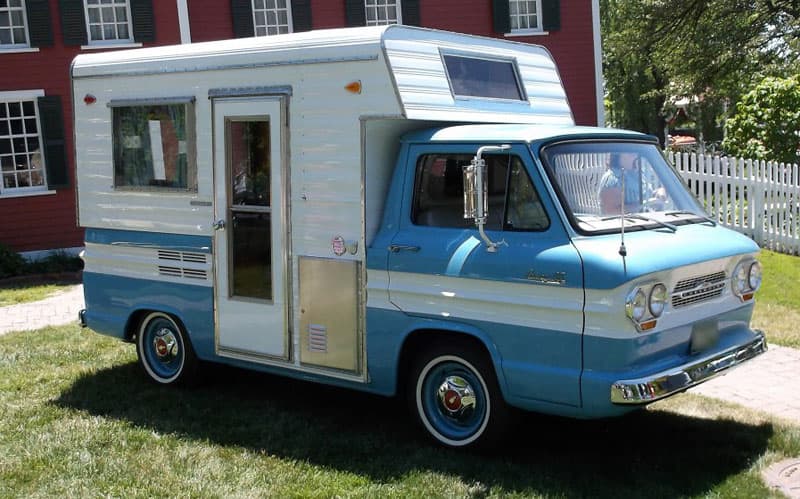
We finished a full restoration of our 1963 Sani-Cruiser camper and 1963 Chevrolet Corvair Rampside truck in 2014 with a rebuilt interior and exterior like the original.

Above: Vintage Rampside truck camper driver’s side
We purchased this rig back in the mid-1990s. I believe this is a rare conversion from the Sani-Cruiser company in the early 1960s.
Sani-Cruiser was based in Carsonville, Michigan. They built motorhomes, but I have found no record of Sani-Cruiser doing this type of conversion. The camper top has their manufacturer’s plate next to the entrance door.
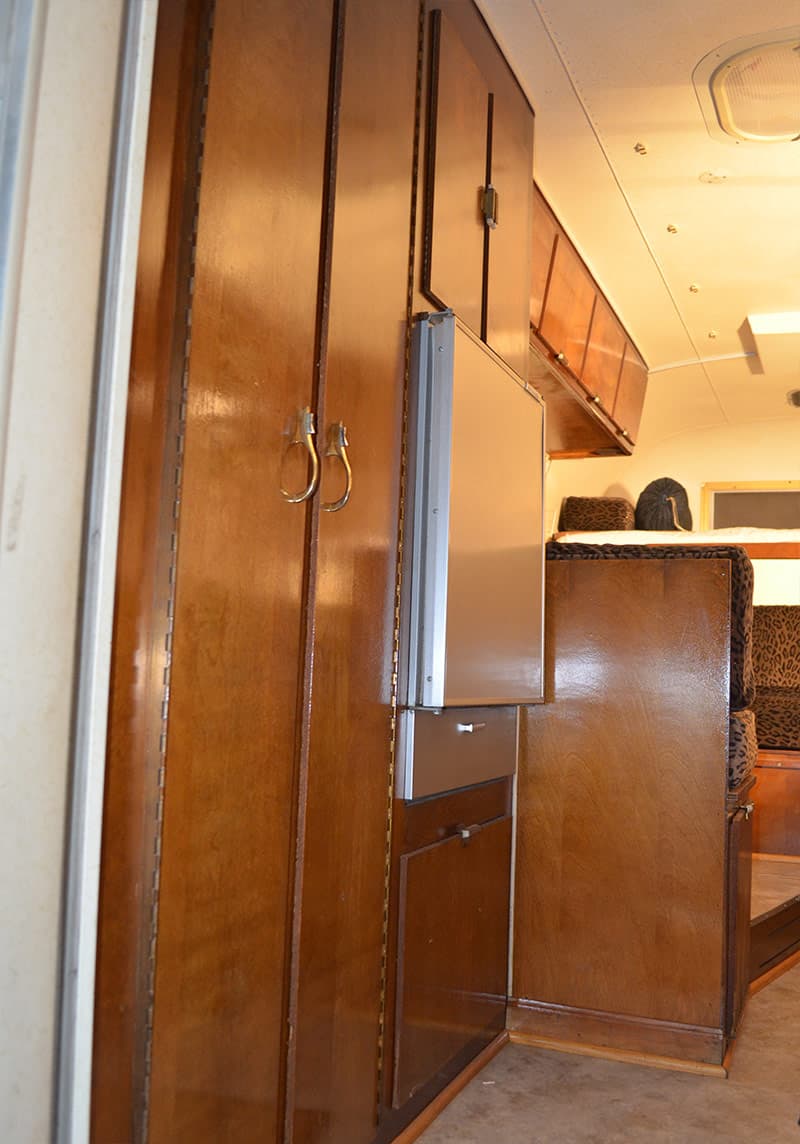
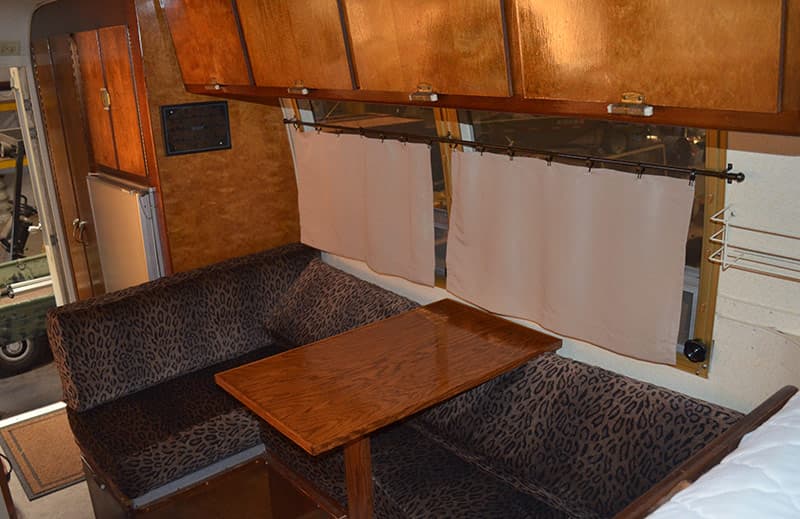
The camper interior is all birch with six coats of amber shellac. All of the original appliances have been restored. The camper is fully self-contained with a refrigerator, stove, sink, and a built-in toilet and holding tank. Although the truck and camper were manufactured separately and then installed, the camper is not detachable.
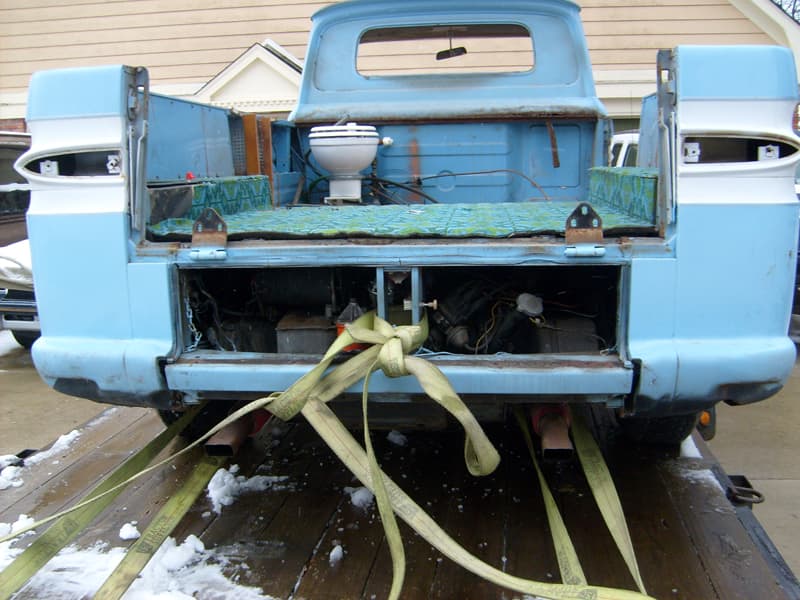
Above: This photograph was taken after the tear down and shows the toilet still in place.
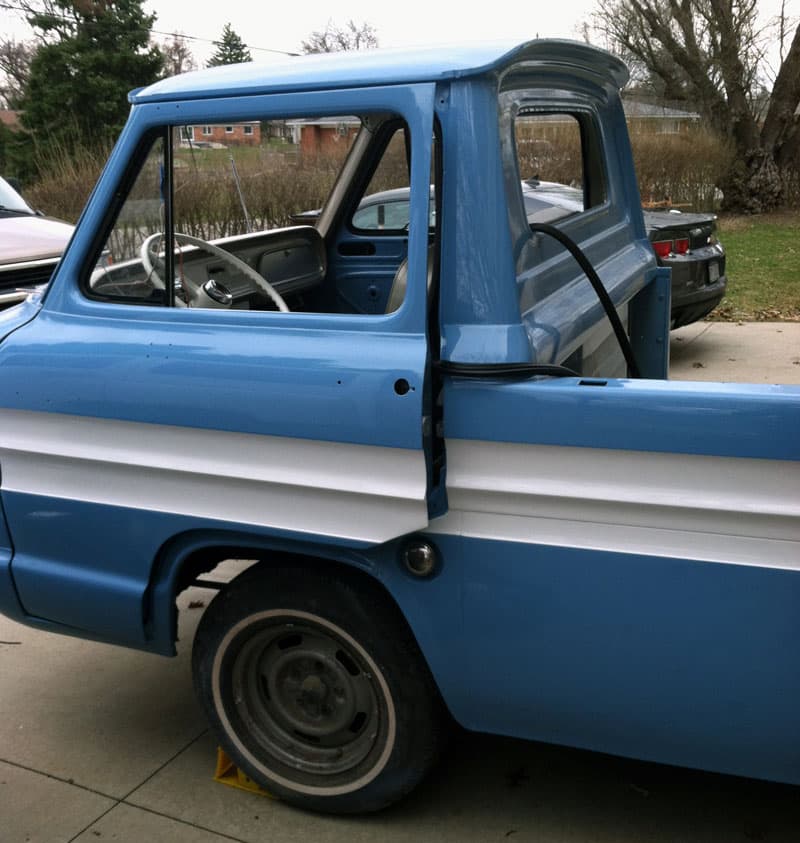
Above: Fresh from paint, the cab with all original colors.
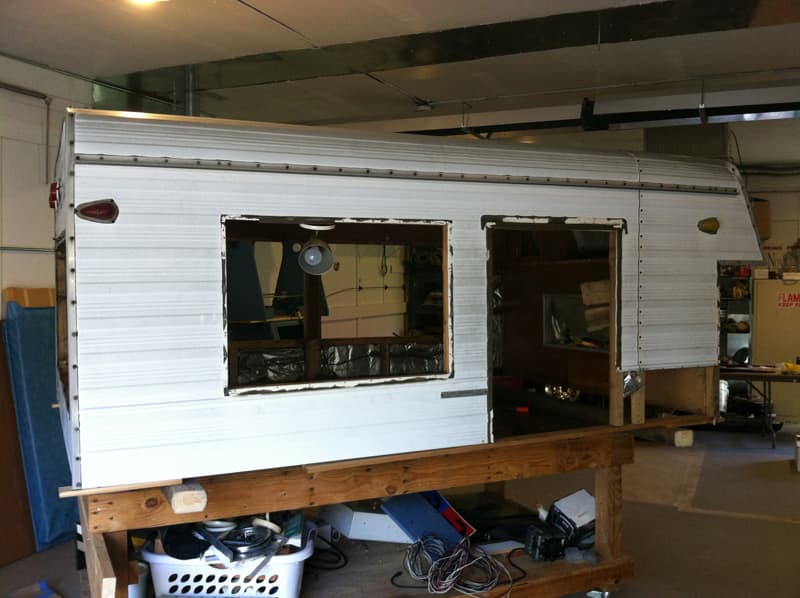
Above: The camper top prior to restoration.
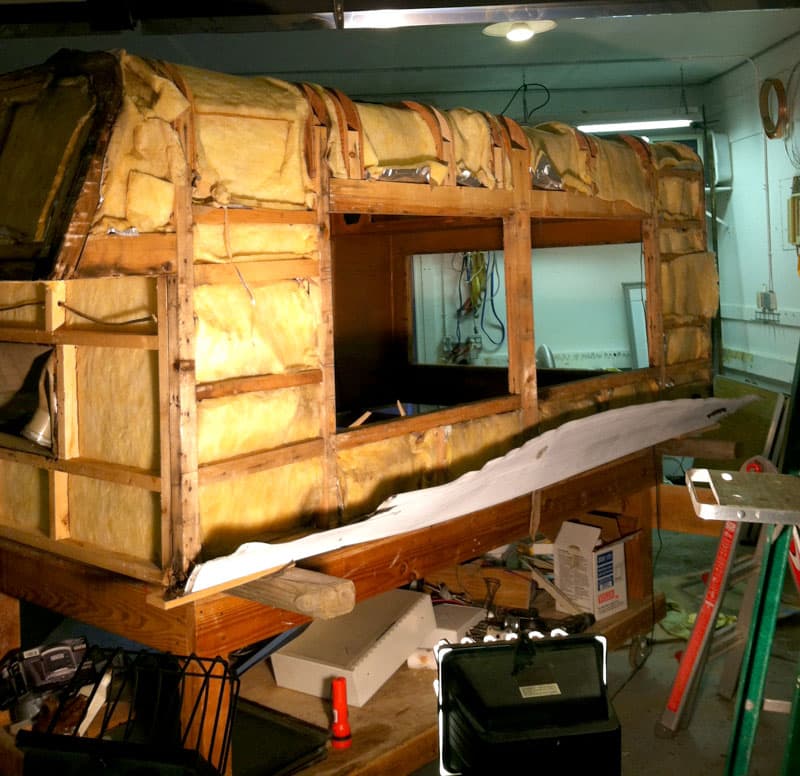
Above: The top is stripped of all original siding revealing all four camper corners rotted.
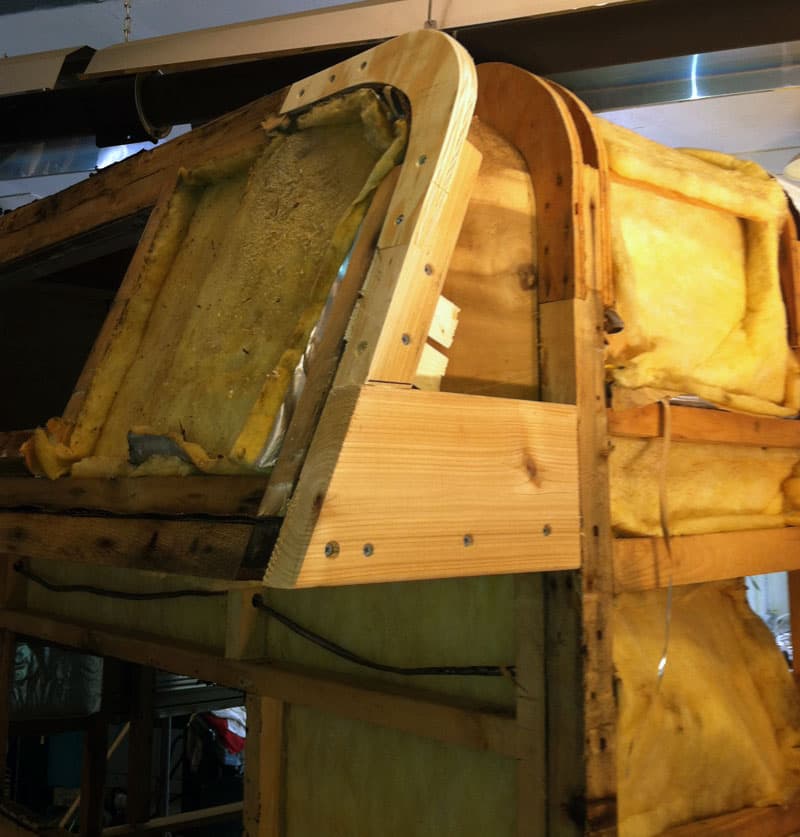
Above: I rebuilt the corners to prepare for new siding.
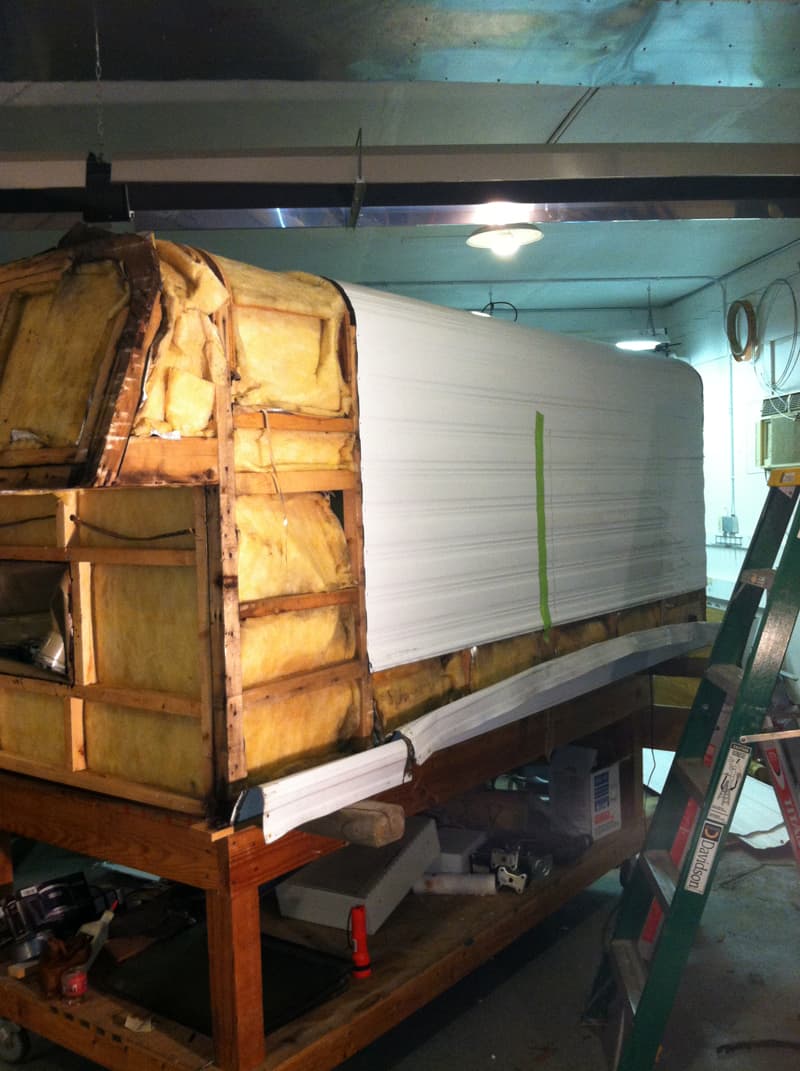
Above: New siding is a short production run of an original vintage pattern. All seams are replicated to original positions.
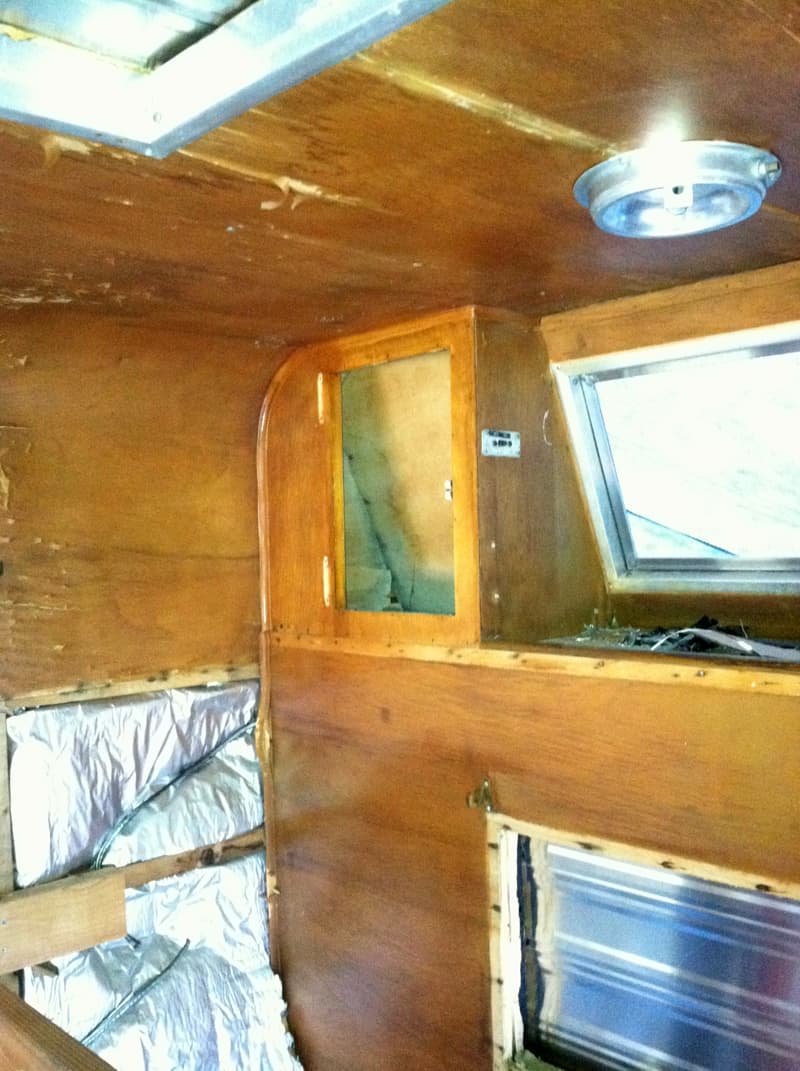
Above: The interior prior to restoration.
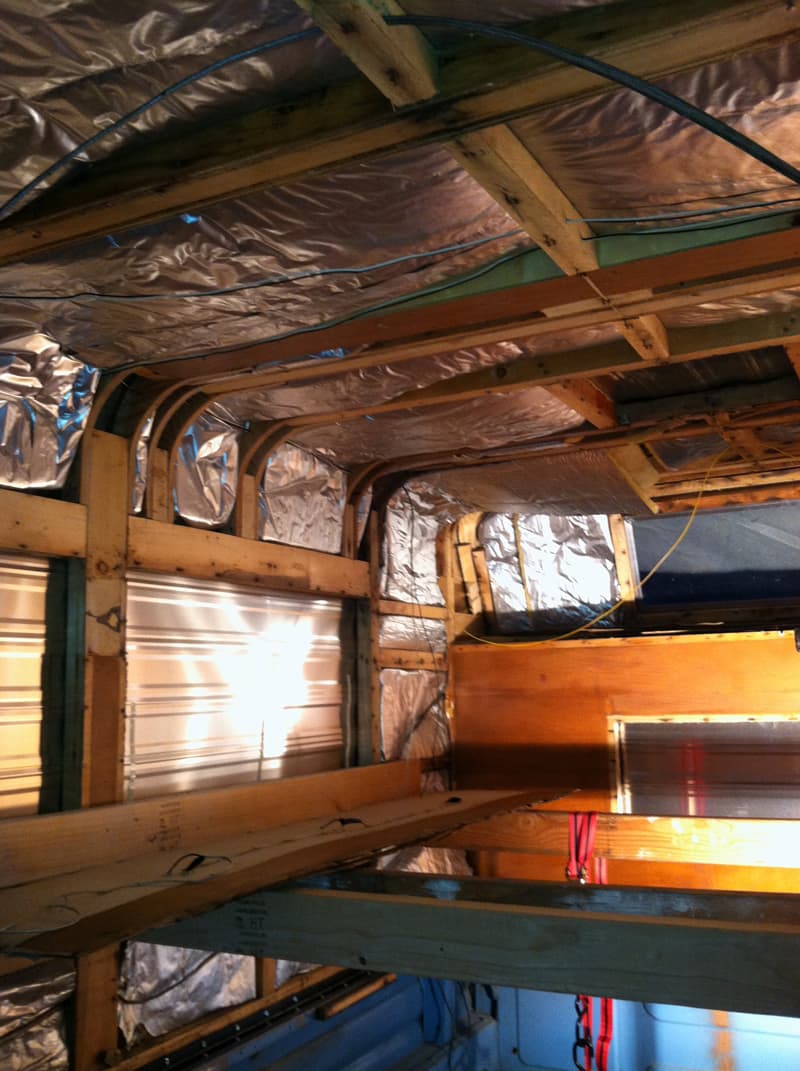
Above: Wood paneling removed showing water damage and peeling.
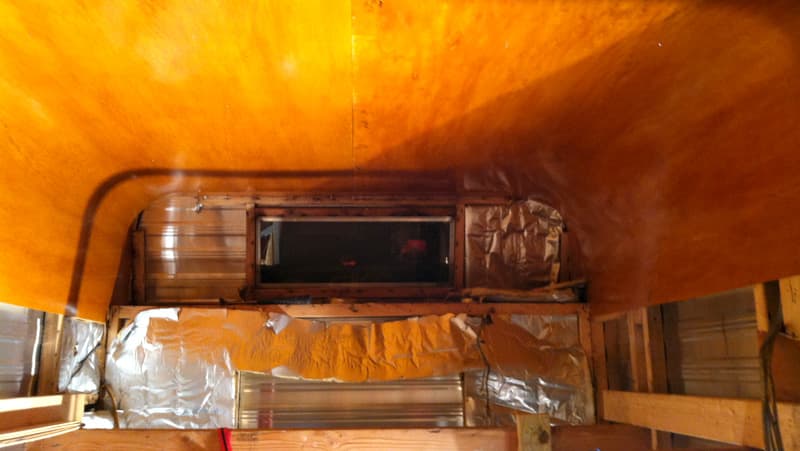
Above: All new birch interior and refaced original cabinets with three coats of amber shellac; the original finish.
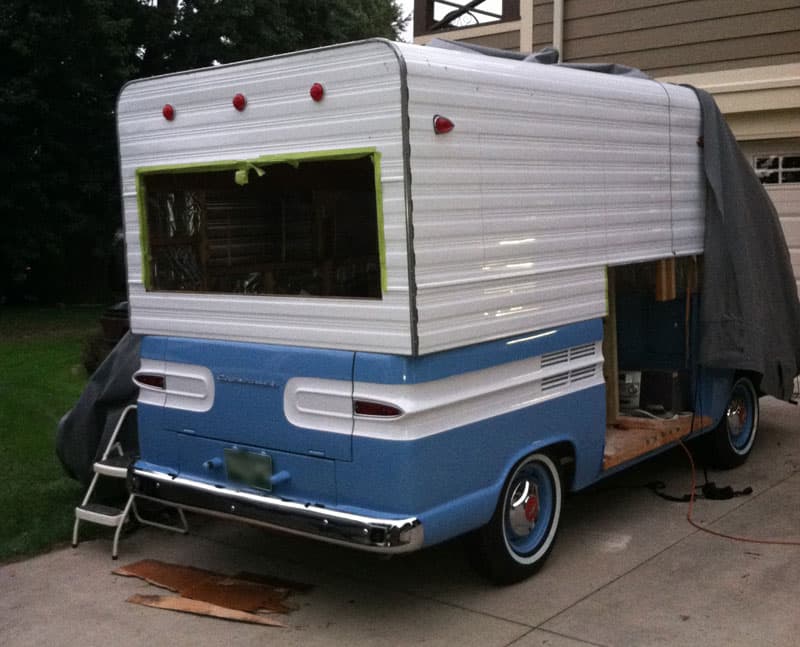
Above: The window cut-out and rear clearance markers replaced with new old stock.
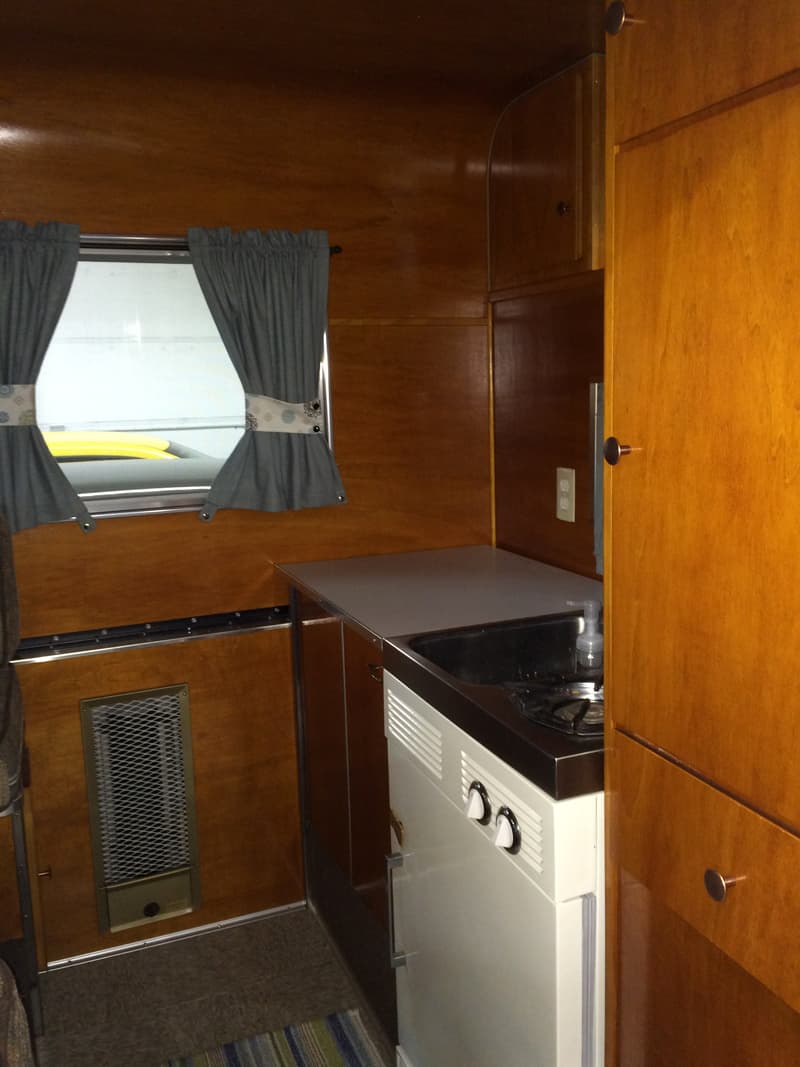
Above: The original refrigerator, stove, and sink combination was restored. The floor tiles are commercial grade sheared to 9×9, as original. Also note the hide-away toilet and the original radiant wall heater.
Above: Vintage Rampside truck camper passenger’s side
I am wondering if you any of your readers know anything about Sani-Cruiser and if there were any more of these conversions completed. If anyone has any information, please contact me.
Jim McMahon
1982 Chevrolet
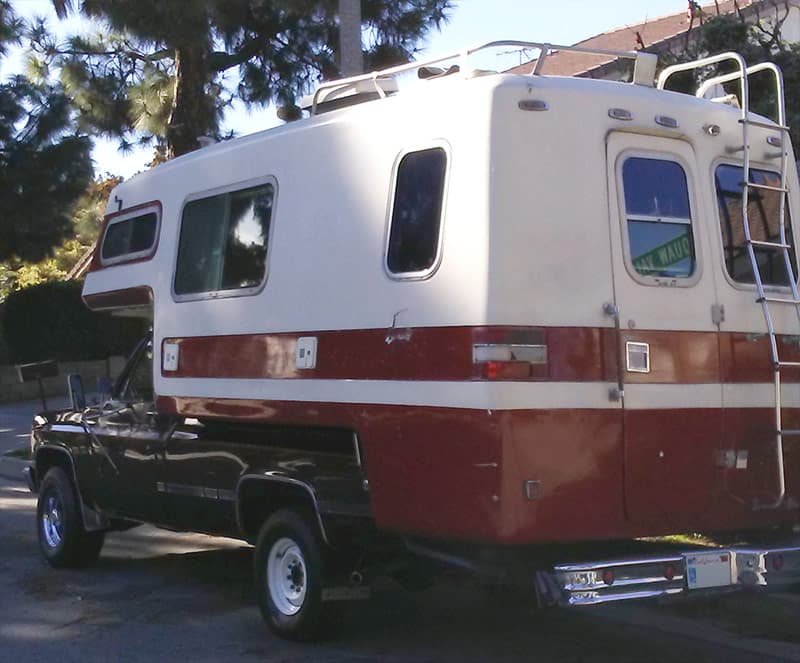
1971 American Road
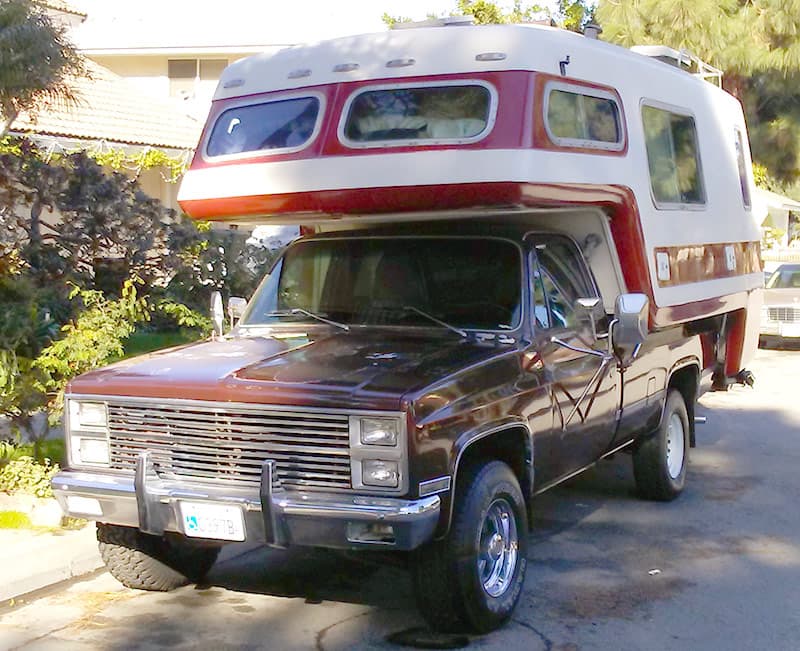
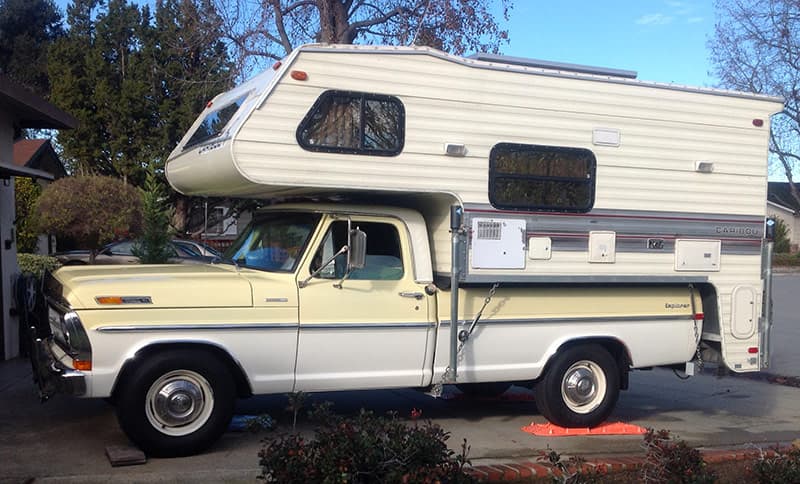
The 1971 American Road camper was purchased by me for $1,000 in the late 1980s. I’m the second owner and purchased it in Carson, California.
I have it sitting on a 1982 Chevrolet pickup truck which I brought brand new, and have driven 400,000 miles. The rig was used mostly for work as I used the camper for a real estate mobile office. I also enjoy RV traveling.
I have done some extensive remodeling on the exterior and the interior of the camper. The Ford camper is fiberglass, and is painted white with matching burnt orange inlays. The interior is oyster white leather.
I briefly attended General Motors’ school of engineering, was a short-term Chevy salesman, and my family was in the automotive business, so RVs and cars are in my blood.
One time, the truck and camper attachment was show car worthy, and the combined unit won many car shows for first place. The truck and camper look very sharp together because of their good contrast.
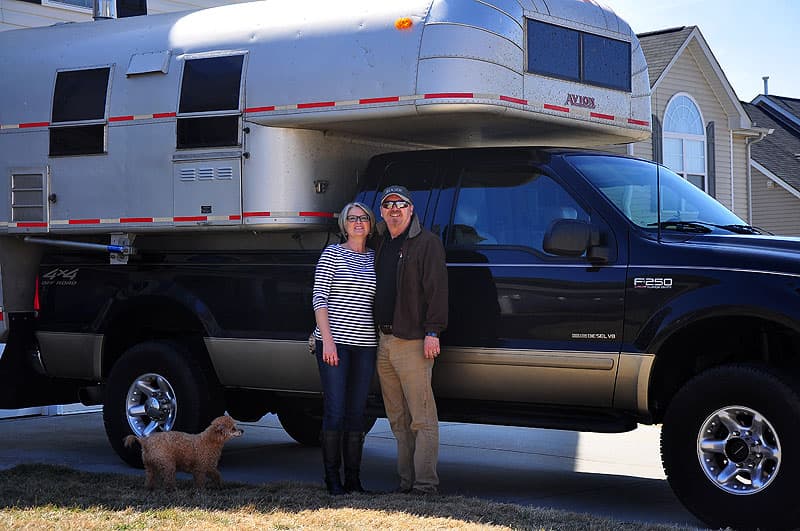
Mark Dyvig
2001 Ford F250
1969 Avion C-11
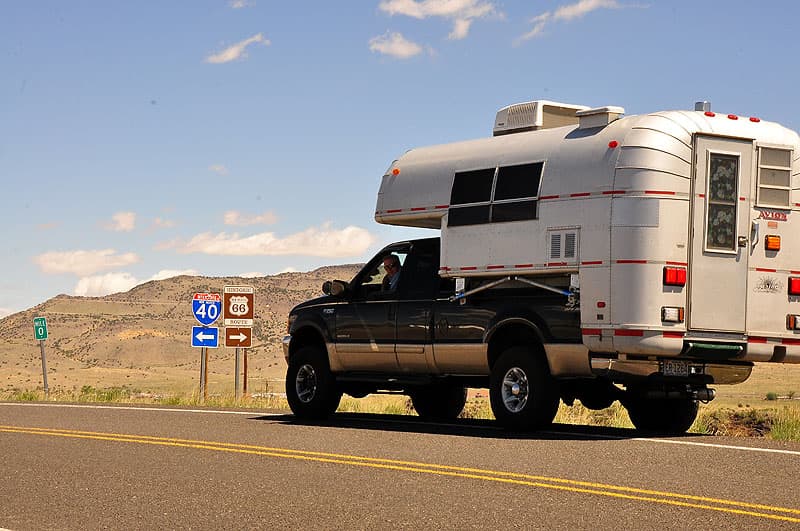
Amy and I searched for months trying to pick the right truck camper, either new or used. When I found the Avion I knew she would love it. We were fortunate enough to find the old gal in pretty good condition. However, after purchasing it, things started to go bad and our updating began.
The refrigerator was original and had stopped working, so we pulled the old one out and started our search for another. Based on the opening size we ended up with a small Norcold three-way refrigerator. It was smaller than the original, so I had to refigure the opening and close it in.
Amy and I handled this; no problem. However, we found the original was a gas-only refrigerator. The new one was gas and electric, so we took it to Camping World to have the refrigerator hooked up properly, including replacing a plugged gas line.
The floor had the original linoleum so we tore that out and replaced it with a wood looking vinyl floor. The new flooring was easy to install, easy to clean, and looks warm and inviting.
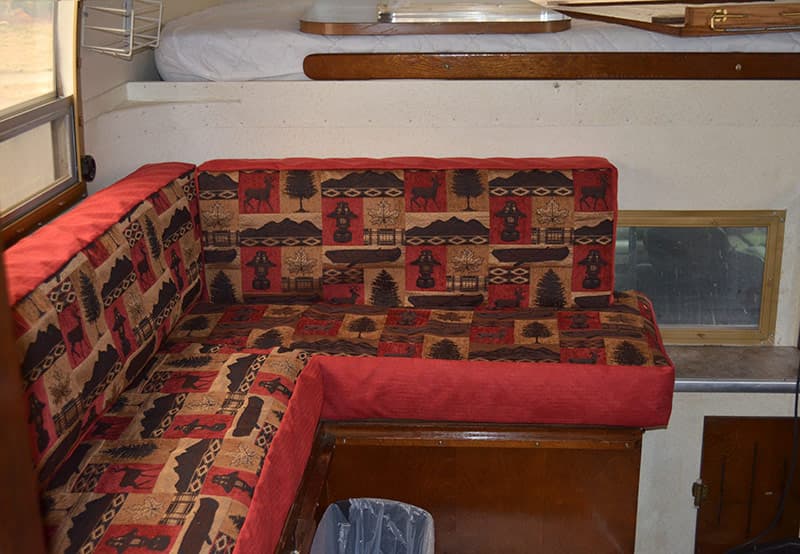
The seat covers were a little tacky so Amy made new covers for all the original cushions using an old fashion camper/outdoor themed fabric.
The cabinets are all original but were dull and nasty. Amy spent a day washing and applying Murphy’s Oil on both front and back while I replaced the weather stripping around the door.
During our first trip, our original water heater refused to work. Upon professional recommendation, we had Camping World replace our old water heater with a new more efficient model.
Once again, size matters. The opening had to be reconfigured as I wanted to keep the original water heater door door. The guys at Camping World added sheet metal to the outside to close the opening and accommodate the original door.
On our trip out west, following my grandmother, we found water coming in by the front windows. Try as we might, we could neither pin-point or stop the leaks.
We finally figured it out when we got home. Amy suggested checking the running lights and she was spot on. We had replaced the outside running lights with LEDs and had not filled the holes well enough with caulking. I thought the gaskets around the lights would stop the water from coming in. My bad!
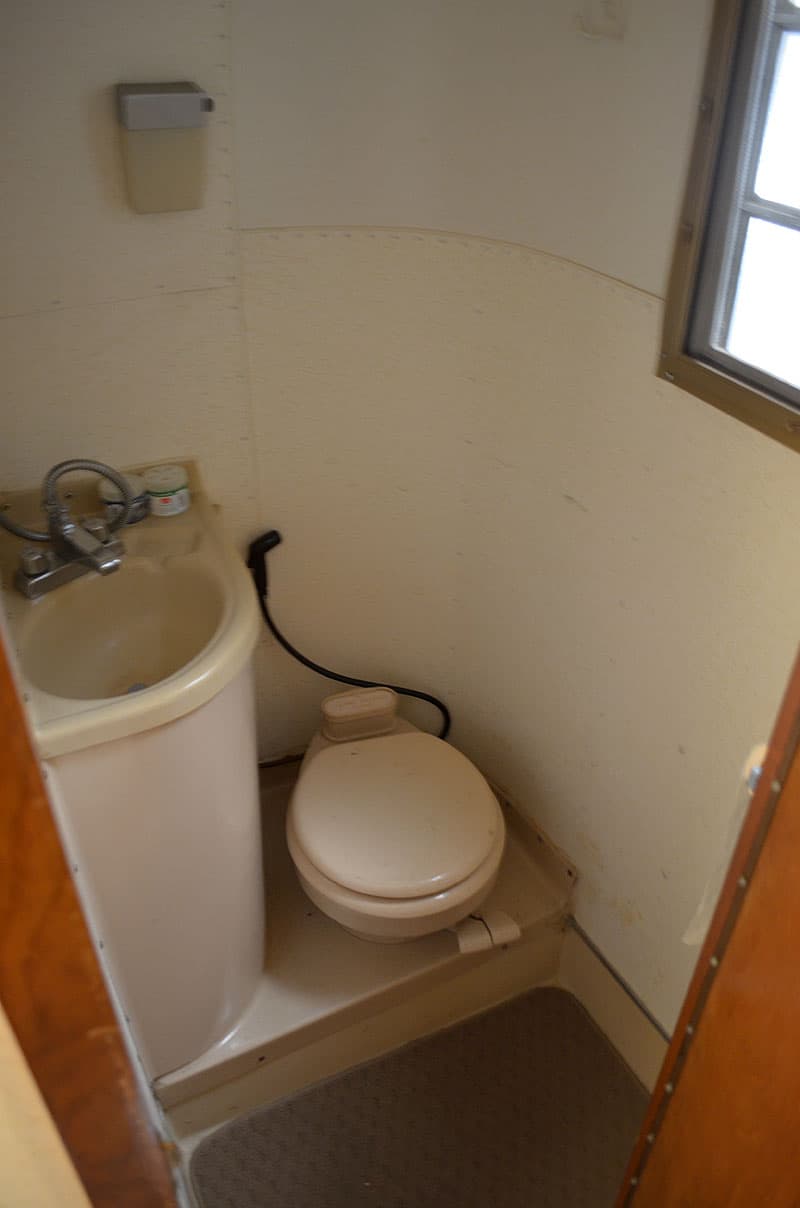
We also found we had leaking toilet and black water tank. The toilet was easy to replace. The black water tank not so much. Since nothing close to the original could be found, we ended up having Camping World re-fiberglass the entire tank and replace the valve controls while they were at it. Now it all works like a dream.
Much of the big and custom stuff we had to do was done by Camping World and we could not have been happier by their work. It was expensive, but we could not be happier with our truck camper.
Check out Mark and Amy’s full article in Truck Camper Magazine, “8,926 Miles In Grandma’s Tire Tracks”.
Donna Zechner
2007 Chevrolet Silverado 2500HD
1979 (or so) Sunline
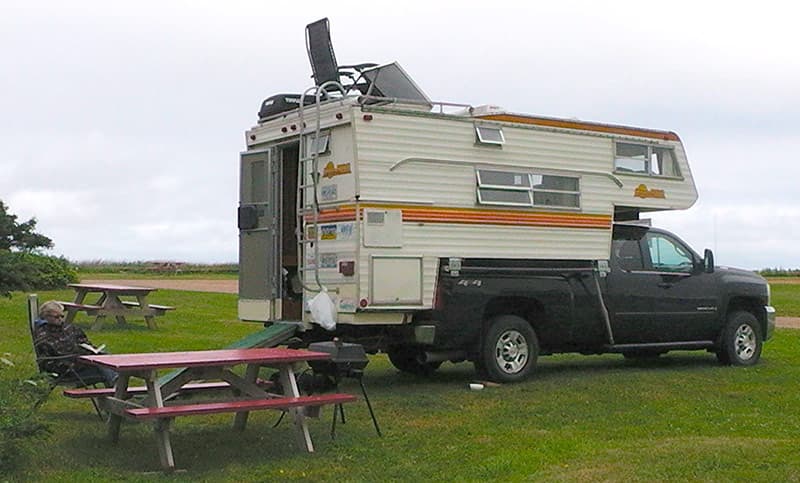
We really don’t know the model, but our Sunline is 11’6” long. The original interior was wood. We changed the kitchen and added stainless counter and back splash. We recovered the wood with a lighter color. We also took out the heater for more storage space and made it more comfortable.
It was worth the money and time we put into it. We went out west to Alaska from Quebec twice and traveled with the camper for a good ten years. We just recently purchased an Arctic Fox 1150 and have kept the Sinline since it was my husband’s first camper.
Bob C.
2002 Dodge 2500
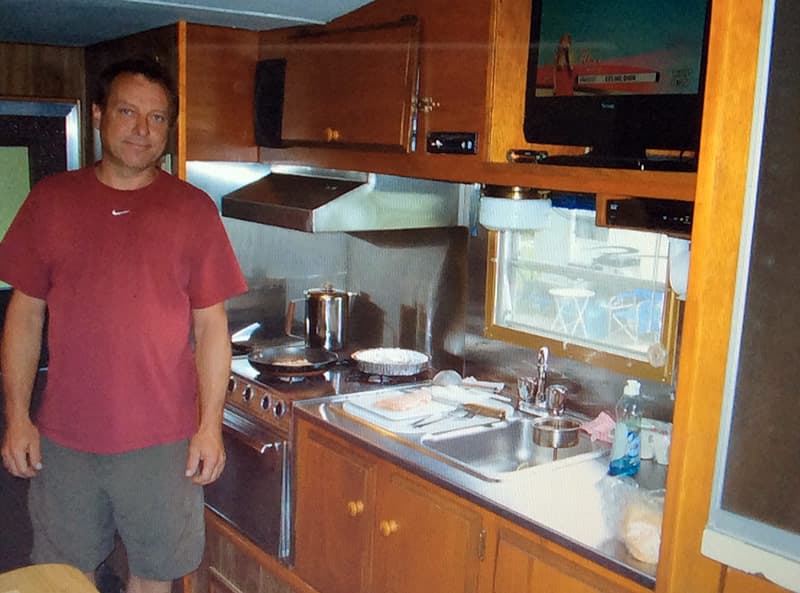
1966 Avion C-10
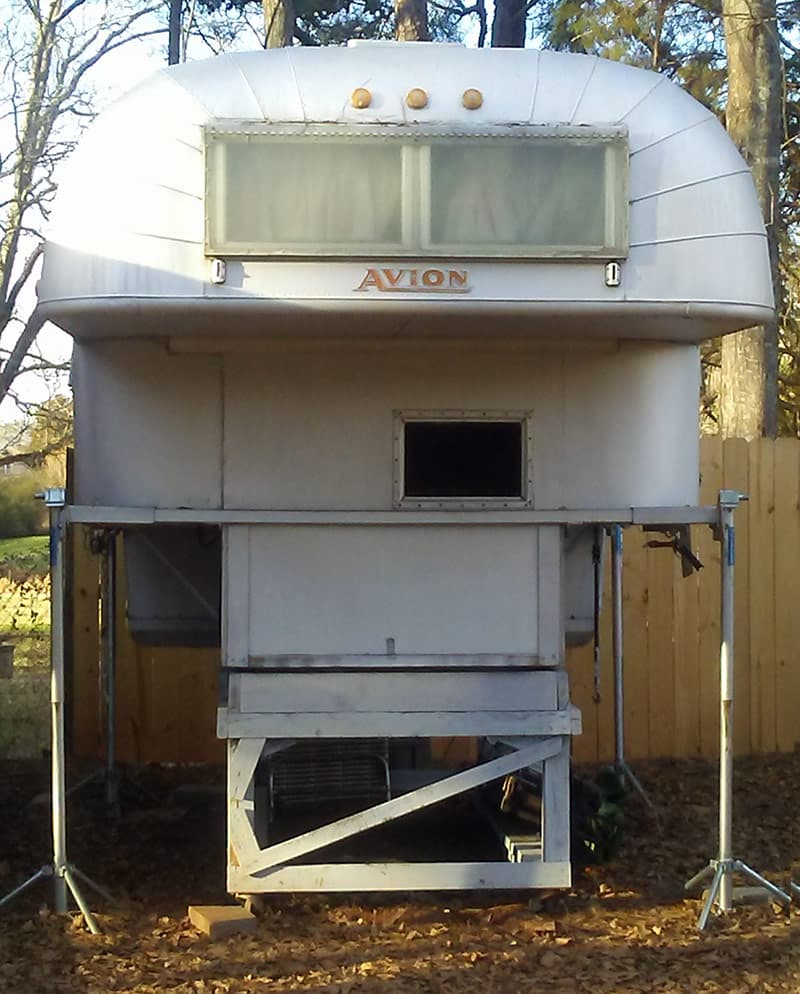
On my 1966 Avion C-10, I cleaned the outside and had new jacks installed. I replaced the refrigerator and water heater and changed the fresh water tank system from air pressure to demand pump.
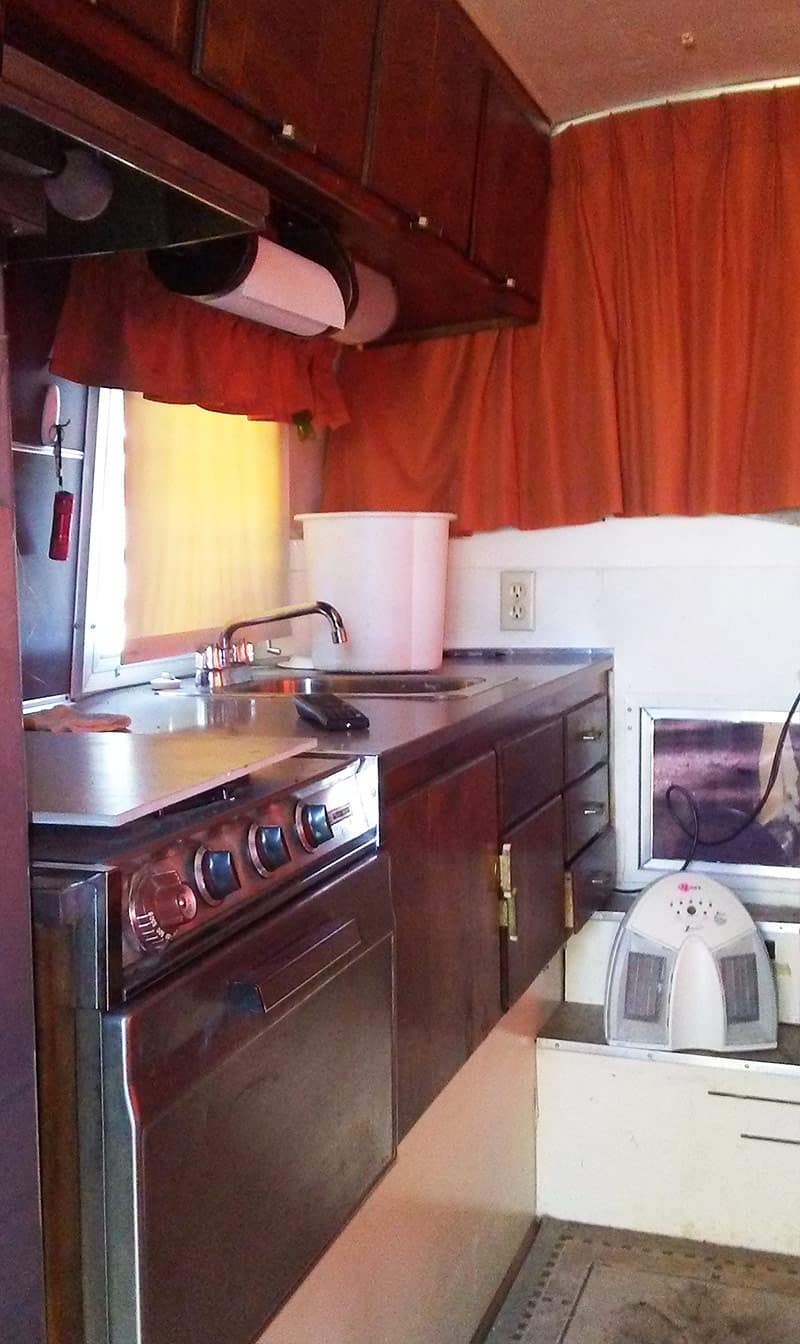
I cleaned the inside, painted, and had new flooring installed. The original upholstery and curtains were cleaned. It is all still very usable. I took out the original blower heater and replaced it with a Mr. Heater catalytic heater.
With a 24-inch extension on the hitch, I can pull a boat, trailer, or motorcycle trailer.
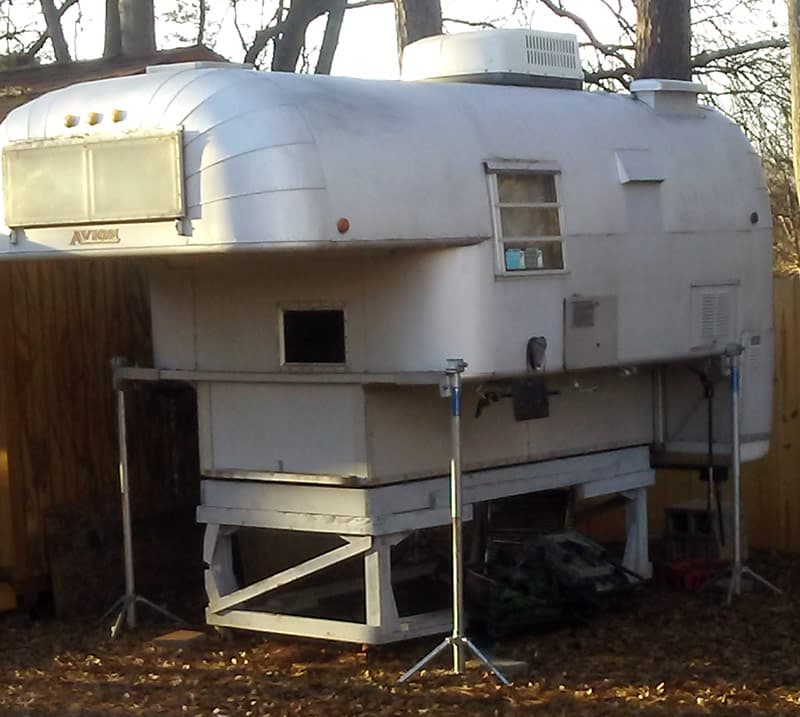
The unit is not really restored, but it’s very usable and fun. It’s also a show stopper because people don’t know what it is. I did all work with my daughter, EM.
Mike Bohn
2007 GMC 2500HD
1974 El Dorado
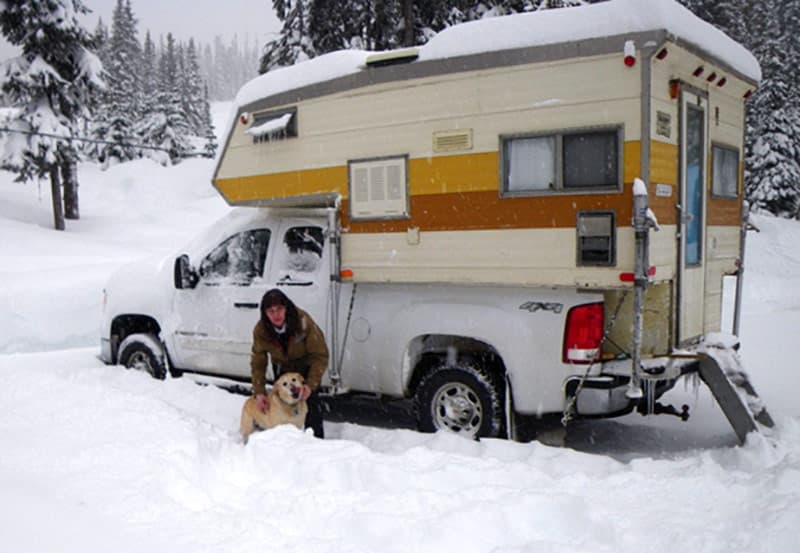
I’ve owned a 1974 Eldorado truck camper for about fifteen years now. It has been redone more for use than a true restoration, but it shows that a stick-built camper can be serviceable for decades.
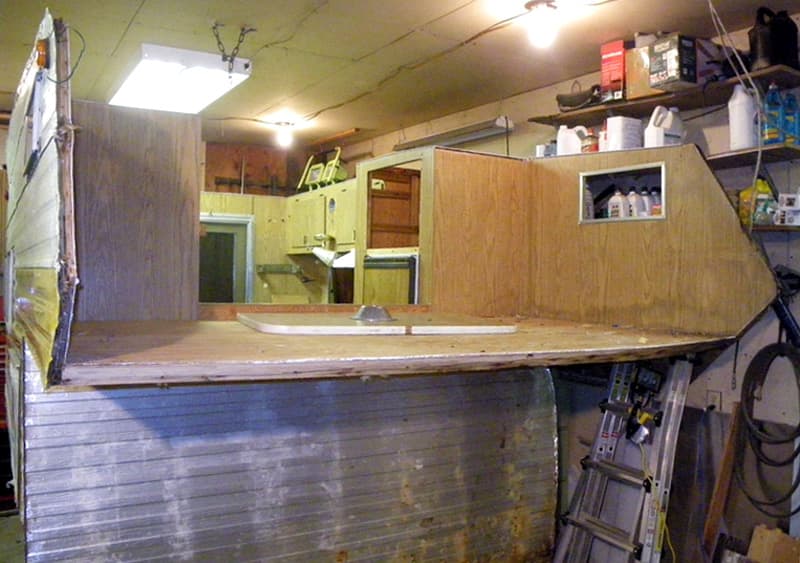
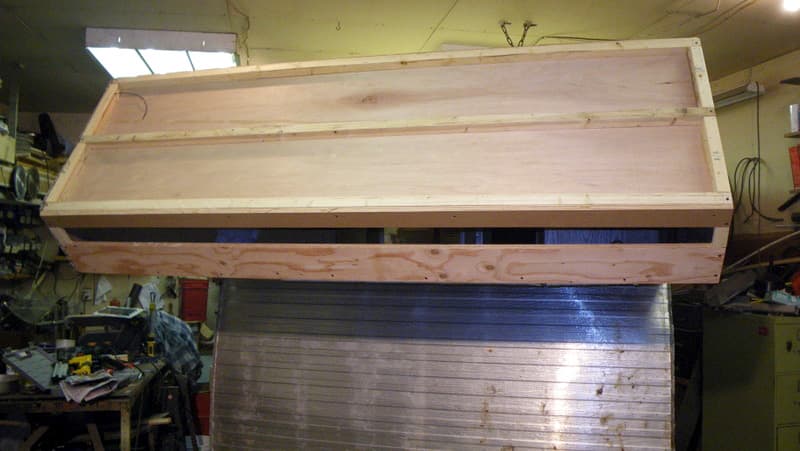
I had the whole roof and overhead off and rebuilt it. When I put on the new roof, I left out the front window for warmth. I used 1.5-inch foam for insulation under the cabover bed and roof.
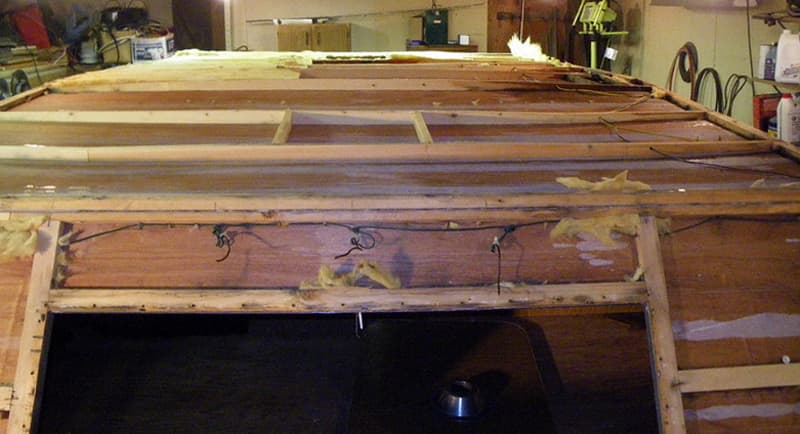
I put on a new back door as well. It was tough to save the skin, but doable. I had to put in a new heater this summer. I miss my old gravity furnace already.
I have two six-volt batteries beside the camper in a box, added a power converter, and LED light bulbs. I changed the refrigerator about five years ago.
I use the camper all winter as I am ski patrol on a mountain and stay on the hill. I have been comfortable at -25 Celsius (-13 Fahrenheit) but have done -38 Celsius (-36 Fahrenheit). That was a bit tough.
My restoration shows that you don’t need to spend big money if you are handy. It was worth doing. I can’t get much for it if I sell it, but it still looks and works fine. It is stored under a roof which really helps.
Viola and Manfred Klement
2000 Ford F-250
1992 Jayco Sportster 8 foot
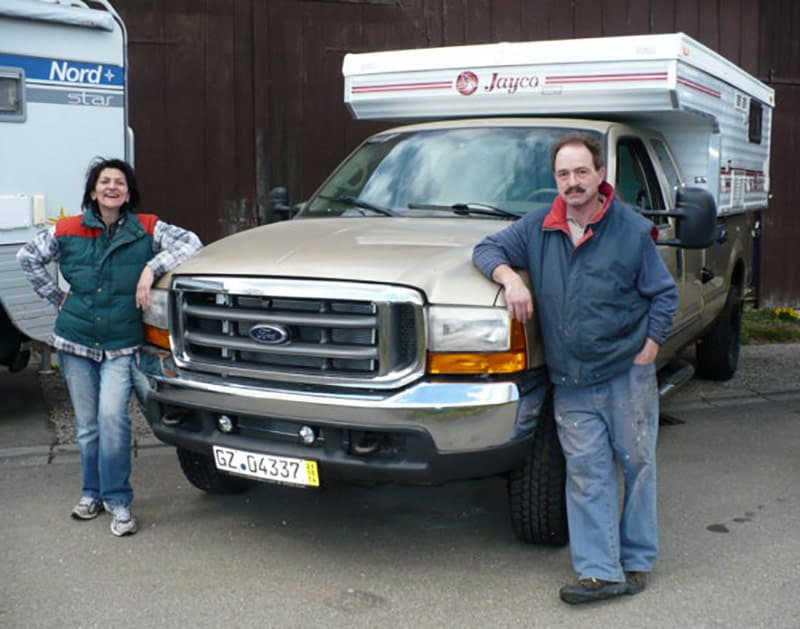
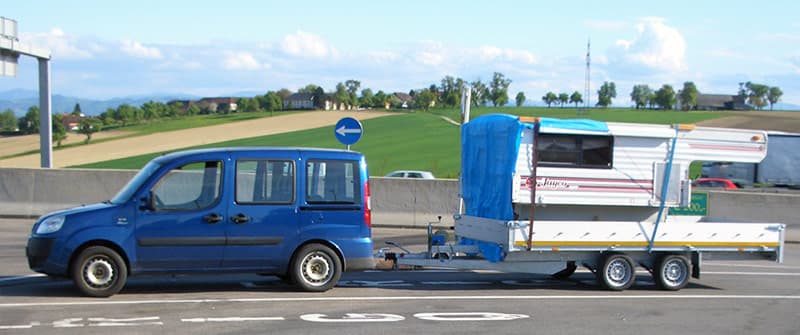
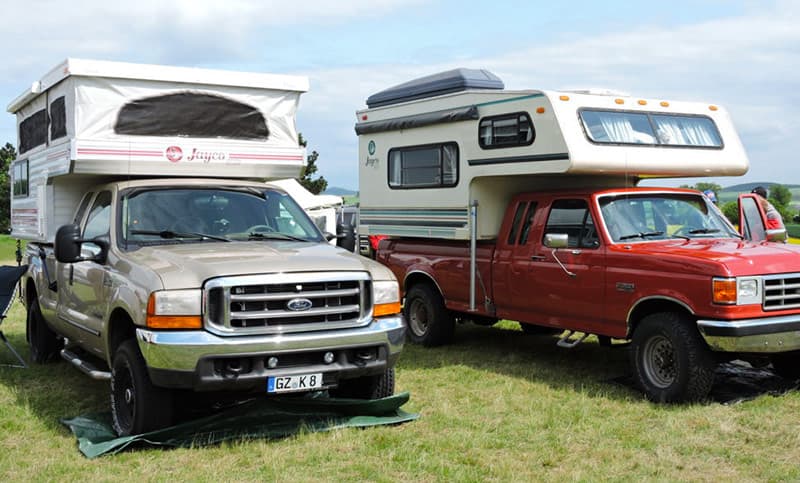
I paid $500 for my camper on eBay. It was 300 miles away from our home and there were only a few pictures of it in a dark barn. We took the risk to learn how these campers were built. We would restore it, or burn it.
Our friends offered us two gallons of gas to burn Jayco after the first pictures I posted in our German camper forum.
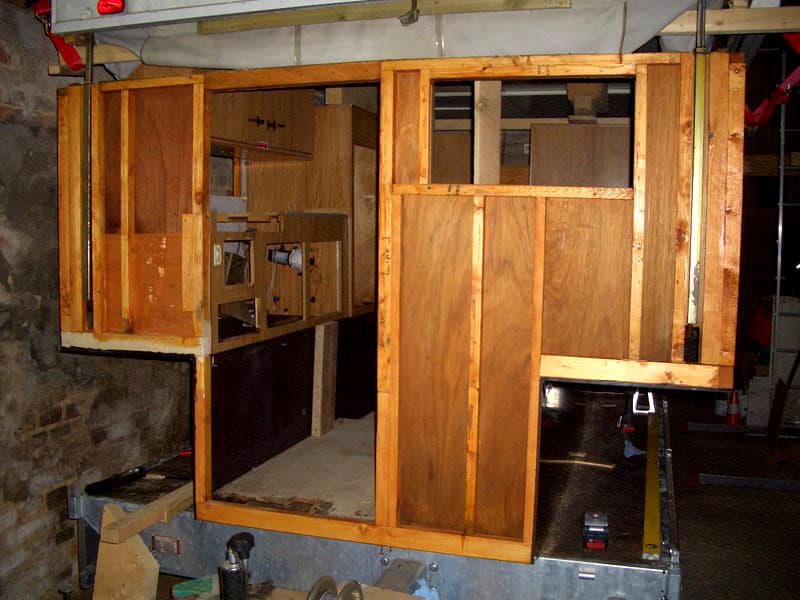
It had some major damage. There was wood rot caused from loose camper jacks and damaged seals. The cabover’s frame looked like burnt wood.
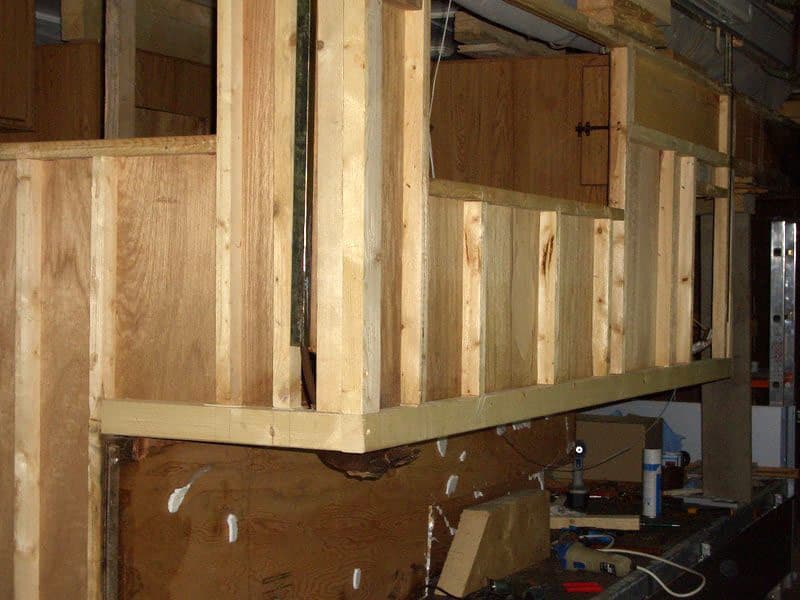
We stripped the camper down to its bones and then replaced 70-percent of the frame. The bottom was rebuilt completely new. This was our personal point of no return.
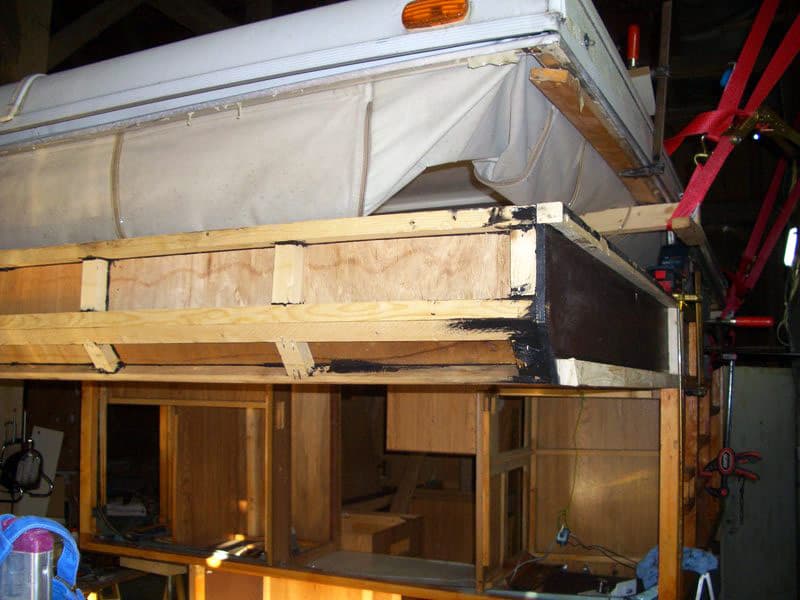
Now the floor is much better than new. A carpenter built it from two layers of coated plywood and PU-foam-insulation. The only original part in the cabover are the nose and the under bed storage. The plywood outside and frame are completely new.
In addition to the framework, we decided to replace the systems. We put in a propane tank which can refilled at gas-stations in Europe as well as a new compact Truma-2400 furnace (8200 BTU).
We put in a new original cooktop (thanks to Don Wheat from Alaskan Campers). We installed it because we found the original countertop in was in good shape and almost like new.
We added a new 20-gallon fresh water tank. We also put in an Italian charger that works on 220-volt power and 12-volt from the truck.
We also installed a 240-watts of solar, a 120Ah AGM battery, two 100-watt flat Eco-Worthy solar panels, and a NASA BM-1 Clipper battery monitor. It’s a perfect setup. The 220-volt power is only plugged-in when the camper is stored in our barn.
We considered ordering new aluminum planking from Jayco, but the shipping cost would have burst our budget. So we closed the corners with aluminum 3×3 L-profiles, which works well. It is not as original as we would have liked, but the original profiles were in a very bad shape. There was no chance to use them.
Then we installed a few gimmicks including lighting around the roof to be switched on from the truck and a two-lens backup camera in the rear window. The old outlets for the furnace, refrigerator, electric, and water were placed in their original positions, partly as a fake to close the holes in the planking.
As a highlight, we installed an electric ATV-Winch to raise and lower the popup-roof. I entered that in the TCM mod contest.
Here’s the video:
This was a two-person, 400-hour project which was finished by Viola’s great decorations and upholstery. On our first trip, the old Dometic compressor refrigerator went out, so we replaced it with an 3-cubic foot Engel refrigerator and a vanity above it.

The complete restoration is shown on the Wander The West forum.
Yes, it was worth the work and the approximately $6,000. We love our camper and have a lot of fun with a pop-up that you can find only three to four times in Europe.
Mike Hennon
1972 Ford F-250 Camper Special
1991 Caribou 9.5
I bought this camper about a year and a half ago for $2,400. I had to rebuild the overhead floor completely because of moisture damage and poor reinforcement from the factory.
After structural upgrades of 1½-inch by 1½-inch wood and heavy duty angle aluminum, it was topped off with new top paneling and carpet. On top of that I made an adjustable bed platform because of my acid reflux issue, which works well.
The outside screws were all replaced with stainless steel hardware, putty taped and caulked. I also added angle aluminum reinforcing the bottom side edge and camper jack mounts which are all tied into each other.
I had to remove the skin at the front bottom under the slider window, replace the paneling and further vertical structural reinforcement.
I replaced all three roof vent covers and the escape hatch over the bed area. As we all know (or should know), the worst enemy of any RV is water damage because of the constant flexing.
I installed a 150-watt adjustable solar panel with two Group 27 deep cycle camper batteries. I also mounted a Honda 1,000-watt generator on the back bumper which ties into a portable battery charger and 1,500 watt inverter.
Within the next month or so I’ll be moving into the rig full-time. I’m a retired Air Force veteran and living on a limited budget. So I set the camper up for dry camping. I can’t afford to stay in a park.
I bought the truck for $9,000 about two years ago with 67,000 original miles. It was already painted, but I had to do a lot of work under the hood; timing chain with gear set, oil pump, alternator, power steering pump, four row aluminum radiator with two cooling fans, steering box with coupler, master cylinder, and Edelbrock 600 four barrel carburetor with manual choke. It’s rebuilt better than the factory.
I converted the ignition to electronic with new resistor wire, added Airlift in the rear with helper springs, coil overs, sway bars in the front and rear, a steering dampener, and 10 ply tires, plus a spare.
I also fabricated my own front camper tie-downs with heavy duty angle aluminum which tie into the frame. I didn’t want to drill holes into the bed. All in all, the rig should perform pretty well.
It was well worth the work, time, and money. As far as the camper goes, the investment wasn’t that much; around $1,000 to $1,500. It pays to do the work yourself. All it takes is knowledge, proper tools, parts, and a little luck.
Harry Andersen
1998 GMC 3500
1972 Caveman 978
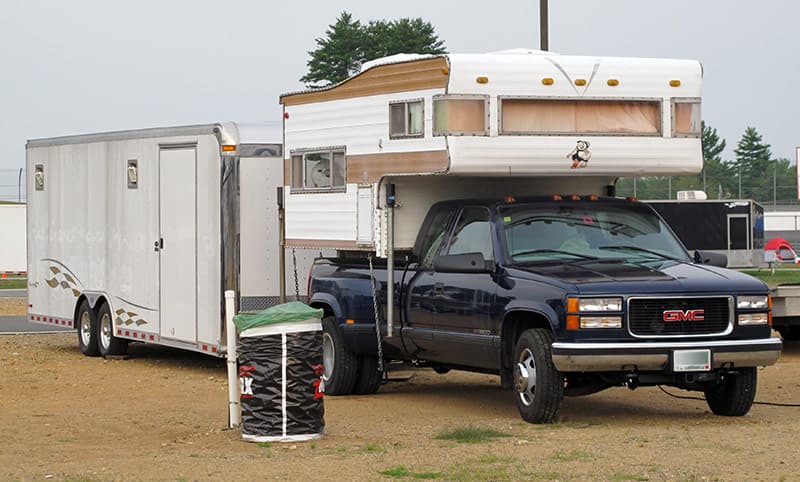
I’ve been able to keep the Caveman camper all original except for replacing one vent hatch with an escape hatch and the other one with mini air conditioning unit. I also replaced the “Art’s easy camper loader” with Rieco-Titan jacks.
It’s recently developed a leak so I may not worry about originality and modernize it more, or I may give up on it and get something newer. It’s a 1972, and we have had it since 1978, so it has served us well.
It is primarily used for camping at races. Most of the restoration has been curtains, upholstery, flooring, and plastic components. Resealing just about everything has been the most time consuming. The cabover corner wrap around the windows has had a number of problems. They are susceptible to breakage, leaking, and scratching.
The camper hasn’t been that much of a money pit, but it has been time consuming.
Robert Bergen
2000 Ford F350
1986 Real Lite
We paid only $1,000 for the camper. Fortunately the frame and skin were in good shape. All of the appliances, furnace, and air conditioner also worked!
My sewing genie reupholstered the cushions and made new curtains. She also got a new foam topper for a mattress.
This camper has no grey water and a small blackwater tank, so I bought a Dry Flush toilet (works like a diaper bagger) and plan to convert the tank to grey water. We also put in wood plank (vinyl) flooring and tile-look backsplash. I added another jack because I didn’t like the three legged look, or feel.
We love our old camper. It is very hard to find a rear dinette 10-foot model that has as much counter space as this one does!
Additional Feedback on Camper Restoration:
“I worked with people who restored a wood-framed truck camper that showed a lot of rot. Removing the aluminum siding without damaging it, removing each stick of framework, replacing it with new wood, and then reassembling the whole thing needed a lot more time and space than money.
At least the rotted frame member provided the needed dimensions for the new piece. It also kept a couple empty nesters busy for most of a winter. While they were at it, they had an electrician from work up-grade/modify the wiring.” – Philip Tron, 2009 Chevy 3500, 2012 Lance 1050
“Greetings all! As an old RV tech, I figured I would wade in on this discussion. Lucky for our economy and the profit margins of RV manufacturers, most people like to have the latest and greatest. But, there is a considerable price tag to participate in that way of thinking.
However, looking at the RV experience and wanting to get out with your family means making some compromises. I believe it’s the act of camping or RVing that’s important rather than your rig.
In regards to a restoration, it’s my experience that only a few models of older campers are worth the effort and expense. These usually are the fiberglass clam shell type units because they are less prone to water intrusion. An old tin wall camper can have health issues if it’s not stored properly. These are next to worthless to purchase and may be almost that in value when restored.
But, worth is in the eye of the beholder and that’s totally a personal discussion. There is no reason an old camper can’t be fixed up nicely for every day use. My opinion is to have more money in the truck as it’s reliability and safety is the utmost importance.” – Wes Hargreaves, 2016 Ford F450, 2006 Snowbird 108DS
“I bought my first truck camper ever for $2,700. It was a 10-foot 1972 Alaskan Camper. After I got it home, I started working on it. The water pump was broken. The furnace and refrigerator didn’t work. The seals around camper were shot.
After a year of fussing with it, I came to the realization that I wasn’t up to the task of restoring it. I sold it for $2,700 and moved up thirty years to a 2002 Four Wheel Camper Grandby. It’s the best thing I ever did.” – Rick Stolz, 1997 Ford F250SD, 2002 Four Wheel Camper Grandby
“We made a dirt cheap offer on a 1996 Elkhorn 1250 that had been lived in at a gold mine camp in Nevada. The top front window had leaked real bad for years and rotted what was left of the wood frame. It was a loser.
After gutting and rebuilding the overhang portion, redoing the inside, and using it one season, it was time to move on. We just barely broke even on all the work, time, and money it took to make it usable again.
The next camper we bought was a 2006 Arctic Fox 850 with one slide-out. The previous owner had cared for the unit, but the camper developed a lead on the top fron side marker light while in storage. The damage was bad enough for the insurance company to total the camper.
We bought the salvage from the owner who had been paid off from the insurance company. It was an easy fix. We will be keeping this one for a while, but no more wood-framed campers in my future.” – Jeff Hauser, 1996 Dodge 2500, 2006 Arctic Fox 850
Here are some other fun restoration articles in Truck Camper Magazine:
Avion – Restoring An American Classic
An Amerigo Camper Restoration
The Ford American Road Restoration From Hell
Return of the Amphicamper
An Alaskan In Time