The 2017 Super Mod Cup Contest turns on high with loading casters, cabover steps, refrigerator fans, a BBQ swing arm, WIFI extender, and an anti-scratch Chihuahua grid.

Welcome to the January 2017 Super Mod Cup Contest. Please review the following ten Medium Mods and vote for your favorite mod.
We will announce the January 2017 Super Mod Cup Contest winner next week. For more information about the monthly mod contest, including how to enter, click here.
Congratulations to Brian Sibbles for winning this month’s contest!
1. Doug Lamb, Fairland, Indiana
2013 Chevy 2500HD
2015 Travel Lite 960RX
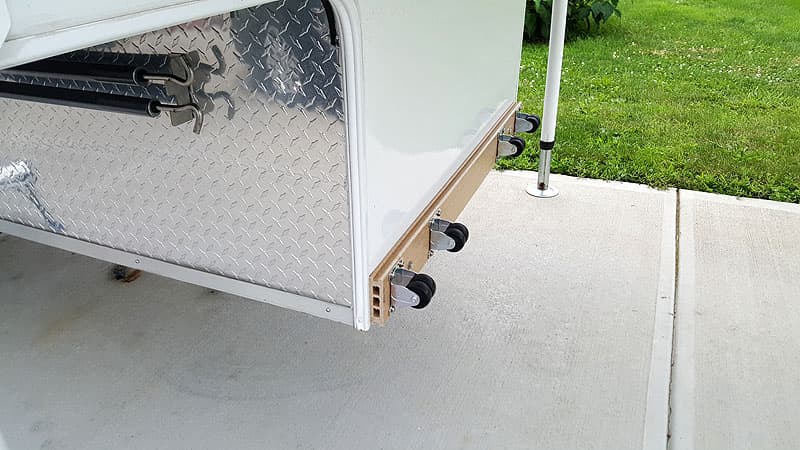
This modification was made to help with loading the camper and to replace an inferior component. I removed the damaged bumper stop and replaced it with a series of low cost casters mounted to a piece of composite deck material. I bolted the decking using the existing bumper holes.
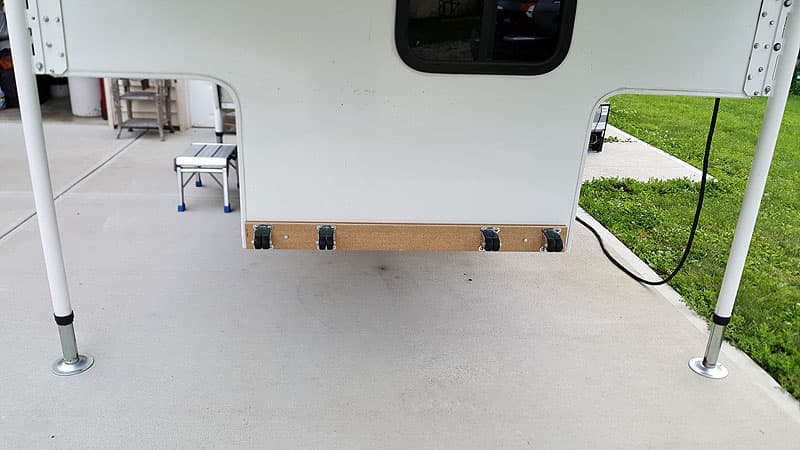
I have a 2×10 piece of wood placed in front of my truck bed for the casters to roll against. No more deformed bumper stops or worrying about camper height prior to lowering into bed of truck.
This modification has worked great! It took me one hour to complete this modification and cost me $30. In my opinion, the skill level of this modification is easy.
2. Nanette Fliesser, Ottawa, Ontario
2013 Chevy Silverado 3500
2014 Host Mammoth
It seems it’s always the men entering their mods typically involving fancy electronics or heavy machinery. Here is one for the ladies (excuse my stereotype).
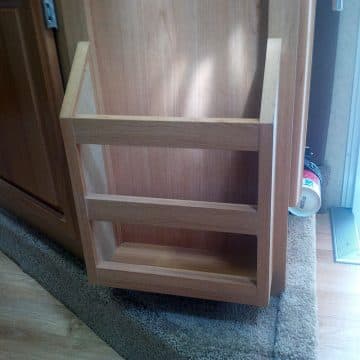 | 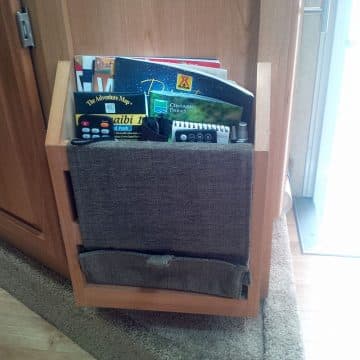 |
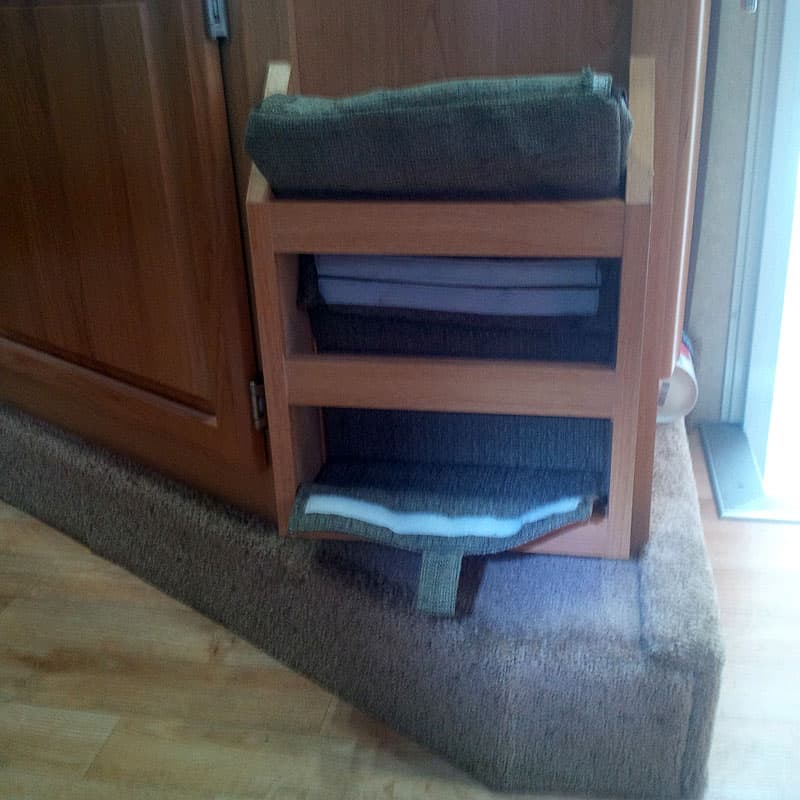
Most every camper has a magazine rack. Ours holds woodworking magazines (my husband fits that stereotype as well). I found this to be a highly inefficient use of the space available, so I made a magazine rack organizer.
Above: The inside, faces the magazines
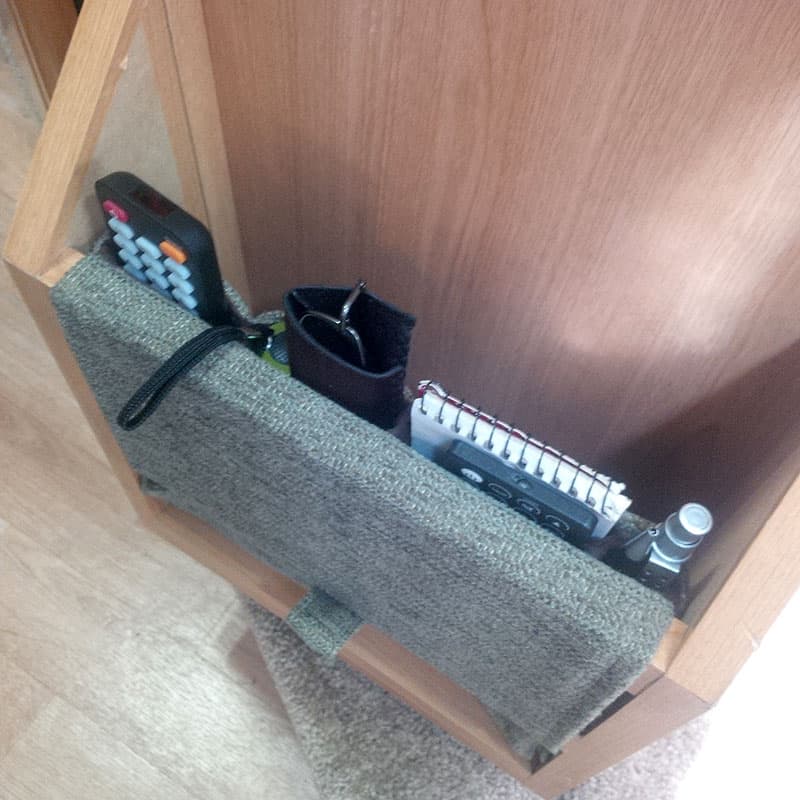
Above: The inside storage for remotes, glasses, and paper
My magazine rack-organizer keeps all those odds and ends at our fingertips; remote controls, pens, paper, eye-glasses, flashlights, charging cables, etc. And yes, it still holds magazines.
You can make the pockets a custom size to suit your own needs or even create a padded tablet pocket with the addition of some quilt batting.
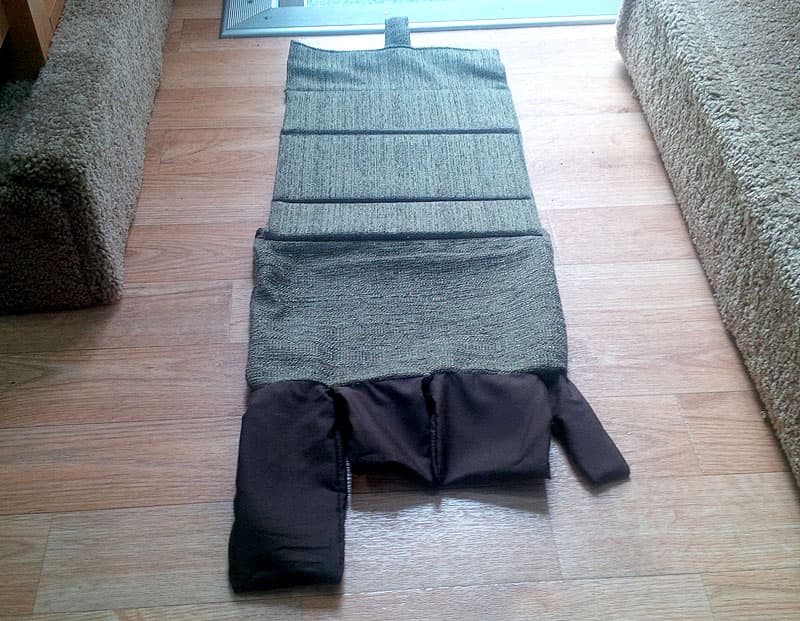
The material I chose is an upholstery fabric that closely matches the sofa and dinette benches. A stiff and heavy fabric works best. You only need a little so check out the scrap bins at the fabric store. The lining of the pockets is just plain broad cloth that I had lying about.
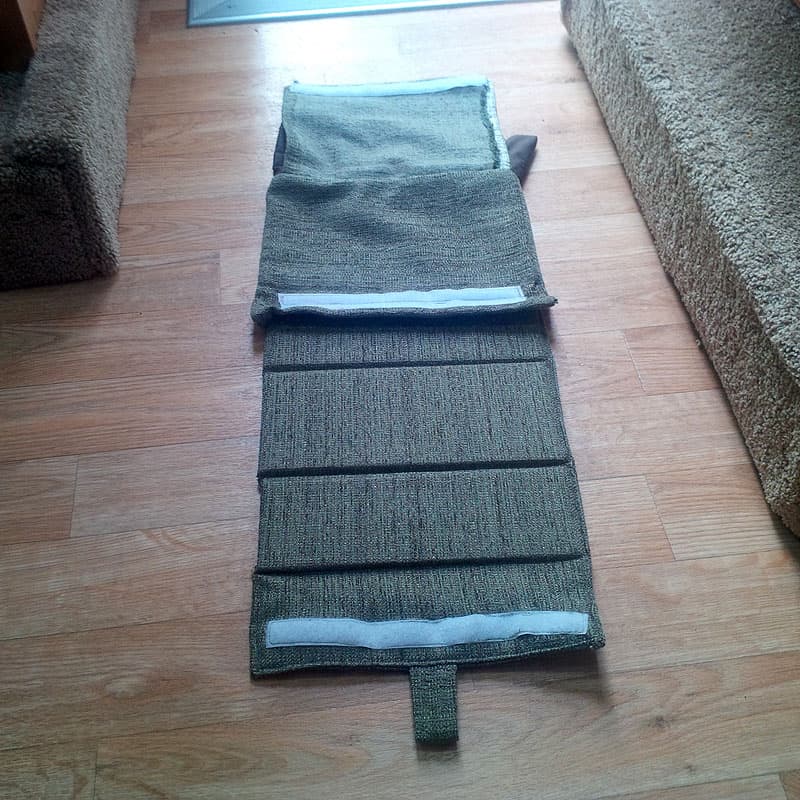
Above: The flap comes over the magazine rack bars to fasten. This is the outside part that faces away from the magazines, and the flap covers the front bars
To create the pockets, I sewed three sides of the lining material together in different sizes based upon what I wanted to store. Then I linked the individual pockets together and sewed the front panel and the inside panel to the outside tops of the pockets.
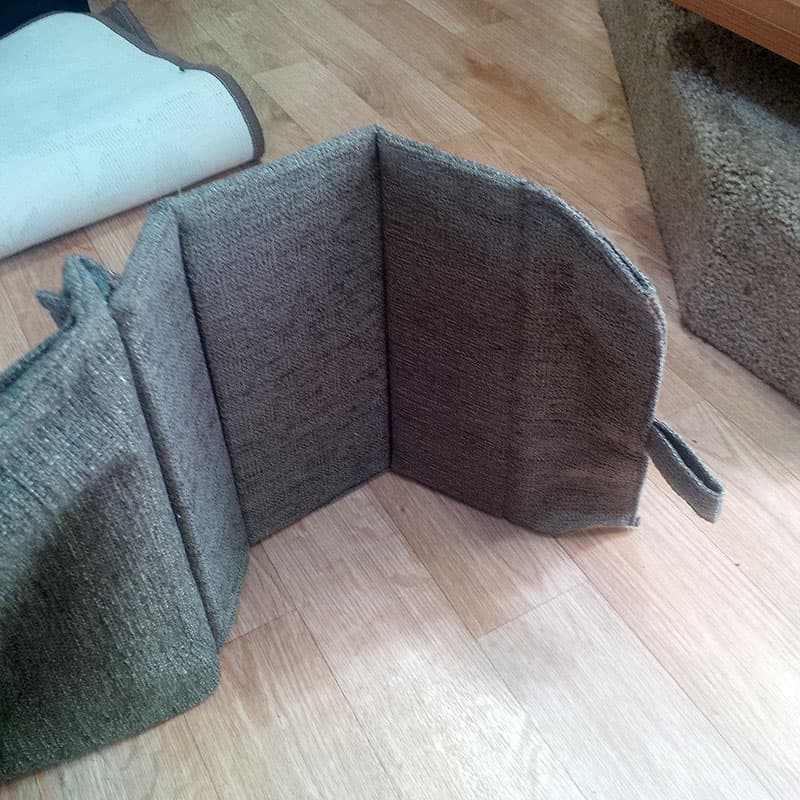
I created a box in the bottom part of the rack accessible from the front with a Velcro closure. The box is held rigid by sewing pockets into the organizer and sliding 1/8-inch hardboard into them. I easily found scraps in my husband’s wood shop.
The hardboard is in the bottom, back, and top of the box. The front flap with the pull toggle is just fabric. When the box is folded in place, it is sturdy enough to take the weight of the magazines above.
I’m not fond of measuring, so I made the ends longer than required. Then I did a dry fit and figured out where to cut the ends, attach the Velcro to close the bottom box, and fasten the front flap over the bars of the rack.
Options on this mod are easy to personalize. Now I always know where to find my glasses!
It took me less than two hours to complete this modification and cost me less than $20. In my opinion, the skill level of this modification is easy.
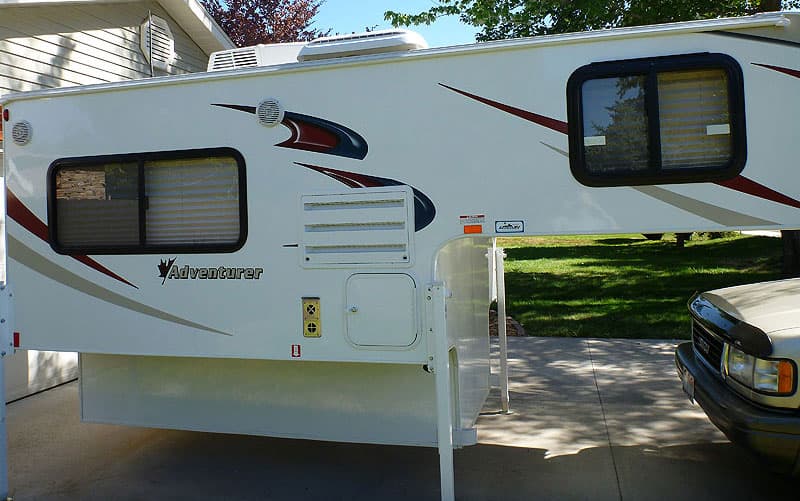
3. Jon Vernon, Boise, Idaho
2009 Dodge Ram 1500
2016 Adventurer 80RB
We have a 2016 Adventurer 80RB. When getting out of bed, it was a huge step to the shelf and down to the floor – especially at night with no light. Then, climbing back up again was a challenge.
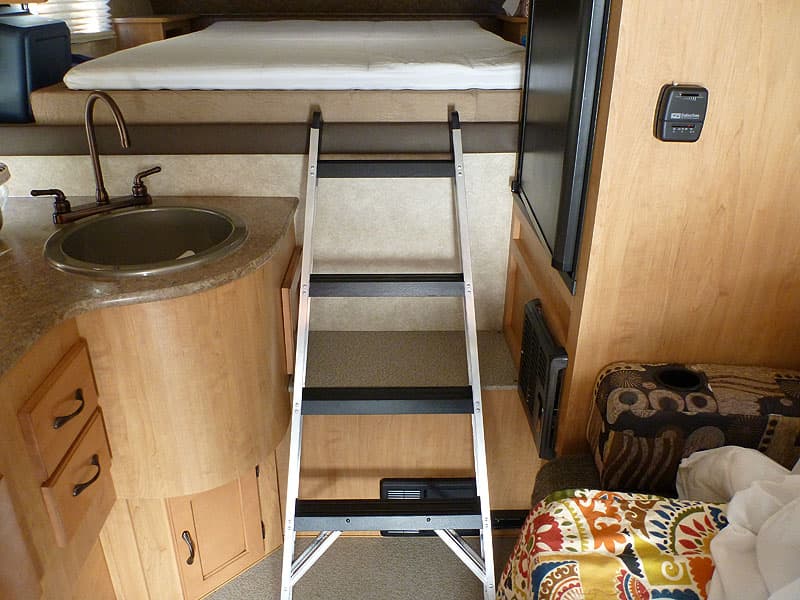
I used an old step ladder and measured from the bed rail to the floor right in front of the middle shelf step. After cutting the ladder to length, I used one-inch wide aluminum and fashioned a hook to attach to the top of each side of the ladder. The aluminum hook would hook over the edge of the bed deck.
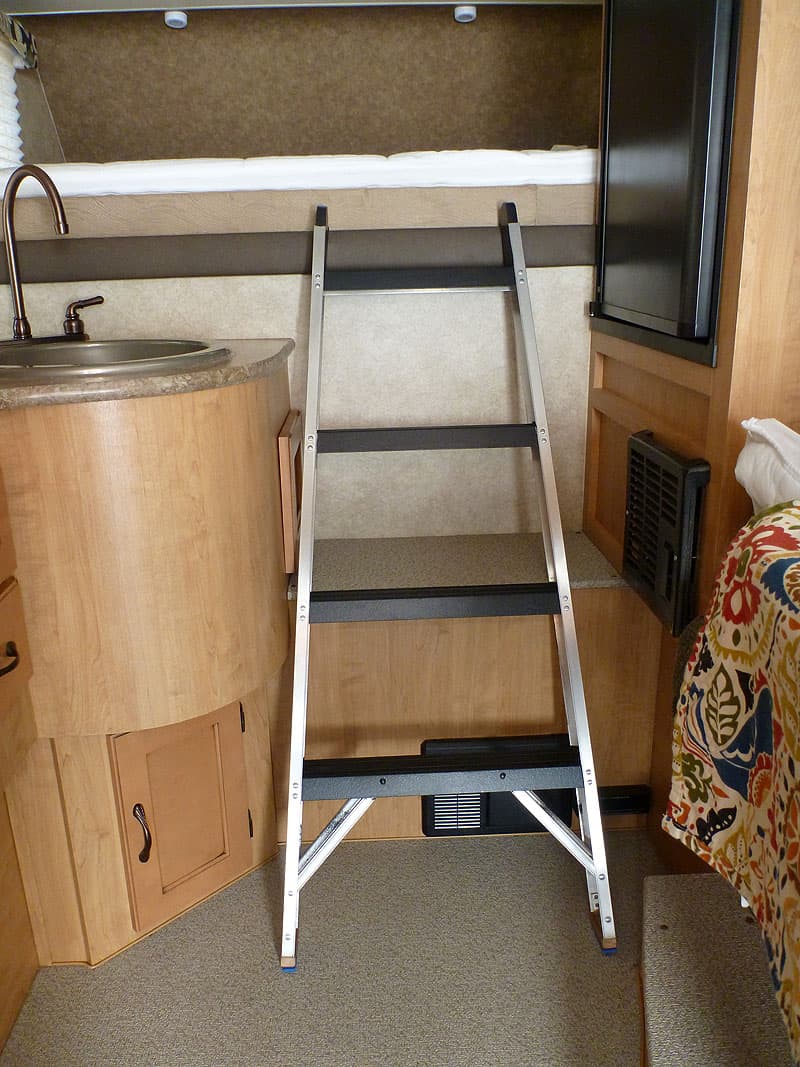
I then removed the rubber feet off the bottom of the ladder and added a one-inch block so that the step on the ladder aligned at the same height as the shelf step. That way our foot was supported by both the ladder and the step.
Next I reinstalled the rubber feet on the bottom of the ladder and coated the step with spray-on rubber to make it easier on bare feet and slip resistant.
It works great. No more climbing down backward looking for the step and the floor. You just walk down the step either forward or backward with no problem. The step is far enough to the side to allow opening the refrigerator with out moving it. If it has to be moved, it is so light that you can throw it up on the bed and out of the way.
It took me four hours to complete this modification and cost me $30. In my opinion, the skill level of this modification is medium.
4. Brian Sibbles, Garden Hill, Ontario
2015 Ram 1500
2012 Travel Lite 800
We love to BBQ when we’re on the road camping, but it was a pain when we didn’t have a picnic table handy to place it on.
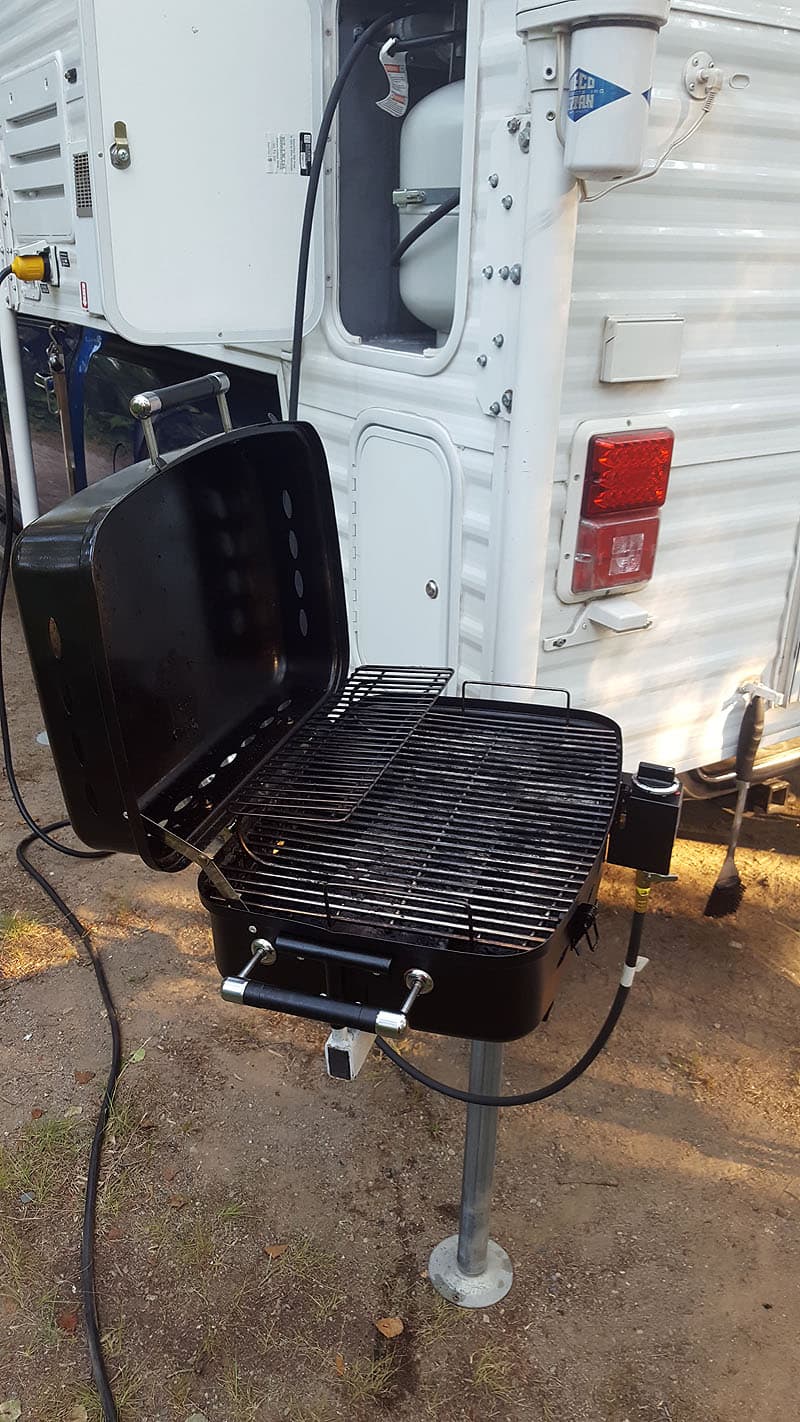
At a RV show, we saw a lot of trailers with outside rails that would hold a BBQ. The problem with truck campers is the height of where that rail is may change from time to time (loaded or unloaded) so you’re either BBQing too low or too high.
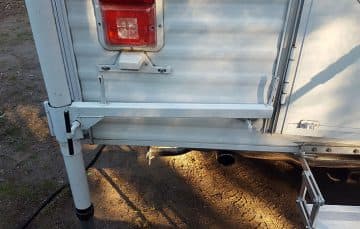 | 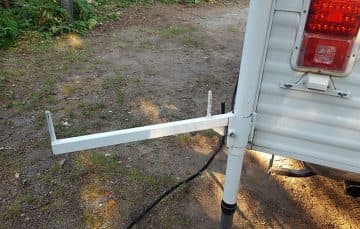 |
We came up with a solution that allows for adjustability. Using a piece of steel, we welded on the rods that slide into the BBQ. Then we took a piece of pipe slightly larger than our jack legs, cut it in half, and welded a hinge on one side to allow the pipe to become a clamp.
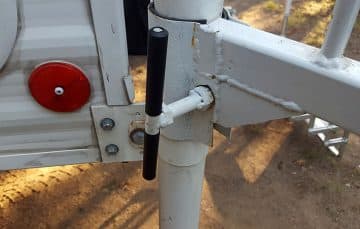 | 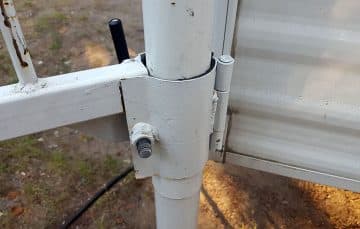 |
Next we coated the inside with a rubber floor mat, made a wing nut from a bolt, and created a completely adjustable swinging arm. Now we can place the BBQ at the perfect height on any jack.
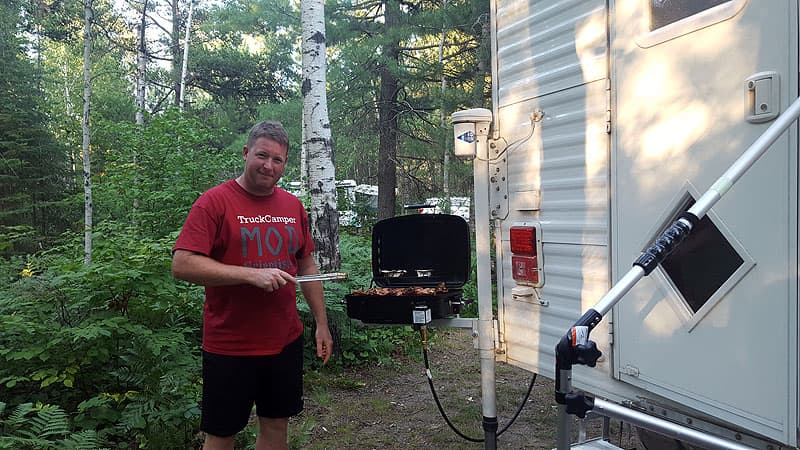
In over 7,500 kilometers, the BBQ has been used almost every day. The adjustable arm works perfect.
It took me two hours to complete this modification and cost me $30. In my opinion, the skill level of this modification is medium.
5. Jeremy Haymore, Burley, Idaho
2015 Chevy Silverado 3500
2015 FWC Grandby
I added three fans to the refrigerator compartment with a temperature sensor and switch.
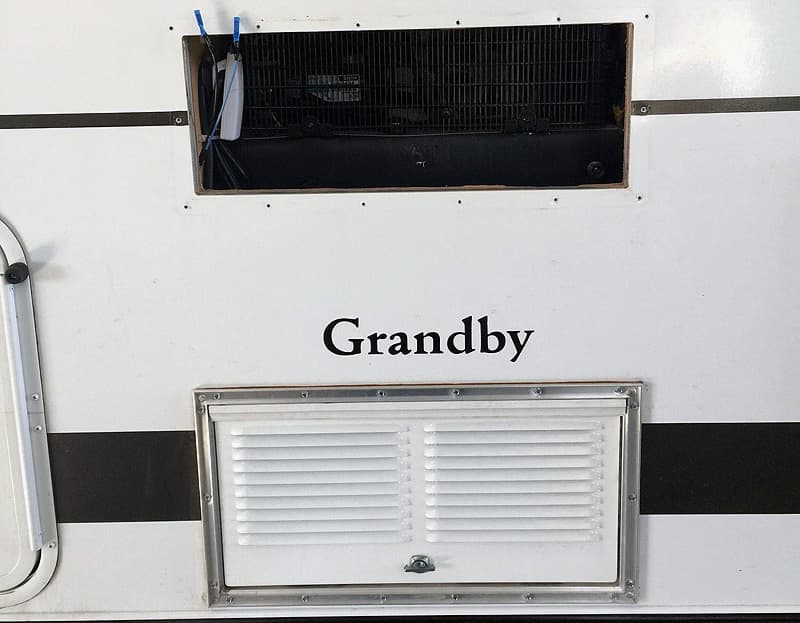
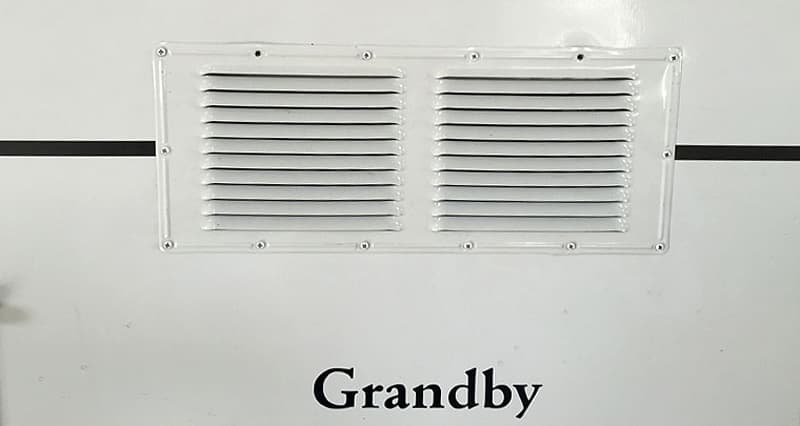
Above: Outside view of the camper with the venting removed to show the top if the refrigerator compartment
Pop-up campers have a unique problem of venting hot air from either a compressor refrigerator or a propane refrigerator.
The hot air from either type of refrigerator is often caught in the compartment reducing efficiency and using extra power. Other types of campers and trailers have a vertical system of venting the hot air which normally solves this problem.
My goal was to improve the efficiency of my refrigerator system with fans. Wanting to avoid the fans running 24/7, I installed a manual and automatic override system to make it work even better.
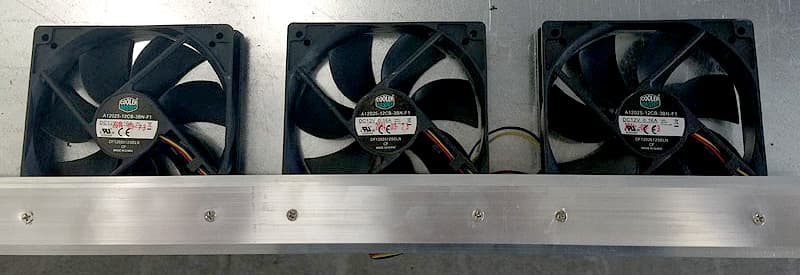
Above: Computer fans lined up and attached to a metal bar
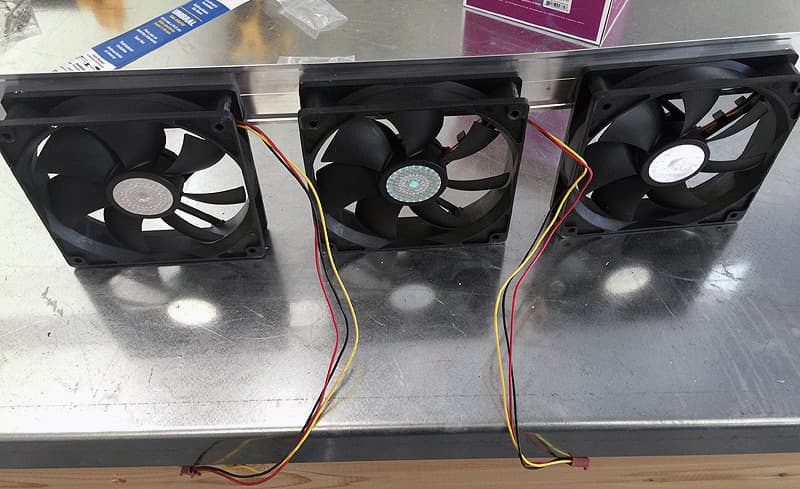
Above: Another view of the computer fans
I added three computer type fans wired together to the battery compartment. I used a piece of metal to attach the fans and then moved them all into the compartment.
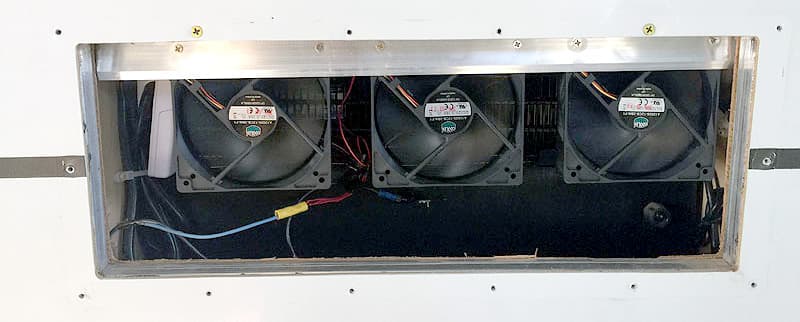
Above: Fans installed in the top part of the compartment
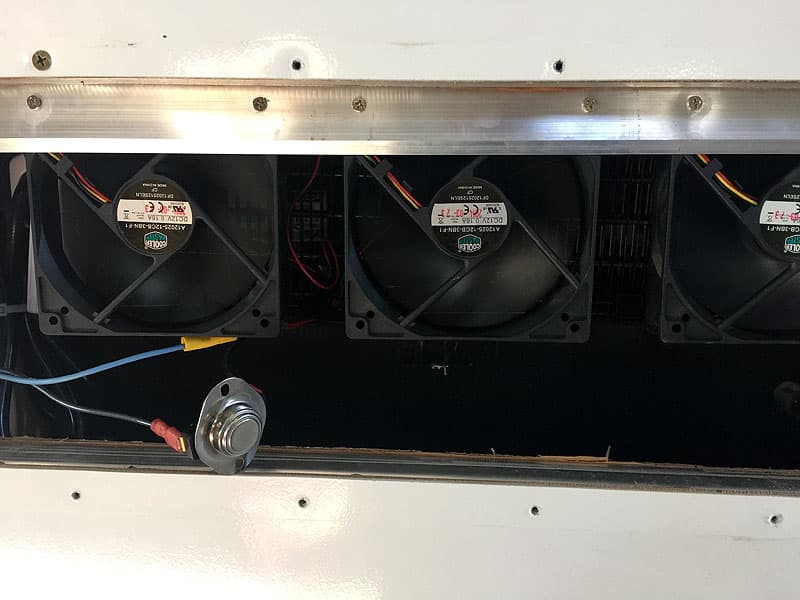
Above: Fans with temperature sensor in place
I also tied in a temperature sensor that only turns on when it reaches 80 degrees inside the compartment. The sensor turns off once it reaches 65 degrees. This way the fan only runs when it’s really needed.
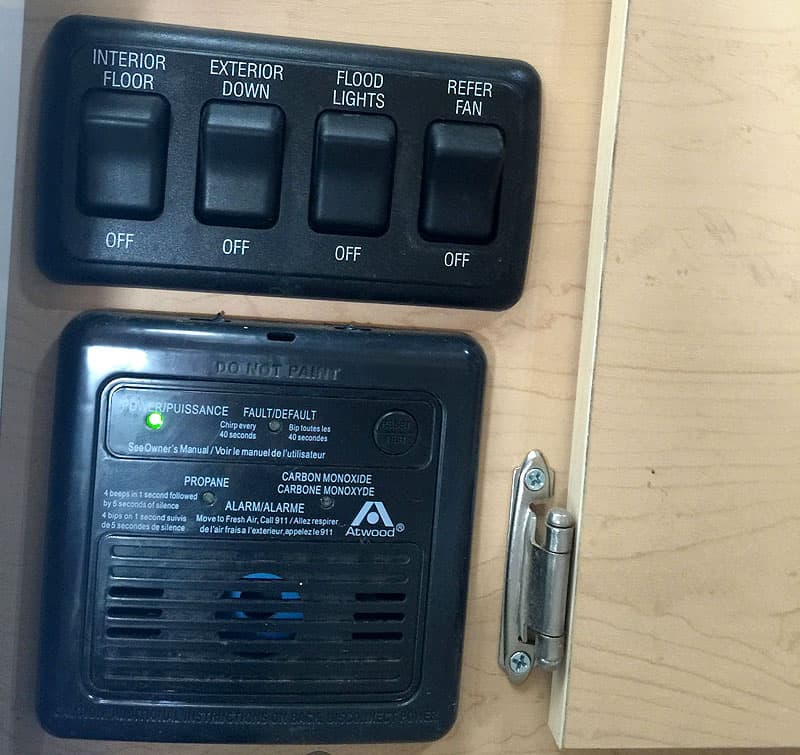
Above: The additional fan switch labeled to look like the stock setup in FWC
The wiring is connected to a switch in the camper which allows me to manually turn it on or off. It is on almost always when I camp. When I leave camp and drive, I can turn off the fan system.
Above: Compartment closed with the fans in place
The modification is an excellent power saving feature. It only runs the fans when I need them.
Prior to the fans, I often noticed temperatures 20 to 30 degrees warmer than outside. This made my compressor refrigerator work much harder and was tough on my batteries. Now with the fans, it is only two to five degrees warmer than the outside.
The fan system has reduced my power usage by 15 to 20-percent. It’s a simple fix that anyone could do to make their batteries last longer.
It took me two hours to complete this modification and cost me less than $40. In my opinion, the skill level of this modification is medium.
6. Barry Yocom, Wasilla, Alaska
2015 Ram 3500
2015 Arctic Fox 811
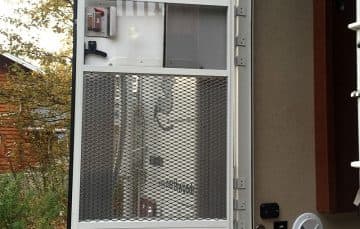 | 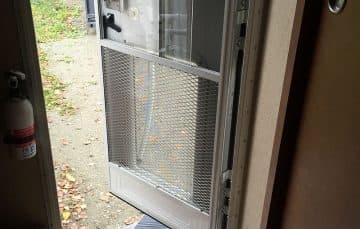 |
The screen in the entry door of our camper was being torn up by our dog. We wanted a solution that would prevent further damage to the screen door.
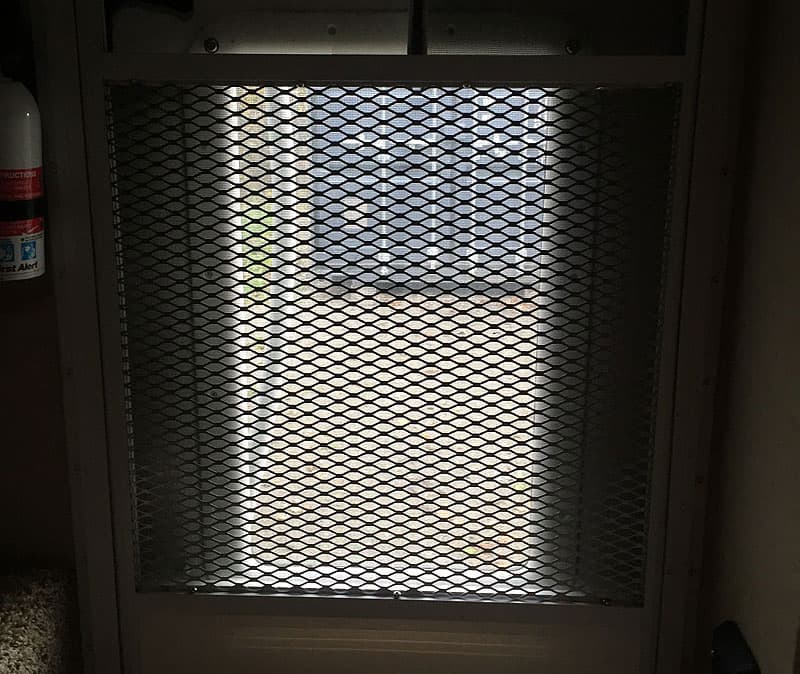
I installed an expanded metal grid (diamond pattern) over the lower screen area that prevents the Chihuahua from further scratching damage.
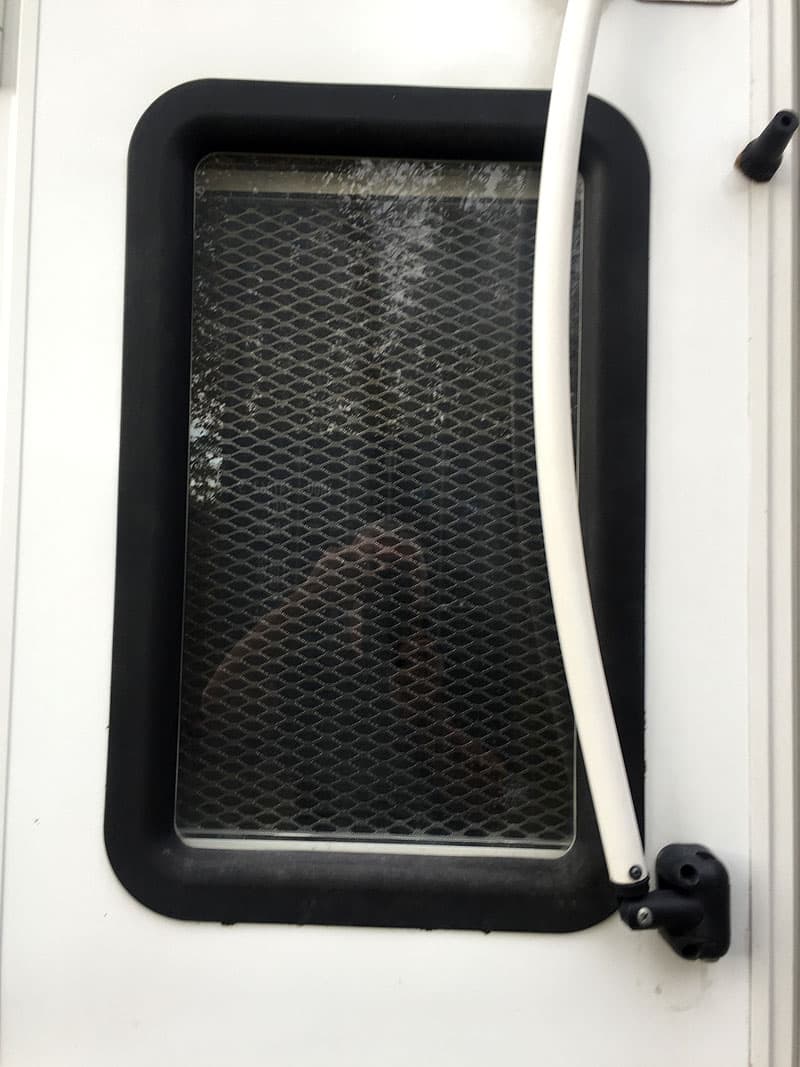
It took me 1.5 hours to complete this modification and cost me $20. In my opinion, the skill level of this modification is easy.
7. Bill Cramer, Los Angeles, California
2006 GMC Sierra 2500HD
1972 Boswell Tiltin Hiltin (restored)
Living in mid-city Los Angeles in an apartment means the camper must live out front on the street. Except for moving it once a week from one side of the street to the other for street cleaning, it may sit for a month or more.
Keeping the truck battery from getting weak was an issue. Idling for thirty minutes or so didn’t help and going for a joy ride in LA traffic is not an option. Since this is earthquake territory, I keep it ready to go at a moment’s notice.
Since I have solar panels on top of the camper the solution was easy.
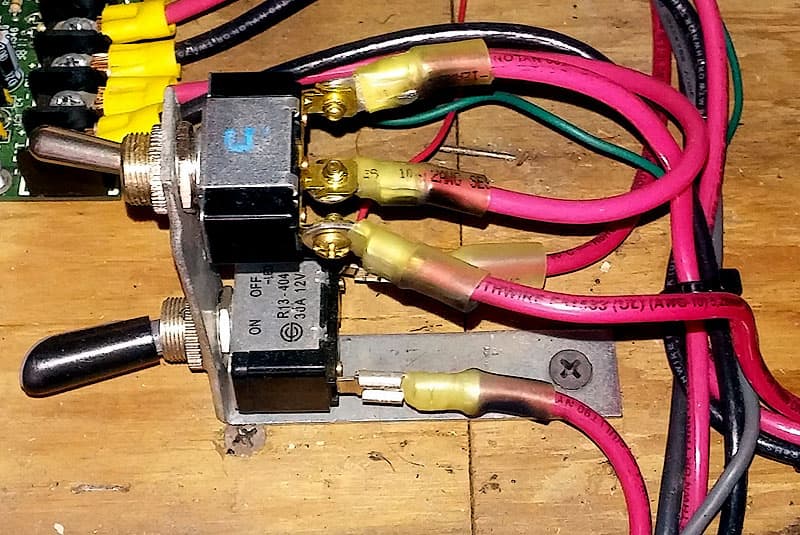
I mounted a switch in the camper’s battery compartment and connected the output of the charge controller to the center lug of the switch.
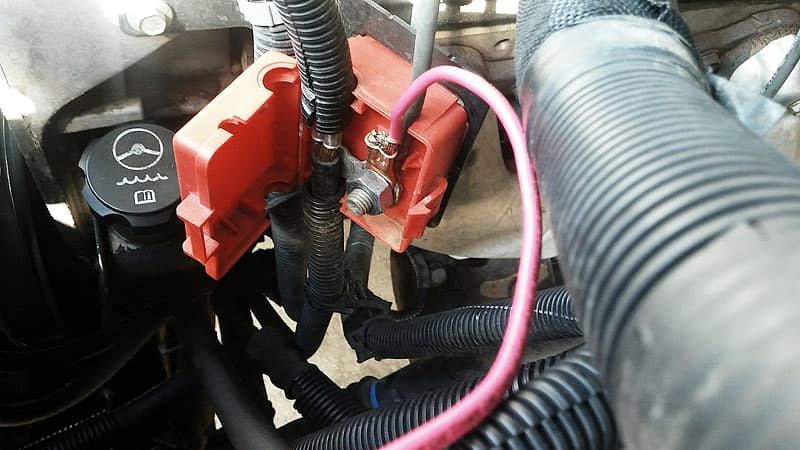
I then ran a wire from one of the two remaining lugs to the truck’s engine compartment and connected it with the in-line fuse holder to the battery positive terminal. The other switch lug is connected back to the camper’s batteries.
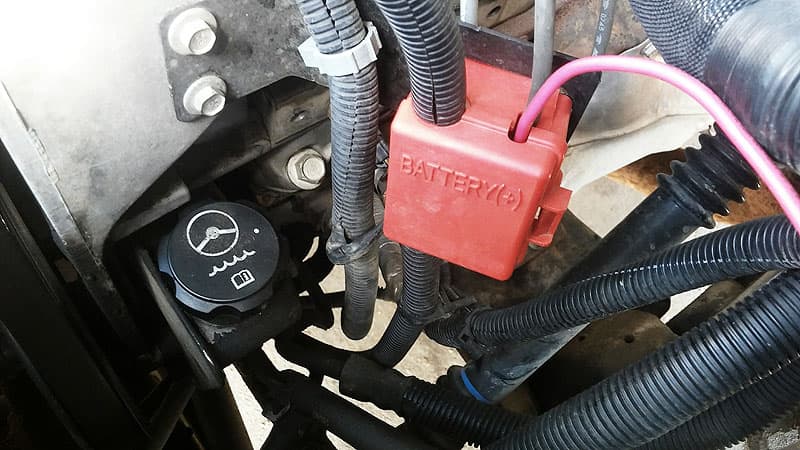
The parts I used were an SPDT heavy switch, ten feet of ten gauge wire, and an inline fuse holder with a 10 amp fuse.
This works perfectly! I don’t have a weak or dead truck battery anymore. About twice a month I flip the switch and the truck battery is fully charged in about thirty minutes. That’s just enough time to make a cup of coffee, sit in the camper, and plan our next adventure. I flip the switch back to the other position which is normally where it stays to power/charge the camper.
It took me one to two hours to complete this modification and cost me $20. In my opinion, the skill level of this modification is medium.
8. Frank Mehaffey, St. Albans, Vermont
2013 Ford F250
2013 CampLite 10.0
The interior of our new charcoal-color camper was much warmer than our off white previous truck camper. The back wall of the camper was being exposed to direct sunlight at several campgrounds during the summer months.
Our rear wet bath had the inside wall at about 100 degrees, and the air conditioner was struggling to maintain a comfortable temperature. We wanted to bring the interior temperature down.

We had silver vinyl wrap placed on the back wall and door of our camper, and put two coats of StayKool silicon roof paint on our roof.
The interior of the bathroom was much cooler, due mostly to reflecting the direct sunlight away, and our walls and door were much cooler to the touch.
It took me three hours to complete this modification and cost me $350. In my opinion, the skill level of this modification is medium.
9. Roland and Kate Goetz, Westbank, British Columbia
2008 Ford F-350
2016 Northern Lite CD Special Edition
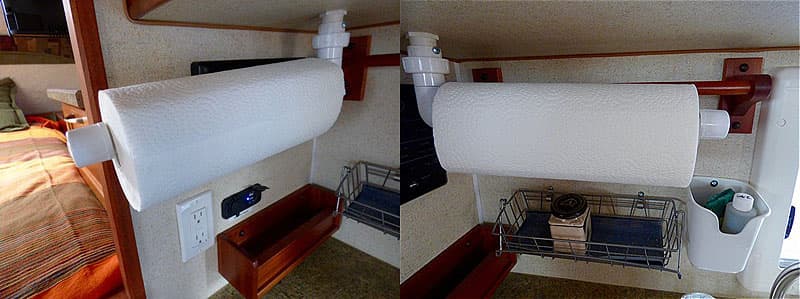
We wanted a paper towel holder that wouldn’t sit on the counter and take up space. This paper towel holder is designed to swivel and lock into any position. This gives us a lot of versatility in a tight space.
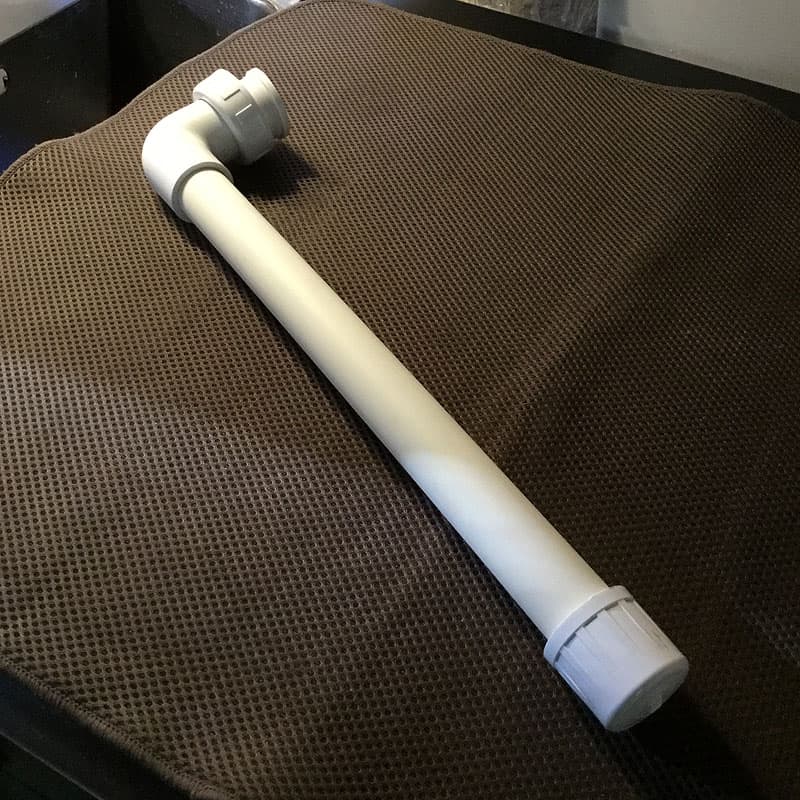
The paper towel holder is made using the following pieces:
1 – 3/4” PVC plug (with a closed flat end)
1 – 3/4” PVC Slip X Slip Union with adjustable collar
1 – 14” length of 3/4” PVC pipe
1 – 3/4” PVC 90º elbow
1 – 3/4” PVC end cap
1 – 1/4” X 1 1/2” carriage bolt, nut and washers
1 – 1/2” round head screw (to secure the union to the plug)
Cut the piece of 3/4-inch PVC to 12 1/2-inches. A roll of paper towels is about 11-inches, so this allows for an extra 3/4-inch at each end for inserting into the 90-degree elbow and attaching the end cap. The lip on the end cap keeps the roll of paper towels from falling off the holder.
Attach the end cap and 90-degree elbow. At the other end of the 90-degree elbow, insert a 1 1/2-inch piece of PVC leaving half sticking out for the Slip X Slip Union.
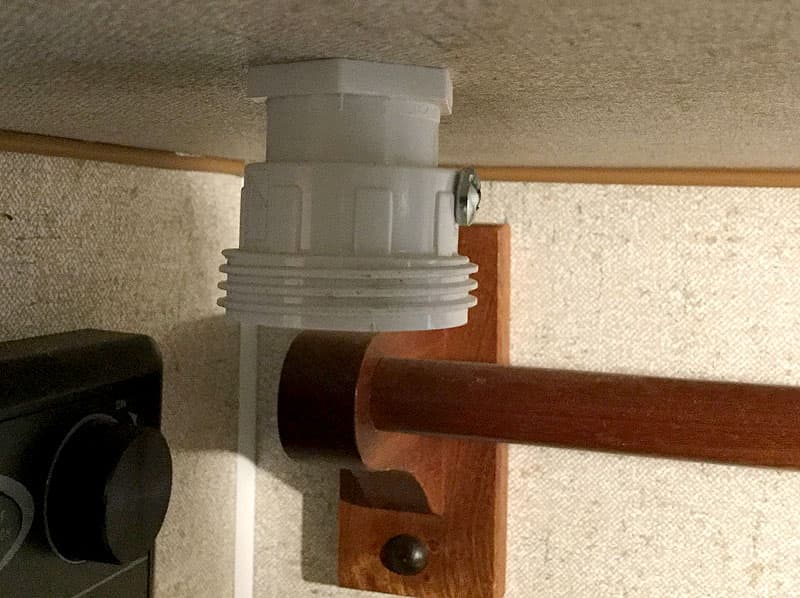
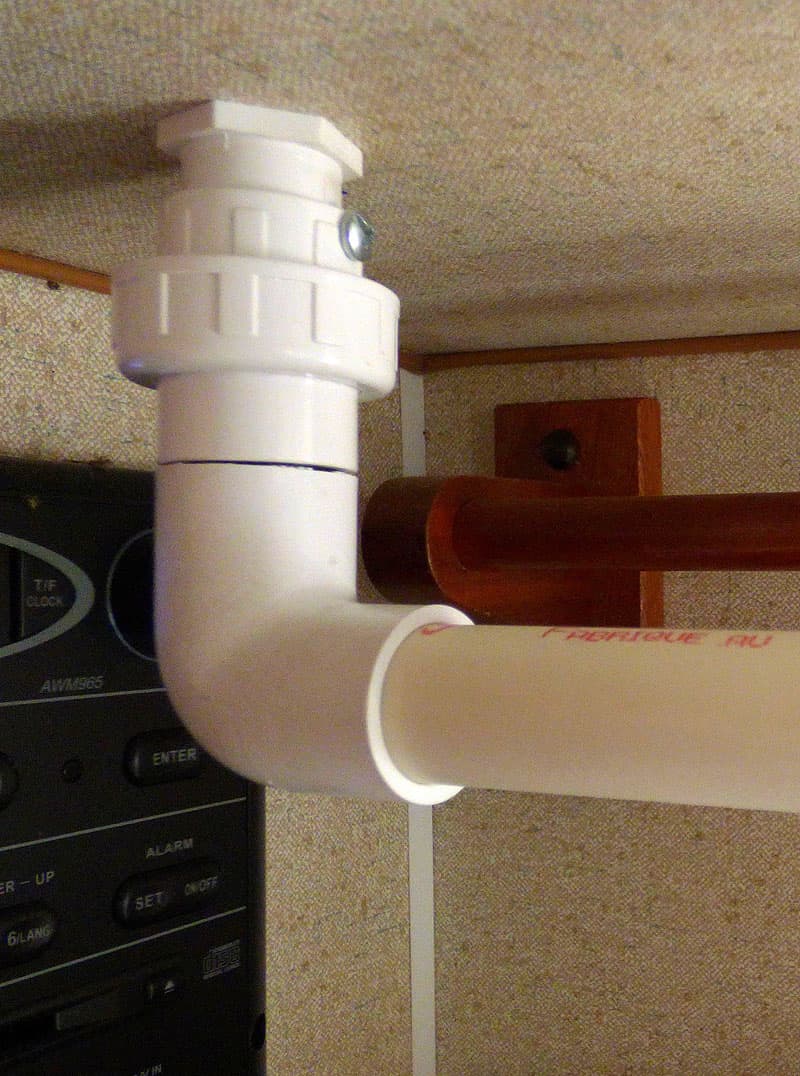
Mount the 3/4-inch PVC plug underneath the cabinet at a location where the finished holder will hold a full roll of paper towels parallel to both the outside wall of the camper as well as the inside wall.
We mounted ours 6-inches from the back wall because the back wall has a spice rack and dish towel holder. We mounted it 4-inches from the inside wall.

We drilled a hole in the plug and through the bottom of the cabinet and mounted the plug to the underneath of the cabinet using a 1 1/2-inch carriage bolt, washer, and nut.
Once the plug is mounted, disassemble the Slip X Slip Union and friction fit the smaller piece onto the plug. Drill a small hole, and lock it into place with the 1/2-inch screw. Reassemble the Slip X Slip Union.
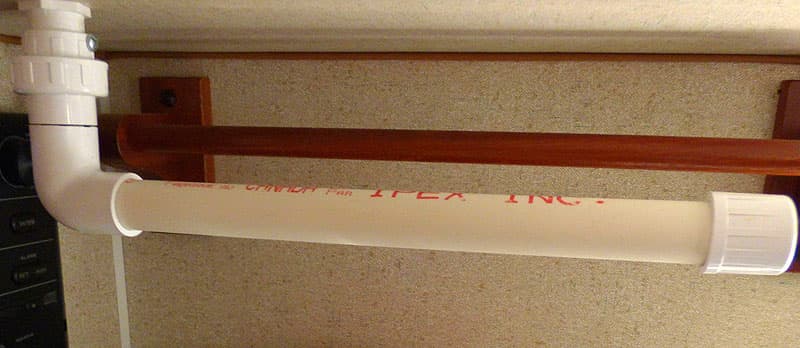
The paper towel holder can now be adjusted into any position. When traveling, we put an elastic band around the paper towels to keep them from unrolling when we hit a bumpy road.
This modification has served us extremely well in the five months we’ve been on the road. It took me one hour to complete this modification and cost me $20. In my opinion, the skill level of this modification is medium.
10. Ray and Brenda Fair, Hopkinton, Massachusetts
2013 Silverado 2500 HD
2015 Eagle Cap 850
During our travels, we have found that many RV parks offer WIFI. However, they fail to mention that in order to gain access to the network you had to bring your computer into their office to get online. This mainly is due to the park’s failure to install outside antenna(s) and/or locating the antenna(s) close to the parked RVs.
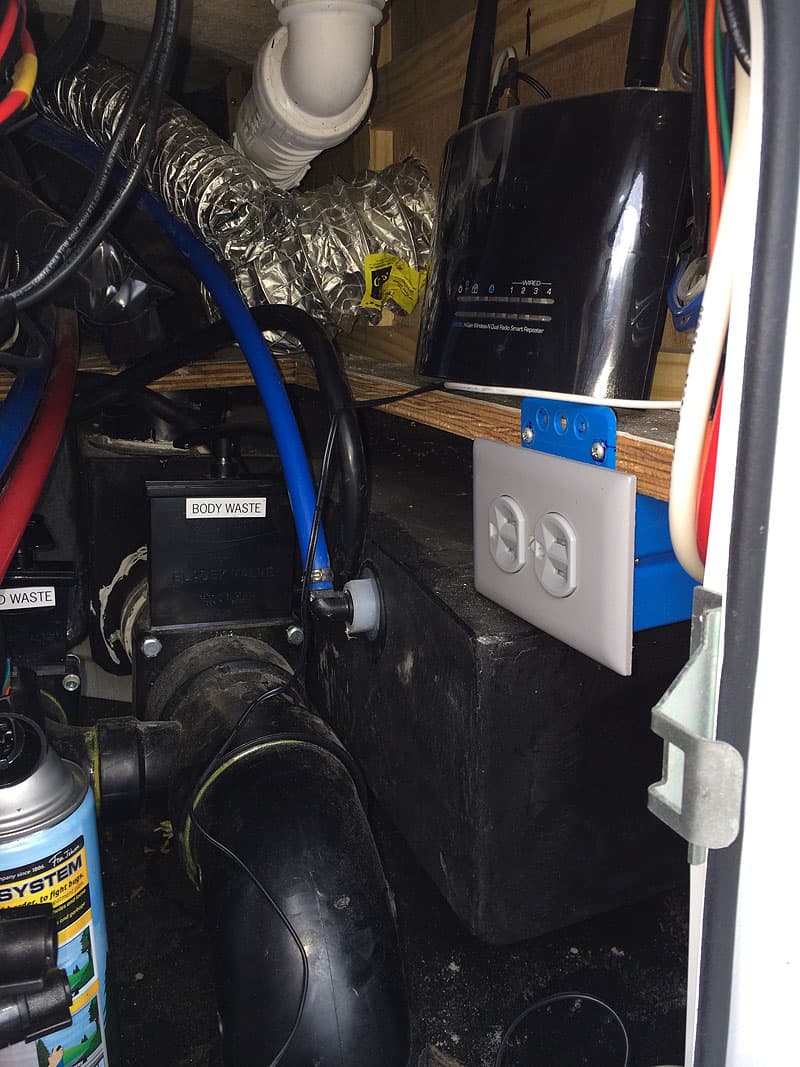
We extended the range of the WiFi signal by installing a Hawking WIFI extender in the basement of our camper. The extender is within the range of the Bluetooth signal from our computer and boosts the signal going to a Hawking Omni-directional antenna mounted on the ladder.
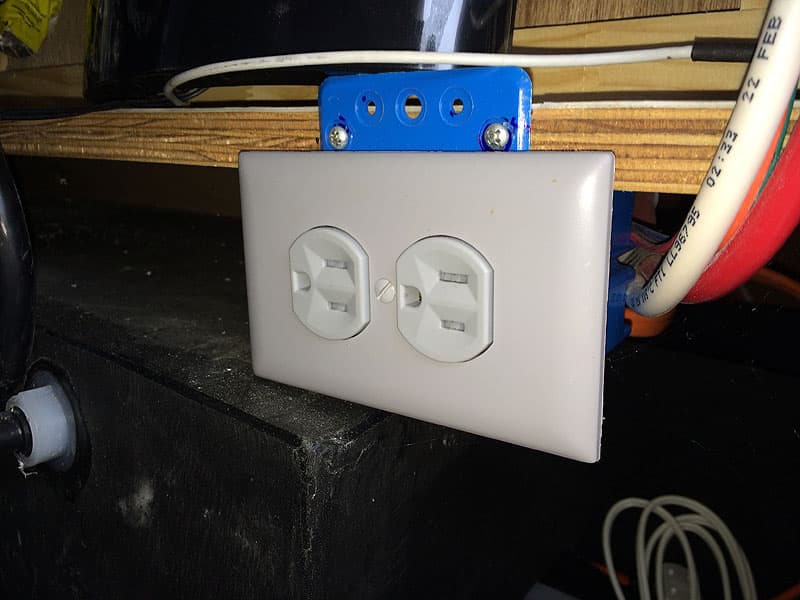
Electrical power to the extender was provided by the installation of a 120-volt duplex plug in the basement. The power for the plug was taken from the load side of the GFI in the main room of our camper.
It took me one hour to complete this modification and the cost of the Hawking HW2R1 extender (repeater) was $90. The high gain antenna and cable was about $150. The electrical wiring and 120-volt plug was from Lowes for $18. In my opinion, the skill level of this modification is medium.
Disclaimer: The modifications above are submitted by Truck Camper Magazine readers. It is your responsibility to make sure that any do-it-yourself modification project you undertake is safe, effective, and legal for your situation.
Enter Your Mods Now!
If you’d like to enter a modification you’ve done on your truck camper, click here. You can enter as many mods as you want, at any time. Good luck mod makers!