The 2017 Super Mod Cup Contest continues with six awesome Mega Mods including a storage bumper mod, rainwater collection and filtration mod, battery system mods, camper jack mods, and more.

Welcome to the December 2016 Super Mod Cup Contest. Please review the following six Mega Mods and vote for your favorite mod.
We will announce the December 2016 Super Mod Cup Contest winner next week. For more information about the monthly mod contest, including how to enter, click here.
1. Wes Hargreaves, Wetaskiwin, Alberta
2016 Ford F-450
2006 Snowbird 108DS
As we all know truck campers usually lack a few things because of the limited space available. I wanted to address three main things: (1) more stuff storage, (2) more grey tank storage, and (3) a better, safer, and more user friendly way to enter and exit the camper.
This camper had a tunnel in the basement area where an aluminum stair system was stored. This tunnel and stair system was accessed from under the door. Every time you needed to get in the camper, out it came.
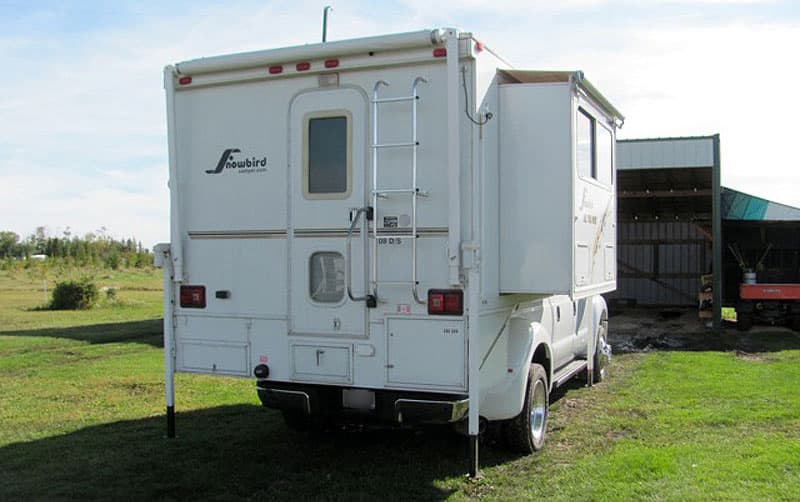
Above: Camper before the modification
This stair system was much too narrow, especially when we are being pulled by Madi, our Pointer. We are explorers and do not usually spend more than a night in one location. Also, we have many stops on our travels. The stair situation was a real pain.
Grey storage is an issue for most of us. Having a dry bathroom with a walk-in shower was one of the features we were looking for. However, the height of the drain in the shower meant that the shower water went into the black tank at the rear of the camper in the basement.
The black tank in our camper is small, which is fine for toilet use, but two short showers and you may get something you don’t want between your toes as the tank over fills. Adding some piping in the rear step mod for grey water storage (shower) was a must.
Stuff storage can be an issue, especially on a long haul. Some things don’t take up much space, but you don’t want them inside (fluids for the truck, sewer hose extension and fittings). These can be stored in the exterior compartments.
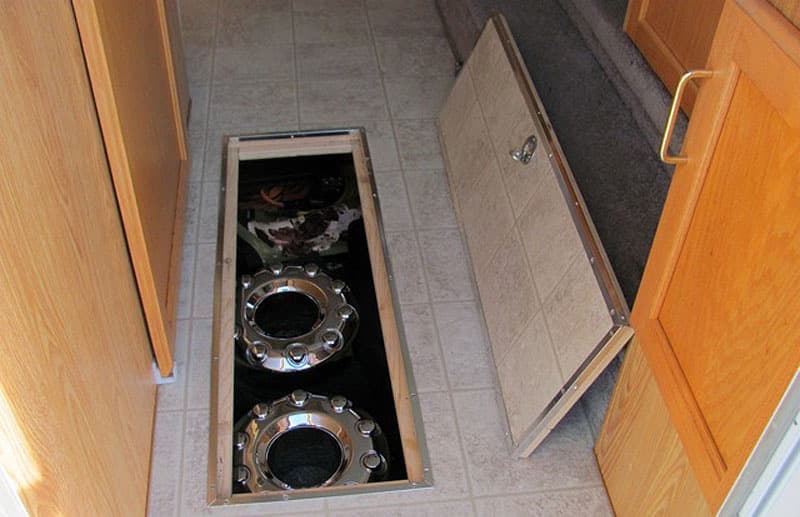
The now unused tunnel where the old stair system was stored can now be a large secure storage area for seldom used items.

Above: Interior hatch, and access to the old stair tunnel is now storage
I cut a hatch through the floor inside the camper to access this area.
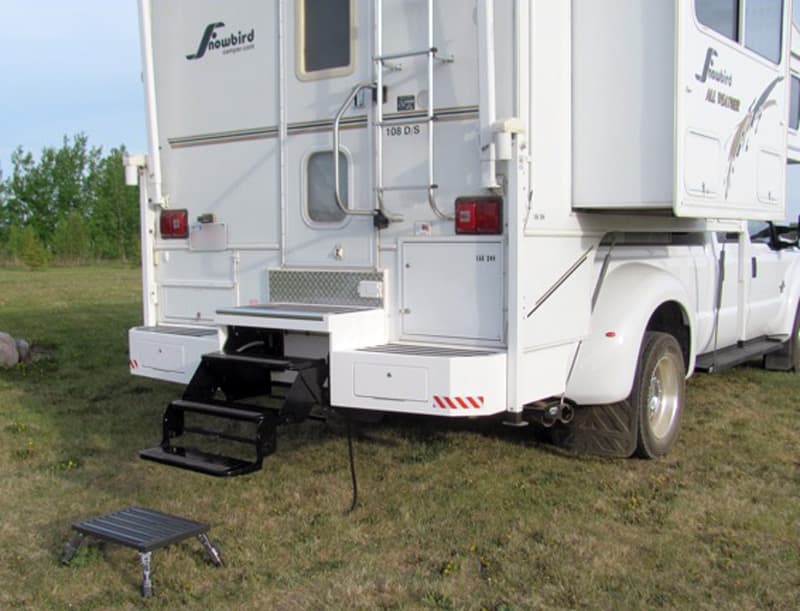
A large rear step storage unit was constructed to deal with our wants. A three step set of RV stairs was installed that folds down with minimal effort and provides 24-inches of wide, non-slip footing.
In the largest of the storage cavities, 4-inch ABS piping was installed for grey water storage from the shower. I managed to add about 14 gallons of grey storage, which is plenty for two quick showers. The remaining cavities are for dirty item storage.
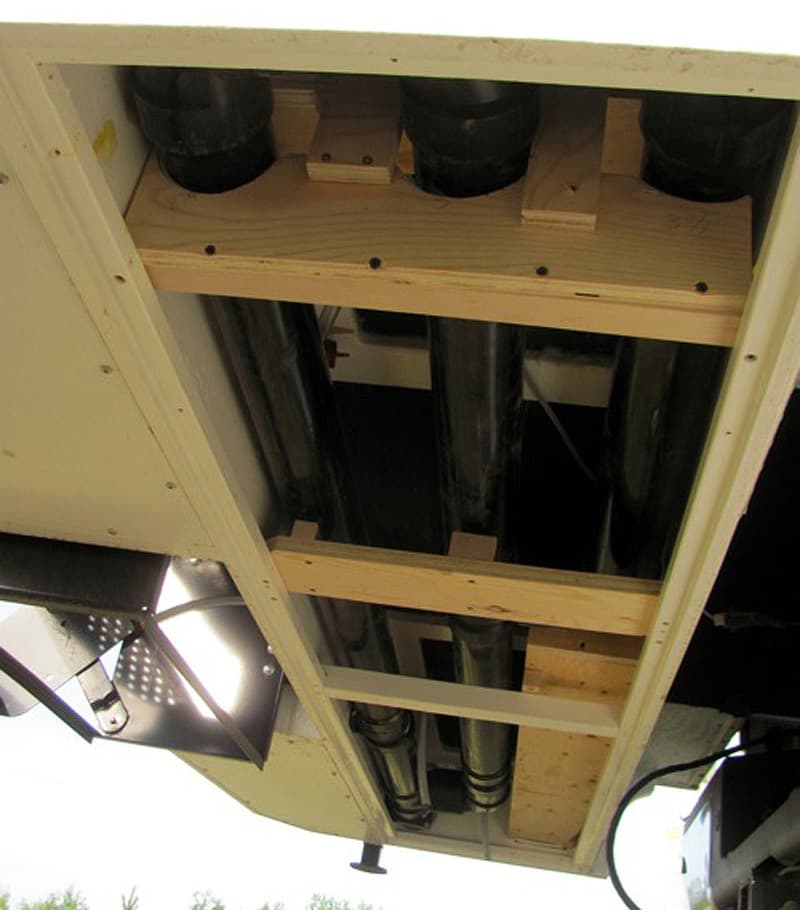
Above: 4″ ABS pipes for grey storage for the shower
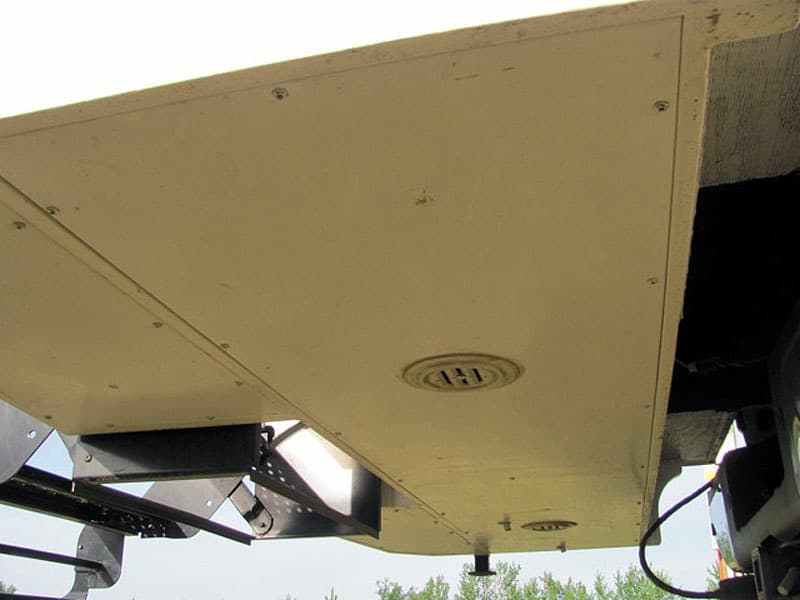
Above: Under side is closed in, but removable with vents
The unit is made of exterior spruce plywood. All construction assembly was made with fasteners and waterproof adhesives.
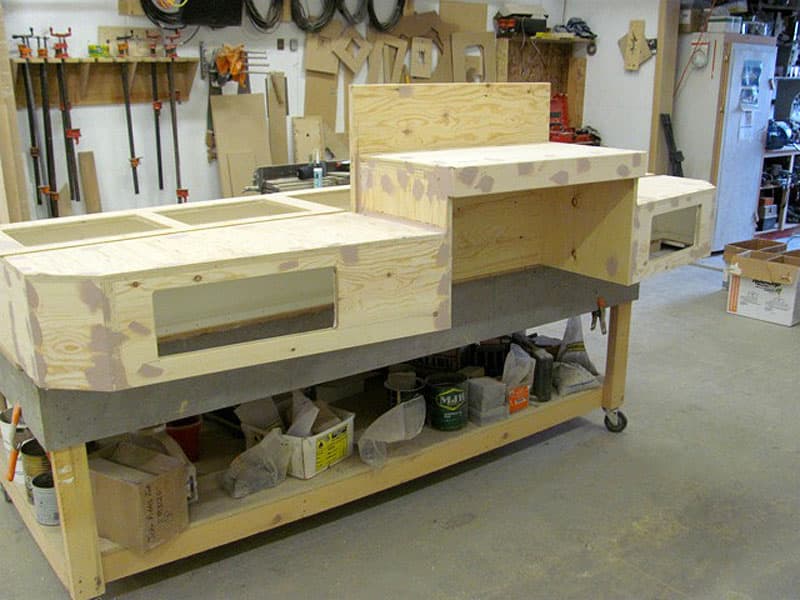
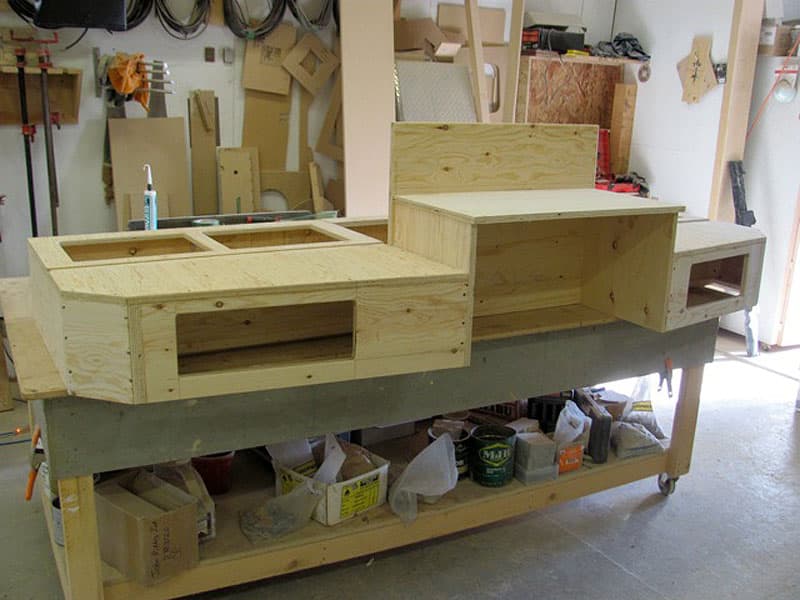
Before any paint was applied, the entire unit was coated with two coats of thickened fiberglass resin, hopefully to stabilize the wood work before the final finish of a few coats of marine enamel.

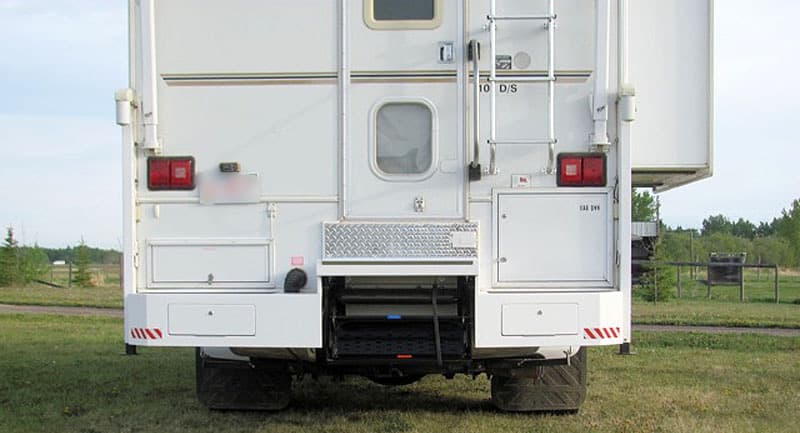
Above: Driver’s side dump and sewer pipe storage
The entire unit was bolted to framing under the camper, sealed with caulk, and non-slip tape was applied to horizontal surfaces.

Above: Final dump gate valve on driver’s side
Previously, the camper had a rear facing dump outlet. It now dumps from the side with a gate valve I installed. It’s accessed through one of the small rear storage compartments.
Above: Installed high enough for hitch extension if ever needed
We have been on two trips so far since the modification and are very pleased to say we are very happy with the results. Stopping and having quick access to the camper is no hassle. We no longer have any surprises in the shower.
Having extra storage has made the camper just what we were looking for. Also, the new basement storage is low. Heavy items (we are rock hounds) can be stored in this area with out adversely effecting the way the truck camper handles.
The step and storage system is heavy with the RV steps installed. We dump daily if possible so we keep that weight to a minimum, but the right size truck is important.
It took me 30 hours hours to complete this modification and cost me $750. In my opinion, the skill level of this modification is hard to very hard.
2. Bill Kichman, Cornwall, Pennsylvania
2006 Dodge 3500
1995 Lance 881
I’ve a bit of prepper mentality, and want our truck camper as self sufficient as possible. 600-watts of solar rooftop power is already installed.
Rainwater collection seemed like the next logical step. I wanted a rooftop filtration system, capable of being removed easily for repairs and/or moving to another camper eventually. I believe I achieved both goals.
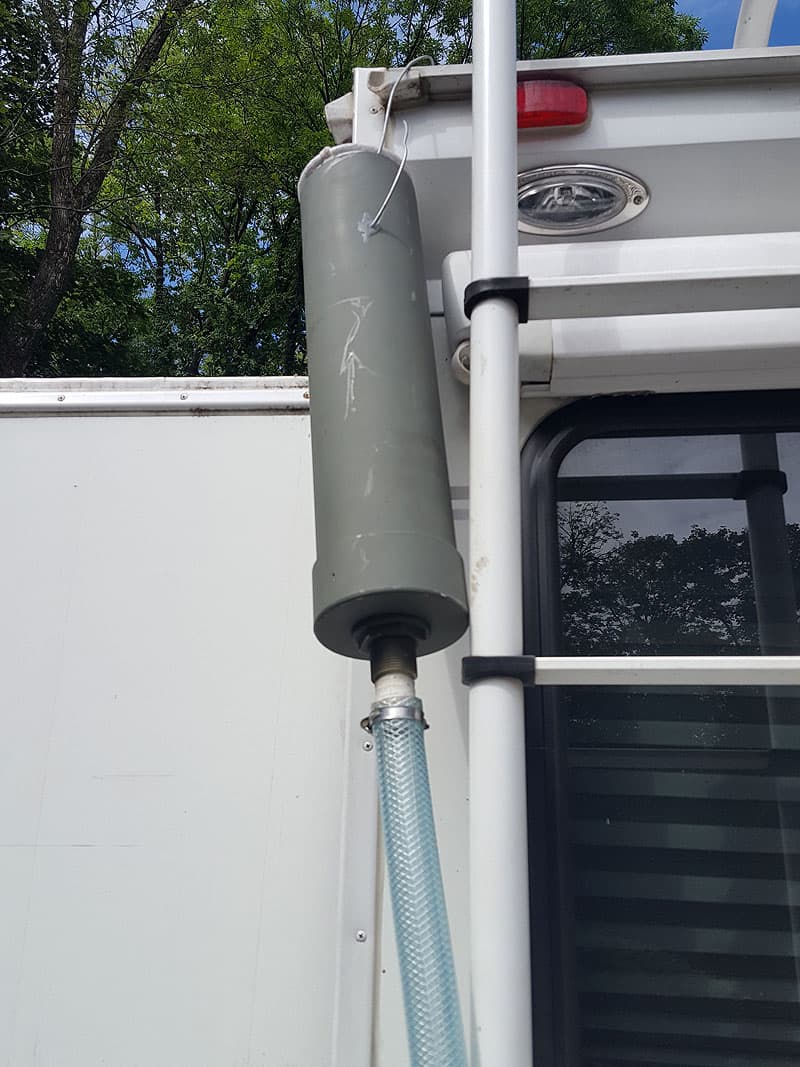
Per the photos, I used a 4-inch plastic pipe and glued an end-fitting to comprise something of a rooftop funnel. Not shown is the modified gallon milk jug to enlarge the funnel effect for catching big downpours.
A 10-micron bag filter fits perfectly into the funnel. The 10-micron filter captures 99% of the junk as evidenced by all the junk in the bottom after a couple rains.
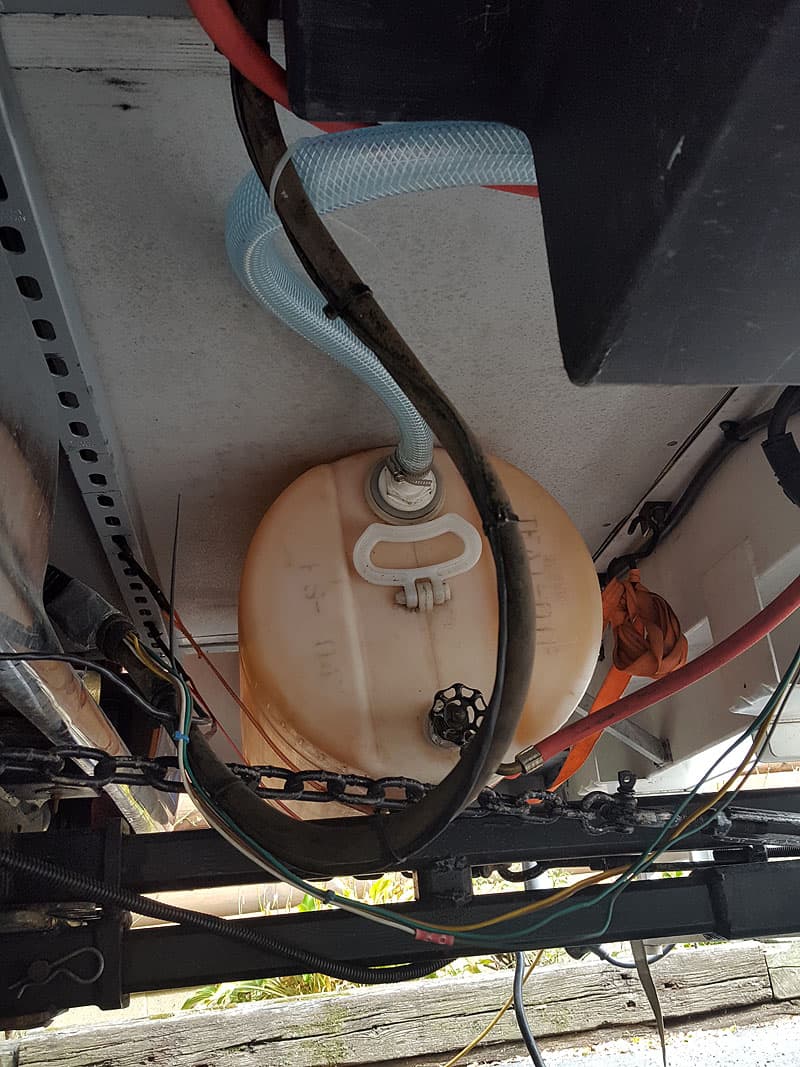
I installed a hose barb to match the 1-1/4-inch hose to the funnel underside. Rainwater collects and runs down the flexible PVC hose into a 15 gallon plastic barrel strapped to the unused cavity between the truck and camper’s bumpers. I always thought that unused space needed a purpose!
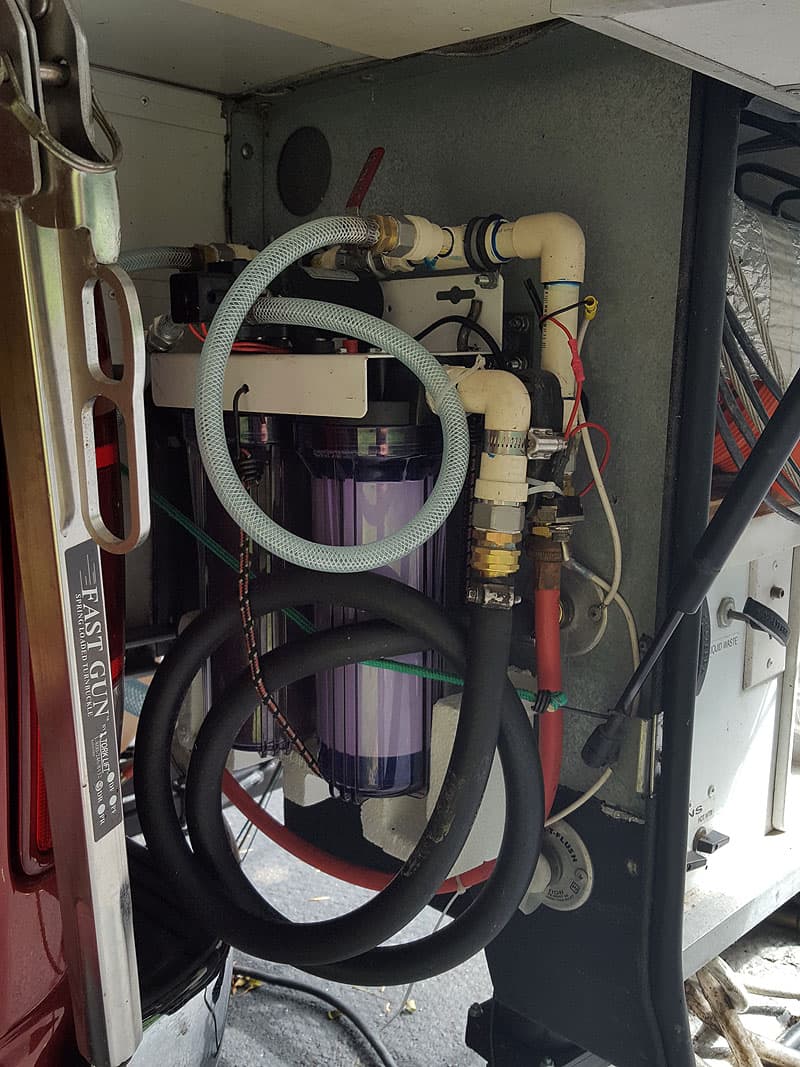
A boiler drain at the tank bottom allows for end of season draining and feeds the filter/pump assembly. The filter assembly consists of a pair of standard 10-inch filter bodies, containing a 1-micron fiber filter element, followed by a carbon block filter. The carbon block filter contains silver, which is anti-microbial. The silver should punish any bacteria or algae growth.
As you can see in the photo, the system has served about 100 gallons so far. The carbon filter is squeaky clean, but the white fiber filter is no longer white. I will replace the filters at end of this season and start fresh next spring.
The filter assembly is plumbed with CPVC plastic pipe (because it’s what I had lying around) arranged with a bypass valve at the top This allows me to connect campground water supply at the inlet, bypass the 12-volt onboard demand pump, and filter that water as well.
Currently there is a 1.2 gpm demand pump installed. It easily pulls tank water to serve the camper, though it’s a bit weak in flow. I ordered a much larger flow pump this week to replace it. A toggle switch mounted adjacent allows easy control.
I pulled a 12-AWG conductor from the DC fuse box through the basement floor to serve the pump with fused power as there is no convenient power wiring to tap at the filter install location.
Currently the water outlet is piped to the external water connection. Inlet and outlet connections are standard hose threads. This allows me to select either inside tank water or external by selecting pump controls, or both at the same time. Note one has the option of simply pumping the output to the main tank periodically if one wishes.
The water reaching the spigot from this system is fine to drink in my opinion. I’ve drunk a few glasses of it, and am still here to type this thread! I found the rainwater (and AC condensate flow) to be “really soft” if that makes sense. Tastes fine, but soft.
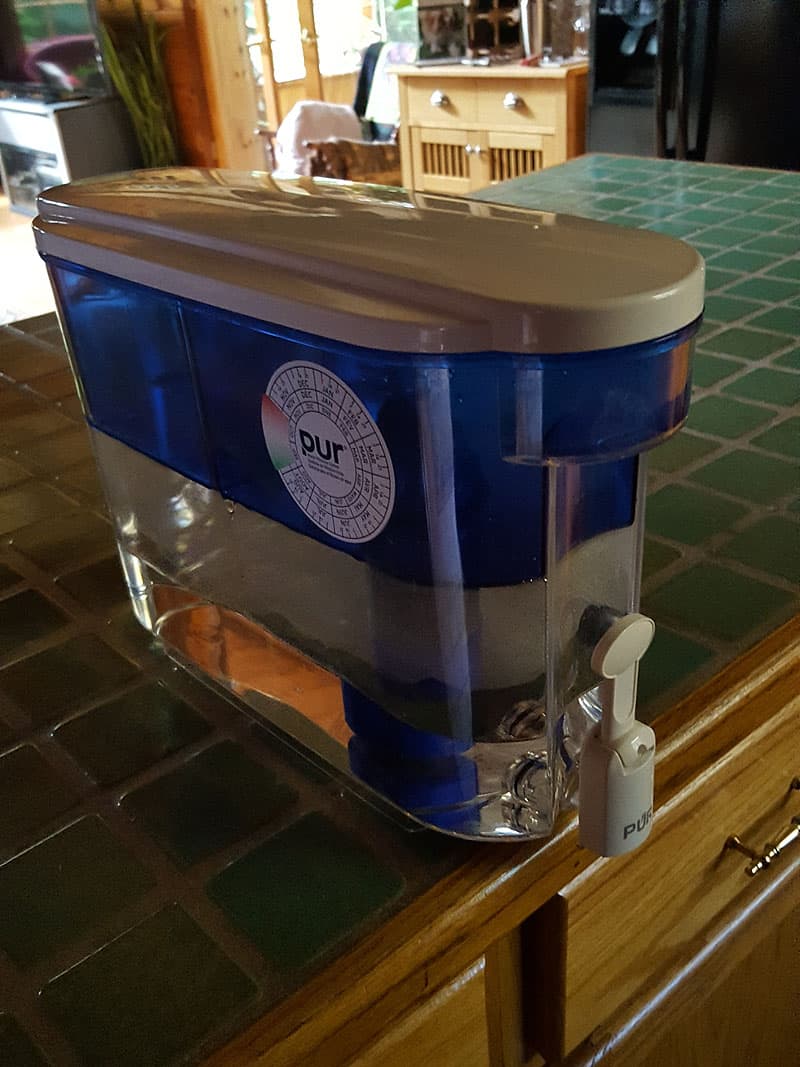
To be absolutely sure of safe water, we purchased a “PUR” brand water filtration device, which serves as our drinking water final filter. It’s really quite convenient to fill the tank and set it out on the counter or picnic table for drinking water. The “PUR” filter has great reviews, many “Brita” users like it better, and my brief experience has been good.
I wish we had done this years ago. It’s a fairly easy mod and really eliminates the running out of water phenomenon. It makes us sort of look forward to the next precipitation. Though a couple of hot AC days filled the 15 gallon tank with condensate. The only downside is that it does nothing to alleviate black and gray water empty interval!
It took me 12 hours to complete this modification and cost me $300 to $350. In my opinion, the skill level of this modification is medium.
3. Lawrence Ginnow, Oshkosh, Wisconsin
2007 Chevy 3500
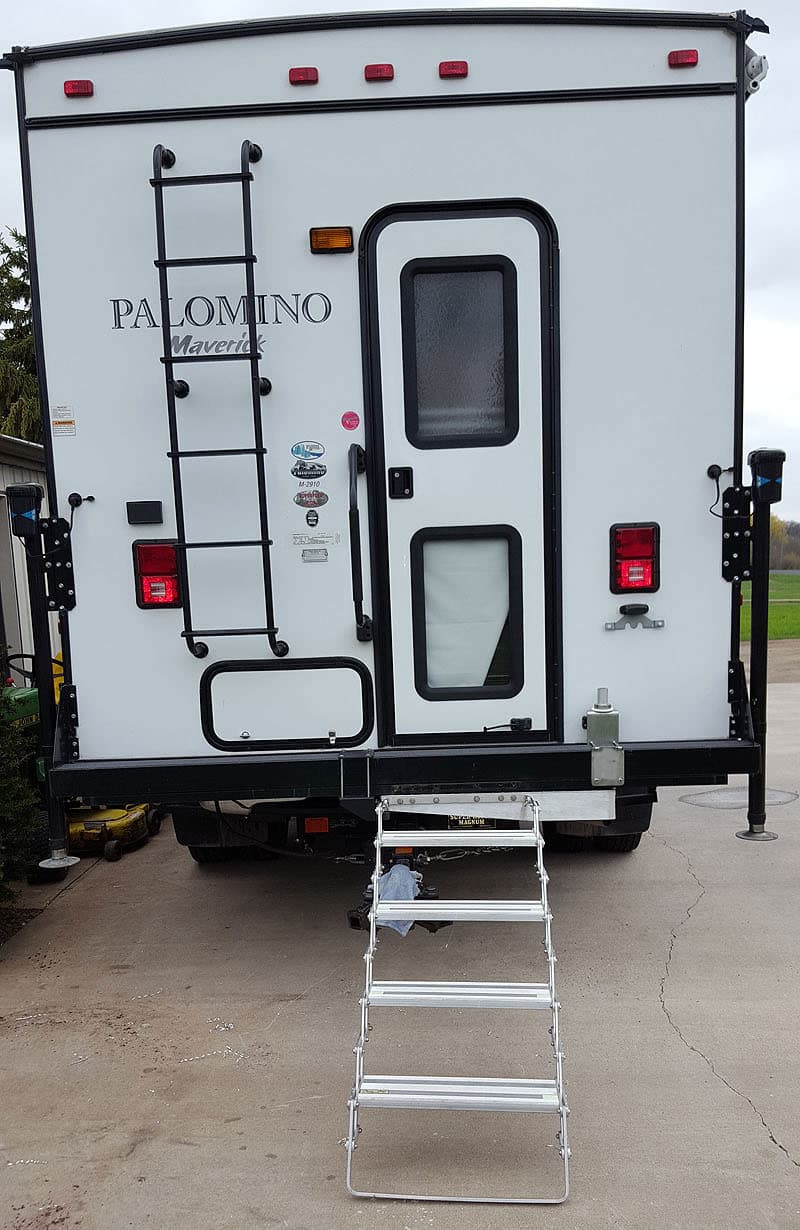
2014 Palomino HS-2910
We couldn’t use our Torklift steps when hooked to a trailer. For my mod, I made the steps swing to the curbside with a swing-out porch/stoop.
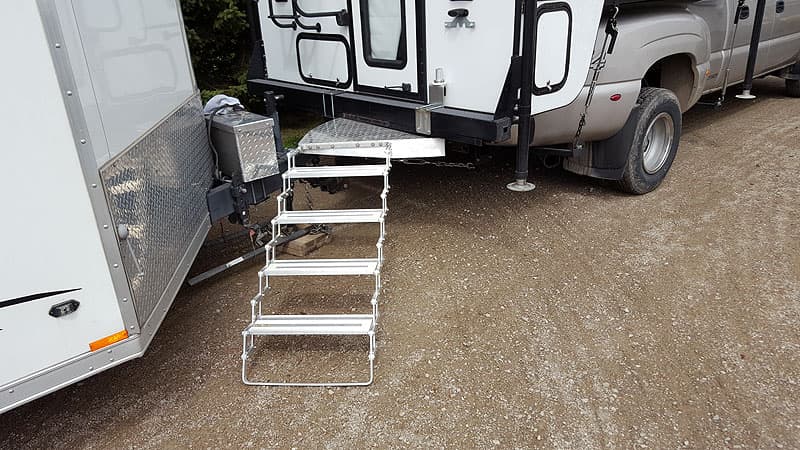
I fabricated an aluminum swinging bracket that uses the original steps. It locks into original position for use with no trailer. Pulling a spring-loaded pin allows the step to swing to the side with the trailer hooked to the truck. The unit clamps to the original tube bumper without drilling any holes into the camper or bumper.
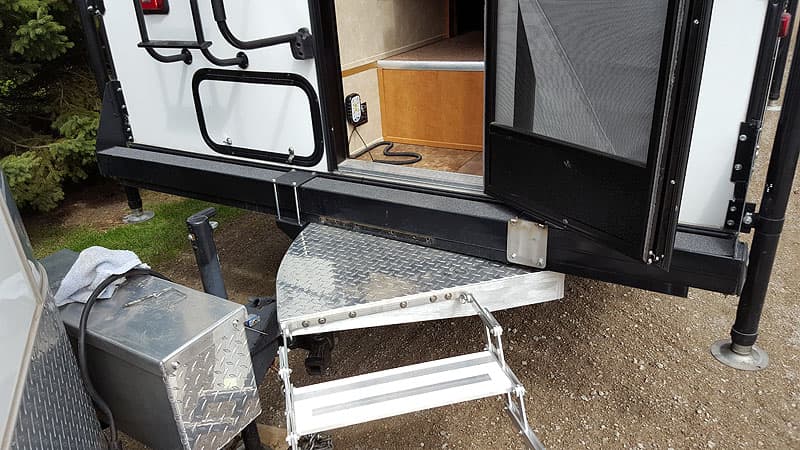
I fabricated everything from 6061 aluminum for best strength to weight ratio. Also, the step is tread plate for a non-skid surface.
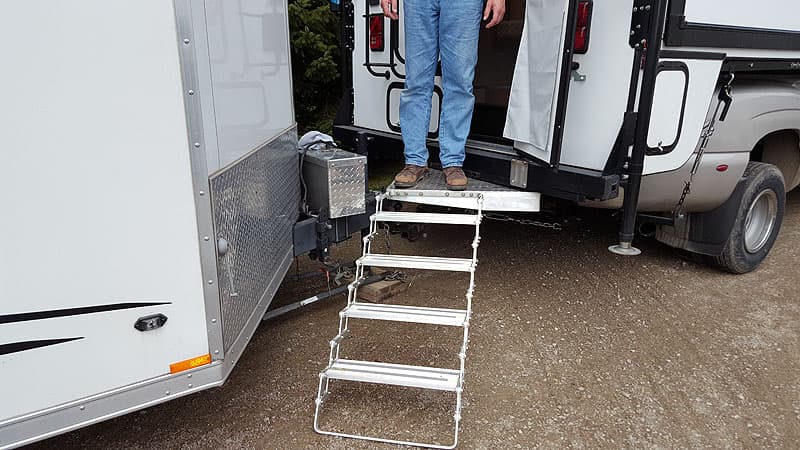
My swinging step unit works well with several different trailers we haul. The step is very stable and holds my 275 pounds with no problem. It sure beats climbing on the hitch, and much safer too.
We use a Torklift SuperHitch with a 21-inch Torklift SuperTruss and a Husky Centerline equalizer. The step clears all of it when swung to the side.
It took me 100 hours of thinking plus 20 hours of fabrication to complete this modification, and cost me $200. In my opinion, the skill level of this modification is hard.
4. Joe Collins, Walton Hills, Ohio
1994 Ford F250
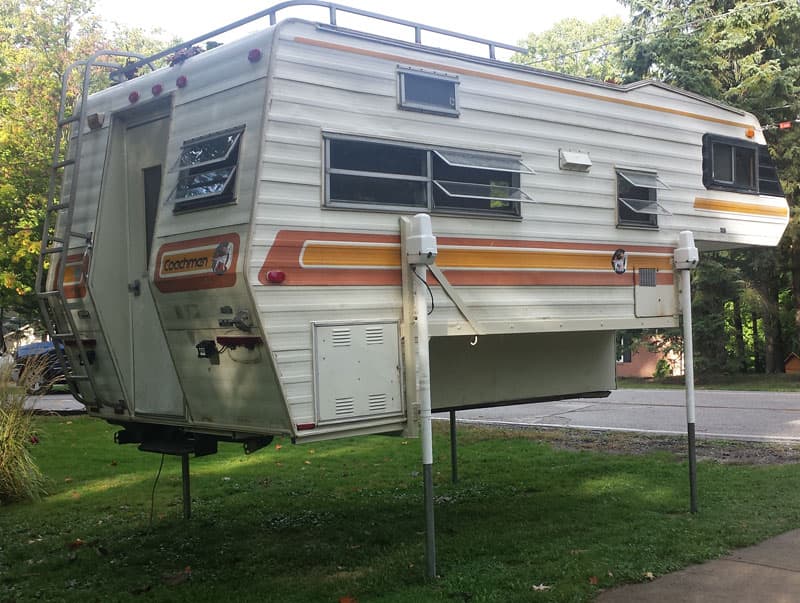
1977 Coachman 11.5 RD
My wife and I recently purchased a 1977 Coachman 11.5-foot truck camper. We are recent Oklahoma transplants to the rust belt region and want to start traveling and seeing this part of the country.
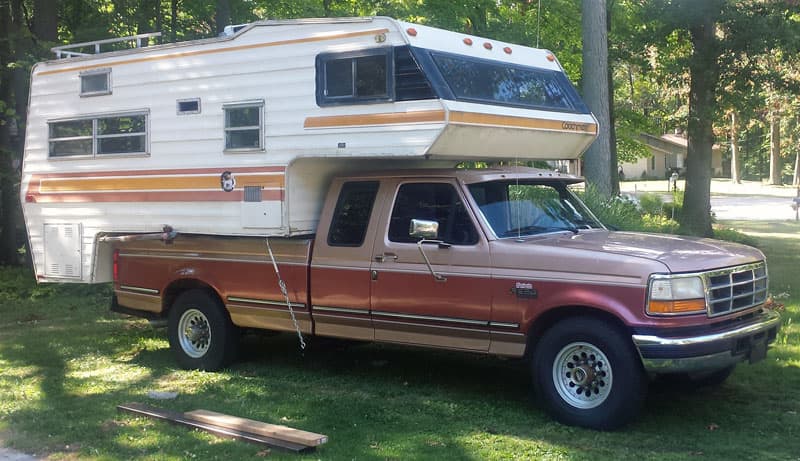
The camper is in nice shape for its age, but the three-jack system had seen better days. It was rated for 2,800 pounds (camper is 2,500 pounds), the jack points were soft, and one jack was bending. I was more than a little scared to use them.
I had planned to find a 4th Rieco-Titan style crank jack, fix the mounting points, and have four crank-ups. Then I stumbled across a part out of a 1997 Fleetwood truck camper 2.5 hours away. I purchased, among other things, the entire Atwood power jack setup with brackets and wiring for $175. For $340 total I had the jacks, both deep cycle solar batteries, the furnace, a pile of wiring, and some other odds and ends.
There was an issue though. The original jacks mounted under the wings whereas my fancy new electric jacks mounted on the corners. I didn’t trust the framing in the front corners and the back corners lean out.
To make this happen, I purchased some 3 x 3-inch angle iron, 1 ¾-inch square tube, and 2-inch steel strap and got about fabricating. I pulled off the bottom trip, treated the soft wood with Minwax hardener, sheathed the underside of the wings with an extra layer of ¾-inch plywood and then sealed/primed all the new and exposed old wood.
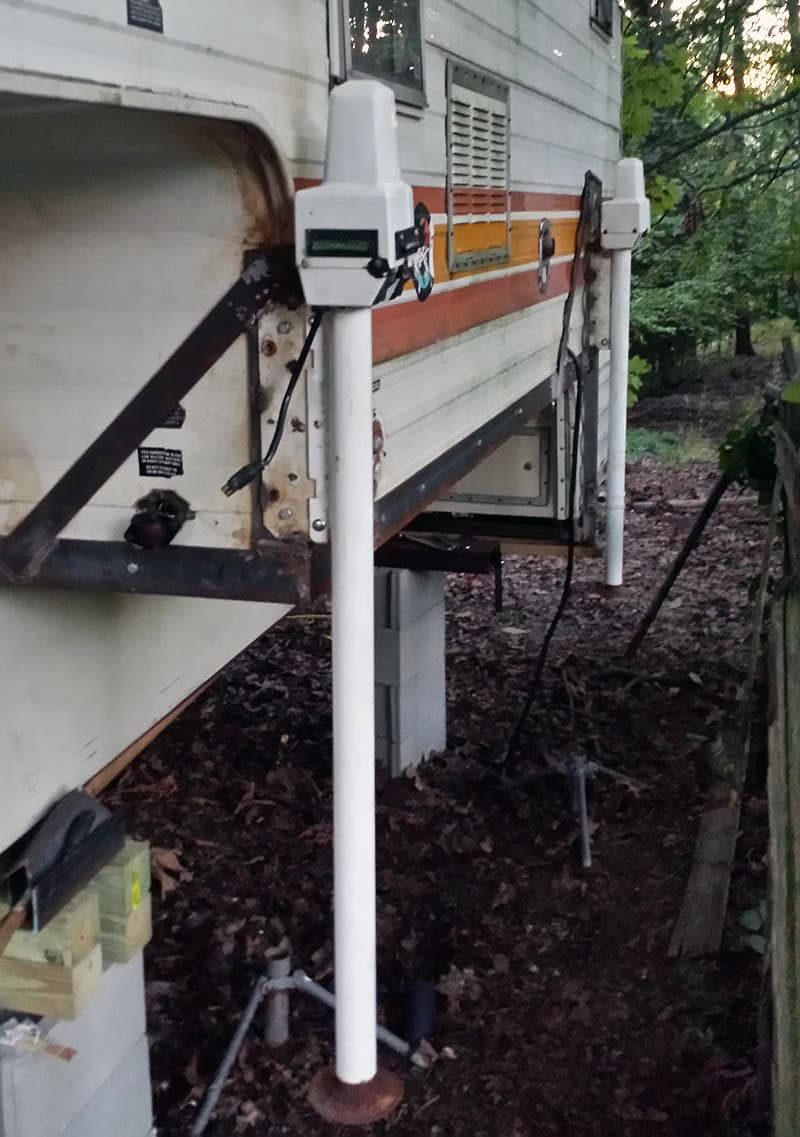
Once that was done, I set about cutting and welding the steel per some drawings I’d made in CAD (I’m an architect by profession). The sides and front of the camper body are framed with the 3 x 3 angle with vertical pieces at the front corners to mount the front jack brackets too. The angle iron is strong enough that a single crank jack placed anywhere along its edge will lift an entire side of the truck camper without any flex.
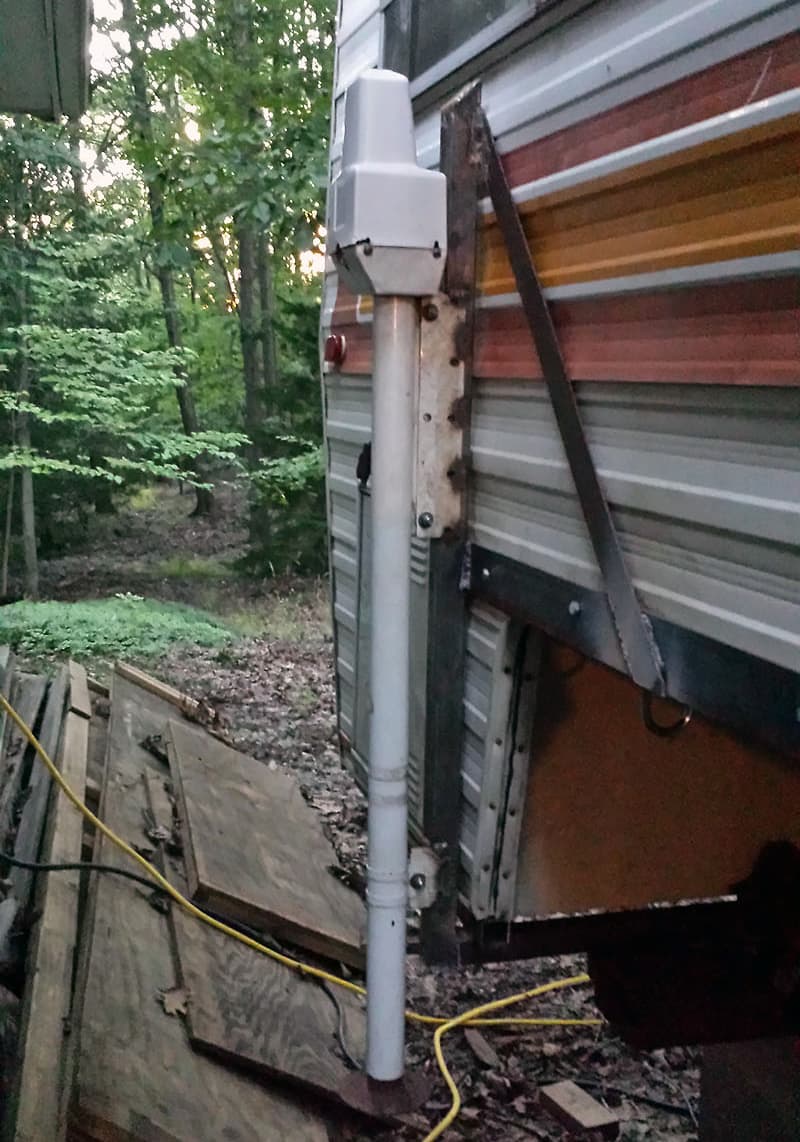
The rear jacks are then mounted to 1 ¾-inch square tube running vertically down the side and welded to the horizontal piece of angle on each side and to another piece of square tube that runs underneath the camper. I located them as far back as I could while still having access to the propane storage cabinet.
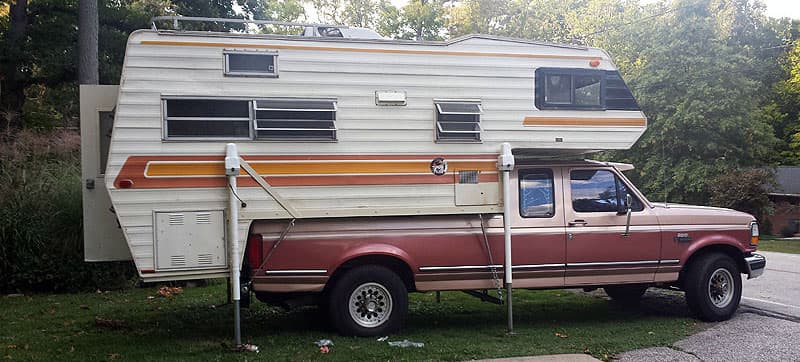
Once that was all said and done I was able to test mount and run the jacks. Success. Now any one of the four jacks will lift a whole side of the camper without any bending or stress to the camper body.
Following the jack installation, I installed the wiring harness for the jacks as well as the salvaged deep cycle house battery and switch-gear.
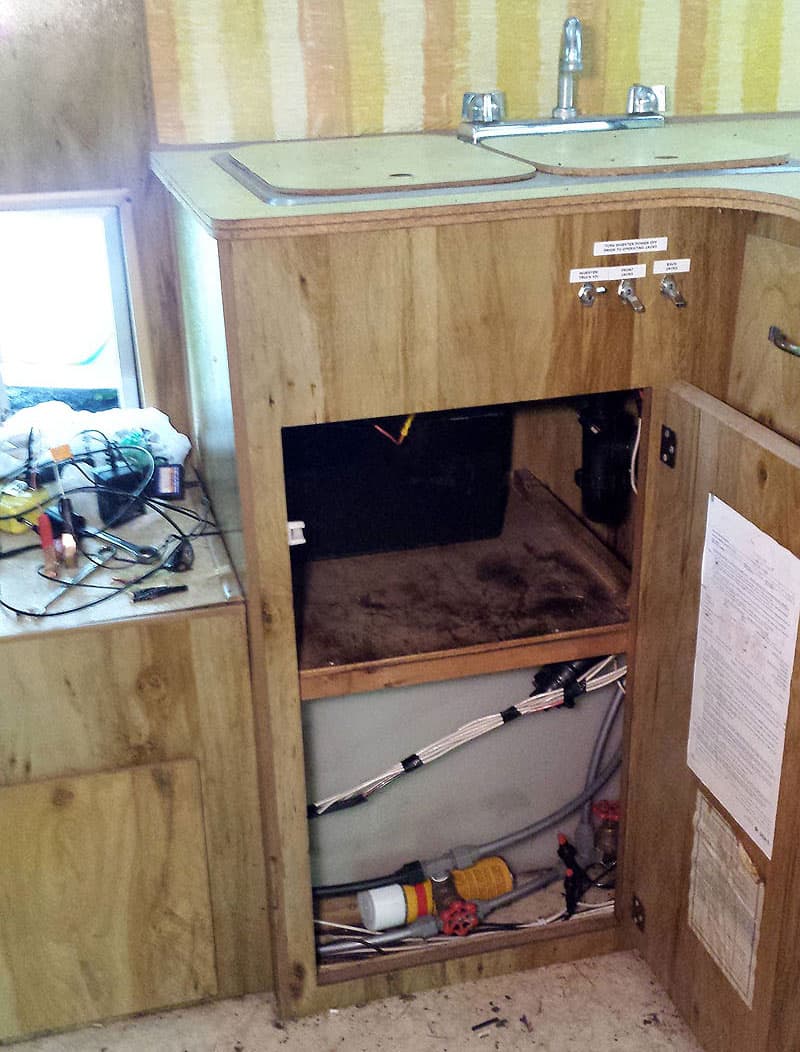
The battery is located under the sink (in a sealed and ventilated box), runs two 30 amp circuits for the jack, and is tapped into the truck umbilical / 12-volt inverter circuitry. Everything is properly sized and fused. It can charge off the truck or a 110-volt float charger, or very minimally off the inverter (non-charger inverter).

For an idea I came up with in my head, and for a guy with nothing more than a $100 Harbor Freight flux welder, this has worked out really well. It makes loading the truck camper so much more convenient and more importantly safer.
A major draw of a truck camper for us was the ability to not have to deal with a trailer or towing a car, yet still having a vehicle to drive at our destination. These jacks make that much more easy to accomplish.
Next I have to seal, prime, and paint all the steel, replace the running lights with LED, and re-caulk the whole camper. I’m also installing a vintage-correct voltmeter to keep an eye on the new house battery retrofit. There are a few other things I’d like to get taken care of, but those are the essentials.
Don’t be intimidated by the welding aspect. I’m in roughly $200 for my welder, gloves, helmet, flux wire, and angle grinder. I’ve taught myself welding on odd projects over the last couple years and it’s a skill that has served me over and over. I suggest every DIY handy person give welding a shot.
It took me 30 to 40 hours to complete this modification and cost me $515 in parts. That’s less than new HD crank jacks and way less than new power jacks. In my opinion, the skill level of this modification is hard.
5. Stephen O’Neal, Miami, Florida
2013 Chevy 3500 HD
2011 Alaskan 11-foot
My approach after a full two years of reading and researching Truck Camper Magazine articles was a camper and truck build that ensured dependability, like in the middle of no where dependability.
My first priority with my new Chevy 3500 HD truck was to have a reliable battery system. To accomplish this, I upgraded my truck battery from OEM Delco to Odyssey AGM Extreme 1220 deep cycle.
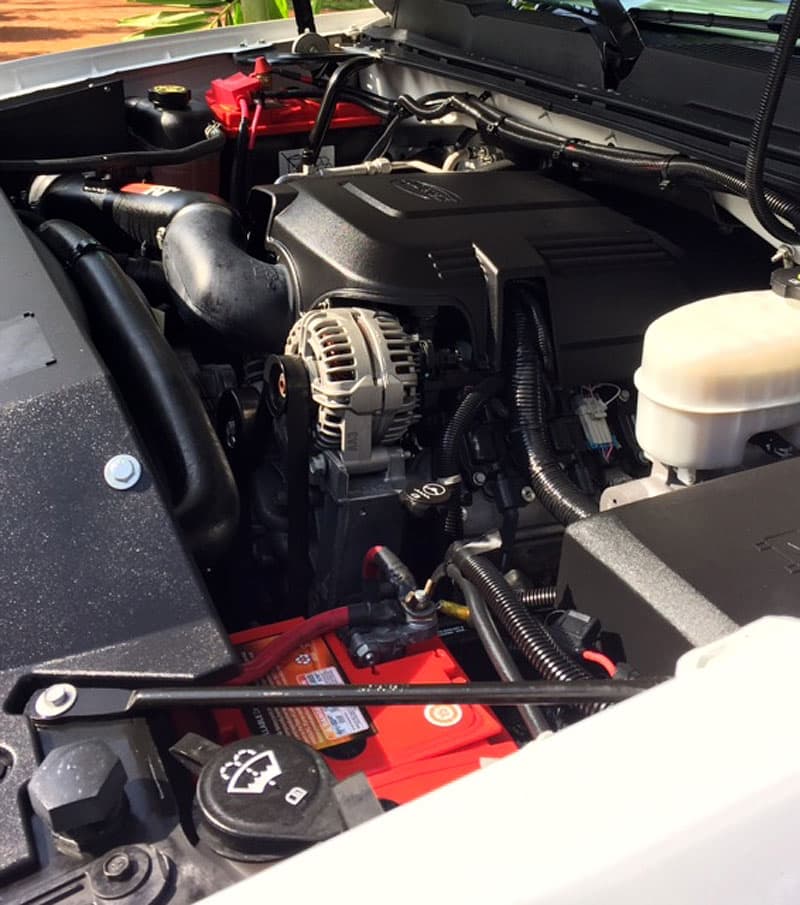
Above: Engine compartment with Odyssey main battery at top and auxiliary Odyssey battery at the bottom in an empty second battery diesel tray.
Odyssey batteries have the power to provide engine-cranking pulses in excess of 2,250 amps for 5 seconds – double to triple that of equally-sized conventional batteries. And they can handle 400 charge-discharge cycles to 80-percent depth of discharge. Operating temperatures are from -40°C (-40°F) to 45°C (113ºF) with a 3-7 year life
So far I have only run my main battery down once in my driveway. It was great to lift the hood, push the parallel button, close the hood, and crank the engine.
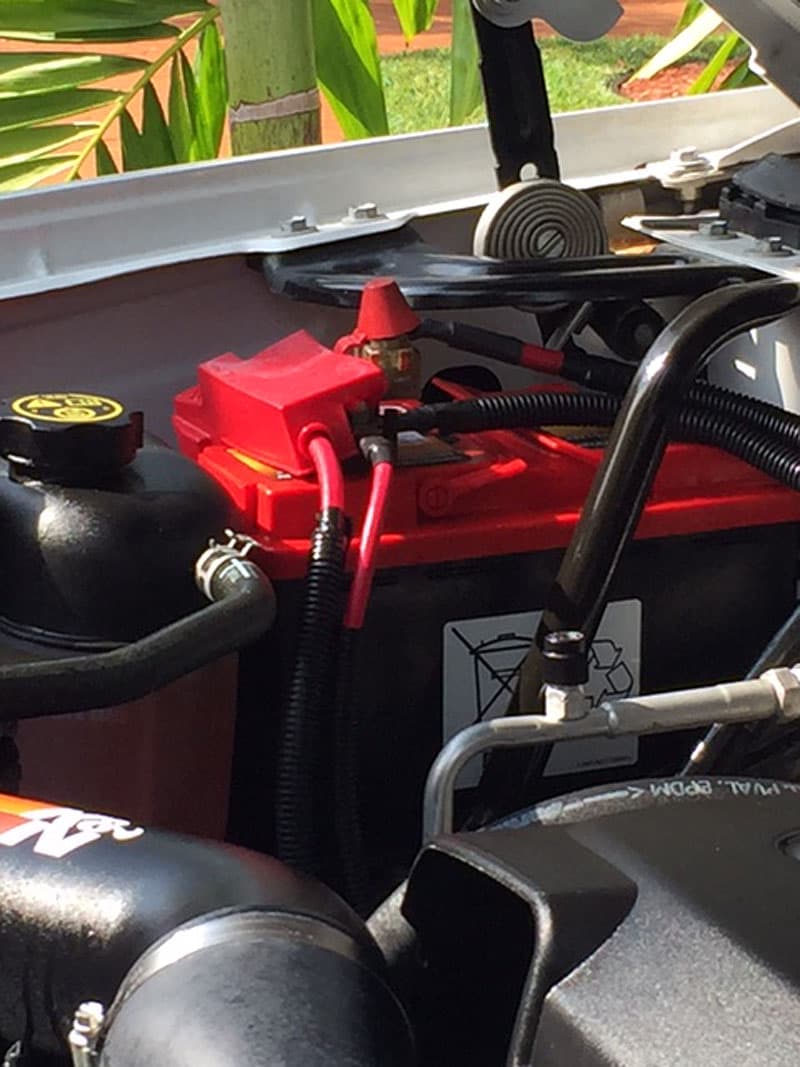
Above: Main battery. Note the conical terminal cover for the block fuse that supplies the auxiliary battery.
Once the main was installed, I added a Odyssey backup battery in the empty diesel tray and paralleled it to the main battery with a battery isolator that will permit the auxiliary battery to be charged by the alternator, but only manually paralleled to supply the main battery. This prevents both batteries from being discharged at the same time.

Above: Auxiliary battery with Wirthco battery isolator.
From the auxiliary battery I can run the air compressor that is installed under the Alaskan and a 15,000 pound winch which is installed in my Ranch Hand front bumper.
Total Cost $ 815 (two Odyssey 1220 $590, relays and cables $225). In my opinion, this mod is hard.
6. Jonathan Harris and Susan Boettger, Ellicott City, Maryland
2006 Chevy Silverado 3500
2007 Lance 1191
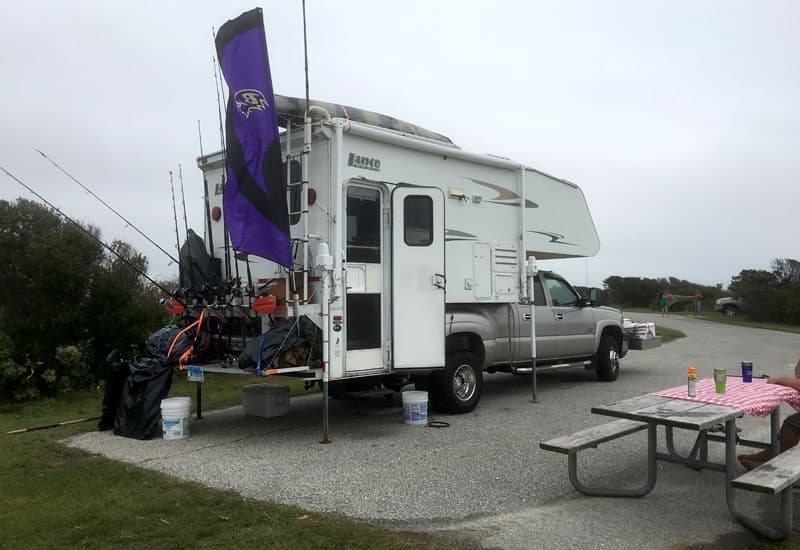
We take our truck camper rig beach camping and surf fishing quite regularly. For our beach camping, we wanted to have emergency truck supplies, fishing gear, firewood, and sand-covered items accessible and out of the truck and camper as much as possible.
For this project, we wanted a place for cutting bait, rigging fishing lines, and storing fishing poles. We wanted a designated space for all of our equipment in the event we needed to pack up and move down the beach quickly due to weather or tide issues.
We also wanted to minimize having to put any wet gear into the truck or camper. Finally, we wanted to make sure we were sensitive to the building materials used; we needed strength, but to minimize additional weight, especially since we drive over the sand.
To accomplish our requirements, we added an aluminum locking tool box and mounted it to the back bumper. Then we designed and built (from scrap) a lightweight aluminum back porch-rack. The porch-rack is mesh-like so sand and water can pass through it.
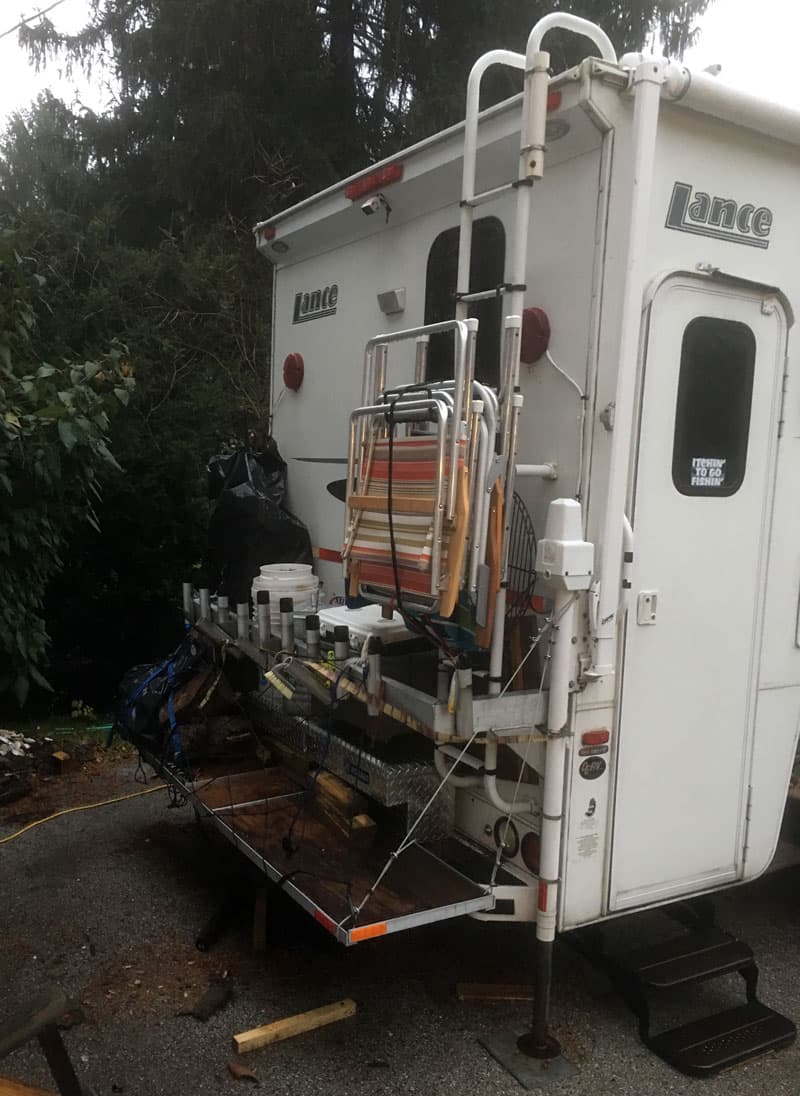
The porch-rack hangs from cabling from the rear Happijac jacks. It is intentionally notched so that we can fit the wooden boards that we are required carry in the event we get stuck in the sand.
We designed, built, cut, welded and mounted an aluminum rack that holds fishing poles at different angles. The rack was designed and spaced intentionally to have storage behind it, and to still be able to access the generator and roof ladder, etc.
Behind the rack we have a tall plastic trash bin that is used to store long items, such as beach umbrellas, wind-blocks, bag chairs, and sand shovels. We built a wooden folding table for outside use, that stores out of the way, directly behind the tool box.
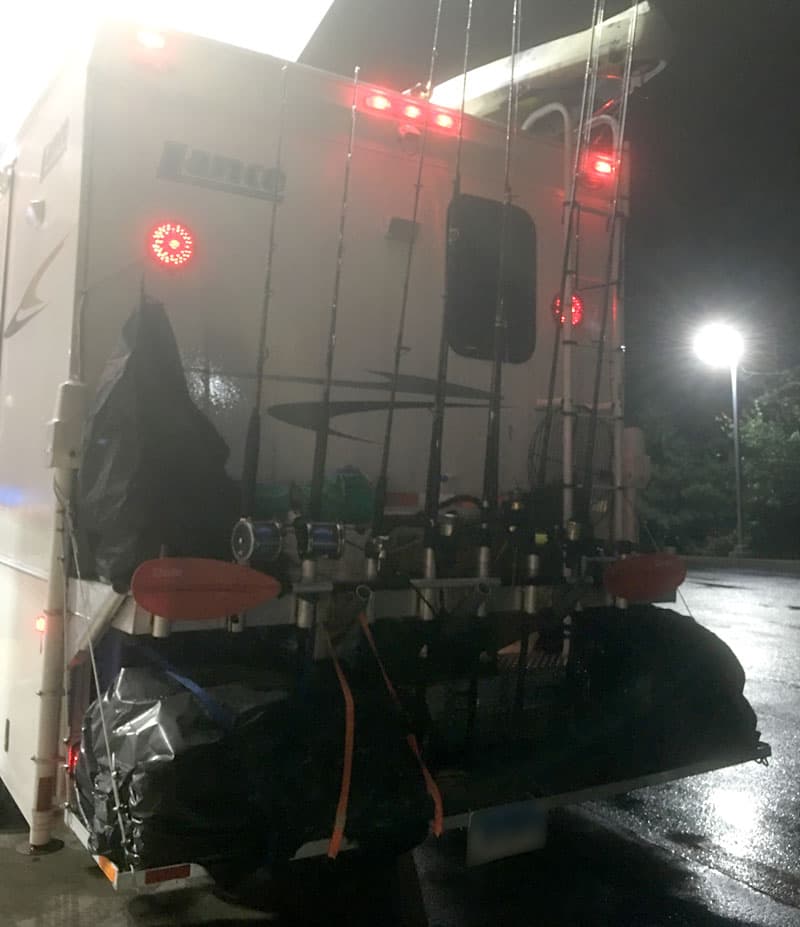
We use a spider-web bungee to help secure various items after strapping things down. We even added a spot on the back porch-rack for relocating the truck license plate, and we included stick-on reflectors for added safety.
The porch-rack has worked out great! We never give up on trying to find ways to continuously improve our beach camping and fishing trip process. We are always brainstorming what else can we do next. That is part of the fun for us!
It took me fifteen hours to complete this modification and cost me $450-$500. In my opinion, the skill level of this modification is hard.
Disclaimer: The modifications above are submitted by Truck Camper Magazine readers. It is your responsibility to make sure that any do-it-yourself modification project you undertake is safe, effective, and legal for your situation.
Enter Your Mods Now!
If you’d like to enter mods into TCM’s Monthly Mod Contest, click here. You can enter as many mods as you want, at any time. Good luck mod makers!